headlamp PONTIAC VIBE 2007 Owners Manual
[x] Cancel search | Manufacturer: PONTIAC, Model Year: 2007, Model line: VIBE, Model: PONTIAC VIBE 2007Pages: 432, PDF Size: 2.54 MB
Page 100 of 432

Theft-Deterrent Systems
Vehicle theft is big business, especially in some
cities. Although your vehicle has a number of
theft-deterrent features, we know that nothing we
put on it can make it impossible to steal.
Content Theft-Deterrent
If your vehicle has this feature, the theft-deterrent
system is designed to activate an alarm if any
of the side doors or the liftgate is forcibly unlocked
or if the battery terminal is disconnected and
then reconnected while the system is set.
The alarm will sound the horn intermittently and
�ash the headlamps, turn signal lamps and interior
lights. If the driver’s or front passenger’s side
doors are unlocked forcibly, the other side doors
and the liftgate will be locked automatically.
Arming the System
To arm the system, do the following:
1. Turn the ignition key to the LOCK position
and remove it.
2. Close and lock all doors and liftgate with the
key or remote keyless entry transmitter.The indicator light
located on the
instrument panel to the
left of the steering
wheel will come
on when all doors and
liftgate are closed
and locked.
The system will be automatically set after
30 seconds. When the system is set,
the indicator light will start �ashing.
3. After the indicator light starts �ashing, you
may leave the vehicle.
Do not leave anyone in the vehicle when you
set the system, because unlocking the
vehicle from the inside will activate the system.
100
Page 121 of 432

Mirrors
Manual Rearview Mirror
While sitting in a comfortable driving position,
adjust the mirror so you can see clearly behind
your vehicle. Move the mirror in the center to
move it up or down and side to side.
The control at the bottom of the mirror is the
day/night feature that allows adjustment to
the mirror so that the glare of headlamps from
behind is reduced. Pull the control for night driving
to reduce glare; push it to return to the day
position.
The mirror may have map lights beneath the
mirror. Press the switch to turn each light
on or off.
Manual Rearview Mirror with
OnStar
®
The vehicle may have an inside rearview mirror
with OnStar®. See your dealer for more information
on the system and how to subscribe to OnStar®.
SeeOnStar®System on page 123for information
on the services OnStar®provides.
While sitting in a comfortable position, adjust the
mirror so you can see clearly behind your
vehicle. Move the mirror in the center to move it
up or down and side to side. The control at
the bottom of the mirror is the day/night feature
that allows adjustment to the mirror so that
the glare of headlamps from behind is reduced.
Move the control from left to right for day or night
conditions.
121
Page 122 of 432
Automatic Dimming Rearview Mirror
While sitting in a comfortable driving position,
adjust the mirror so you can see clearly behind
your vehicle. Hold the mirror in the center to move
it up or down and side to side.
The mirror may have an automatic dimming
feature that darkens gradually to reduce the glare
of headlamps from behind. When the ignition
key is inserted and turned on, the inside rear view
mirror always turns on in the automatic function
mode. An indicator light located on the mirror
will come on to show you that the function is on.
When the inside air temperature is low, it may take
a little longer for the mirror to darken in response
to the detection of headlights. Press the button
in the center of the mirror to turn this feature
on or off.
One photocell on the front of the mirror senses
when it is becoming dark outside. Another
photocell, facing rearward, senses headlamps
behind you.
To keep the photocells operating well, occasionally
clean them with a cotton swab and glass cleaner.
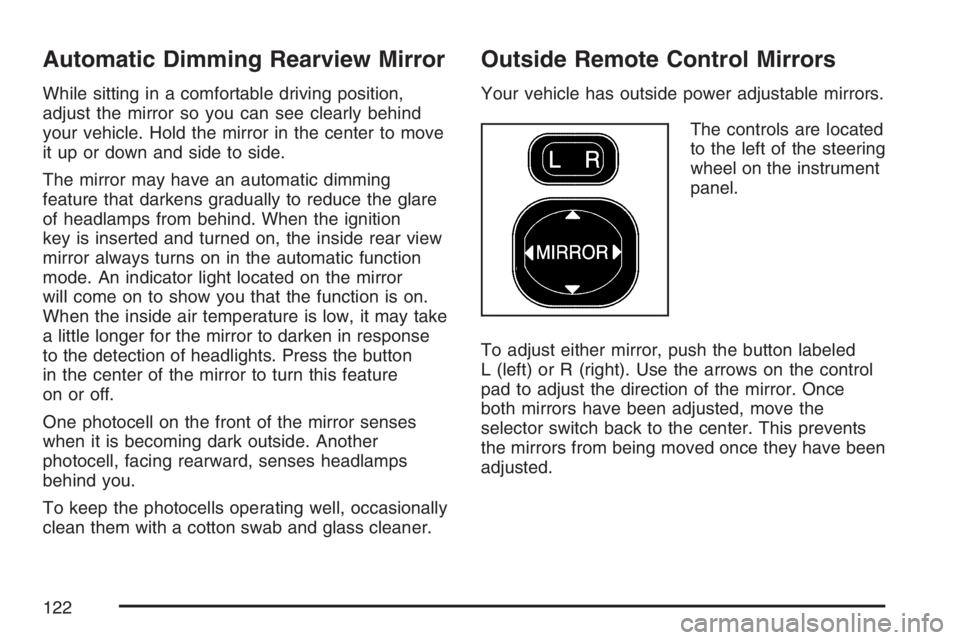
Outside Remote Control Mirrors
Your vehicle has outside power adjustable mirrors.
The controls are located
to the left of the steering
wheel on the instrument
panel.
To adjust either mirror, push the button labeled
L (left) or R (right). Use the arrows on the control
pad to adjust the direction of the mirror. Once
both mirrors have been adjusted, move the
selector switch back to the center. This prevents
the mirrors from being moved once they have been
adjusted.
122
Page 133 of 432
Instrument Panel Overview........................ 136
Hazard Warning Flashers.......................... 138
Other Warning Devices............................. 138
Horn.......................................................... 138
Tilt Wheel.................................................. 139
Turn Signal/Multifunction Lever.................. 139
Turn and Lane-Change Signals................. 140
Headlamp High/Low-Beam Changer.......... 140
Flash-to-Pass............................................ 141
Windshield Wipers..................................... 141
Windshield Washer.................................... 142
Rear Window Wiper/Washer...................... 142
Cruise Control........................................... 143
Exterior Lamps.......................................... 146
Headlamps on Reminder........................... 146
Daytime Running Lamps (DRL)................. 147
Automatic Headlamp System..................... 147
Fog Lamps................................................ 148
Instrument Panel Brightness...................... 148
Interior Lamps Control............................... 149
Entry Lighting............................................ 149
Reading Lamps......................................... 150
Accessory Power Outlet(s)........................ 150Power Outlet 115 Volt Alternating
Current.................................................. 151
Ashtray(s) and Cigarette Lighter................ 151
Climate Controls......................................... 152
Climate Control System............................. 152
Outlet Adjustment...................................... 155
Passenger Compartment Air Filter............. 156
Warning Lights, Gages, and Indicators..... 158
Instrument Panel Cluster........................... 159
Speedometer and Odometer...................... 160
Trip Odometers......................................... 160
Tachometer............................................... 161
Safety Belt Reminder Light........................ 161
Airbag Readiness Light............................. 162
Passenger Airbag Status Indicator............. 163
Charging System Light.............................. 165
Brake System Warning Light..................... 166
Anti-Lock Brake System Warning Light...... 167
Low Tire Pressure Warning Light.............. 167
Traction Control System (TCS)
Warning Light........................................ 168
StabiliTrak
®Indicator Light......................... 168
Section 3 Instrument Panel
133
Page 139 of 432
Tilt Wheel
A tilt steering column allows you to adjust the
steering column before you drive. You can also
raise it to the highest level to give your legs more
room when you exit and enter the vehicle.
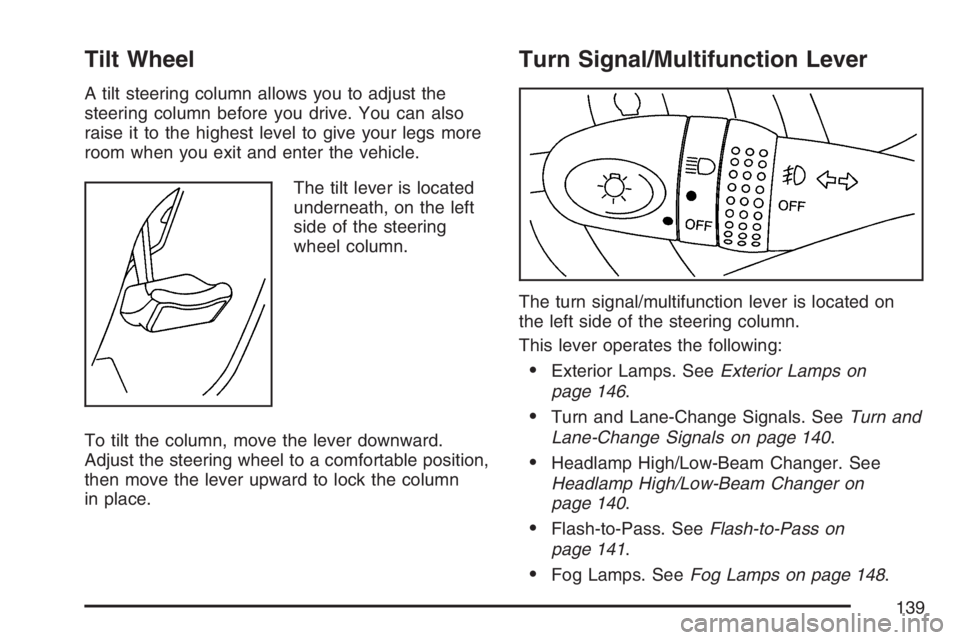
The tilt lever is located
underneath, on the left
side of the steering
wheel column.
To tilt the column, move the lever downward.
Adjust the steering wheel to a comfortable position,
then move the lever upward to lock the column
in place.
Turn Signal/Multifunction Lever
The turn signal/multifunction lever is located on
the left side of the steering column.
This lever operates the following:
Exterior Lamps. SeeExterior Lamps on
page 146.
Turn and Lane-Change Signals. SeeTurn and
Lane-Change Signals on page 140.
Headlamp High/Low-Beam Changer. See
Headlamp High/Low-Beam Changer on
page 140.
Flash-to-Pass. SeeFlash-to-Pass on
page 141.
Fog Lamps. SeeFog Lamps on page 148.
139
Page 140 of 432
Turn and Lane-Change Signals
The turn signal has an upward (for right) and a
downward (for left) position. These positions allow
you to signal a turn or a lane change.
To signal a turn, move the lever all the way up or
down. When the turn is �nished, the lever will
return automatically.
To signal a lane change, raise or lower the lever
until the arrow starts to �ash. Hold it there until you
complete your lane change. The lever will return
by itself when you release it.
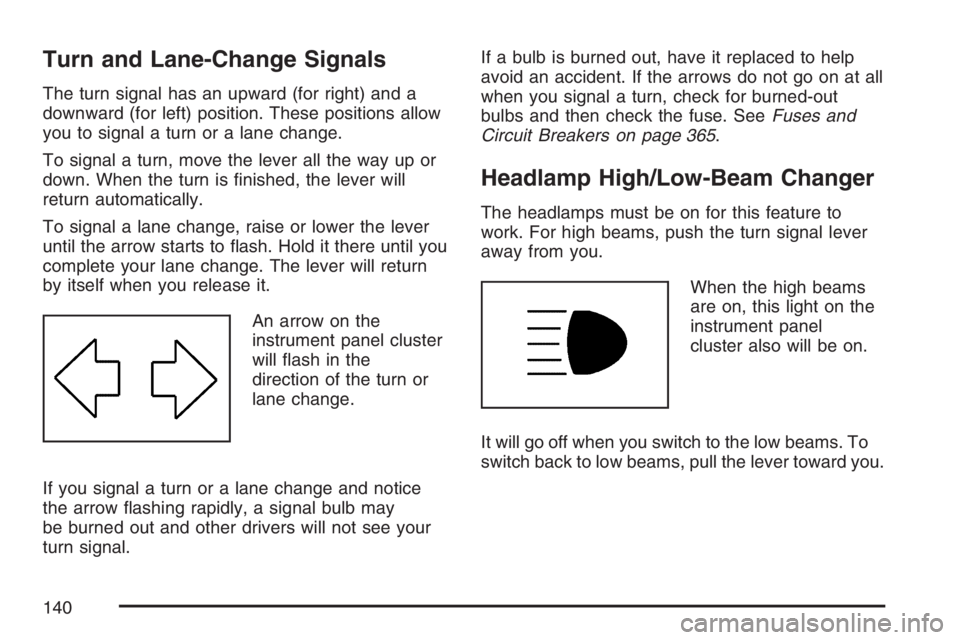
An arrow on the
instrument panel cluster
will �ash in the
direction of the turn or
lane change.
If you signal a turn or a lane change and notice
the arrow �ashing rapidly, a signal bulb may
be burned out and other drivers will not see your
turn signal.If a bulb is burned out, have it replaced to help
avoid an accident. If the arrows do not go on at all
when you signal a turn, check for burned-out
bulbs and then check the fuse. SeeFuses and
Circuit Breakers on page 365.
Headlamp High/Low-Beam Changer
The headlamps must be on for this feature to
work. For high beams, push the turn signal lever
away from you.
When the high beams
are on, this light on the
instrument panel
cluster also will be on.
It will go off when you switch to the low beams. To
switch back to low beams, pull the lever toward you.
140
Page 141 of 432
Flash-to-Pass
With the lever in the low-beam position, pull the
lever toward you to momentarily switch to
high beams (to signal that you are going to pass).
If you have the headlamps on when you release
the lever, they will return to the low beams.
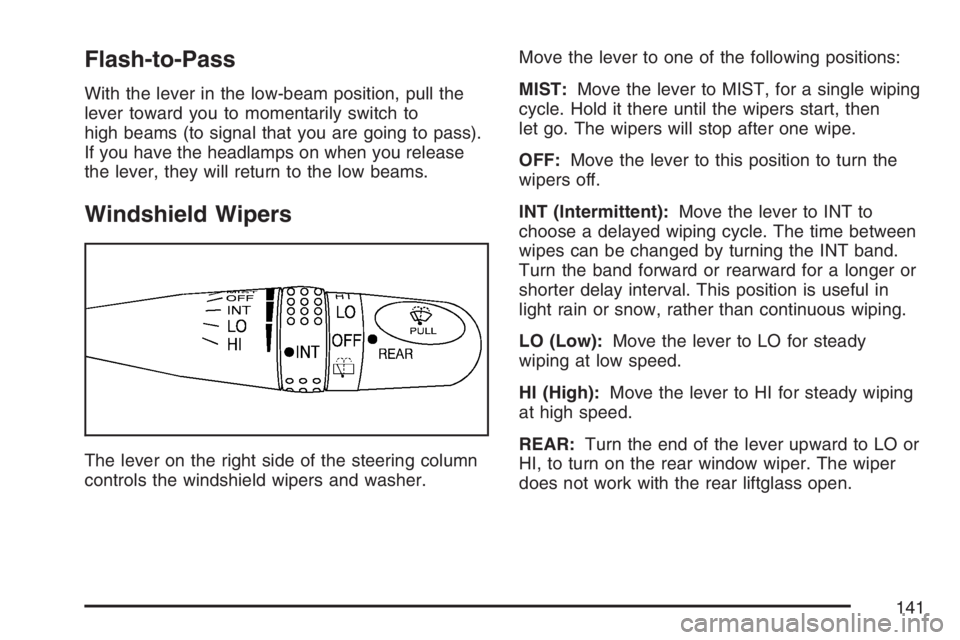
Windshield Wipers
The lever on the right side of the steering column
controls the windshield wipers and washer.Move the lever to one of the following positions:
MIST:Move the lever to MIST, for a single wiping
cycle. Hold it there until the wipers start, then
let go. The wipers will stop after one wipe.
OFF:Move the lever to this position to turn the
wipers off.
INT (Intermittent):Move the lever to INT to
choose a delayed wiping cycle. The time between
wipes can be changed by turning the INT band.
Turn the band forward or rearward for a longer or
shorter delay interval. This position is useful in
light rain or snow, rather than continuous wiping.
LO (Low):Move the lever to LO for steady
wiping at low speed.
HI (High):Move the lever to HI for steady wiping
at high speed.
REAR:Turn the end of the lever upward to LO or
HI, to turn on the rear window wiper. The wiper
does not work with the rear liftglass open.
141
Page 146 of 432
Exterior Lamps
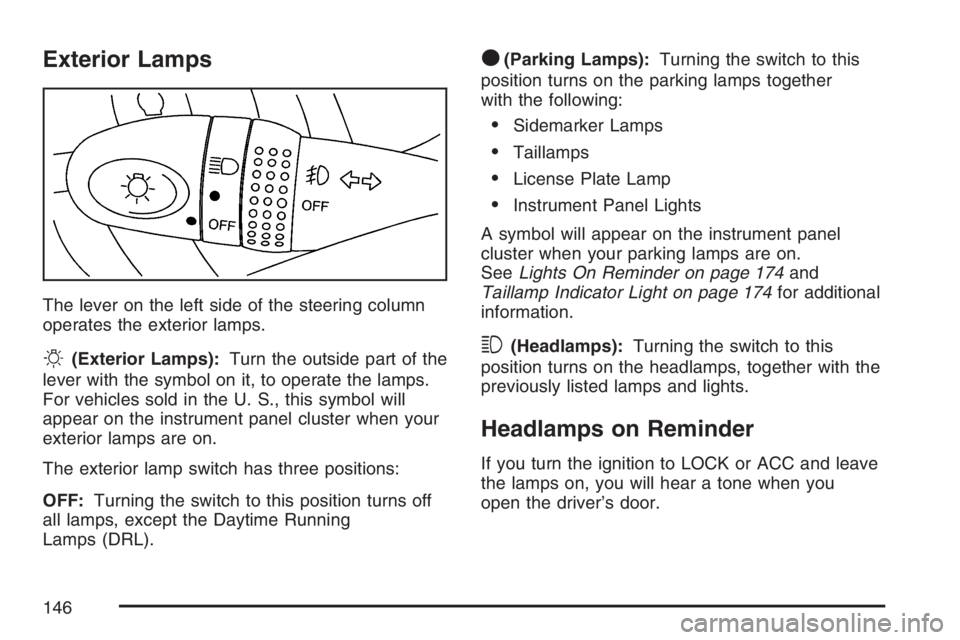
The lever on the left side of the steering column
operates the exterior lamps.
O(Exterior Lamps):Turn the outside part of the
lever with the symbol on it, to operate the lamps.
For vehicles sold in the U. S., this symbol will
appear on the instrument panel cluster when your
exterior lamps are on.
The exterior lamp switch has three positions:
OFF:Turning the switch to this position turns off
all lamps, except the Daytime Running
Lamps (DRL).
O(Parking Lamps):Turning the switch to this
position turns on the parking lamps together
with the following:
Sidemarker Lamps
Taillamps
License Plate Lamp
Instrument Panel Lights
A symbol will appear on the instrument panel
cluster when your parking lamps are on.
SeeLights On Reminder on page 174and
Taillamp Indicator Light on page 174for additional
information.
3(Headlamps):Turning the switch to this
position turns on the headlamps, together with the
previously listed lamps and lights.
Headlamps on Reminder
If you turn the ignition to LOCK or ACC and leave
the lamps on, you will hear a tone when you
open the driver’s door.
146
Page 147 of 432
Daytime Running Lamps (DRL)
Daytime Running Lamps (DRL) can make it easier
for others to see the front of your vehicle during
the day. DRL can be helpful in many different
driving conditions, but they can be especially
helpful in the short periods after dawn and before
sunset. Fully functional daytime running lamps
are required on all vehicles �rst sold in Canada.
The DRL system will make the headlamps
come on at a reduced brightness when the
following conditions are met:
The ignition is on with the engine running.
The exterior lamps switch is off.
The parking brake is released.
When the DRL are on, only the headlamps will be
on at a reduced brightness. The taillamps,
sidemarker and other lamps will not be on. The
instrument panel will not be lit up either.
When you turn the exterior lamp switch to the
headlamp position, the DRL will go off and
the headlamps will come on. The other lamps that
come on with the headlamps will also come on.When it begins to get dark, the headlamps will
automatically switch from DRL to the regular
headlamps. See “Automatic Headlamp System”
following.
When you turn the exterior lamp switch off, the
regular lamps will go off and the headlamps
will change to the reduced brightness of DRL
provided it is not dark outside. DRL also comes on
if only the parking lamps are being used.
Automatic Headlamp System
Your vehicle has an automatic light sensor on the
top left corner of the instrument panel, so be
sure it is not covered or the headlamps will be on
continuously.
When it is dark enough outside, the automatic
headlamp system will turn on the low-beam
headlamps at the normal brightness along with
other lamps such as the taillamps, sidemarker,
parking lamps and instrument panel lights. This is
indicated by the headlamp symbol on your
instrument panel cluster. SeeInstrument Panel
Cluster on page 159.
147
Page 148 of 432
If you are driving through a parking garage,
overcast weather, or a tunnel, the automatic
headlamp system may turn on the low-beam
headlamps at a normal brightness along with the
taillamps, sidemarker, parking lamps and the
instrument panel lights. The radio lights will be
dimmer, and the instrument panel cluster
lights may dim. There will be a delay before the
lights will turn on when starting the car at night.
Fog Lamps
-(Fog Lamps):Turn the band on the turn
signal/multifunction lever to the fog lamp symbol to
turn the fog lamps on. They will come on only
when the headlamps are on low beam.
Some localities have laws that require the
headlamps to be on along with the fog lamps.
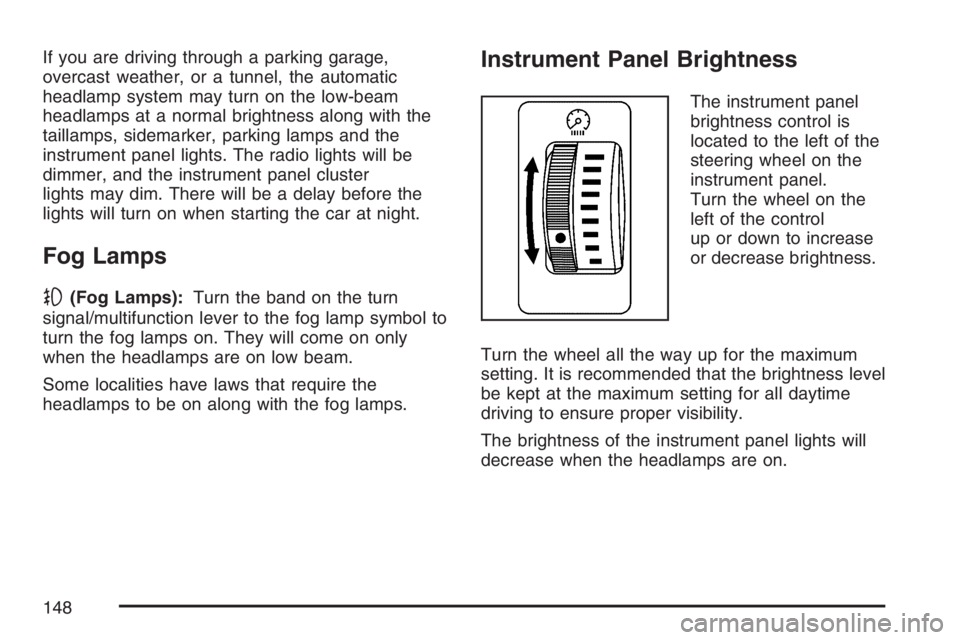
Instrument Panel Brightness
The instrument panel
brightness control is
located to the left of the
steering wheel on the
instrument panel.
Turn the wheel on the
left of the control
up or down to increase
or decrease brightness.
Turn the wheel all the way up for the maximum
setting. It is recommended that the brightness level
be kept at the maximum setting for all daytime
driving to ensure proper visibility.
The brightness of the instrument panel lights will
decrease when the headlamps are on.
148