brake fluid PONTIAC VIBE 2010 Owners Manual
[x] Cancel search | Manufacturer: PONTIAC, Model Year: 2010, Model line: VIBE, Model: PONTIAC VIBE 2010Pages: 318, PDF Size: 1.7 MB
Page 5 of 318
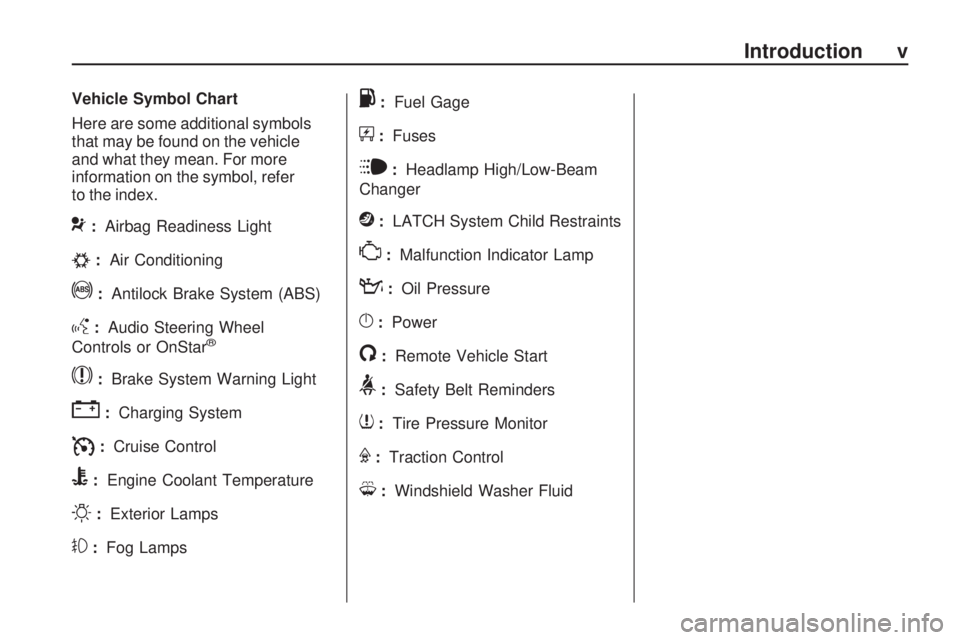
Vehicle Symbol Chart
Here are some additional symbols
that may be found on the vehicle
and what they mean. For more
information on the symbol, refer
to the index.
9:Airbag Readiness Light
#:Air Conditioning
!:Antilock Brake System (ABS)
g:Audio Steering Wheel
Controls or OnStar®
$: Brake System Warning Light
":Charging System
I:Cruise Control
B:Engine Coolant Temperature
O:Exterior Lamps
#:Fog Lamps
.:Fuel Gage
+:Fuses
i:Headlamp High/Low-Beam
Changer
j: LATCH System Child Restraints
*:Malfunction Indicator Lamp
::Oil Pressure
}:Power
/:Remote Vehicle Start
>:Safety Belt Reminders
7:Tire Pressure Monitor
F:Traction Control
M:Windshield Washer Fluid
Introduction v
Page 83 of 318

Instruments and
Controls
Instrument Panel OverviewInstrument Panel Overview.....4-2
ControlsSteering Wheel Adjustment.....4-4
Steering Wheel Controls .........4-4
Horn ...................................
.4-5
Windshield Wiper/Washer .......4-5
Rear Window Wiper/Washer . . . .4-6
Power Outlets (Accessory Power Outlets) ....................
.4-6
Power Outlets (115 Volt Alternating Current) .............
.4-7
Cigarette Lighter ..................
.4-8
Ashtrays .............................
.4-8
Warning Lights, Gages, and
Indicators
Warning Lights, Gages, and
Indicators ..........................
.4-8
Instrument Cluster ................
.4-9
Speedometer .....................
.4-10
Odometer ..........................
.4-10
Trip Odometer ....................
.4-10
Tachometer .......................
.4-10
Fuel Gage .........................
.4-10
Engine Coolant Temperature Gage .............4-11
Safety Belt Reminders ..........4-11
Airbag Readiness Light .........4-12
Passenger Airbag Status Indicator ..........................
.4-13
Charging System Light .........4-14
Malfunction Indicator Lamp .................
.4-14
Brake System Warning Light ...............................
.4-17
Antilock Brake System (ABS) Warning Light ...........4-17
Service All-Wheel Drive Light ...............................
.4-18Speed Sensitive Power
Steering (SSPS) Warning
Light ...............................
.4-18
StabiliTrak®Indicator Light . . . .4-18
Traction Control System (TCS) Warning Light ...........4-19
Tire Pressure Light .............
.4-19
Engine Oil Pressure Light .....4-19
Low Fuel Warning Light ........4-20
Security Light .....................
.4-20
High-Beam on Light .............4-20
Fog Lamp Light ..................
.4-20
Lamps on Reminder .............4-20
Taillamp Indicator Light .........4-21
Low Washer Fluid Warning Light ...............................
.4-21
Cruise Control Light .............4-21
Door Ajar Light ...................
.4-21
Vehicle PersonalizationVehicle Personalization .........4-21
OnStar SystemOnStar®System.................
.4-23
Instruments and Controls 4-1
Page 185 of 318
Vehicle Care
General InformationGeneral Information..............
.9-2
California Proposition 65 Warning ........................
.9-2
California Perchlorate Materials Requirements ........9-3
Accessories and Modifications ......................
.9-3
Vehicle ChecksDoing Your Own
Service Work .....................
.9-4
Hood ..................................
.9-5
Engine Compartment Overview ...........................
.9-6
Engine Oil ...........................
.9-9
Automatic Transmission Fluid ...............................
.9-12
Manual Transmission Fluid . . . .9-14
Hydraulic Clutch .................
.9-15
Engine Air Cleaner/Filter .......9-16
Cooling System ..................
.9-19
Engine Coolant ..................
.9-19Engine Overheating
.............9-23
Power Steering Fluid ............9-24
Washer Fluid .....................
.9-24
Brakes ..............................
.9-26
Brake Fluid ........................
.9-27
Battery ..............................
.9-28
All-Wheel Drive ..................
.9-29
Starter Switch Check ............9-30
Wiper Blade Replacement .....9-30
Headlamp AimingHeadlamp Aiming...............
.9-32
Bulb ReplacementBulb Replacement ..............
.9-33
Halogen Bulbs ...................
.9-33
Headlamps and Parking Lamps .............................
.9-33
Taillamps ...........................
.9-35
License Plate Lamp .............9-36
Replacement Bulbs .............
.9-37
Electrical SystemElectrical System Overload . . . .9-37
Fuses and Circuit Breakers . . .9-38
Engine Compartment Fuse Block ..............................
.9-38
Instrument Panel Fuse Block ..............................
.9-41
Wheels and TiresTires.................................
.9-43
Tire Sidewall Labeling ..........9-44
Tire Designations ................
.9-46
Tire Terminology and Definitions ........................
.9-46
Tire Pressure .....................
.9-49
Tire Pressure Monitor System ............................
.9-50
Tire Pressure Monitor Operation .........................
.9-52
Tire Inspection ...................
.9-54
Tire Rotation ......................
.9-55
When It Is Time for New Tires ...............................
.9-56
Buying New Tires ...............
.9-56
Different Size Tires and Wheels ............................
.9-58
Uniform Tire Quality Grading ...........................
.9-58
Wheel Alignment and Tire Balance ...........................
.9-60
Wheel Replacement .............9-60
Tire Chains ........................
.9-61
If a Tire Goes Flat ..............
.9-62
Tire Changing ....................
.9-63
Compact Spare Tire .............9-68
Vehicle Care 9-1
Page 191 of 318
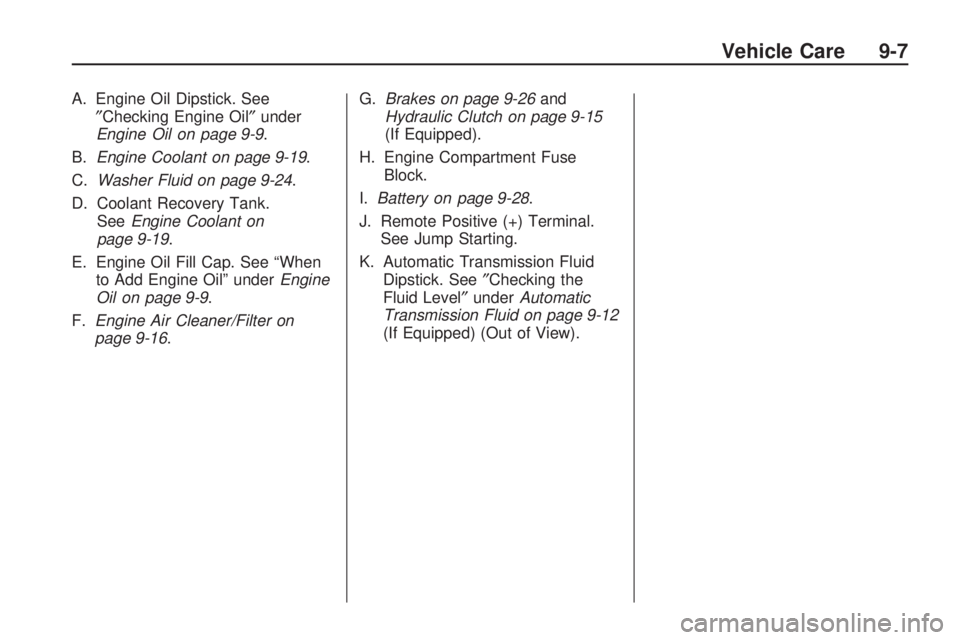
A. Engine Oil Dipstick. See″Checking Engine Oil ″under
Engine Oil on page 9-9 .
B. Engine Coolant on page 9-19 .
C. Washer Fluid on page 9-24 .
D. Coolant Recovery Tank. See Engine Coolant on
page 9-19.
E. Engine Oil Fill Cap. See “When to Add Engine Oil” under Engine
Oil on page 9-9.
F. Engine Air Cleaner/Filter on
page 9-16. G.
Brakes on page 9-26 and
Hydraulic Clutch on page 9-15
(If Equipped).
H. Engine Compartment Fuse Block.
I. Battery on page 9-28 .
J. Remote Positive (+) Terminal. See Jump Starting.
K. Automatic Transmission Fluid Dipstick. See ″Checking the
Fluid Level″ underAutomatic
Transmission Fluid on page 9-12
(If Equipped) (Out of View).
Vehicle Care 9-7
Page 193 of 318
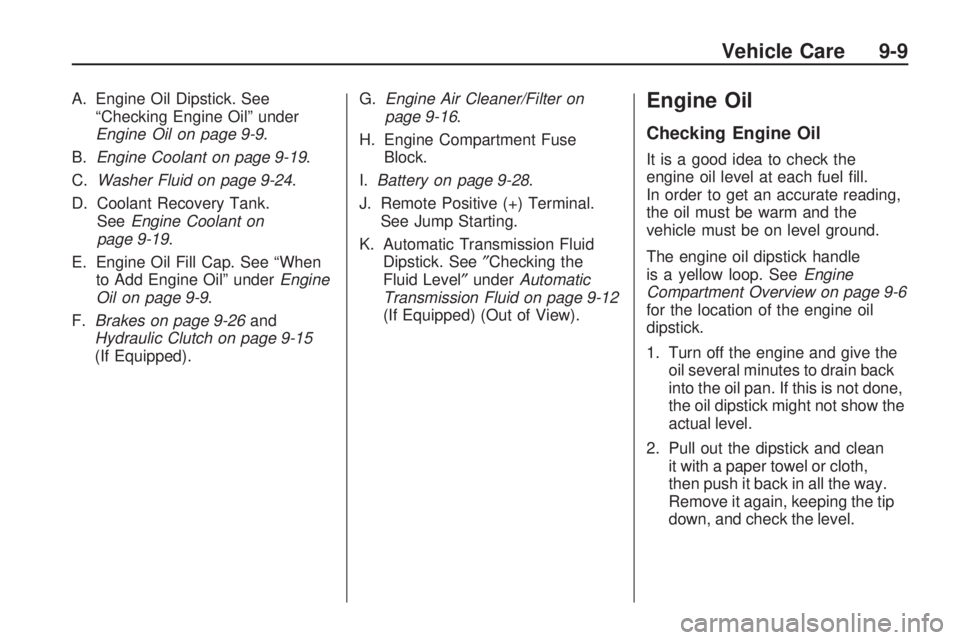
A. Engine Oil Dipstick. See“Checking Engine Oil” under
Engine Oil on page 9-9 .
B. Engine Coolant on page 9-19 .
C. Washer Fluid on page 9-24 .
D. Coolant Recovery Tank. See Engine Coolant on
page 9-19.
E. Engine Oil Fill Cap. See “When to Add Engine Oil” under Engine
Oil on page 9-9.
F. Brakes on page 9-26 and
Hydraulic Clutch on page 9-15
(If Equipped). G.
Engine Air Cleaner/Filter on
page 9-16.
H. Engine Compartment Fuse Block.
I. Battery on page 9-28 .
J. Remote Positive (+) Terminal. See Jump Starting.
K. Automatic Transmission Fluid Dipstick. See ″Checking the
Fluid Level″ underAutomatic
Transmission Fluid on page 9-12
(If Equipped) (Out of View).Engine Oil
Checking Engine Oil
It is a good idea to check the
engine oil level at each fuel fill.
In order to get an accurate reading,
the oil must be warm and the
vehicle must be on level ground.
The engine oil dipstick handle
is a yellow loop. See Engine
Compartment Overview on page 9-6
for the location of the engine oil
dipstick.
1. Turn off the engine and give the oil several minutes to drain back
into the oil pan. If this is not done,
the oil dipstick might not show the
actual level.
2. Pull out the dipstick and clean it with a paper towel or cloth,
then push it back in all the way.
Remove it again, keeping the tip
down, and check the level.
Vehicle Care 9-9
Page 197 of 318
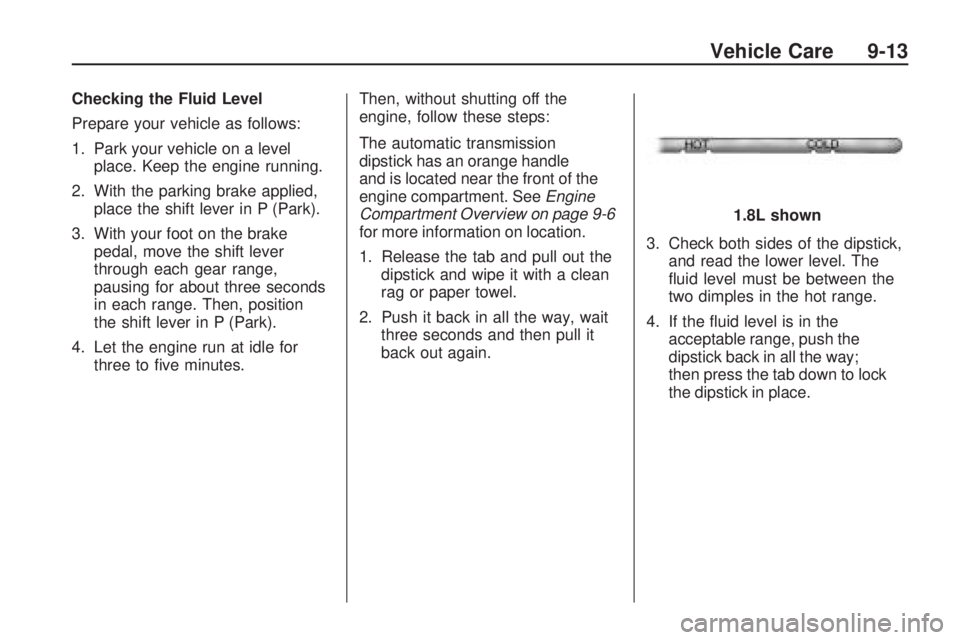
Checking the Fluid Level
Prepare your vehicle as follows:
1. Park your vehicle on a levelplace. Keep the engine running.
2. With the parking brake applied, place the shift lever in P (Park).
3. With your foot on the brake pedal, move the shift lever
through each gear range,
pausing for about three seconds
in each range. Then, position
the shift lever in P (Park).
4. Let the engine run at idle for three to five minutes. Then, without shutting off the
engine, follow these steps:
The automatic transmission
dipstick has an orange handle
and is located near the front of the
engine compartment. See
Engine
Compartment Overview on page 9-6
for more information on location.
1. Release the tab and pull out the dipstick and wipe it with a clean
rag or paper towel.
2. Push it back in all the way, wait three seconds and then pull it
back out again. 3. Check both sides of the dipstick,
and read the lower level. The
fluid level must be between the
two dimples in the hot range.
4. If the fluid level is in the acceptable range, push the
dipstick back in all the way;
then press the tab down to lock
the dipstick in place. 1.8L shown
Vehicle Care 9-13
Page 199 of 318
Notice:Too much or too
little �uid can damage your
transmission. Too much can mean
that some of the �uid could come
out and fall on hot engine parts or
exhaust system parts, starting a
�re. Too little �uid could cause the
transmission to overheat. Be sure
to get an accurate reading if you
check your transmission �uid.
Check the fluid level only when your
engine is off, the vehicle is parked on
a level place and the transmission
is cool enough for you to rest your
fingers on the transmission case.
Then, follow these steps:
1. Remove the filler plug.
2. Check that the lubricant level is up to the bottom of the filler
plug hole. 3. If the fluid level is good, install
the plug and be sure it is fully
seated. If the fluid level is low,
add more fluid as described in
the next steps.
How to Add Fluid
Here is how to add fluid. Refer
to the Maintenance Schedule
to determine what kind of fluid to
use. See Recommended Fluids
and Lubricants on page 10-15 .
1. Remove the filler plug.
2. Add fluid at the filler plug hole. Add only enough fluid to bring
the fluid level up to the bottom
of the filler plug hole.
3. Install the filler plug. Be sure the plug is fully seated.
Hydraulic Clutch
The hydraulic clutch linkage in your
vehicle is self-adjusting. The master
cylinder reservoir is filled with DOT-3
brake fluid.
It is not necessary to regularly
check the fluid unless you suspect
there is a leak in the system.
Adding fluid will not correct a leak.
The hydraulic clutch and brake
master cylinder use the same
reservoir.
A fluid loss in this system could
indicate a problem. Have the system
inspected and repaired.
Vehicle Care 9-15
Page 211 of 318
Brake Fluid
The brake master cylinder and, on
manual transmission vehicles, the
clutch hydraulic system use the
same reservoir. The reservoir is filled
with DOT-3 brake fluid as indicated
on the reservoir cap. SeeEngine
Compartment Overview on page 9-6
for the location of the reservoir. There are only two reasons why the
brake fluid level in the reservoir
might go down:
•The brake fluid level goes down
because of normal brake lining
wear. When new linings are
installed, the fluid level goes
back up.
•A fluid leak in the brake and/or
clutch hydraulic system can also
cause a low fluid level. Have the
brake and/or clutch hydraulic
system fixed, since a leak means
that sooner or later the brakes
and/or clutch will not work well.
Do not top off the brake/clutch fluid.
Adding fluid does not correct a leak.
If fluid is added when the linings are
worn, there will be too much fluid
when new brake linings are installed. Add or remove brake fluid, as
necessary, only when work is done
on the brake/clutch hydraulic system.
{CAUTION
If too much brake fluid is added,
it can spill on the engine and burn,
if the engine is hot enough. You
or others could be burned, and
the vehicle could be damaged.
Add brake fluid only when work
is done on the brake hydraulic
system.
When the brake fluid falls to a low
level, the brake warning light comes
on. See Brake System Warning
Light on page 4-17.
Vehicle Care 9-27
Page 212 of 318
What to Add
Use only new DOT-3 brake
fluid from a sealed container.
SeeRecommended Fluids and
Lubricants on page 10-15 .
Always clean the brake fluid
reservoir cap and the area around
the cap before removing it. This
helps keep dirt from entering the
reservoir.
{CAUTION
With the wrong kind of fluid in the
brake or clutch hydraulic system,
the brakes or clutch might not
work well. This could cause a
crash. Always use the proper
brake fluid. Notice:
Using the wrong �uid can
badly damage brake or clutch
hydraulic system parts.
For example, just a few drops
of mineral-based oil, such as
engine oil, in the brake or clutch
hydraulic system can damage
brake or clutch hydraulic
system parts so badly that they
will have to be replaced. Do not
let someone put in the wrong
kind of �uid.
If brake �uid is spilled on the
vehicle’s painted surfaces, the
paint �nish can be damaged.
Be careful not to spill brake
�uid on the vehicle. If you do,
wash it off immediately.
Battery
This vehicle has a maintenance
free battery. When it is time for a
new battery, see your dealer/retailer
for one that has the replacement
number shown on the original
battery’s label. See
Engine
Compartment Overview on
page 9-6 for battery location.
{WARNING
Battery posts, terminals, and
related accessories contain lead
and lead compounds, chemicals
known to the State of California
to cause cancer and reproductive
harm. Wash hands after handling.
9-28 Vehicle Care
Page 280 of 318
At Least Once a Year
Key Lock Cylinders Service
Lubricate the key lock cylinders
with the lubricant specified in
Recommended Fluids and
Lubricants on page 10-15.
Seat Operation Check
Make sure the head restraints stay
in position and all seat latches
lock. Check that the recliner holds
by pushing and pulling the seatback
while it is reclined.
Body Lubrication Service
Lubricate all hood latch assembly,
secondary latch, pivots, spring
anchor, release pawl, hood and
body door hinges, rear compartment,
and any folding seat hardware.
Recommended Fluids and
Lubricants on page 10-15 tells
you what to use. More frequent
lubrication might be required when
exposed to a corrosive environment.
Starter Switch Check
See Starter Switch Check on
page 9-30. Automatic Transmission Shift
Lock Control System Check
{CAUTION
When you are doing this
inspection, the vehicle could move
suddenly. If the vehicle moves,
you or others could be injured.
1. Before starting this check, be sure there is enough room around the
vehicle. It should be parked on a
level surface.
2. Firmly apply the parking brake. See Parking Brake on page 8-33 .
Be ready to apply the regular
brake immediately if the vehicle
begins to move.
3. With the engine off, turn the ignition to ON/RUN, but do not
start the engine. Without applying
the regular brake, try to move the
shift lever out of P (Park) with
normal effort. If the shift lever
moves out of P (Park), contact
your dealer/retailer for service. Ignition Transmission Lock
Check
While parked, and with the parking
brake set, try to turn the ignition
to LOCK/OFF in each shift
lever position.
•For automatic transmission
vehicles, the ignition should
turn to LOCK/OFF only when
the shift lever is in P (Park).
•For manual transmission
vehicles, the ignition should
turn to LOCK/OFF only if
you push the ignition key in
farther, while turning it toward
LOCK/OFF.
Contact your dealer/retailer if
service is required.
10-12 Service and Maintenance