fold seats PONTIAC VIBE 2010 Owners Manual
[x] Cancel search | Manufacturer: PONTIAC, Model Year: 2010, Model line: VIBE, Model: PONTIAC VIBE 2010Pages: 318, PDF Size: 1.7 MB
Page 21 of 318
Seats and
Restraints
Head RestraintsHead Restraints...................
.2-2
Active Head Restraints ...........2-3
Front SeatsSeat Position.......................
.2-3
Seat Adjustment ...................
.2-4
Reclining Seatbacks .............
.2-4
Folding Seatback .................
.2-6
Rear SeatsRear Seats..........................
.2-7
Safety BeltsSafety Belts.........................
.2-8
How to Wear Safety Belts Properly ...........................
.2-12
Lap-Shoulder Belt ...............
.2-18
Safety Belt Use During Pregnancy .......................
.2-20
Safety Belt Extender ............2-21Safety System Check
...........2-21
Safety Belt Care .................
.2-22
Replacing Safety Belt System Parts After
a Crash ...........................
.2-22
Airbag SystemAirbag System...................
.2-23
Where Are the Airbags? .......2-24
When Should an Airbag Inflate? ............................
.2-26
What Makes an Airbag Inflate? ............................
.2-27
How Does an Airbag Restrain? .........................
.2-28
What Will You See After an Airbag Inflates? .............2-28
Passenger Sensing System ............................
.2-29
Servicing the Airbag-Equipped Vehicle .....2-34
Adding Equipment to the Airbag-Equipped Vehicle .....2-35
Airbag System Check ...........2-36
Replacing Airbag System Parts After a Crash ............2-36
Child RestraintsOlder Children....................
.2-37
Infants and Young Children ...........................
.2-38
Child Restraint Systems ........2-41
Where to Put the Restraint ..........................
.2-43
Lower Anchors and Tethers for Children (LATCH
System) ...........................
.2-45
Replacing LATCH System Parts After a Crash ............2-51
Securing Child Restraints (Rear Seat Position) ...........2-51
Securing Child Restraints (Right Front Seat Position) . . . .2-53
Seats and Restraints 2-1
Page 26 of 318
Folding Seatback
{CAUTION
If you fold the seatback forward to
carry longer objects, such as skis,
be sure any such cargo is not near
an airbag. In a crash, an inflating
airbag might force that object
toward a person. This could
cause severe injury or even death.
Secure objects away from the area
in which an airbag would inflate.
For more information, seeWhere
Are the Airbags? on page 2-24 .
{CAUTION
Things you put on this seatback
can strike and injure people in a
sudden stop or turn, or in a crash.
Remove or secure all items
before driving.
On vehicles with this feature, the
seatback folds down to allow for
more cargo space. When the area
is not being used for more cargo
space or as a temporary table, put
the seatback in the locked, upright
position. Only adjust the seat when
the vehicle is not moving.
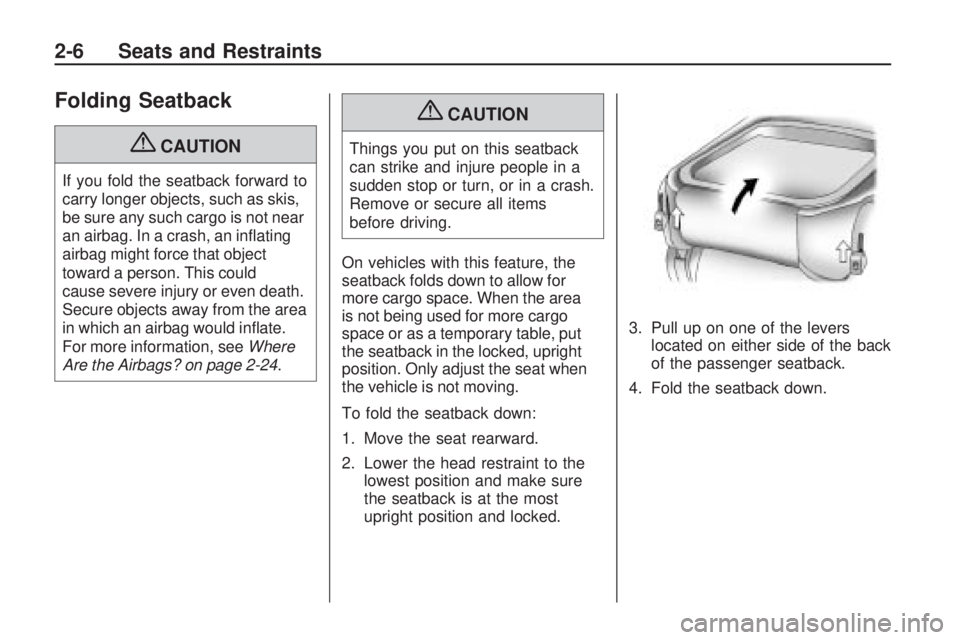
To fold the seatback down:
1. Move the seat rearward.
2. Lower the head restraint to the lowest position and make sure
the seatback is at the most
upright position and locked. 3. Pull up on one of the levers
located on either side of the back
of the passenger seatback.
4. Fold the seatback down.
2-6 Seats and Restraints
Page 27 of 318

To raise the seatback:
1. Pull up on one of the leverslocated on either side of the back
of the passenger’s seatback.
2. Pull the seatback up and push it back to lock it into place. Make
sure the safety belt is not twisted
or caught in the seatback.
3. Push and pull the top of the seatback to be sure it is
locked into position.
4. Use the reclining front seatback lever to adjust the seatback to a
comfortable position.Rear Seats
You can fold either side of the
seatback down. The rear right side
seatback can also be used as a
temporary table while the vehicle
is stopped.
{CAUTION
A rear seatback folded forward,
or any other object contacting or
pressing the front seatback may
affect the proper functioning of
the passenger sensing system.
See Passenger Sensing System
on page 2-29.
To fold either seatback down:
1. Move the front seat forward and the seatback to the upright
position.
2. Move the headrests all the way down. 3. Pull up on the lock release knob,
located on the top outboard side
of the seatback.
Notice: Folding a rear seat with
the safety belts still fastened may
cause damage to the seat or the
safety belts. Always unbuckle the
safety belts and return them to
their normal stowed position
before folding a rear seat.
4. Fold the seatback down.
Seats and Restraints 2-7
Page 67 of 318
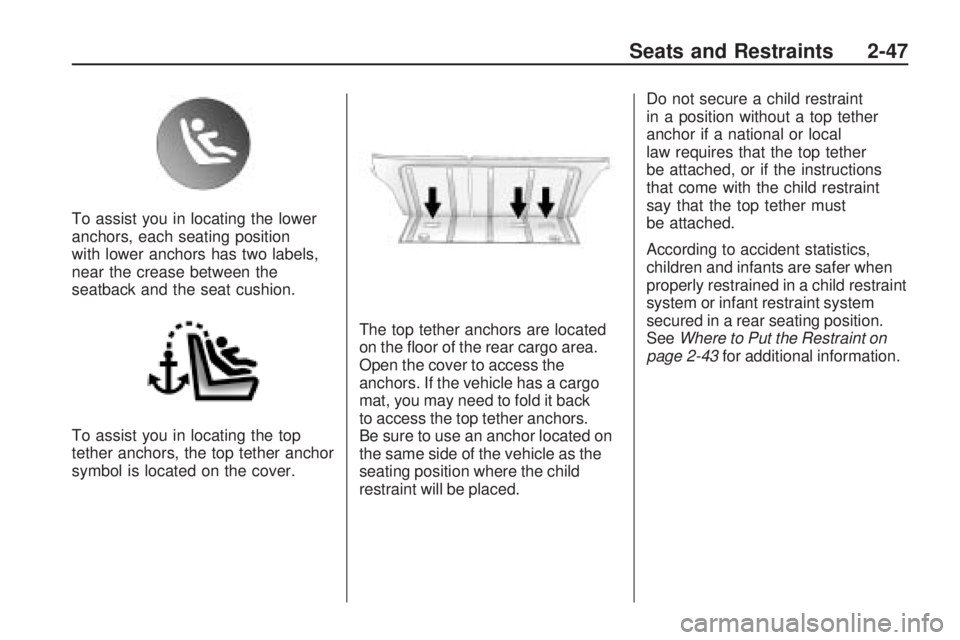
To assist you in locating the lower
anchors, each seating position
with lower anchors has two labels,
near the crease between the
seatback and the seat cushion.
To assist you in locating the top
tether anchors, the top tether anchor
symbol is located on the cover.The top tether anchors are located
on the floor of the rear cargo area.
Open the cover to access the
anchors. If the vehicle has a cargo
mat, you may need to fold it back
to access the top tether anchors.
Be sure to use an anchor located on
the same side of the vehicle as the
seating position where the child
restraint will be placed.Do not secure a child restraint
in a position without a top tether
anchor if a national or local
law requires that the top tether
be attached, or if the instructions
that come with the child restraint
say that the top tether must
be attached.
According to accident statistics,
children and infants are safer when
properly restrained in a child restraint
system or infant restraint system
secured in a rear seating position.
See
Where to Put the Restraint on
page 2-43 for additional information.
Seats and Restraints 2-47
Page 69 of 318

Do not fold the empty rear
seat with a safety belt buckled.
This could damage the safety belt
or the seat. Unbuckle and return
the safety belt to its stowed
position, before folding the seat.
1. Attach and tighten the lowerattachments to the lower anchors.
If the child restraint does not have
lower attachments or the desired
seating position does not have
lower anchors, secure the child
restraint with the top tether and
the safety belts. Refer to the
child restraint manufacturer
instructions and the instructions
in this manual.
1.1. Find the lower anchors for the desired seating position.
1.2. Put the child restraint on the seat.
1.3. Attach and tighten the lower attachments on the child
restraint to the lower
anchors. 2. If the child restraint manufacturer
recommends that the top tether
be attached, attach and tighten
the top tether to the top tether
anchor, if equipped. Refer to the
child restraint instructions and the
following steps:
2.1. Find the top tether anchor.
2.2. If the vehicle has a cargo mat, you may need to fold
it back to access the
top tether anchors.
2.3. Open the top tether anchor cover to expose the anchor. 2.4. Route, attach, and tighten
the top tether according
to the child restraint
instructions and the
following instructions:
If the position you are using
does not have a headrest or
head restraint and you are
using a single tether, route
the tether over the seatback.
Seats and Restraints 2-49
Page 77 of 318
Storage
Storage CompartmentsGlove Box...........................
.3-1
Cupholders ..........................
.3-1
Front Storage ......................
.3-2
Overhead Console ................
.3-2
Center Console Storage .........3-2
Additional Storage FeaturesCargo Cover........................
.3-2
Load Rails and Hooks ...........3-4
Cargo Tie Downs .................
.3-4
Cargo Management System . . . .3-4
Roof Rack SystemRoof Rack...........................
.3-5
Storage
Compartments
Glove Box
Lift up on the glove box lever to
open it.
Cupholders
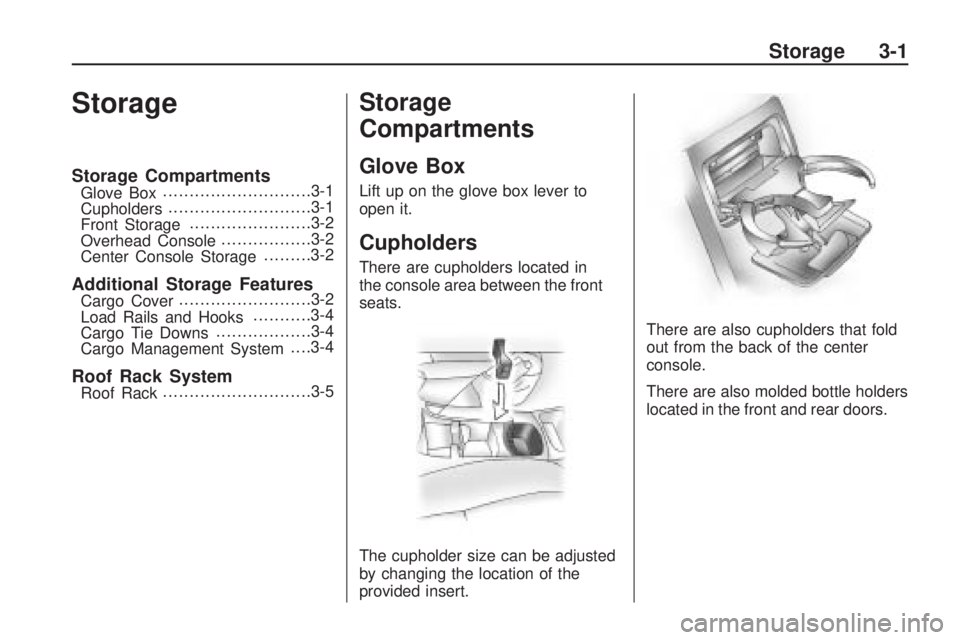
There are cupholders located in
the console area between the front
seats.
The cupholder size can be adjusted
by changing the location of the
provided insert. There are also cupholders that fold
out from the back of the center
console.
There are also molded bottle holders
located in the front and rear doors.
Storage 3-1
Page 149 of 318
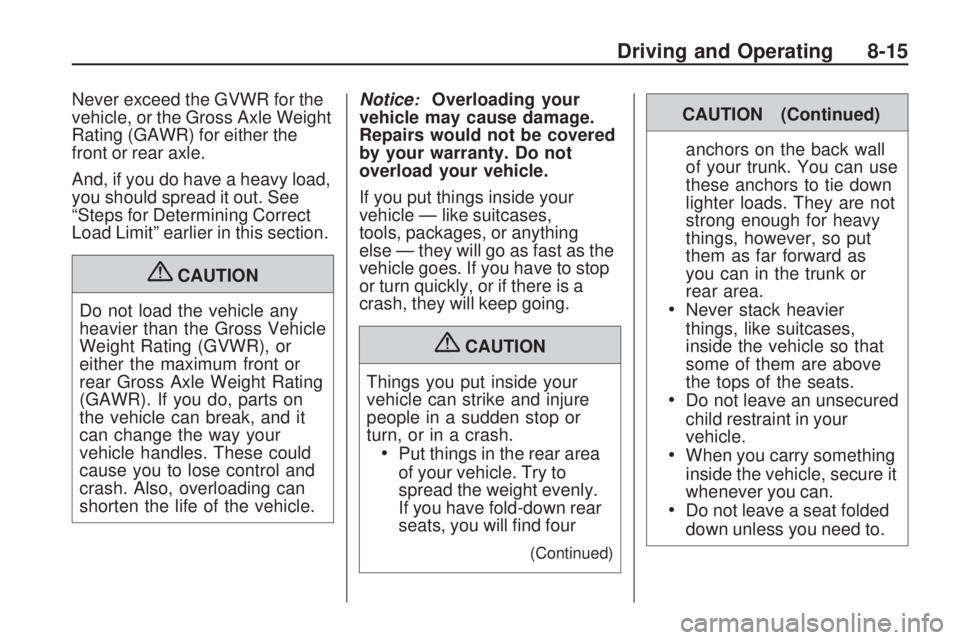
Never exceed the GVWR for the
vehicle, or the Gross Axle Weight
Rating (GAWR) for either the
front or rear axle.
And, if you do have a heavy load,
you should spread it out. See
“Steps for Determining Correct
Load Limit” earlier in this section.
{CAUTION
Do not load the vehicle any
heavier than the Gross Vehicle
Weight Rating (GVWR), or
either the maximum front or
rear Gross Axle Weight Rating
(GAWR). If you do, parts on
the vehicle can break, and it
can change the way your
vehicle handles. These could
cause you to lose control and
crash. Also, overloading can
shorten the life of the vehicle. Notice
:Overloading your
vehicle may cause damage.
Repairs would not be covered
by your warranty. Do not
overload your vehicle.
If you put things inside your
vehicle — like suitcases,
tools, packages, or anything
else — they will go as fast as the
vehicle goes. If you have to stop
or turn quickly, or if there is a
crash, they will keep going.
{CAUTION
Things you put inside your
vehicle can strike and injure
people in a sudden stop or
turn, or in a crash.
•Put things in the rear area
of your vehicle. Try to
spread the weight evenly.
If you have fold-down rear
seats, you will find four
(Continued)
CAUTION (Continued) anchors on the back wall
of your trunk. You can use
these anchors to tie down
lighter loads. They are not
strong enough for heavy
things, however, so put
them as far forward as
you can in the trunk or
rear area.
•Never stack heavier
things, like suitcases,
inside the vehicle so that
some of them are above
the tops of the seats.
•Do not leave an unsecured
child restraint in your
vehicle.
•When you carry something
inside the vehicle, secure it
whenever you can.
•Do not leave a seat folded
down unless you need to.
Driving and Operating 8-15
Page 312 of 318

Engine (cont.)Pressure Light ..................4-19
Running While Parked .......8-24
Starting ........................... 8-18
Entry Lighting ........................ 5-5
Equipment, Towing ...............8-49
Event Data Recorders .........12-14
Extender, Safety Belt ............2-21
Exterior Care ....................... 9-75
Exterior Lamp Controls ........... 5-1
F
Filter
Engine Air Cleaner ............9-16
Flashers, Hazard Warning ....... 5-3
Flash-to-Pass ........................ 5-2
Flat Tire .............................. 9-62
Flat Tire, Changing ...............9-63
Floor Mats .......................... 9-83
Fluid Automatic Transmission .....9-12
Brakes ............................ 9-27
Power Steering .................9-24
Washer ........................... 9-24
Fog Lamps Bulb Replacement .............. 5-4
Light ............................... 4-20Folding Mirrors
....................1-10
Folding Seatback ................... 2-6
Front Seat Position Seats Adjustment ........................ 2-3
Front Seats Adjustment ........................ 2-4
Front Storage ........................ 3-2
Fuel ................................... 8-38
Additives ......................... 8-40
Economy Driving ................ 8-2
Filling a Portable Fuel Container ..................... 8-43
Filling the Tank .................8-41
Fuels in Foreign Countries ..................... 8-40
Gage .............................. 4-10
Gasoline Specifications ......8-39
Low Fuel Warning Light .....4-20
Recommended .................8-39
Requirements, California ....8-39
Fuses Engine Compartment FuseBlock ........................... 9-38
Fuses and Circuit Breakers ...................... 9-38
Instrument Panel Fuse Block ........................... 9-41
G
Gages
Engine CoolantTemperature .................4-11
Fuel ................................ 4-10
Odometer ........................ 4-10
Speedometer ................... 4-10
Tachometer ...................... 4-10
Trip Odometer ..................4-10
Warning Lights and Indicators ....................... 4-8
Gasoline Specifications ................... 8-39
General Information Service and Maintenance . . . 10-1
Towing ............................ 8-43
Vehicle Care ...................... 9-2
Glove Box ............................ 3-1
GM Mobility Reimbursement Program .......................... 12-5
i-4 INDEX
Page 316 of 318
S
Safety Belts.......................... 2-8
Care ............................... 2-22
Extender ......................... 2-21
How to Wear Safety Belts Properly ....................... 2-12
Lap-Shoulder Belt .............2-18
Reminders ....................... 4-11
Replacing After a Crash .....2-22
Use During Pregnancy ......2-20
Safety Defects Reporting General Motors ...............12-14
U.S. Government ............12-13
Safety Locks ......................... 1-6
Safety System Check ...........2-21
Satellite Radio ....................... 6-6
Satellite Radio Antenna .......... 6-9
Scheduled Maintenance ........10-3
Scheduling Appointments .......12-8
Seats Adjustment, Front ............... 2-4
Folding Seatback ................ 2-6
Head Restraints ................. 2-2
Position, Front ................... 2-3
Rear ................................. 2-7
Reclining Seatbacks ............ 2-4Securing Child
Restraints ................ 2-51, 2-53
Security Light ............................... 4-20
Vehicle ............................. 1-7
Service Accessories andModifications .................. 9-3
All-Wheel-Drive Light .........4-18
Engine Soon Lamp ...........4-14
Maintenance, General Information ................... 10-1
Parts Identification Label ....11-1
Publications Ordering Information ................. 12-12
Scheduling Appointments . . . 12-8
Service and Maintenance Records ......................... 10-18
Service, Doing Your Own Work ................................ 9-4
Servicing the Airbag-Equipped Vehicle ............................ 2-34
Shifting Into Park ......................... 8-20
Out
of Park ..................... 8-22
Signals, Turn and Lane-Change ..................... 5-3 Spare Tire
Compact ......................... 9-68
Specifications and Capacities ....................... 11-2
Speed Sensitive Power Steering (SSPS)
Warning Light ................... 4-18
Speedometer ....................... 4-10
StabiliTrak System ................8-35
StabiliTrak
®Indicator Light .....4-18
Starter Switch Check ............9-30
Starting the Engine ..............8-18
Steering ............................... 8-4
Fluid, Power .................... 9-24
Steering Wheel Adjustment ..... 4-4
Steering Wheel Controls ......... 4-4
Storage Areas Cargo Cover ...................... 3-2
Cargo Management System .......................... 3-4
Center Console .................. 3-2
Front ................................ 3-2
Glove Box ......................... 3-1
Roof Rack ......................... 3-5
Stuck Vehicle ...................... 8-11
Sun Visors .......................... 1-12
Sunroof .............................. 1-13
Symbols ................................. iii
i-8 INDEX