oil change PONTIAC VIBE 2010 Owners Manual
[x] Cancel search | Manufacturer: PONTIAC, Model Year: 2010, Model line: VIBE, Model: PONTIAC VIBE 2010Pages: 318, PDF Size: 1.7 MB
Page 5 of 318
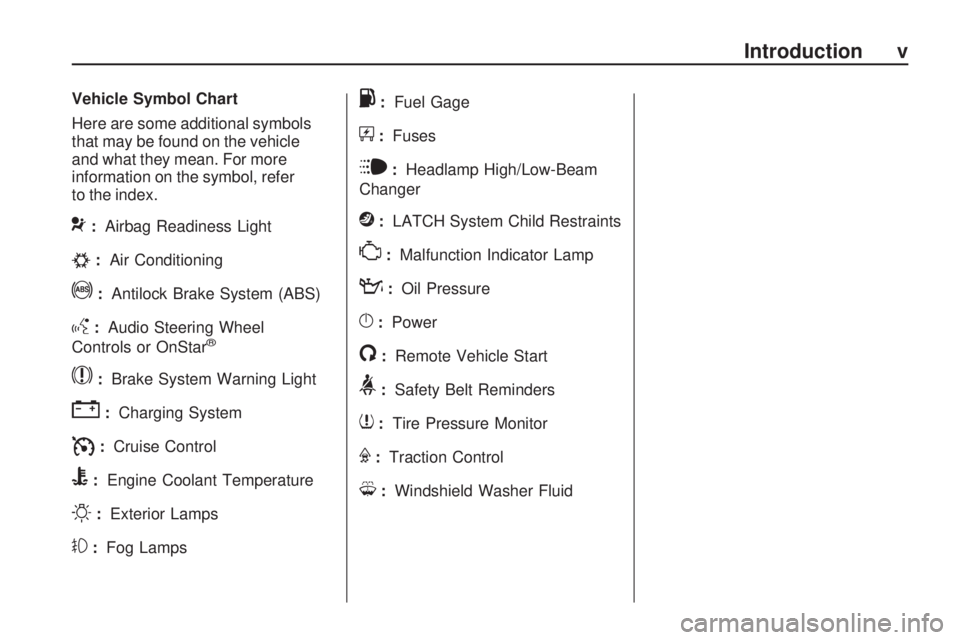
Vehicle Symbol Chart
Here are some additional symbols
that may be found on the vehicle
and what they mean. For more
information on the symbol, refer
to the index.
9:Airbag Readiness Light
#:Air Conditioning
!:Antilock Brake System (ABS)
g:Audio Steering Wheel
Controls or OnStar®
$: Brake System Warning Light
":Charging System
I:Cruise Control
B:Engine Coolant Temperature
O:Exterior Lamps
#:Fog Lamps
.:Fuel Gage
+:Fuses
i:Headlamp High/Low-Beam
Changer
j: LATCH System Child Restraints
*:Malfunction Indicator Lamp
::Oil Pressure
}:Power
/:Remote Vehicle Start
>:Safety Belt Reminders
7:Tire Pressure Monitor
F:Traction Control
M:Windshield Washer Fluid
Introduction v
Page 102 of 318
If the light comes on and stays on, it
means that oil is not flowing through
the engine properly. The vehicle
could be low on oil and might have
some other system problem.
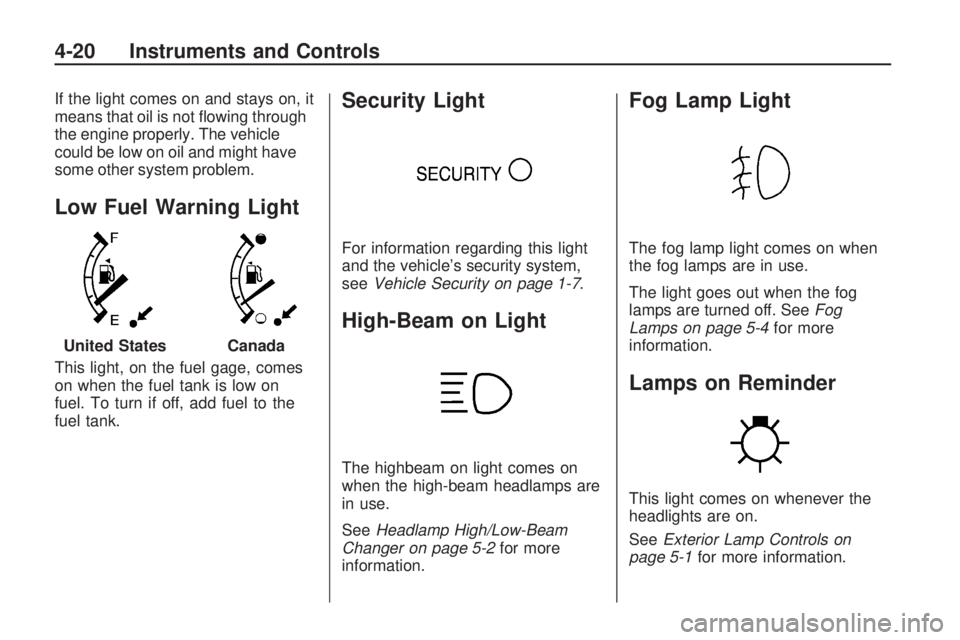
Low Fuel Warning Light
This light, on the fuel gage, comes
on when the fuel tank is low on
fuel. To turn if off, add fuel to the
fuel tank.
Security Light
For information regarding this light
and the vehicle’s security system,
seeVehicle Security on page 1-7 .
High-Beam on Light
The highbeam on light comes on
when the high-beam headlamps are
in use.
SeeHeadlamp High/Low-Beam
Changer on page 5-2 for more
information.
Fog Lamp Light
The fog lamp light comes on when
the fog lamps are in use.
The light goes out when the fog
lamps are turned off. See Fog
Lamps on page 5-4 for more
information.
Lamps on Reminder
This light comes on whenever the
headlights are on.
See Exterior Lamp Controls on
page 5-1 for more information.
United States
Canada
4-20 Instruments and Controls
Page 174 of 318
Fuels in Foreign
Countries
If you plan on driving in another
country outside the United States
or Canada, the proper fuel might
be hard to find. Never use leaded
gasoline or any other fuel not
recommended in the previous text
on fuel. Costly repairs caused by
use of improper fuel would not be
covered by the vehicle warranty.
To check the fuel availability, ask an
auto club, or contact a major oil
company that does business in the
country where you will be driving.
Fuel Additives
To provide cleaner air, all gasolines
in the United States are now required
to contain additives that help prevent
engine and fuel system deposits
from forming, allowing the emission
control system to work properly.
In most cases, you should not have
to add anything to the fuel. However,
some gasolines contain only the
minimum amount of additive required
to meet U.S. Environmental
Protection Agency regulations.
To help keep fuel injectors and
intake valves clean, or if the vehicle
experiences problems due to dirty
injectors or valves, look for gasoline
that is advertised as TOP TIER
Detergent Gasoline. Look for the
TOP TIER label on the fuel pump to
ensure gasoline meets enhanced
detergency standards developed
by the auto companies. A list of
marketers providing TOP TIER
Detergent Gasoline can be found
at www.toptiergas.com.For customers who do not use
TOP TIER Detergent Gasoline
regularly, one bottle of GM Fuel
System Treatment PLUS, added to
the fuel tank at every engine oil
change, can help clean deposits
from fuel injectors and intake valves.
GM Fuel System Treatment
PLUS is the only gasoline additive
recommended by General Motors.
It is available at your dealer/retailer.
Gasolines containing oxygenates,
such as ethers and ethanol, and
reformulated gasolines might be
available in your area. We
recommend that you use these
gasolines, if they comply with the
specifications described earlier.
However, E85 (85% ethanol) and
other fuels containing more than
10% ethanol must not be used in
vehicles that were not designed for
those fuels.
8-40 Driving and Operating
Page 180 of 318
Making Turns
Notice:Making very sharp turns
while trailering could cause the
trailer to come in contact with the
vehicle. The vehicle could be
damaged. Avoid making very
sharp turns while trailering.
When turning with a trailer, make
wider turns than normal. Do this so
the trailer won’t strike soft shoulders,
curbs, road signs, trees or other
objects. Avoid jerky or sudden
maneuvers. Signal well in advance.
Turn Signals When Towing a
Trailer
The arrows on the instrument panel
flash whenever signaling a turn or
lane change. Properly hooked up,
the trailer lamps also flash, telling
other drivers the vehicle is turning,
changing lanes or stopping. When towing a trailer, the arrows on
the instrument panel flash for turns
even if the bulbs on the trailer are
burned out. For this reason you may
think other drivers are seeing the
signal when they are not. It is
important to check occasionally to be
sure the trailer bulbs are still working.
Driving On Grades
Reduce speed and shift to a lower
gear before starting down a long or
steep downgrade. If the transmission
is not shifted down, the brakes
might have to be used so much that
they would get hot and no longer
work well.
Vehicles with an automatic
transmission can tow in D (Drive).
Shift the transmission to a lower gear
if the transmission shifts too often
under heavy loads and/or hilly
conditions. For vehicles with a
manual transmission, it is better
not to use the highest gear.When towing at high altitude on
steep uphill grades, consider the
following: Engine coolant will boil at a
lower temperature than at normal
altitudes. If the engine is turned off
immediately after towing at high
altitude on steep uphill grades, the
vehicle may show signs similar to
engine overheating. To avoid this,
let the engine run while parked,
preferably on level ground, with the
automatic transmission in P (Park)
for a few minutes before turning the
engine off. For vehicles with manual
transmissions, let the engine run
while parked, preferably on level
ground, with the transmission out of
gear and the parking brake applied,
for a few minutes before turning the
engine off. If the overheat warning
comes on, see
Engine Overheating
on page 9-23.
8-46 Driving and Operating
Page 195 of 318
•GM6094MUse only an oil that meets GM
Standard GM6094M.
•SAE 5W-30SAE 5W-30 is best for the
vehicle. These numbers on an
oil container show its viscosity,
or thickness. Do not use
other viscosity oils such
as SAE 20W-50.
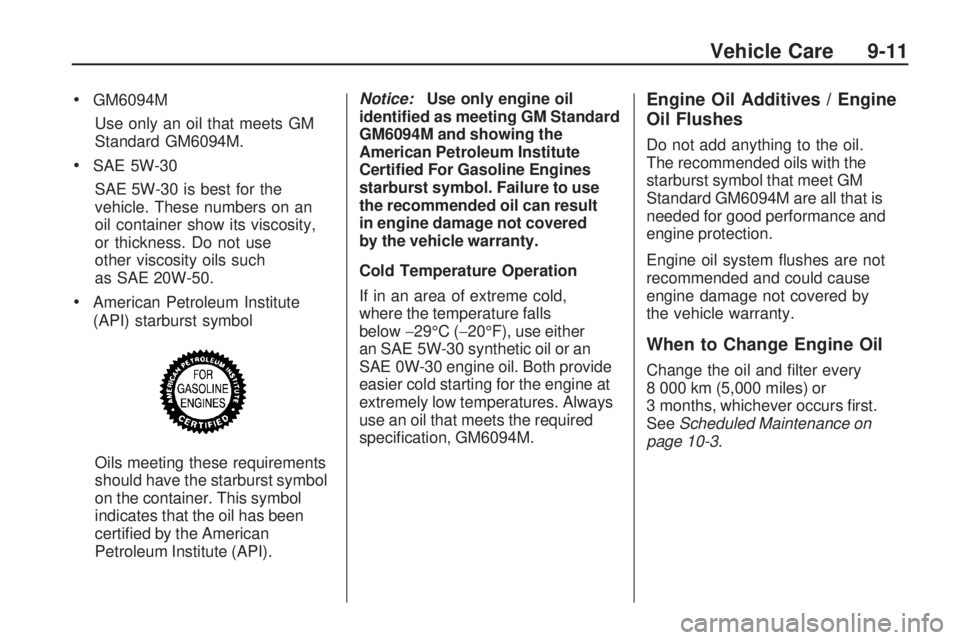
•American Petroleum Institute
(API) starburst symbol
Oils meeting these requirements
should have the starburst symbol
on the container. This symbol
indicates that the oil has been
certified by the American
Petroleum Institute (API). Notice:
Use only engine oil
identi�ed as meeting GM Standard
GM6094M and showing the
American Petroleum Institute
Certi�ed For Gasoline Engines
starburst symbol. Failure to use
the recommended oil can result
in engine damage not covered
by the vehicle warranty.
Cold Temperature Operation
If in an area of extreme cold,
where the temperature falls
below −29°C (−20°F), use either
an SAE 5W-30 synthetic oil or an
SAE 0W-30 engine oil. Both provide
easier cold starting for the engine at
extremely low temperatures. Always
use an oil that meets the required
specification, GM6094M.
Engine Oil Additives / Engine
Oil Flushes
Do not add anything to the oil.
The recommended oils with the
starburst symbol that meet GM
Standard GM6094M are all that is
needed for good performance and
engine protection.
Engine oil system flushes are not
recommended and could cause
engine damage not covered by
the vehicle warranty.
When to Change Engine Oil
Change the oil and filter every
8 000 km (5,000 miles) or
3 months, whichever occurs first.
See Scheduled Maintenance on
page 10-3.
Vehicle Care 9-11
Page 196 of 318
What to Do with Used Oil
Used engine oil contains certain
elements that can be unhealthy for
your skin and could even cause
cancer. Do not let used oil stay on
your skin for very long. Clean your
skin and nails with soap and water,
or a good hand cleaner. Wash or
properly dispose of clothing or rags
containing used engine oil. See the
manufacturer’s warnings about the
use and disposal of oil products.
Used oil can be a threat to the
environment. If you change your own
oil, be sure to drain all the oil from the
filter before disposal. Never dispose
of oil by putting it in the trash, pouring
it on the ground, into sewers, or into
streams or bodies of water. Recycle
it by taking it to a place that collects
used oil.
Automatic Transmission
Fluid
When to Check and Change
Automatic Transmission Fluid
Check the fluid in the transmission
and differential at the intervals listed
inScheduled Maintenance on
page 10-3, and be sure to use
the transmission fluid listed in
Recommended Fluids and
Lubricants on page 10-15 .
How to Check Automatic
Transmission Fluid
This operation can be difficult, you
may choose to have this done at the
dealer/retailer service department.
If you do it yourself, be sure to
follow all the instructions here,
or you could get a false reading
on the dipstick. Wait at least 30 minutes before
checking the transmission fluid level
if you have been driving:
•When outside temperatures are
above 90°F (32°C).
•At high speed for quite a while.
•In heavy traffic — especially
in hot weather.
•While pulling a trailer.
To get the right reading, the fluid
should be at normal operating
temperature, which is 158°F to
176°F (70°C to 80°C).
Get the vehicle warmed up by
driving about 15 miles (24 km)
when outside temperatures
are above 50°F (10°C). If it is
colder than 50°F (10°C), you
may have to drive longer.
9-12 Vehicle Care
Page 198 of 318
How to Add Automatic
Transmission Fluid
Refer to the Maintenance
Schedule to determine what
kind of transmission fluid to use.
Recommended Fluids and
Lubricants on page 10-15.
If the fluid level is low, add only
enough of the proper fluid to bring
the level into the area between
dimples on the dipstick.
1. Pull out the dipstick.
2. Using a long-neck funnel, add enough fluid at the dipstick
hole to bring it to the proper level.
It does not take much fluid,
generally less than one pint
(0.5 L). Do not overfill. Notice:
Too much or too
little �uid can damage your
transmission. Too much can mean
that some of the �uid could come
out and fall on hot engine parts or
exhaust system parts, starting a
�re. Too little �uid could cause the
transmission to overheat. Be sure
to get an accurate reading if you
check your transmission �uid.
3. After adding fluid, recheck the fluid level as described under
“How to Check Automatic
Transmission Fluid,” earlier
in this section.
4. When the correct fluid level is obtained, push the dipstick
back in all the way; then press
the tab down to lock the dipstick
in place.
Manual Transmission
Fluid
When to Check
A good time to have your manual
transmission fluid level checked
is when the engine oil is changed.
However, the fluid in your manual
transmission does not require
changing.
How to Check
This operation can be difficult, you
may choose to have this done
at your dealer/retailer service
department.
If you do it yourself, be sure to
follow all the instructions here, or
you could get a false reading.
9-14 Vehicle Care
Page 200 of 318
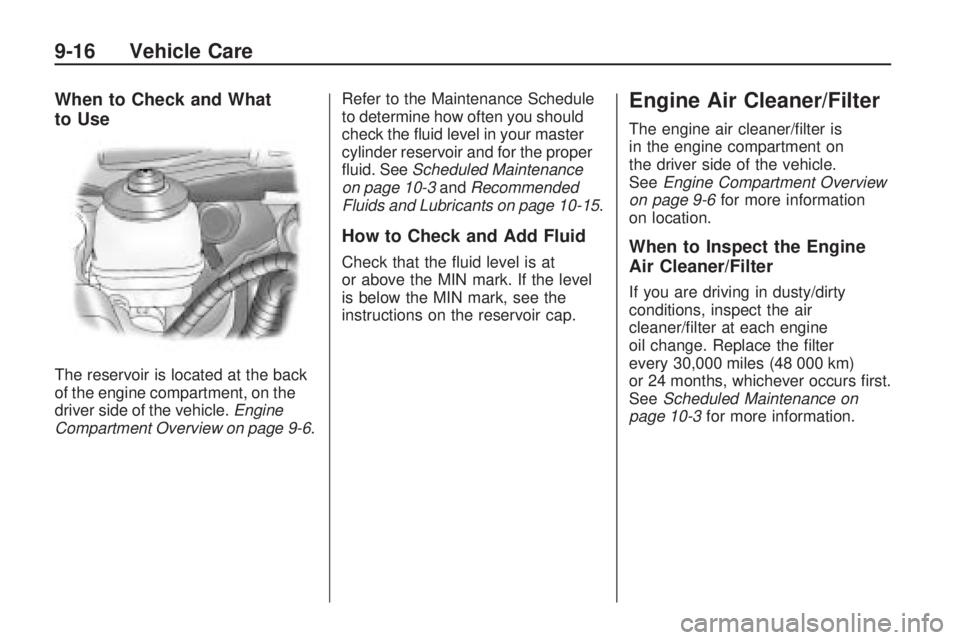
When to Check and What
to Use
The reservoir is located at the back
of the engine compartment, on the
driver side of the vehicle.Engine
Compartment Overview on page 9-6 .Refer to the Maintenance Schedule
to determine how often you should
check the fluid level in your master
cylinder reservoir and for the proper
fluid. See
Scheduled Maintenance
on page 10-3 andRecommended
Fluids and Lubricants on page 10-15 .
How to Check and Add Fluid
Check that the fluid level is at
or above the MIN mark. If the level
is below the MIN mark, see the
instructions on the reservoir cap.
Engine Air Cleaner/Filter
The engine air cleaner/filter is
in the engine compartment on
the driver side of the vehicle.
SeeEngine Compartment Overview
on page 9-6 for more information
on location.
When to Inspect the Engine
Air Cleaner/Filter
If you are driving in dusty/dirty
conditions, inspect the air
cleaner/filter at each engine
oil change. Replace the filter
every 30,000 miles (48 000 km)
or 24 months, whichever occurs first.
See Scheduled Maintenance on
page 10-3 for more information.
9-16 Vehicle Care
Page 266 of 318
To clean:
1. Saturate a lint-free, clean whitecloth with water or club soda.
2. Remove excess moisture.
3. Start on the outside edge of the soil and gently rub toward the
center. Continue cleaning, using
a clean area of the cloth each
time it becomes soiled.
4. Continue to gently rub the soiled area.
5. If the soil is not completely removed, use a mild soap
solution and repeat the cleaning
process with plain water.
If any of the soil remains, a
commercial fabric cleaner or spot
lifter may be necessary. Test a small
hidden area for colorfastness before
using a commercial upholstery
cleaner or spot lifter. If the locally
cleaned area gives any impression
that a ring formation may result,
clean the entire surface. A paper towel can be used to blot
excess moisture from the fabric
or carpet after the cleaning process.
Leather
To remove dust, a soft cloth
dampened with water can be used.
If a more thorough cleaning is
necessary, a soft cloth dampened
with a mild soap solution can be
used. Allow the leather to dry
naturally. Do not use heat, steam,
or spot lifters or spot removers,
or shoe polish on leather. Many
commercial leather cleaners and
coatings that are sold to preserve
and protect leather may permanently
change the appearance and
feel of the leather and are not
recommended. Do not use silicone
or wax-based products, or those
containing organic solvents to
clean the vehicle’s interior because
they can alter the appearance by
increasing the gloss in a non-uniform
manner.
Instrument Panel, Vinyl, and
Other Plastic Surfaces
To remove dust, a soft cloth
dampened with water can be used.
If a more thorough cleaning is
necessary, a clean soft cloth
dampened with a mild soap
solution can be used to gently
remove dust and dirt. Never use
spot lifters or removers on plastic
surfaces. Many commercial cleaners
and coatings that are sold to
preserve and protect soft plastic
surfaces may permanently change
the appearance and feel of the
interior and are not recommended.
Do not use silicone or wax-based
products, or those containing organic
solvents to clean the vehicle’s
interior because they can alter the
appearance by increasing the gloss
in a non-uniform manner.
9-82 Vehicle Care
Page 269 of 318
Service and
Maintenance
General InformationGeneral Information.............10-1
Scheduled MaintenanceScheduled Maintenance ........10-3
Recommended Fluids,
Lubricants, and Parts
Recommended Fluids and
Lubricants ......................
.10-15
Maintenance Replacement Parts .............................
.10-17
Maintenance RecordsMaintenance Records .........10-18
General Information
Important: Keep engine oil at the
proper level and change as
recommended.
Have you purchased the GM
Protection Plan? The Plan
supplements the vehicle warranties.
See the Warranty and Owner
Assistance booklet or your dealer/
retailer for details.
Notice:
Maintenance intervals,
checks, inspections, replacement
parts, and recommended �uids
and lubricants as prescribed in
this manual are necessary to
keep this vehicle in good working
condition. Any damage caused
by failure to follow scheduled
maintenance might not be covered
by the vehicle warranty. Proper vehicle maintenance not only
helps to keep the vehicle in good
working condition, but also helps the
environment. All recommended
maintenance is important. Improper
vehicle maintenance can even affect
the quality of the air we breathe.
Improper fluid levels or the wrong tire
inflation can increase the level of
emissions from the vehicle. To help
protect the environment, and to keep
the vehicle in good condition, be sure
to maintain the vehicle properly.
Using the Maintenance
Schedule
We want to help keep this vehicle in
good working condition. But we do
not know exactly how you will drive it.
You might drive very short distances
only a few times a week. Or you
might drive long distances all the
time in very hot, dusty weather.
You might use the vehicle in making
deliveries. Or you might drive it to
work, to do errands, or in many
other ways.
Service and Maintenance 10-1