warning lights PORSCHE 911 CARRERA 2010 5.G User Guide
[x] Cancel search | Manufacturer: PORSCHE, Model Year: 2010, Model line: 911 CARRERA, Model: PORSCHE 911 CARRERA 2010 5.GPages: 310, PDF Size: 3.39 MB
Page 62 of 310
60
Operation, Safety
Brake booster The brake booster assists braking only when
the engine is running.
When the car is moving while the engine is not run-
ning, or if the brake booster is defective, more
pressure on the brake pedal is required to bring
the car to a stop.
If this happens, ABS and PSM will also not oper-
ate.
Moisture or road salt on brakes affects braking.
When the vehicle is driven on salted or sanded
roads for extended periods, the brakes should be
washed down thoroughly about every 2 weeks. An
automatic carwash facility cannot do this job prop-
erly.
Brakes will dry after a few cautious brake applica-
tions.
Warning!
Risk of an accident, resulting in serious per-
sonal injury or death.
Driving through water may reduce the trac-
tion.
Moisture on brakes from road water, car
wash, or coating of road salt may affect
braking efficiency.
fCautiously apply brakes to test brakes after ex-posure to road water, etc.
Brake wear Your car has excellent brakes, but they are still
subject to wear. The rate at which they wear de-
pends on how the brakes are used.
fHave the brake system inspected at the
intervals recommended in your Maintenance
Booklet.
Brake system warning light
You can check the functionality of the brake
system warning light by switching the ignition to
the "On" position and verifying that the warning
light illuminates.
If the warning lights in the instrument panel and on-
board computer stay on when the engine is run-
ning or come on while driving, the brake pads are
worn excessively.
fDo not continue to operate the vehicle.
Have your authorized Porsche dealer inspect
or replace the brake pads.
Brake pads Wear on the brake pads and brake discs depends
to a great extent on the driving style and the con-
ditions of use and therefore cannot be expressed
in actual miles on the road.
The high-performance brake system is designed
for optimal braking effect at all speeds and tem-
peratures.
Certain speeds, braking forces and ambient
conditions (such as temperature and humidity)
therefore might cause “brake noises”.
New brake pads or linings
New brake pads and brake discs have to be “bro-
ken in”, and therefore only attain optimal friction
when the car has covered several hundred miles
or km.
The slightly reduced braking ability must be com-
pensated for by pressing the brake pedal harder.
This also applies whenever the brake pads and
brake discs are replaced.
Warning light USA
Warning light Canada
Page 64 of 310

62
Operation, Safety When the ignition is switched on the ABS warning
light will light up while the system is electronically
interrogated and goes out when the engine is
started if the check is not yet complete.
If the ABS warning lamp fails to go out, this indi-
cates that ABS has been deactivated due to a
fault. If the warning lights in the instrument panel
and on-board computer light up while you are driv-
ing, this indicates that a fault has occurred. In both
cases, normal braking, as in vehicles without ABS,
is still retained.
The ABS system should, however, be examined at
an authorized Porsche dealer immediately to pre-
vent the occurrence of further faults.
fIf the ABS system becomes inoperative, take
your vehicle to your authorized Porsche dealer
immediately.
Warning!
Risk of an accident, resulting in serious per-
sonal injury or death.
The control unit of the ABS brake system is
set for standard tire size. If non-standard
tires are installed, the control unit may mis-
interpret the speed of the vehicle, because of
the variant data it receives from the sensors
on the axles.
fUse only tire makes and types tested by Porsche.
Clutch Pedal The clutch pedal must be depressed fully
before the starter will engage.
Warning!
Risk of an accident, resulting in serious per-
sonal injury or death.
fAlways check the movement of the clutch ped-
al before driving and make sure that it is not
obstructed by a floor mat or any other object.
fSecure the floor mat to prevent it from sliding
into positions that could interfere with the safe
operation of your vehicle.
Your Porsche dealer will be glad to offer you
nonskid floor mats of the correct size.
To avoid damage to the clutch and transmis-
sion:
fAlways depress the clutch pedal fully when
changing gears.
fDo not hold the car on a steep grade with the clutch pedal partially depressed.
Should the free travel of the clutch pedal suddenly
become larger, it could mean a malfunction of the
clutch.
fSee your Porsche dealer for correction.
Warning light USA
Warning light Canada
Page 72 of 310
70
Operation, Safety
Automatic modeThe limits for automatic extension and retraction
of the spoiler depend on various circumstances
(e.g. driving speed, engine compartment temper-
ature).
If automatic control fails, a warning message is
displayed by the on-board computer.
Engine compartment temperature
under 122 °F/55 °C
Spoiler extends at 75 mph/120 km/h and
retracts at 37 mph/60 km/h.
Engine compartment temperature
over 140 °F/60 °C
Spoiler extends at 50 mph/80 km/h and retracts
at 19 mph/30 km/h.
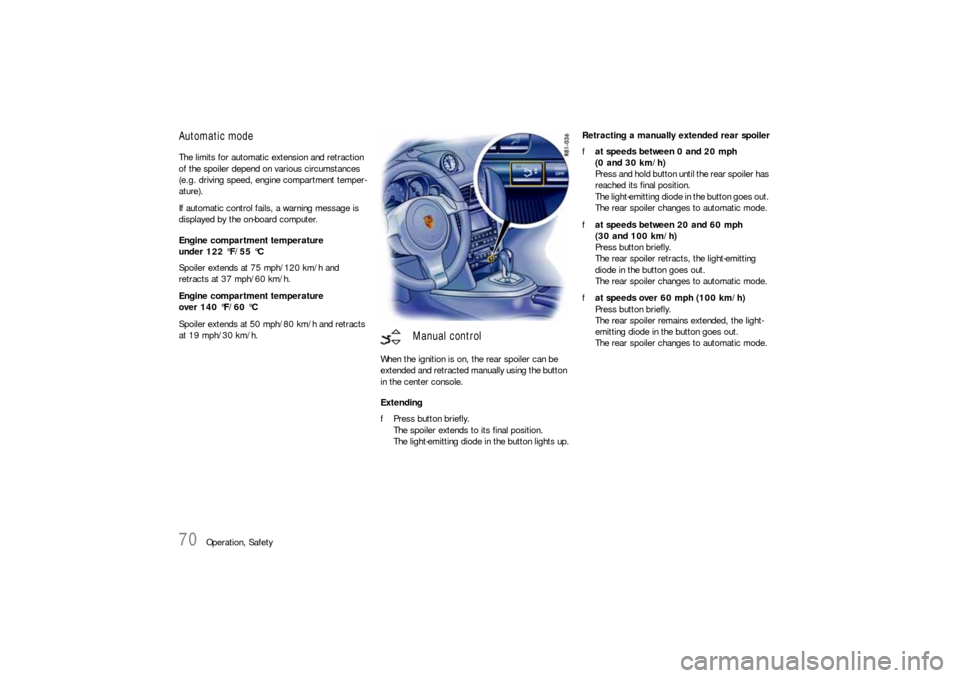
When the ignition is on, the rear spoiler can be
extended and retracted manually using the button
in the center console.
Extending
fPress button briefly.
The spoiler extends to its final position.
The light-emitting diode in the button lights up.Retracting a manually extended rear spoiler
fat speeds between 0 and 20 mph
(0 and 30 km/h)
Press and hold button until the rear spoiler has
reached its final position.
The light-emitting diode in the button goes out.
The rear spoiler changes to automatic mode.
fat speeds between 20 and 60 mph
(30 and 100 km/h)
Press button briefly.
The rear spoiler retracts, the light-emitting
diode in the button goes out.
The rear spoiler changes to automatic mode.
fat speeds over 60 mph (100 km/h)
Press button briefly.
The rear spoiler remains extended, the light-
emitting diode in the button goes out.
The rear spoiler changes to automatic mode.
Manual control
Page 79 of 310

Operation, Safety
77
Starting Procedures fPlease see the chapter “IMMOBILIZER” on
Page 15.
fPlease see the chapter “EMISSION CONTROL
SYSTEM” on Page 218.
Warning!
Serious injury or death may result if you are
involved in a collision without having fas-
tened the safety belts.
fFasten safety belts before driving away. Before starting the engine fApply the footbrake.
fManual transmission:
Move the gearshift lever into neutral.
The clutch pedal must be depressed fully
before the starter will engage.
fIn vehicles with PDK transmission:
Move PDK selector lever to position P or N.
Temperature sensors on the engine automatically
provide the correct fuel/air mixture required for
starting.
Therefore, it is not necessary to depress the
accelerator pedal while starting a cold or a
warm engine.
Starting the enginefTurn ignition key to ignition lock position 2.
fAs soon as the engine starts, release the igni-
tion key.
The first operation of the starter is ended automat-
ically when the engine starts.
If the engine does not start, subsequent starter
operations will not be ended automatically.
If the engine fails to start after 10 or 15 seconds
of cranking:
fWait about 10 seconds before engaging the
starter again.
fWhen starting the engine, be ready to drive
immediately.
Drive vehicle at moderate speeds and avoid
engine speeds above 4,200 rpm during the
first 5 minutes.
fDo not let the engine idle to warm up.
Danger!
Engine exhaust fumes have many compo-
nents which you can smell. They also contain
carbon monoxide (CO), which is a colorless
and odorless gas.
Carbon monoxide can cause unconscious-
ness and even death if inhaled.
fNever start or let the engine run in an en-
closed, unventilated area.
It is not recommended to sit in your car for pro-longed periods with the engine on and the car
not moving.
An unattended vehicle with a running engine
is potentially hazardous.
If warning lights should come on to indicate
improper operation, they would go unno-
ticed.
fNever leave the engine idling unattended.
Danger of fire.
fDo not park or operate the vehicle in areas
where the hot exhaust system may come in
contact with dry grass, brush, fuel spill or oth-
er flammable material.
fIf your car catches on fire for any reason, call
the fire department.
Do not endanger your life by attempting to put
out the fire.
Risk of burn injury when standing near or
coming into contact with the exhaust pipe.
The exhaust pipe is hot when the vehicle is running
and remains hot for some time after the vehicle is
turned off.
fTo prevent injury, make a point of noting where
your vehicle’s exhaust pipe is, avoid placing
your legs near the exhaust pipe, and closely
supervise children around the vehicle when the
exhaust pipe could be hot.
A hot exhaust pipe can cause serious burns.
Page 82 of 310
80
Operation, SafetyWarning chime
If the ignition key is withdrawn and the door is
opened while the lights (not the parking light or
Welcome Home lighting) are on, a chime warns of
possible battery discharge.
In some countries, differences are possible
due to provisions of law.
Daytime driving lightsThe daytime driving lights are integrated in the
front auxiliary headlights. These lights are
switched on only when the engine is running and
with the light switch in the positions OFF or HOME.
Low beam headlights must be switched on when
driving through tunnels or at dusk, for example.
Operation of the daytime driving lights may vary
depending on country-specific regulations.
Canada only:
In addition to the auxiliary headlights the parking
lights are switched on.
USA only:
The daytime driving lights can be deactivated in
the on-board computer.
fPlease see the chapter “ON-BOARD
COMPUTER (BC)” on Page 126.
Vehicles with the Sport Chrono Package Plus
Further individual light functions (e.g. daytime driv-
ing lights) are available in vehicles with the Sport
Chrono Package Plus.
fPlease observe the chapter “Individual Memo-
ry” in the separate PCM operating instructions.Cornering lightThe dynamic cornering light is activated above
speeds of 6 mph (10 km/h).
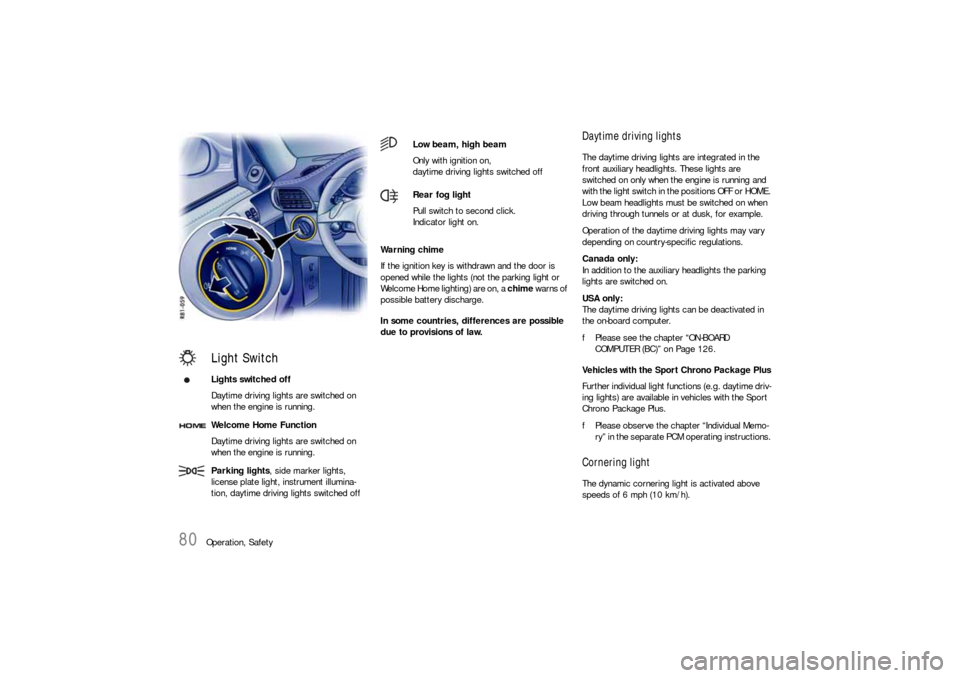
Light SwitchLights switched off
Daytime driving lights are switched on
when the engine is running.
Welcome Home Function
Daytime driving lights are switched on
when the engine is running.
Parking lights, side marker lights,
license plate light, instrument illumina-
tion, daytime driving lights switched off
Low beam, high beam
Only with ignition on,
daytime driving lights switched off
Rear fog light
Pull switch to second click.
Indicator light on.
Page 99 of 310
Operation, Safety
97
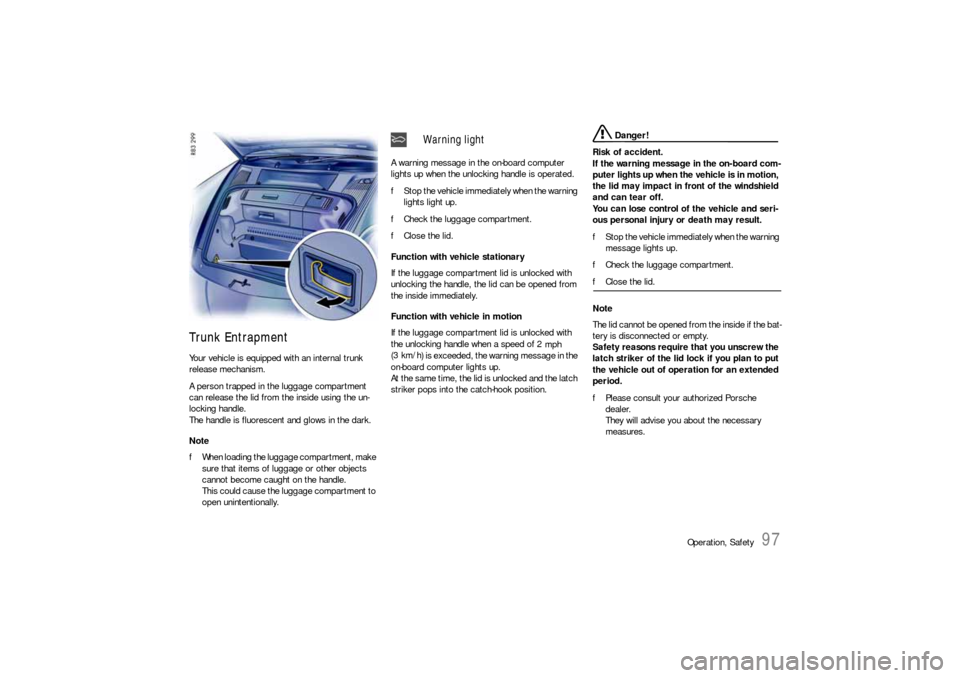
Trunk EntrapmentYour vehicle is equipped with an internal trunk
release mechanism.
A person trapped in the luggage compartment
can release the lid from the inside using the un-
locking handle.
The handle is fluorescent and glows in the dark.
Note
fWhen loading the luggage compartment, make
sure that items of luggage or other objects
cannot become caught on the handle.
This could cause the luggage compartment to
open unintentionally.A warning message in the on-board computer
lights up when the unlocking handle is operated.
fStop the vehicle immediately when the warning
lights light up.
fCheck the luggage compartment.
fClose the lid.
Function with vehicle stationary
If the luggage compartment lid is unlocked with
unlocking the handle, the lid can be opened from
the inside immediately.
Function with vehicle in motion
If the luggage compartment lid is unlocked with
the unlocking handle when a speed of 2
mph
(3 km/h
) is exceeded, the warning message in the
on-board computer lights up.
At the same time, the lid is unlocked and the latch
striker pops into the catch-hook position.
Danger!
Risk of accident.
If the warning message in the on-board com-
puter lights up when the vehicle is in motion,
the lid may impact in front of the windshield
and can tear off.
You can lose control of the vehicle and seri-
ous personal injury or death may result.
fStop the vehicle immediately when the warning
message lights up.
fCheck the luggage compartment.
fClose the lid.
Note
The lid cannot be opened from the inside if the bat-
tery is disconnected or empty.
Safety reasons require that you unscrew the
latch striker of the lid lock if you plan to put
the vehicle out of operation for an extended
period.
fPlease consult your authorized Porsche
dealer.
They will advise you about the necessary
measures.
Warning light
Page 102 of 310
100
Operation, Safety
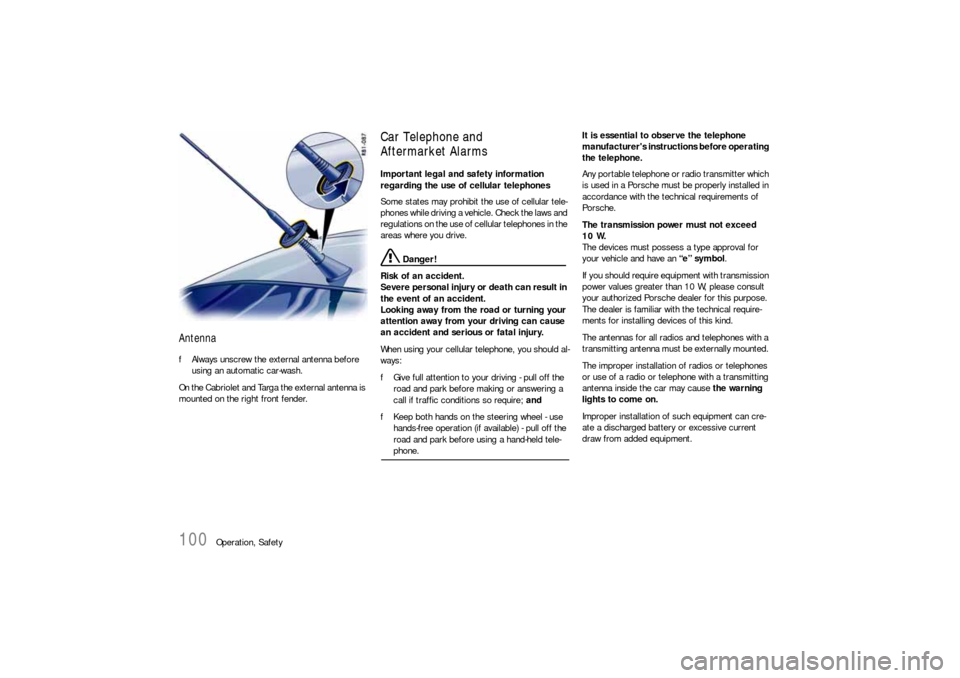
AntennafAlways unscrew the external antenna before
using an automatic car-wash.
On the Cabriolet and Targa the external antenna is
mounted on the right front fender.
Car Telephone and
Aftermarket Alarms Important legal and safety information
regarding the use of cellular telephones
Some states may prohibit the use of cellular tele-
phones while driving a vehicle. Check the laws and
regulations on the use of cellular telephones in the
areas where you drive.
Danger!
Risk of an accident.
Severe personal injury or death can result in
the event of an accident.
Looking away from the road or turning your
attention away from your driving can cause
an accident and serious or fatal injury.
When using your cellular telephone, you should al-
ways:
fGive full attention to your driving - pull off the
road and park before making or answering a
call if traffic conditions so require; and
fKeep both hands on the steering wheel - use
hands-free operation (if available) - pull off the
road and park before using a hand-held tele-phone. It is essential to observe the telephone
manufacturer's instructions before operating
the telephone.
Any portable telephone or radio transmitter which
is used in a Porsche must be properly installed in
accordance with the technical requirements of
Porsche.
The transmission power must not exceed
10 W.
The devices must possess a type approval for
your vehicle and have an “e” symbol.
If you should require equipment with transmission
power values greater than 10 W, please consult
your authorized Porsche dealer for this purpose.
The dealer is familiar with the technical require-
ments for installing devices of this kind.
The antennas for all radios and telephones with a
transmitting antenna must be externally mounted.
The improper installation of radios or telephones
or use of a radio or telephone with a transmitting
antenna inside the car may cause the warning
lights to come on.
Improper installation of such equipment can cre-
ate a discharged battery or excessive current
draw from added equipment.
Page 105 of 310
Operation, Safety
103
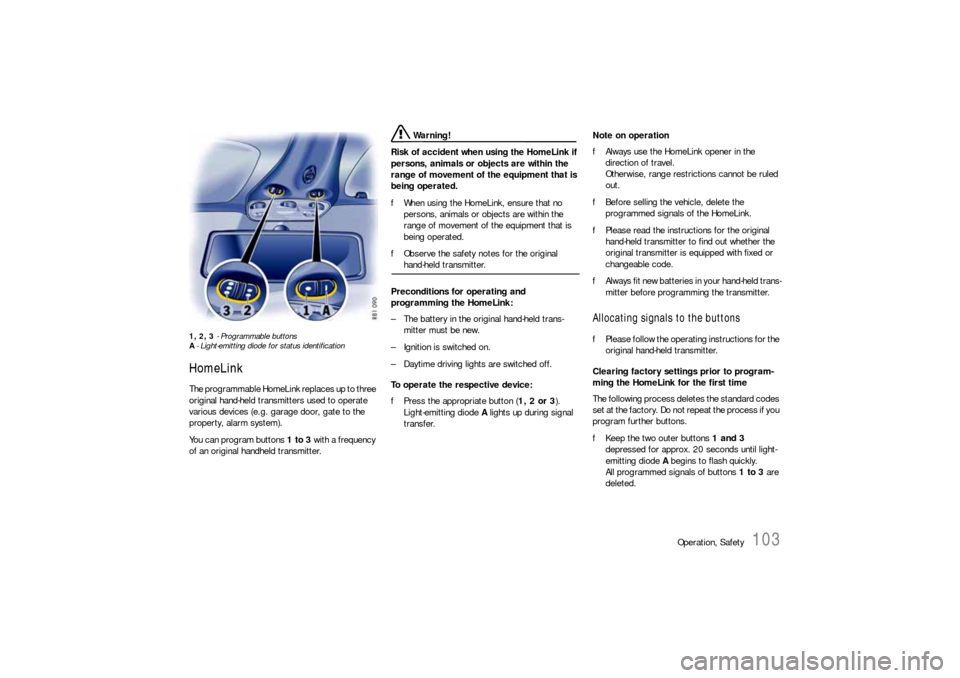
1, 2, 3 - Programmable buttons
A- Light-emitting diode for status identificationHomeLinkThe programmable HomeLink replaces up to three
original hand-held transmitters used to operate
various devices (e.g. garage door, gate to the
property, alarm system).
You can program buttons 1 to 3 with a frequency
of an original handheld transmitter.
Warning!
Risk of accident when using the HomeLink if
persons, animals or objects are within the
range of movement of the equipment that is
being operated.
fWhen using the HomeLink, ensure that no
persons, animals or objects are within the
range of movement of the equipment that is
being operated.
fObserve the safety notes for the original hand-held transmitter.
Preconditions for operating and
programming the HomeLink:
– The battery in the original hand-held trans-
mitter must be new.
– Ignition is switched on.
– Daytime driving lights are switched off.
To operate the respective device:
fPress the appropriate button (1, 2 or 3).
Light-emitting diode A lights up during signal
transfer.Note on operation
fAlways use the HomeLink opener in the
direction of travel.
Otherwise, range restrictions cannot be ruled
out.
fBefore selling the vehicle, delete the
programmed signals of the HomeLink.
fPlease read the instructions for the original
hand-held transmitter to find out whether the
original transmitter is equipped with fixed or
changeable code.
fAlways fit new batteries in your hand-held trans-
mitter before programming the transmitter.
Allocating signals to the buttonsfPlease follow the operating instructions for the
original hand-held transmitter.
Clearing factory settings prior to program-
ming the HomeLink for the first time
The following process deletes the standard codes
set at the factory. Do not repeat the process if you
program further buttons.
fKeep the two outer buttons 1 and 3
depressed for approx. 20 seconds until light-
emitting diode A begins to flash quickly.
All programmed signals of buttons 1 to 3 are
deleted.
Page 109 of 310
Automatic air conditioning system, Heated rear window/Door mirror heating
107
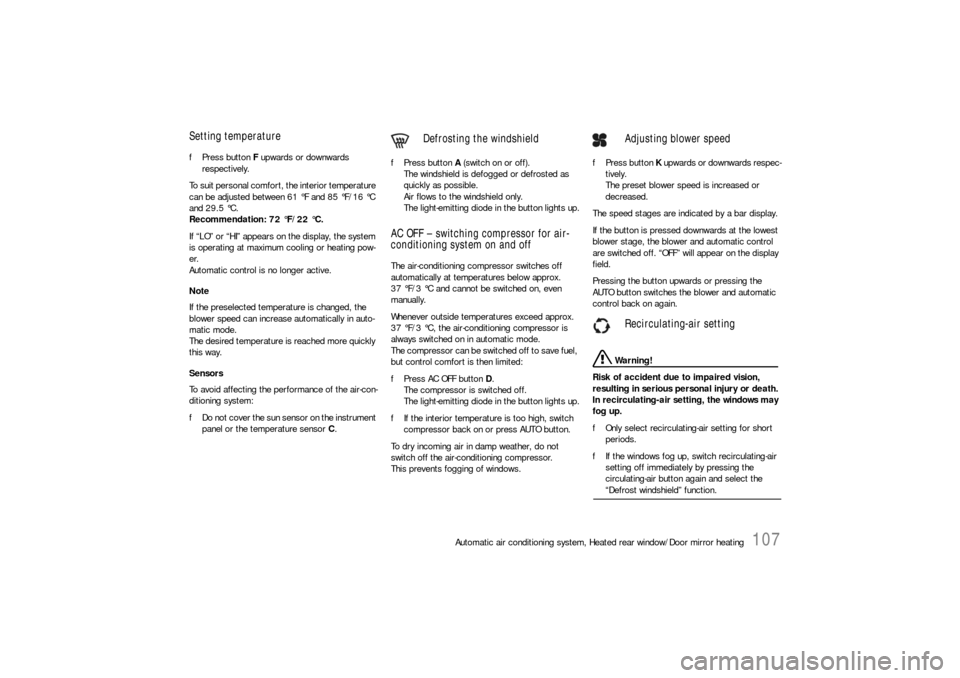
Setting temperaturefPress button F upwards or downwards
respectively.
To suit personal comfort, the interior temperature
can be adjusted between 61 °F and 85 °F/16 °C
and 29.5 °C.
Recommendation: 72 °F/22 °C.
If “LO” or “HI” appears on the display, the system
is operating at maximum cooling or heating pow-
er.
Automatic control is no longer active.
Note
If the preselected temperature is changed, the
blower speed can increase automatically in auto-
matic mode.
The desired temperature is reached more quickly
this way.
Sensors
To avoid affecting the performance of the air-con-
ditioning system:
fDo not cover the sun sensor on the instrument
panel or the temperature sensor C.fPress button A (switch on or off).
The windshield is defogged or defrosted as
quickly as possible.
Air flows to the windshield only.
The light-emitting diode in the button lights up.
AC OFF – switching compressor for air-
conditioning system on and offThe air-conditioning compressor switches off
automatically at temperatures below approx.
37 °F/3 °C and cannot be switched on, even
manually.
Whenever outside temperatures exceed approx.
37 °F/3 °C, the air-conditioning compressor is
always switched on in automatic mode.
The compressor can be switched off to save fuel,
but control comfort is then limited:
fPress AC OFF button D.
The compressor is switched off.
The light-emitting diode in the button lights up.
fIf the interior temperature is too high, switch
compressor back on or press AUTO button.
To dry incoming air in damp weather, do not
switch off the air-conditioning compressor.
This prevents fogging of windows.fPress button K upwards or downwards respec-
tively.
The preset blower speed is increased or
decreased.
The speed stages are indicated by a bar display.
If the button is pressed downwards at the lowest
blower stage, the blower and automatic control
are switched off. “OFF” will appear on the display
field.
Pressing the button upwards or pressing the
AUTO button switches the blower and automatic
control back on again.
Warning!
Risk of accident due to impaired vision,
resulting in serious personal injury or death.
In recirculating-air setting, the windows may
fog up.
fOnly select recirculating-air setting for short
periods.
fIf the windows fog up, switch recirculating-air
setting off immediately by pressing the
circulating-air button again and select the “Defrost windshield” function.
Defrosting the windshield
Adjusting blower speed
Recirculating-air setting
Page 114 of 310

112
Instruments, On-Board Computer, Warnings
Instrument Panel USA Models Also refer to the corresponding chapters in
the Owner’s Manual.
1. Engine oil temperature gage
2. Speedometer with analogue display
3. Tire pressure warning light
4. Turn signal indicator light, left
5. Tachometer
6. High beam indicator light
7. Turn signal indicator light, right
8. ABS warning light
9. Cooling system
Temperature gage, warning light
10.Fuel
Level gage, warning light
11.Engine oil pressure gage
12.Adjustment button for instrument illumination
and trip counter
13.Odometer and daily trip mileage display
14.Automatic speed control indicator light15.Light sensor for instrument illumination
16.Airbag warning light
17.Check Engine warning light
(Emission control warning light)
18.Central warning light
19.On-board computer display
20.Porsche Stability Management
PSM Multifunctional light
21.Brake warning light
22.Safety belt warning light
23.PDK transmission, gear display
24.PDK transmission, selector lever position
25.Clock and outside temperature display
26.Adjustment button for clockWhen the ignition is switched on, the warning
lights light up for a lamp check.
Note
Warnings that have been given are stored in the
appropriate control unit memory and can be read
out at an authorized Porsche dealer.
This information can help to warn you about situa-
tions which may be hazardous to you or your car.