reset PORSCHE 911 TURBO 2014 6.G User Guide
[x] Cancel search | Manufacturer: PORSCHE, Model Year: 2014, Model line: 911 TURBO, Model: PORSCHE 911 TURBO 2014 6.GPages: 300, PDF Size: 10.61 MB
Page 107 of 300
Instrument Panel and Multi-Function Display 105
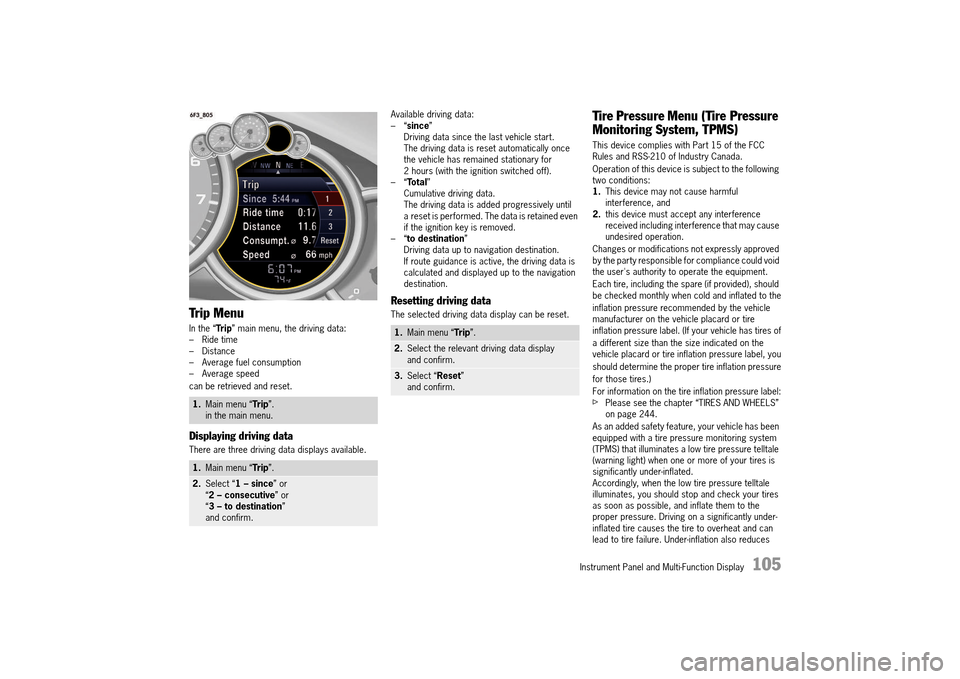
Trip Menu
In the “Trip” main menu, the driving data: – Ride time– Distance– Average fuel consumption– Average speed
can be retrieved and reset.
Displaying driving data
There are three driving data displays available.
Available driving data: –“ since” Driving data since the last vehicle start.The driving data is reset automatically once the vehicle has remained stationary for 2 hours (with the ignition switched off).–“ Total” Cumulative driving data.The driving data is added progressively until a reset is performed. The data is retained even if the ignition key is removed.–“ to destination” Driving data up to navigation destination.If route guidance is active, the driving data is calculated and displayed up to the navigation destination.
Resetting driving data
The selected driving data display can be reset.
Tire Pressure Menu (Tire Pressure
Monitoring System, TPMS)
This device complies with Part 15 of the FCC Rules and RSS-210 of Industry Canada.
Operation of this device is subject to the following two conditions:1. This device may not cause harmful interference, and2. this device must accept any interference received including interference that may cause undesired operation.
Changes or modifications not expressly approved by the party responsible for compliance could void the user's authority to operate the equipment.
Each tire, including the spare (if provided), should be checked monthly when cold and inflated to the
inflation pressure recommended by the vehicle manufacturer on the vehicle placard or tire inflation pressure label. (If your vehicle has tires of
a different size than the size indicated on the vehicle placard or tire inflation pressure label, you
should determine the proper tire inflation pressure
for those tires.)
For information on the tire inflation pressure label:fPlease see the chapter “TIRES AND WHEELS” on page 244.
As an added safety feature, your vehicle has been equipped with a tire pressure monitoring system (TPMS) that illuminates a low tire pressure telltale (warning light) when one or more of your tires is significantly under-inflated.Accordingly, when the low tire pressure telltale illuminates, you should stop and check your tires as soon as possible, and inflate them to the proper pressure. Driving on a significantly under-inflated tire causes the tire to overheat and can lead to tire failure. Under-inflation also reduces
1. Main menu “Trip”. in the main menu.
1. Main menu “Trip”.
2.Select “1 – since” or “ 2 – consecutive” or “ 3 – to destination” and confirm.
1. Main menu “Trip”.
2.Select the relevant driving data display and confirm.
3. Select “Reset” and confirm.
14_991_Turbo_21.book Seite 105 Mittwoch, 9. April 2014 2:19 14
Page 113 of 300
Instrument Panel and Multi-Function Display 111
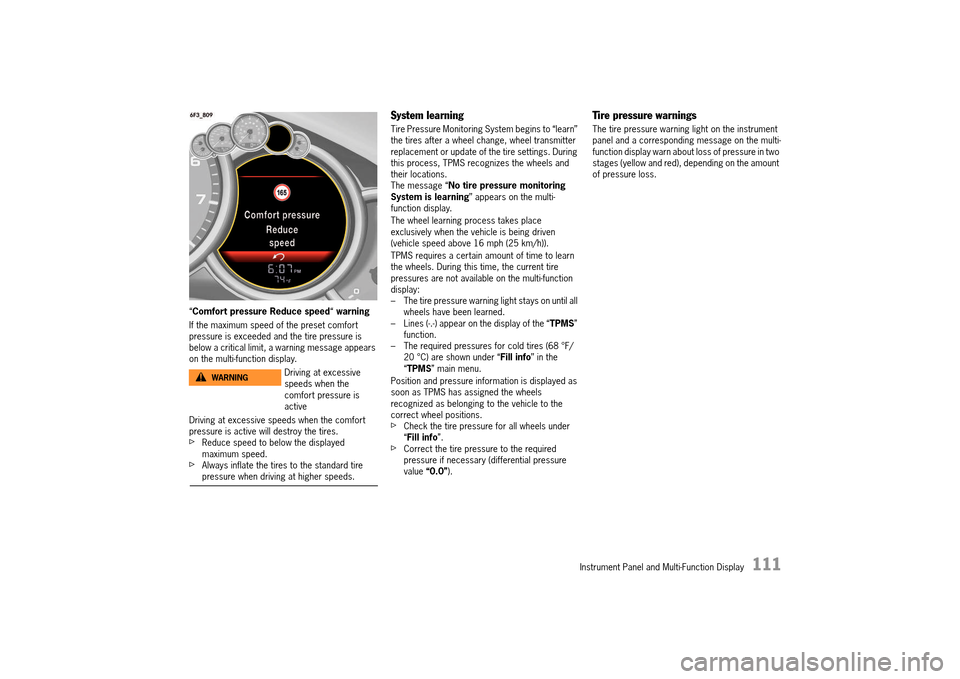
“Comfort pressure Reduce speed“ warning
If the maximum speed of the preset comfort pressure is exceeded and the tire pressure is below a critical limit, a warning message appears on the multi-function display.
Driving at excessive speeds when the comfort pressure is active will destroy the tires.fReduce speed to below the displayed maximum speed.fAlways inflate the tires to the standard tire pressure when driving at higher speeds.
System learning
Tire Pressure Monitoring System begins to “learn” the tires after a wheel change, wheel transmitter replacement or update of the tire settings. During this process, TPMS recognizes the wheels and their locations.The message “ No tire pressure monitoring System is learning ” appears on the multi- function display.
The wheel learning process takes place exclusively when the vehicle is being driven (vehicle speed above 16 mph (25 km/h)).
TPMS requires a certain amount of time to learn the wheels. During this time, the current tire pressures are not available on the multi-function display:– The tire pressure warning light stays on until all wheels have been learned.– Lines (-.-) appear on the display of the “ TPMS” function.– The required pressures for cold tires (68 °F/20 °C) are shown under “ Fill info” in the “ TPMS” main menu.
Position and pressure information is displayed as soon as TPMS has assigned the wheels recognized as belonging to the vehicle to the correct wheel positions.fCheck the tire pressure for all wheels under “ Fill info”.fCorrect the tire pressure to the required pressure if necessary (differential pressure value “0.0”).
Tire pressure warnings
The tire pressure warning light on the instrument panel and a corresponding message on the multi-function display warn about loss of pressure in two stages (yellow and red), depending on the amount of pressure loss.
Driving at excessive speeds when the comfort pressure is active
WARNINGh
14_991_Turbo_21.book Seite 111 Mittwoch, 9. April 2014 2:19 14
Page 117 of 300
Instrument Panel and Multi-Function Display 115
Chrono on multi-function display
All stopwatch displays are started and stopped in the “ Chrono” menu on the multi-function display.
For instructions on using the multi-function display:fPlease see the chapter “OPERATING THE MULTI-FUNCTION DISPLAY ON THE INSTRUMENT PANEL” on page 96.
Information
If you exit the “ Chrono” menu while the stopwatch is running, measurement will continue.
The stopwatch stops after the ignition is switched off. If the ignition is switched on again within approximately 4 minutes, the stopwatch will continue to run.
The only way to reset the stopwatch to zero is by selecting “ Reset” in the “Chrono” menu.
For information on resetting the stopwatch:fPlease see the chapter “RESETTING THE STOPWATCH TIME” on page 116.
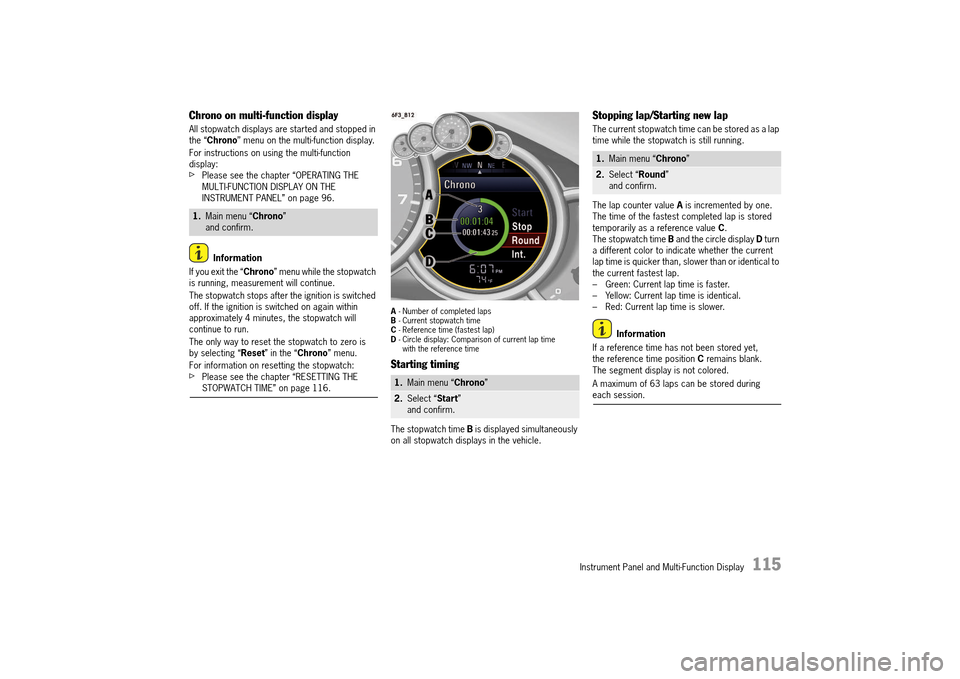
A - Number of completed laps B - Current stopwatch time C - Reference time (fastest lap) D - Circle display: Comparison of current lap time with the reference time
Starting timing
The stopwatch time B is displayed simultaneously on all stopwatch displays in the vehicle.
Stopping lap/Starting new lap
The current stopwatch time can be stored as a lap time while the stopwatch is still running.
The lap counter value A is incremented by one. The time of the fastest completed lap is stored temporarily as a reference value C. The stopwatch time B and the circle display D turn a different color to indicate whether the current lap time is quicker than, slower than or identical to the current fastest lap.– Green: Current lap time is faster.– Yellow: Current lap time is identical.– Red: Current lap time is slower.
Information
If a reference time has not been stored yet, the reference time position C remains blank. The segment display is not colored.
A maximum of 63 laps can be stored during each session.
1. Main menu “Chrono” and confirm.
1. Main menu “Chrono”
2.Select “Start” and confirm.
1. Main menu “Chrono”
2.Select “Round” and confirm.
14_991_Turbo_21.book Seite 115 Mittwoch, 9. April 2014 2:19 14
Page 118 of 300
116 Instrument Panel and Multi-Function Display
Storing intermediate time
You can store an intermediate time while the stopwatch is still running.
The intermediate time is displayed temporarily on the multi-function display. It is not stored.Timing continues in the background.
Stopping timing
You can stop the stopwatch at any time.
The stopwatch time B stops.
Continuing timing
You can resume timing again after stopping the stopwatch.
The stopwatch time B continues.
Resetting the stopwatch time
The stopwatch time can be reset to zero.
All stopwatch time displays are reset to zero.
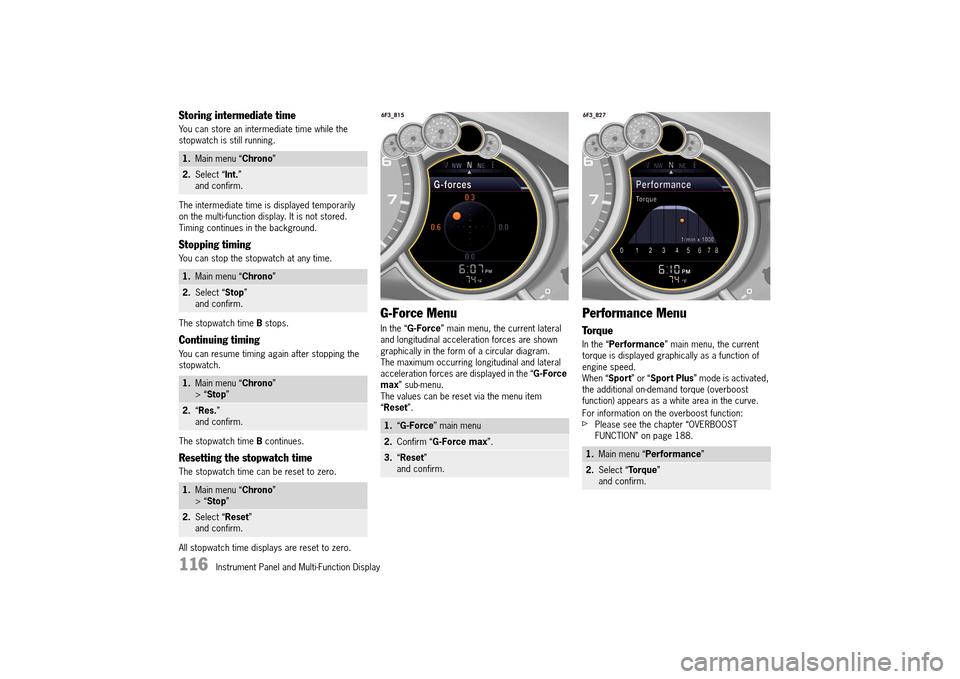
G-Force Menu
In the “ G-Force” main menu, the current lateral and longitudinal acceleration forces are shown graphically in the form of a circular diagram. The maximum occurring longitudinal and lateral acceleration forces are displayed in the “ G-Force max ” sub-menu. The values can be reset via the menu item “ Reset”.
Performance Menu
Torque
In the “Performance” main menu, the current torque is displayed graphically as a function of engine speed.When “ Sport” or “Sport Plus” mode is activated, the additional on-demand torque (overboost function) appears as a white area in the curve.
For information on the overboost function:fPlease see the chapter “OVERBOOST FUNCTION” on page 188.
1. Main menu “Chrono”
2.Select “Int.” and confirm.
1. Main menu “Chrono”
2.Select “Stop” and confirm.
1. Main menu “Chrono” > “ Stop”
2.“Res.” and confirm.
1. Main menu “Chrono” > “ Stop”
2.Select “Reset” and confirm.
1. “G-Force” main menu
2.Confirm “G-Force max”.
3.“Reset” and confirm.
1. Main menu “Performance”
2.Select “Torque” and confirm.
14_991_Turbo_21.book Seite 116 Mittwoch, 9. April 2014 2:19 14
Page 119 of 300
Instrument Panel and Multi-Function Display 117
ACC Menu
For information on operating and display options for the adaptive cruise control:fPlease see the chapter “ADAPTIVE CRUISE CONTROL” on page 157.
Vehicle Settings on the
Multi-Function Display
Different settings can be adjusted in the multi-function display on the instrument panel depending on the vehicle equipment.
On vehicles with memory, the settings are stored on the car key or the person buttons in the driver’s door.
For information on the memory:fPlease see the chapter “STORING PERSONAL SETTINGS” on page 143.
Setting or operating the multi-function display when driving could distract you from paying attention to traffic. You could lose control of the vehicle. fCarry out any complicated operating or setting procedures only with the vehicle stationary and in park.
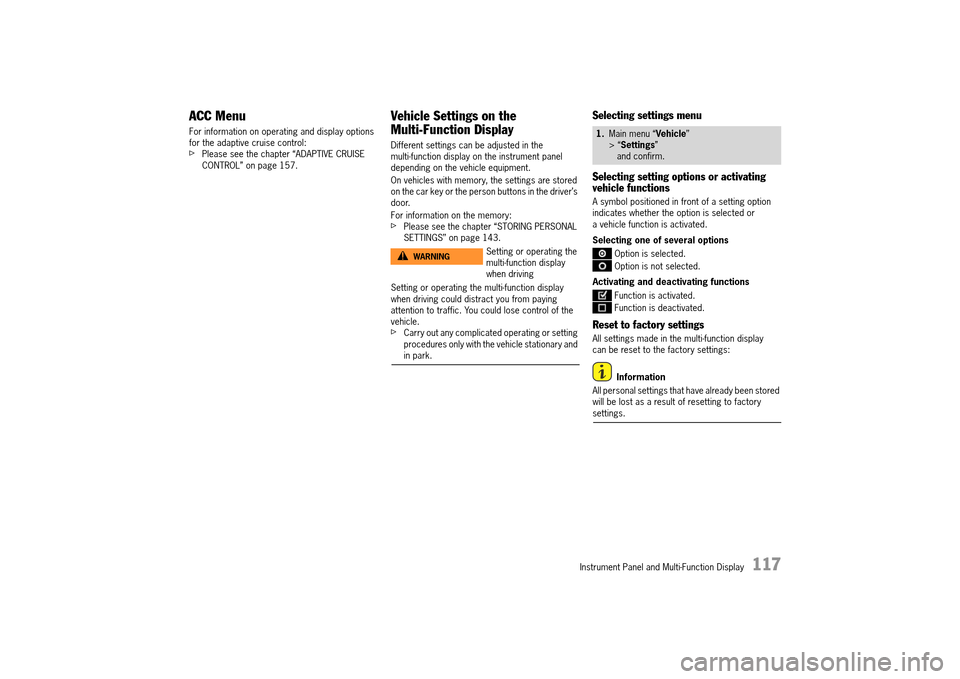
Selecting settings menu
Selecting setting options or activating vehicle functions
A symbol positioned in front of a setting option indicates whether the option is selected or a vehicle function is activated.
Selecting one of several options
Option is selected.
Option is not selected.
Activating and deactivating functions
Function is activated.
Function is deactivated.
Reset to factory settings
All settings made in the multi-function display can be reset to the factory settings:
Information
All personal settings that have already been stored will be lost as a result of resetting to factory settings.
Setting or operating the multi-function display when driving
WARNINGh
1. Main menu “Vehicle” > “ Settings” and confirm.
14_991_Turbo_21.book Seite 117 Mittwoch, 9. April 2014 2:19 14
Page 120 of 300
118 Instrument Panel and Multi-Function Display
Adapting appearance of multi-function display
The contents and appearance of the multi-function display can be adapted individually.
Selecting main menu display contents
Individual elements in the main menu can be hidden and shown as required.
The main menu items “ Vehicle” and “ACC” cannot be hidden.
Adapting display contents of audio main menu
In the audio main menu, you can display either a list of all radio stations currently within range or a list of all stored radio stations.
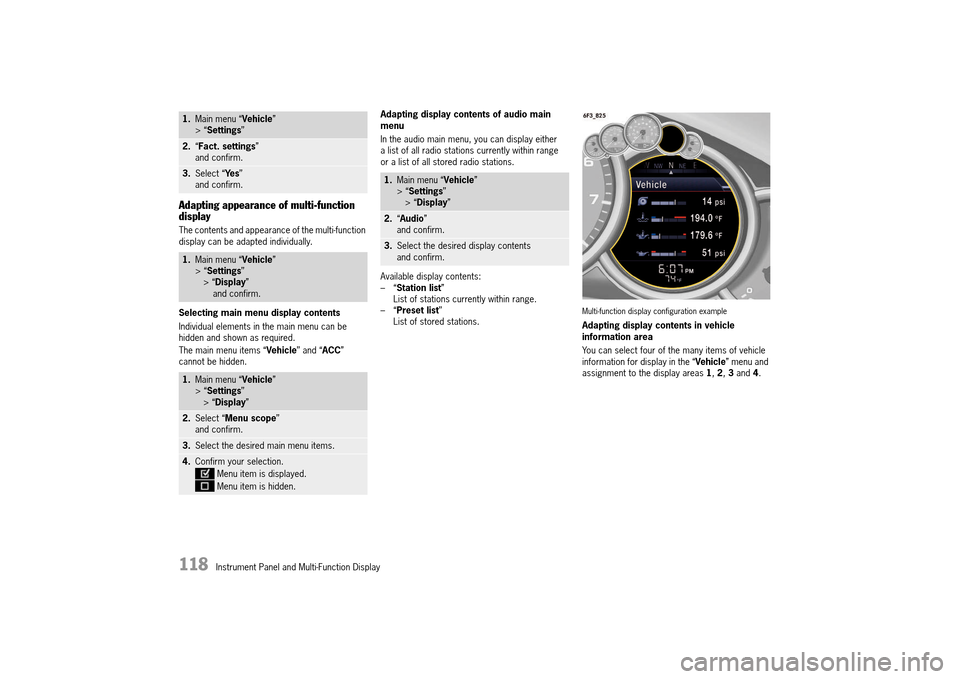
Available display contents: –“ Station list” List of stations currently within range.–“ Preset list” List of stored stations.Multi-function display configuration example
Adapting display contents in vehicle information area
You can select four of the many items of vehicle information for display in the “ Vehicle” menu and assignment to the display areas 1, 2, 3 and 4.
1.Main menu “Vehicle” > “ Settings”
2.“Fact. settings” and confirm.
3. Select “Ye s” and confirm.
1. Main menu “Vehicle” > “ Settings” > “ Display” and confirm.
1. Main menu “Vehicle” > “ Settings” > “ Display”
2.Select “Menu scope” and confirm.
3. Select the desired main menu items.
4.Confirm your selection.
Menu item is displayed.
Menu item is hidden.
1. Main menu “Vehicle” > “ Settings” > “ Display”
2.“Audio” and confirm.
3. Select the desired display contents and confirm.
14_991_Turbo_21.book Seite 118 Mittwoch, 9. April 2014 2:19 14
Page 139 of 300
Instrument Panel and Multi-Function Display 137
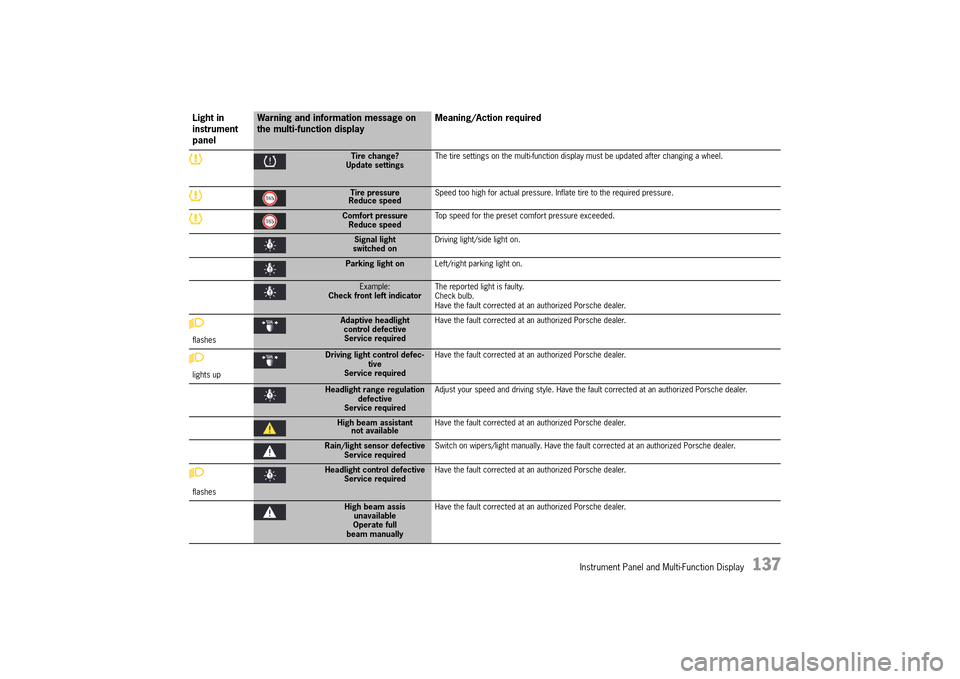
Tire change? Update settings The tire settings on the multi-function display must be updated after changing a wheel.
Tire pressure Reduce speed Speed too high for actual pressure. Inflate tire to the required pressure.
Comfort pressure Reduce speed Top speed for the preset comfort pressure exceeded.
Signal light switched on Driving light/side light on.
Parking light on Left/right parking light on.
Example: Check front left indicator The reported light is faulty. Check bulb.Have the fault corrected at an authorized Porsche dealer.
flashes
Adaptive headlight control defectiveService required
Have the fault corrected at an authorized Porsche dealer.
lights up
Driving light control defec- tiveService required
Have the fault corrected at an authorized Porsche dealer.
Headlight range regulation defectiveService required
Adjust your speed and driving style. Have the fault corrected at an authorized Porsche dealer.
High beam assistant not available Have the fault corrected at an authorized Porsche dealer.
Rain/light sensor defective Service required Switch on wipers/light manually. Have the fault corrected at an authorized Porsche dealer.
flashes
Headlight control defective Service required Have the fault corrected at an authorized Porsche dealer.
High beam assis unavailableOperate fullbeam manually
Have the fault corrected at an authorized Porsche dealer.
Light in instrument panel
Warning and information message on the multi-function display Meaning/Action required
14_991_Turbo_21.book Seite 137 Mittwoch, 9. April 2014 2:19 14
Page 149 of 300
Driving and Driving Safety 147
Ignition lock position 0 – Ignition off (initial position)
The engine and ignition are off in ignition lock position 0. The ignition key can be removed in this position.
Ignition lock position 1 – Ignition on
fTurn ignition key to position 1.
All electrical equipment can be switched on. The warning lights on the instrument panel light up for a lamp check.fPlease see the chapter “INSTRUMENT PANEL USA MODELS” on page 90.
If a load is not switched on for 10 minutes after switching on the ignition, the ignition must be switched on again. Turn the ignition key to ignition lock position 0 (initial position) first.
The ignition key cannot be removed when the ignition is switched on or when the engine has been started.
To remove the ignition key: fStop the vehicle.fMove PDK selector lever to position P.fSwitch ignition off.fRemove the ignition key.
Ignition lock position 2 – Start engine
fTurn ignition key to ignition lock position 2.
The key is reset automatically from position 2 to position 1 when you start the engine.
Emergency operation with Porsche Entry & Drive
Interference in radio transmission between the vehicle and ignition lock or a discharged ignition lock battery can disable the Porsche Entry & Drive comfort function.
If this happens, the control unit can be removed from the ignition lock and the vehicle can be started using the ignition key.
For information on removing the control unit from the ignition lock: fPlease see the chapter “EMERGENCY OPERATION – UNLOCKING THE IGNITION KEY/CONTROL UNIT” on page 28.
Starting and Stopping the Engine
The immobilizer can be deactivated and the engine started only using an authorized ignition key.fPlease see the chapter “IMMOBILIZER” on page 217.
Exhaust gas contains colorless and odorless carbon monoxide (CO), which is toxic even in low concentrations. Carbon monoxide can cause unconsciousness and even death if inhaled.fNever start or let the engine running in an enclosed, unventilated area. It is not recommended to sit in your car for prolonged periods with the engine on and the car not moving.
Exhaust fumes and the exhaust system are very hot when the engine is running. The exhaust system remains hot for some time after the engine is turned off.fDo not park or drive your vehicle where combustible materials, such as dry grass or leaves, can come into contact with the hot exhaust system.fIf your car catches on fire for any reason, call the fire department. Do not endanger your life by attempting to put out the fire.
Exhaust Gas
Exhaust System Fire Hazard
WARNINGh
WARNINGh
14_991_Turbo_21.book Seite 147 Mittwoch, 9. April 2014 2:19 14
Page 150 of 300
148 Driving and Driving Safety
An unattended vehicle with a running engine is potentially hazardous. If warning lights come on to indicate improper operation, no one would be present to observe the light and turn off the engine.fNever leave the engine idling unattended.
Starting the vehicle
fOperate the footbrake.fMove PDK selector lever to the P or N position.fDo not press the accelerator pedal.The engine control unit will provide the correct starting mixture.fTurn the ignition key or control unit (Porsche Entry & Drive) to ignition lock position 2. The starting process is carried out and completed automatically as soon as ignition lock position 2 (start engine) is reached. The ignition key or control unit is reset automatically to ignition lock position 1 (ignition on).fDo not operate the starter for more than approx. 10 seconds. If necessary, repeat the starting procedure after a pause of approx. 10 seconds. Turn the ignition key back to ignition lock position 0 (initial position) first. The first operation of the starter is ended automatically when the engine starts.If the engine does not start, subsequent starter operations will not be ended automatically.fDo not warm up the engine when stationary. Drive off immediately. Avoid high revs and full throttle until the engine has reached operating temperature.
fIf the vehicle battery power is too weak, the engine can be started with jump leads.
For information on jump-lead starting: fPlease see the chapter “EXTERNAL POWER SUPPLY, EMERGENCY STARTING WITH JUMPER CABLES” on page 273.
Information
To ensure a good battery charge condition, thereby ensuring that the battery will start the engine, all electrical loads that are not required should be switched off when the ignition is switched on and when engine revs are low (in traffic jams, in city traffic or in lines).
Stopping
fOnly remove the ignition key when the vehicle is stationary.fOnly switch the ignition off when the vehicle is stationary, as there is no power steering and brake booster assistance when the engine is switched off.fWhen leaving the vehicle, always remove the ignition key, apply the electric parking brake and engage selector-lever position P. The control unit always remains in the ignition lock on vehicles with Porsche Entry & Drive.
Engine components become very hot when the engine is running.fBefore working on any part in the engine compartment, turn the engine off and let it cool down sufficiently.
The exhaust pipe is hot when the engine is running and remains hot for some time after the vehicle is turned off. fTo prevent injury, make a point of noting where your vehicle’s exhaust pipe is, avoid placing your legs near the exhaust pipe when loading and unloading cargo in the rear, and closely supervise children around the vehicle during time when the exhaust pipe could be hot. A hot exhaust pipe can cause painful skin burns.
Radiator fan
The fan can start running depending on the temperature, even with the engine switched off.fExercise extreme care that parts of the body, articles of clothing or jewelry do not get caught in the radiator fan. fExercise extreme caution when working in the area of the radiator fans.
For information on radiator fans:fPlease see the chapter “RADIATOR FAN, ENGINE COMPARTMENT BLOWERS” on page 221.
NOTICE
Hot Engine PartsWARNINGh
Hot Exhaust Tailpipe
Radiator Fan
WARNINGh
WARNINGh
14_991_Turbo_21.book Seite 148 Mittwoch, 9. April 2014 2:19 14
Page 165 of 300
Driving and Driving Safety 163
Information
The distance depends on the driving speed. The slower the vehicle is traveling, the shorter the distance and the faster the vehicle is traveling, the longer the distance.
Increasing the desired distance
fPress the rocker switch Z upwards. The desired distance is increased.More orange segments are shown in the desired distance display A.
Reducing the desired distance
fPress the rocker switch Z downwards. The desired distance is reduced.Fewer orange segments are shown in the desired distance display A.
Display showing distance from vehicle in front
If a vehicle is detected in front, the vehicle symbol C appears on the multi-function display and in the status display B. The grey area D shows the current distance from the vehicle in front.
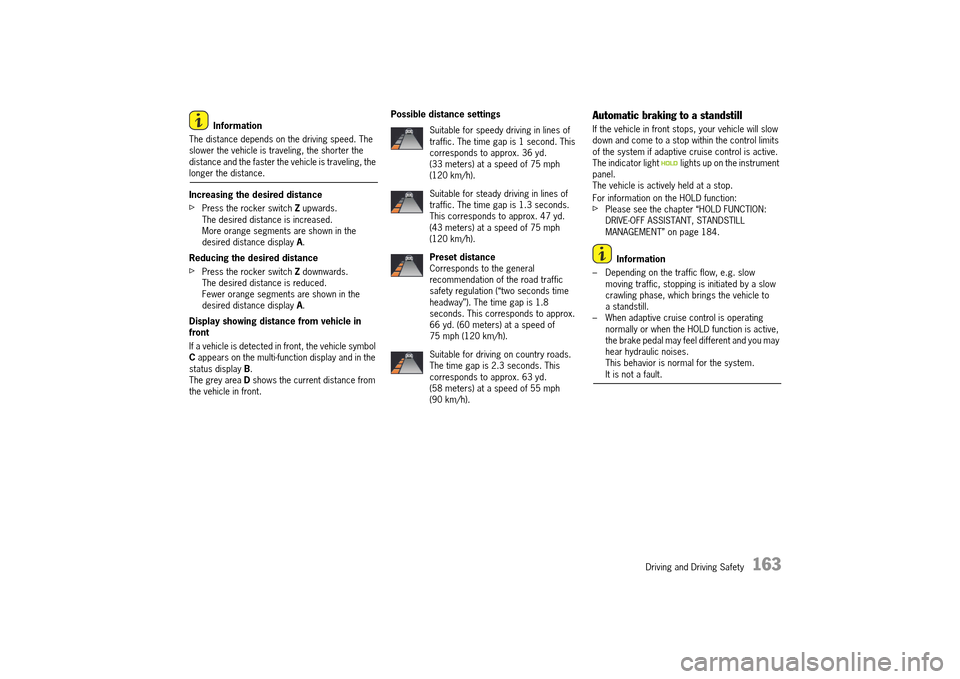
Possible distance settingsAutomatic braking to a standstill
If the vehicle in front stops, your vehicle will slow down and come to a stop within the control limits of the system if adaptive cruise control is active.The indicator light lights up on the instrument panel.The vehicle is actively held at a stop.
For information on the HOLD function:fPlease see the chapter “HOLD FUNCTION: DRIVE-OFF ASSISTANT, STANDSTILL MANAGEMENT” on page 184.
Information
– Depending on the traffic flow, e.g. slow moving traffic, stopping is initiated by a slow crawling phase, which brings the vehicle to a standstill.– When adaptive cruise control is operating normally or when the HOLD function is active, the brake pedal may feel different and you may hear hydraulic noises.This behavior is normal for the system. It is not a fault.
Suitable for speedy driving in lines of traffic. The time gap is 1 second. This corresponds to approx. 36 yd. (33 meters) at a speed of 75 mph (120 km/h).
Suitable for steady driving in lines of traffic. The time gap is 1.3 seconds. This corresponds to approx. 47 yd. (43 meters) at a speed of 75 mph (120 km/h).
Preset distance Corresponds to the general recommendation of the road traffic safety regulation (“two seconds time headway”). The time gap is 1.8 seconds. This corresponds to approx. 66 yd. (60 meters) at a speed of 75 mph (120 km/h).
Suitable for driving on country roads. The time gap is 2.3 seconds. This corresponds to approx. 63 yd. (58 meters) at a speed of 55 mph (90 km/h).
14_991_Turbo_21.book Seite 163 Mittwoch, 9. April 2014 2:19 14