oil level PORSCHE 944 1987 1.G Owners Manual
[x] Cancel search | Manufacturer: PORSCHE, Model Year: 1987, Model line: 944, Model: PORSCHE 944 1987 1.GPages: 66, PDF Size: 3.3 MB
Page 5 of 66

Dear Porsche Owner Before going on a trip...
A lot has gone into the manufacture of your Porsche, including advanced engineering
techniques, rigid quality control and
demanding inspections. These engineering
and safety features will be enhanced by
you... the safe driver...
who knows his car and all controls who maintains his vehicle properly who uses his driving skills wisely, and who always drives within his own capabilities and
his level of familiarity with his vehicle.
You will find helpful hints in this manual on
how to perform most of the checks listed on
these pages. If in doubt, have these checks
performed by your Porsche dealer.
First things first
Turn the engine off before you attempt any
checks or repairs of the vehicle.
Be sure tires are inflated correctly. Check for
damage and tire wear.
See that wheel bolts are properly tightened
and not loose or missing.
Check engine oil level, add if necessary.
Make it a habit to have engine oil checked
with every fuel filling. Check coolant level to assure sufficient
engine cooling.
Be sure you have a well charged battery. Check brake fluid level. If too low, have
brake system checked.
Replenish windshield washer fluid. Check if engine hood is latched safely. Replace worn or cracked wiper blades. See that all windows are clear and
unobstructed.
Keep air intake slots and area between engine hood and windshield free of snow and ice, so that the heater and the windshield wipers work properly.
Check whether all light lenses are clean.
Be sure all lights are working and headlights
are aimed correctly.
Check under vehicle for leaks. Be sure all luggage is stowed securely.
Emergency equipment 3
It is good practice to carry emergency
equipment in your vehicle. Some of the things
you should have are: window scraper, snow
brush, container or bag of sand or salt,
emergency light, small shovel, first-
aid kit, etc.
8
In the driver's seat... On the road...
Check operation of horn.
Position seat for easy reach of controls. Adjust inside and outside rear view mirrors. Attach your safety belts. Check operation of foot and parking brakes. Check all warning and indicator lights when
starting the engine.
NEVER leave car idling unattended. Lock doors from inside, especially with
children in the car.
To prevent inadvertent opening of doors
from inside or outside, drive with locked
doors.
Never drive after you have consumed
alcohol.
Always have your safety belt attached. Always drive defensively. Expect the unexpected. Use signals to indicate turns and lane
changes.
Turn on headlights at dusk. Always keep a safe distance from the vehicle in front of you, depending on traffic, road and weather conditions. Reduce speed at night and during inclement weather.
Driving in wet weather requires caution and
reduced speeds, particularly on roads with
standing water, as the handling characteristics of the vehicle may be impaired due to tire
aquaplaning.
Also, when crossing stretches of deeper water there is a danger that too high of a speed can
cause water to enter the engine combustion
chambers through the intake air system
and/or water may strike the cooling fan
causing cooling system damage. In order to
avoid possible en- gine or cooling system damage when driving
through deep water, the vehicle should be
driven at a walking speed in first gear.
Observe speed limits and obey road signs.
When tired, get well off the road, stop and
take a rest. Turn the engine off. Do not sit in
the vehicle with engine idling. See
WARNINGS on "Engine Exhaust".
When parked, always set the parking brake.
Move the selector lever to "P" (Automatic
transmission) or move the gearshift lever to
reverse or first gear (Manual transmission).
On hills also turn the wheels toward the curb.
When emergency repairs become necessary, move the vehicle well off the road. Turn on
emergency flasher and use other warning
devices to alert other motorists. Do not park
or operate the vehicle in areas where the hot
exhaust system may come in contact with dry grass, brush, fuel spill or other flammable
material.
Make it a habit to have the engine oil
checked with every fuel filling.
9
Page 20 of 66
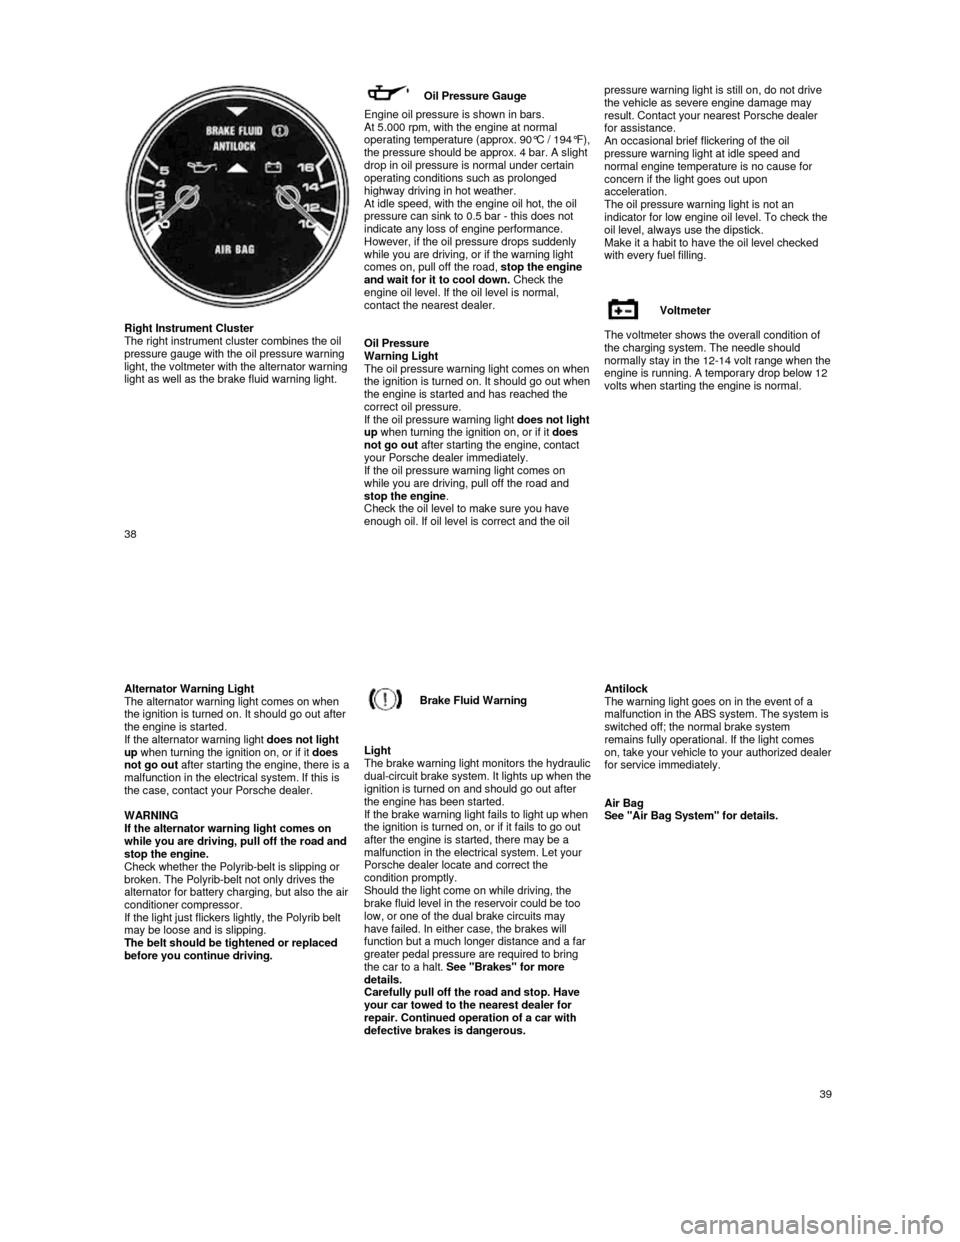
Right Instrument Cluster
The right instrument cluster combines the oil
pressure gauge with the oil pressure warning
light, the voltmeter with the alternator warning
light as well as the brake fluid warning light.
Oil Pressure Gauge
Engine oil pressure is shown in bars. At 5.000 rpm, with the engine at normal operating temperature (approx. 90°C / 194°F), the pressure should be approx. 4 bar. A slight
drop in oil pressure is normal under certain
operating conditions such as prolonged
highway driving in hot weather.
At idle speed, with the engine oil hot, the oil pressure can sink to 0.5 bar - this does not
indicate any loss of engine performance.
However, if the oil pressure drops suddenly
while you are driving, or if the warning light comes on, pull off the road,
stop the engine
and wait for it to cool down. Check the
engine oil level. If the oil level is normal,
contact the nearest dealer.
Oil Pressure
Warning Light
The oil pressure warning light comes on when the ignition is turned on. It should go out when the engine is started and has reached the
correct oil pressure.
If the oil pressure warning light
does not light up when turning the ignition on, or if it does
not go out after starting the engine, contact
your Porsche dealer immediately.
If the oil pressure warning light comes on
while you are driving, pull off the road and stop the engine .
Check the oil level to make sure you have
enough oil. If oil level is correct and the oil pressure warning light is still on, do not driv
e
the vehicle as severe engine damage may
result. Contact your nearest Porsche dealer
for assistance.
An occasional brief flickering of the oil pressure warning light at idle speed and
normal engine temperature is no cause for
concern if the light goes out upon
acceleration.
The oil pressure warning light is not an
indicator for low engine oil level. To check the
oil level, always use the dipstick.
Make it a habit to have the oil level checked
with every fuel filling.
Voltmeter
The voltmeter shows the overall condition of
the charging system. The needle should
normally stay in the 12-
14 volt range when the engine is running. A temporary drop below 12
volts when starting the engine is normal.
38
Alternator Warning Light
The alternator warning light comes on when
the ignition is turned on. It should go out after
the engine is started.
If the alternator warning light does not light
up when turning the ignition on, or if it does
not go out
after starting the engine, there is a malfunction in the electrical system. If this is
the case, contact your Porsche dealer.
WARNING
If the alternator warning light comes on
while you are driving, pull off the road and
stop the engine.
Check whether the Polyrib-belt is slipping or
broken. The Polyrib-belt not only drives the
alternator for battery charging, but also the air
conditioner compressor.
If the light just flickers lightly, the Polyrib bel t
may be loose and is slipping.
The belt should be tightened or replaced
before you continue driving.
Brake Fluid Warning
Light
The brake warning light monitors the hydraulic dual-circuit brake system. It lights up when the ignition is turned on and should go out after
the engine has been started.
If the brake warning light fails to light up when
the ignition is turned on, or if it fails to go out
after the engine is started, there may be a
malfunction in the electrical system. Let your
Porsche dealer locate and correct the
condition promptly.
Should the light come on while driving, the
brake fluid level in the reservoir could be too
low, or one of the dual brake circuits may
have failed. In either case, the brakes will
function but a much longer distance and a far
greater pedal pressure are required to bring
the car to a halt. See "Brakes" for more
details.
Carefully pull off the road and stop. Have
your car towed to the nearest dealer for
repair. Continued operation of a car with
defective brakes is dangerous.
Antilock
The warning light goes on in the event of a
malfunction in the ABS system. The system is
switched off; the normal brake system
remains fully operational. If the light comes
on, take your vehicle to your authorized dealer for service immediately.
Air Bag
See "Air Bag System" for details.
39
Page 25 of 66

Break-in Hints for the first 1.000 miles /
1.600 kilometers
There are no specific break-in rules for your
Porsche. However, by observing a few
precautions you can help extend the service
life and performance of your engine.
During the first 1.000 miles / 1.600 km, all
working components of the engine adjust to
each other to a certain degree. Therefore:
Avoid full throttle starts and abrupt stops. Change speeds frequently. Vary the throttle
load.
Do not exceed maximum engine speed of
5.000 rpm (revolutions per minute).
Do not run a cold engine at high rpm or in
Neutral.
Do not let the engine labor, especially when
driving uphill. Shift to the next proper gear in
time (use the most favorable rpm range).
There may be a slight stiffness in the steering, gearshifting or other controls during the break-
in period, which will gradually disappear.
Never lug the engine in high gear at low
speeds. This rule applies all the time, not
just during the break-in period.
Breaking in brake pads
Brake pads do not possess maximum braking
efficiency when the car is new. Therefore
more pedal force is necessary during the first
100 to 150 miles (150 to 250 km). This also
applies to replacement brake pads.
New tires
New tires do not possess maximum traction.
They tend to
be slippery. Break in new tires by driving at moderate speeds during the first 60
to 120 miles (100 to 200 km), and longer
braking distances must be anticipated.
Engine Oil Consumption
During the break-in period oil consumption
may be higher than normal.
As always, the rate of oil consumption depends on the quality and viscosity of oil, the speed at which the engine is operated, the climate, road conditions as well as the amount of dilution and oxidation of the lubricant.
Check engine oil level, add if necessary. Make it a habit to have engine oil checked with
every fuel filling.
47
Engine Exhaust WARNING
Engine exhaust is dangerous if inhaled.
Never start or let the engine run in a closed garage. Never sit in your car for
prolonged periods with the engine on and
the car not moving.
Although exhaust fumes from the engine have many components which you can smell, they also contain carbon monoxide, which is a colorless and odorless gas.
Carbon monoxide can be fatal if inhaled.
If you smell gas fumes in the vehicle, drive with the windows open but keep the
hatchback closed. Have the cause
immediately located and corrected.
Because of inherent hazards, we do not recommend transporting objects larger
than those fitting safely into the luggage
compartment. Keep the hatchback closed
while driving to prevent poisonous
exhaust gas from being drawn into the
vehicle.
Never carry additional fuel containers in your vehicle. Such containers, full or
partially empty, may leak, cause an
explosion, or result in fire in case of a
collision.
Operating Your Porsche in other Countries Government regulations in the United States
and Canada require that automobiles meet
specific emission regulations and safety
standards.
Therefore cars built for the U.S. and Canada
differ from vehicles sold in other countries.
If you plan to take your Porsche outside the
continental limits of the United States or
Canada, there is the possibility that
unleaded fuel may not be available;
unleaded fuel may have a considerably lower octane rating. Excessive engine knock and
serious damage to both engine and catalytic
converter could result;
service may be inadequate due to lack of
proper service facilities, tools or diagnostic
equipment;
replacement parts may not be available or
very difficult to get.
Porsche cannot be responsible for the
mechanical damage that could result
because of inadequate fuel, service or
parts availability.
If you bought your car abroad and want to
bring it back home, be sure to find out about
shipping and forwarding requirements, as well as current import and customs regulations.
48
Page 36 of 66
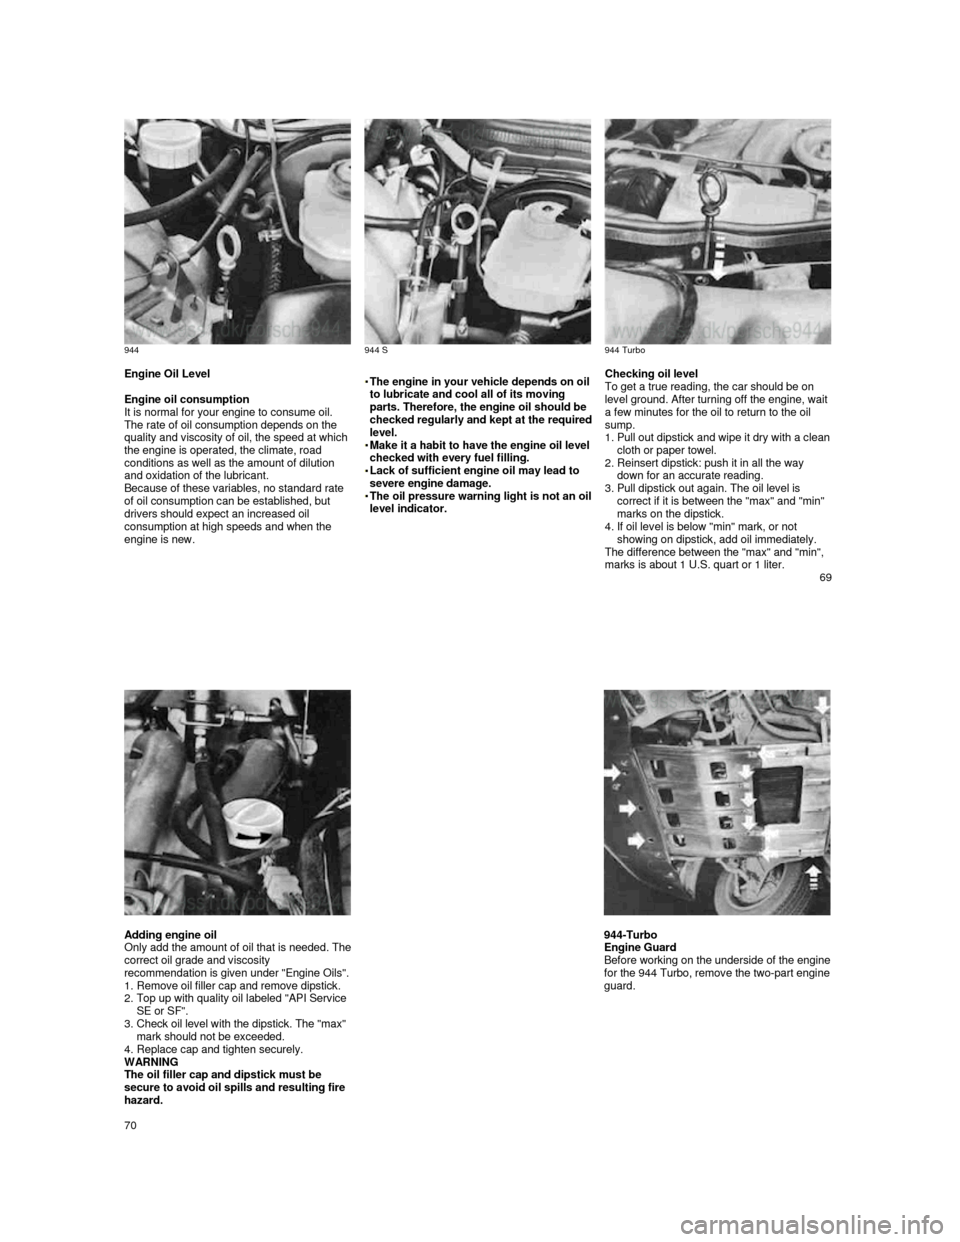
944
944 S
944 Turbo Engine Oil Level
Engine oil consumption
It is normal for your engine to consume oil.
The rate of oil consumption depends on the
quality and viscosity of oil, the speed at which
the engine is operated, the climate, road
conditions as well as the amount of dilution
and oxidation of the lubricant.
Because of these variables, no standard rate
of oil consumption can be established, but
drivers should expect an increased oil
consumption at high speeds and when the
engine is new.
The engine in your vehicle depends on oil to lubricate and cool all of its moving
parts. Therefore, the engine oil should be
checked regularly and kept at the required level.
Make it a habit to have the engine oil level checked with every fuel filling. Lack of sufficient engine oil may lead to severe engine damage. The oil pressure warning light is not an oil level indicator.
Checking oil level
To get a true reading, the car should be on
level ground. After turning off the engine, wait
a few minutes for the oil to return to the oil
sump.
1. Pull out dipstick and wip
e it dry with a clean cloth or paper towel.
2. Reinsert dipstick: push it in all the way
down for an accurate reading.
3.
Pull dipstick out again. The oil level is
correct if it is between the "max" and "min"
marks on the dipstick.
4.
If oil level is below "min" mark, or not
showing on dipstick, add oil immediately.
The difference between the "max" and "min",
marks is about 1 U.S. quart or 1 liter. 69
Adding engine oil Only add the amount of oil that is needed. The correct oil grade and viscosity
recommendation is given under "Engine Oils". 1. Remove oil filler cap and remove dipstick.
2. Top up with quality oil labeled "API Service
SE or SF".
3.
Check oil level with the dipstick. The "max"
mark should not be exceeded.
4.
Replace cap and tighten securely.
WARNING
The oil filler cap and dipstick must be
secure to avoid oil spills and resulting fire
hazard.
944-Turbo
Engine Guard
Before working on the underside of the engine for the 944 Turbo, remove the two-part engine guard.
70
Page 37 of 66
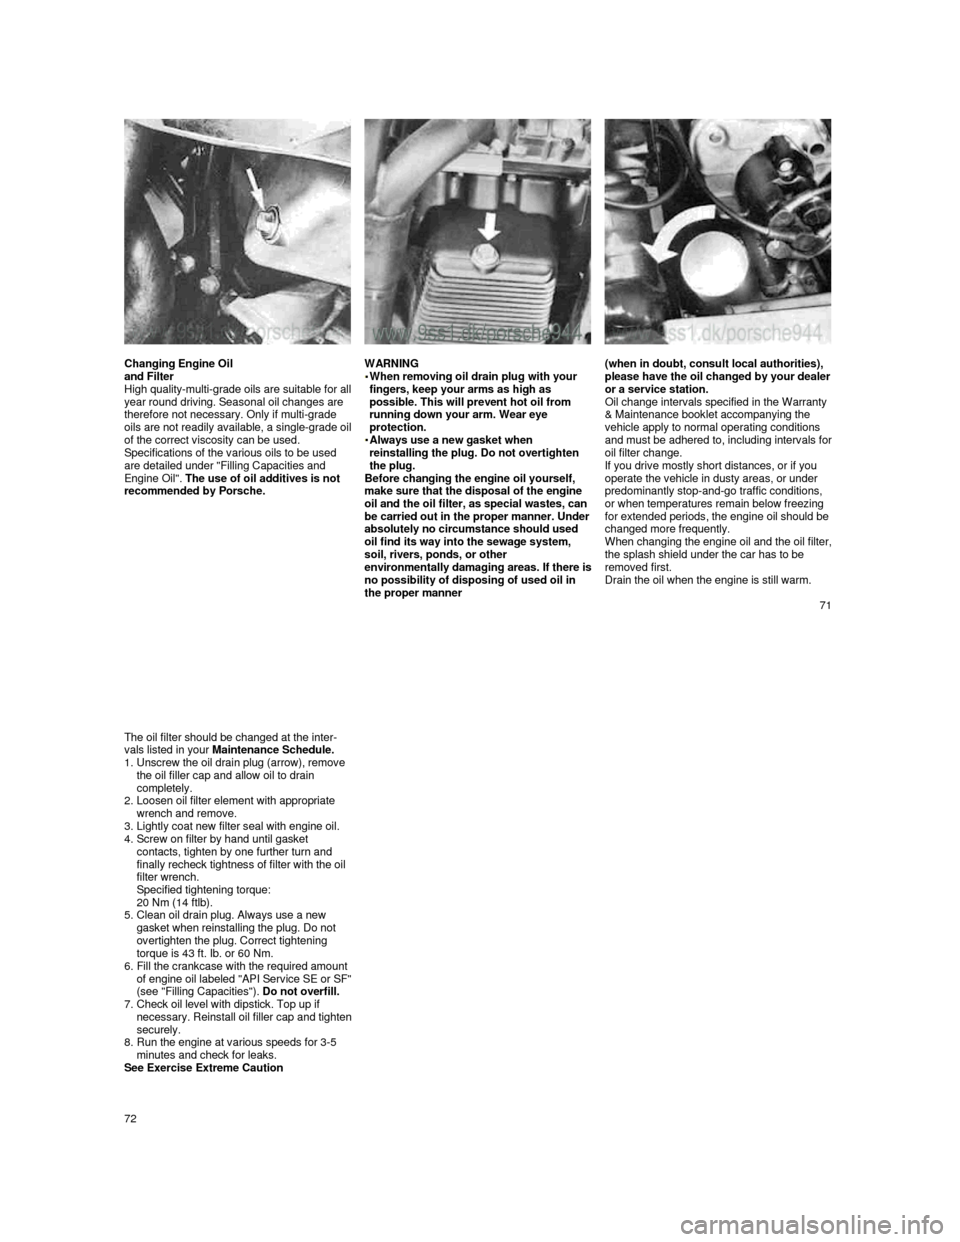
Changing Engine Oil
and Filter
High quality-multi-
grade oils are suitable for all year round driving. Seasonal oil changes are
therefore not necessary. Only if multi-grade
oils are not readily available, a single-
grade oil of the correct viscosity can be used.
Specifications of the various oils to be used
are detailed under "Filling Capacities and
Engine Oil". The use of oil additives is not
recommended by Porsche.
WARNING
When removing oil drain plug with your fingers, keep your arms as high as
possible. This will prevent hot oil from
running down your arm. Wear eye
protection.
Always use a new gasket when reinstalling the plug. Do not overtighten
the plug.
Before changing the engine oil yourself,
make sure that the disposal of the engine
oil and the oil filter, as special wastes, can
be carried out in the proper manner. Under absolutely no circumstance should used
oil find its way into the sewage system,
soil, rivers, ponds, or other
environmentally damaging areas. If there is no possibility of disposing of used oil in the proper manner
(when in doubt, consult local authorities),
please have the oil changed by your dealer or a service station.
Oil change intervals specified in the Warranty
& Maintenance booklet accompanying the
vehicle apply to normal operating conditions
and must be adhered to, including intervals for oil filter change.
If you drive mostly short distances, or if you
operate the vehicle in dusty areas, or under
predominantly stop-and-go traffic conditions,
or when temperatures remain below freezing
for extended periods, the engine oil should be
changed more frequently.
When chang
ing the engine oil and the oil filter, the splash shield under the car has to be
removed first.
Drain the oil when the engine is still warm.
71
The oil filter should be changed at the inter-
vals listed in your Maintenance Schedule.
1. Unscrew the oil drain plug (arrow), remove the oil filler cap and allow oil to drain
completely.
2.
Loosen oil filter element with appropriate wrench and remove.
3. Lightly coat new filter seal with engine oil.
4. Screw on filter by hand until gasket
contacts, tighten by one further turn and
finally recheck tightness of filter with the oil
filter wrench.
Specified tightening torque:
20 Nm (14 ftlb).
5.
Clean oil drain plug. Always use a new
gasket when reinstalling the plug. Do not
overtighten the plug. Correct tightening
torque is 43 ft. Ib. or 60 Nm.
6.
Fill the crankcase with the required amount of engine oil labeled "API Service SE or SF" (see "Filling Capacities"). Do not overfill.
7. Check oil level with dipstick. Top up if necessary. Reinstall oil filler cap and tighten securely.
8. Run the engine at various speeds for 3-5
minutes and check for leaks.
See Exercise Extreme Caution
72
Page 40 of 66
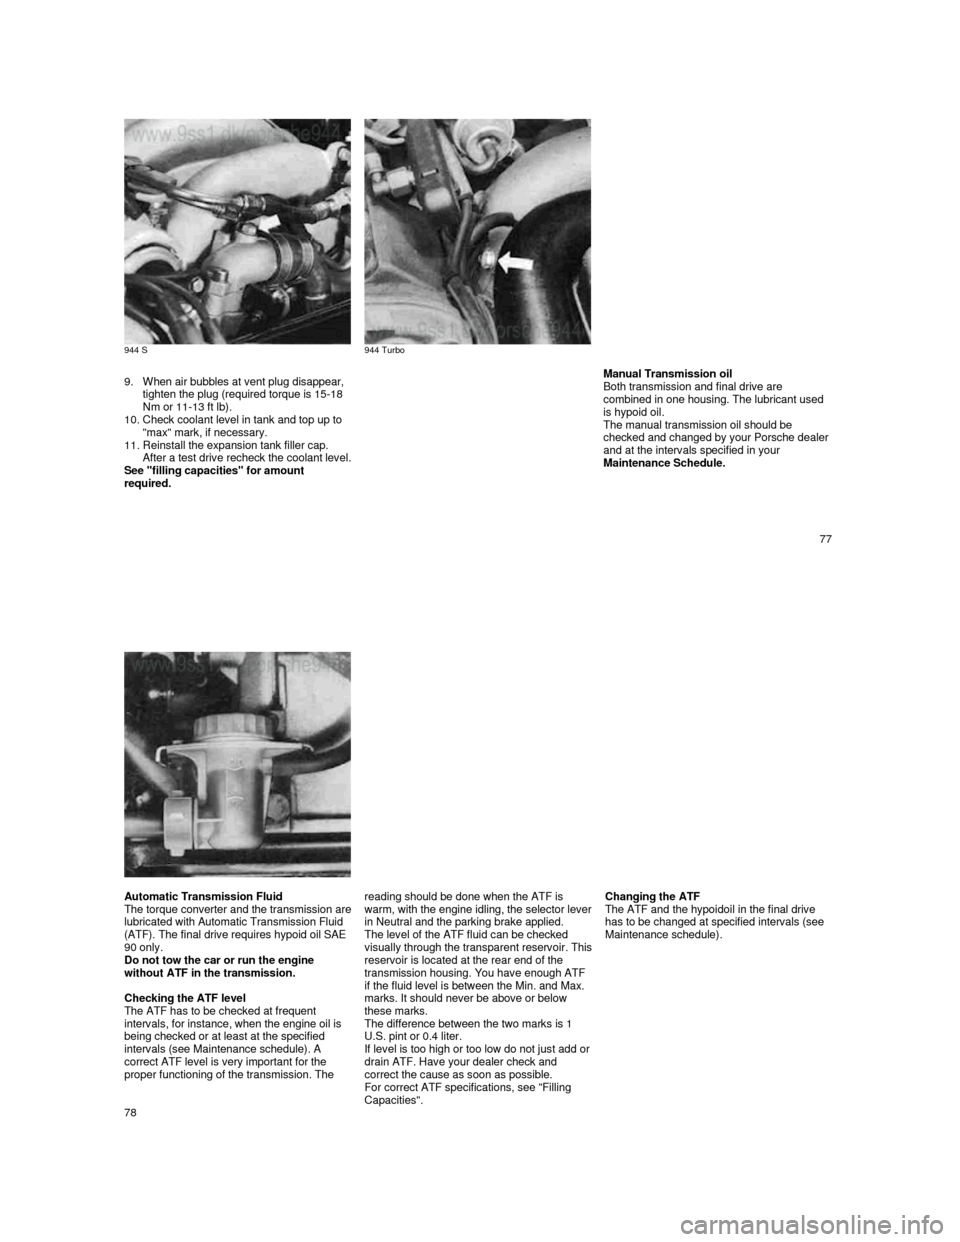
944 S
944 Turbo
9. When air bubbles at vent plug disappear, tighten the plug (required torque is 15-18
Nm or 11-13 ft lb).
10.
Check coolant level in tank and top up to
"max" mark, if necessary.
11.
Reinstall the expansion tank filler cap. After a test drive recheck the coolant level. See "filling capacities" for amount
required.
Manual Transmission oil
Both transmission and final drive are
combined in one housing. The lubricant used
is hypoid oil.
The manual transmission oil should be
checked and changed by your Porsche dealer
and at the intervals specified in your
Maintenance Schedule.
77
Automatic Transmission Fluid The torque converter and the transmission are lubricated with Automatic Transmission Fluid
(ATF). The final drive requires hypoid oil SAE
90 only.
Do not tow the car or run the engine
without ATF in the transmission.
Checking the ATF level
The ATF has to be checked at frequent
intervals, for instance, when the engine oil is
being checked or at least at the specified
intervals (see Maintenance schedule). A
correct ATF level is very important for the
proper functioning of the transmission. The
reading should be done when the ATF is warm, with the engine idling, the selector lever in Neutral and the parking brake applied.
The level of the ATF fluid can be checked
visually through the transparent reservoir. This reservoir is located at the rear end of the
transmission housing. You have enough ATF
if the fluid level is between the Min. and Max.
marks. It should never be above or below
these marks.
The difference between the two marks is 1
U.S. pint or 0.4 liter.
If level is too high or too low do not just add or
drain ATF. Have your dealer check and
correct the cause as soon as possible.
For correct ATF specifications, see "Filling
Capacities".
Changing the ATF
The ATF and the hypoidoil in the final drive
has to be changed at specified intervals (see
Maintenance schedule).
78
Page 41 of 66
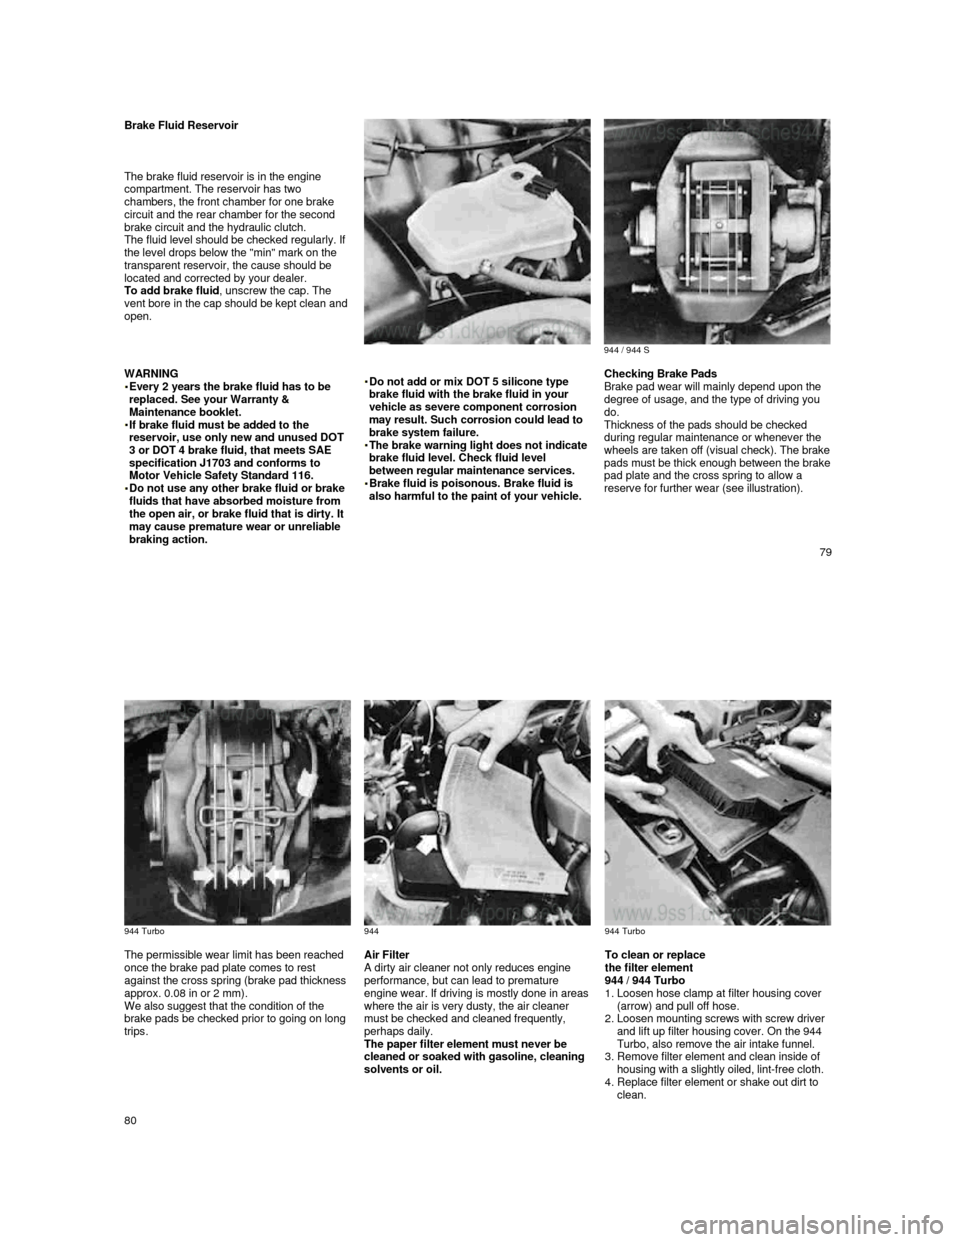
Brake Fluid Reservoir
The brake fluid reservoir is in the engine
compartment. The reservoir has two
chambers, the front chamber for one brake
circuit and the rear chamber for the second
brake circuit and the hydraulic clutch.
The fluid level should be checked regularly. If
the level drops below the "min" mark on the
transparent reservoir, the cause should be
located and corrected by your dealer.
To add brake fluid , unscrew the cap. The
vent bore in the cap should be kept clean and
open.
944 / 944 S WARNING
Every 2 years the brake fluid has to be replaced. See your Warranty &
Maintenance booklet.
If brake fluid must be added to the reservoir, use only new and unused DOT
3 or DOT 4 brake fluid, that meets SAE
specification J1703 and conforms to
Motor Vehicle Safety Standard 116.
Do not use any other brake fluid or brake fluids that have absorbed moisture from
the open air, or brake fluid that is dirty. It
may cause premature wear or unreliable
braking action.
Do not add or mix DOT 5 silicone type brake fluid with the brake fluid in your
vehicle as severe component corrosion
may result. Such corrosion could lead to
brake system failure.
The brake warning light does not indicate brake fluid level. Check fluid level
between regular maintenance services.
Brake fluid is poisonous. Brake fluid is also harmful to the paint of your vehicle.
Checking Brake Pads
Brake pad wear will mainly depend upon the
degree of usage, and the type of driving you
do.
Thickness of the pads should be checked
during regular maintenance or whenever the
wheels are taken off (visual check). The brake pads must be thick enough between the brake pad plate and the cross spring to allow a
reserve for further wear (see illustration).
79
944 Turbo
944
944 Turbo
The permissible wear limit has been reached
once the brake pad plate comes to rest
against the cross spring (brake pad thickness
approx. 0.08 in or 2 mm).
We also suggest that the condition of the
brake pads be checked prior to going on long
trips. Air Filter
A dirty air cleaner not only reduces engine performance, but can lead to premature
engine wear. If driving is mostly done in areas
where the air is very dusty, the air cleaner must be checked and cleaned frequently,
perhaps daily.
The paper filter element must never be
cleaned or soaked with gasoline, cleaning
solvents or oil.
To clean or replace
the filter element
944 / 944 Turbo
1. Loosen hose clamp at filter housing cover (arrow) and pull off hose.
2.
Loosen mounting screws with screw driver
and lift up filter housing cover. On the 944
Turbo, also remove the air intake funnel.
3.
Remove filter element and clean inside of
housing with a slightly oiled, lint-free cloth.
4.
Replace filter element or shake out dirt to
clean.
80
Page 45 of 66
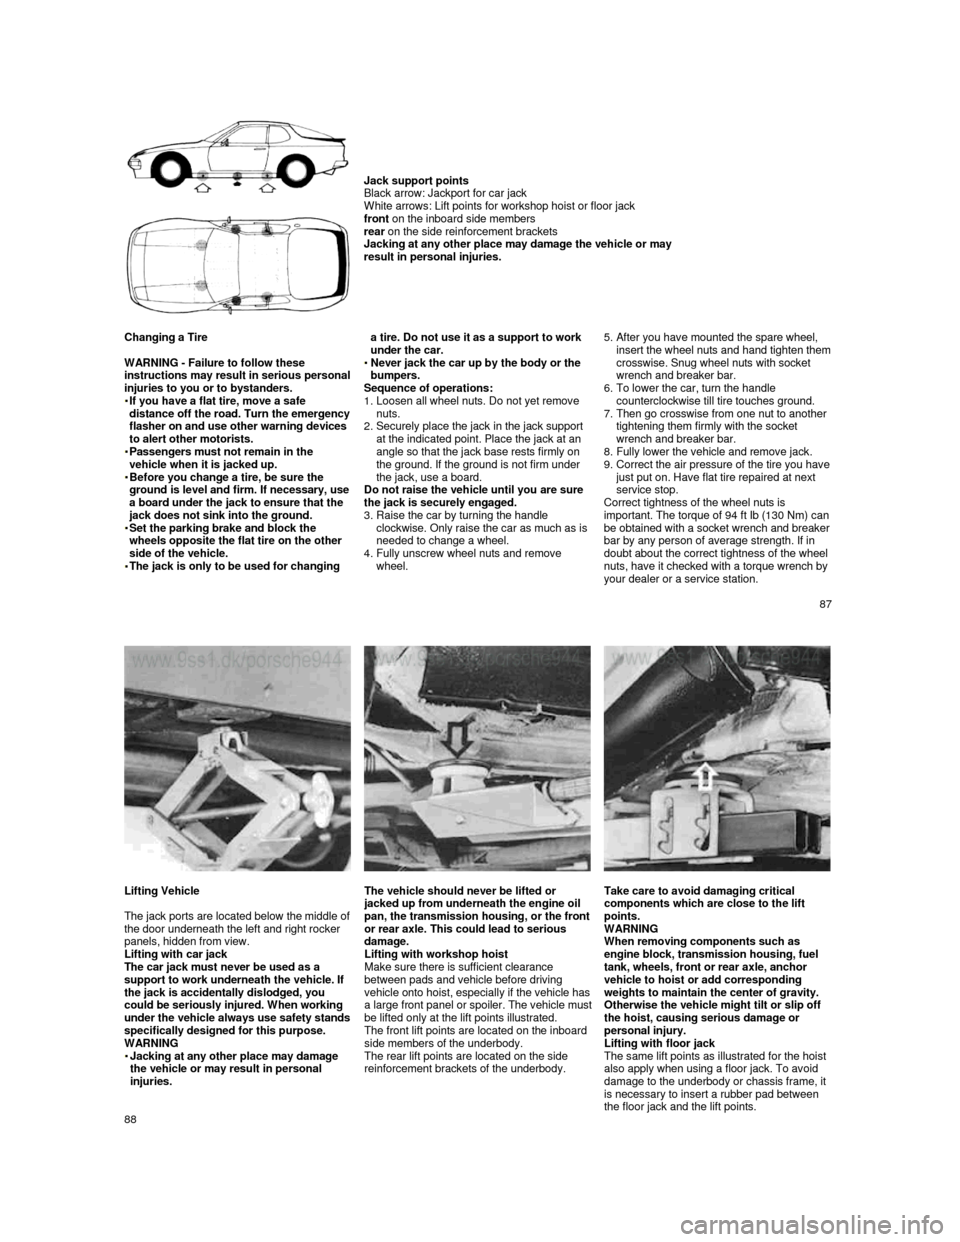
Jack support points
Black arrow: Jackport for car jack
White arrows: Lift points for workshop hoist or flo or jack
front on the inboard side members
rear on the side reinforcement brackets
Jacking at any other place may damage the vehicle o r may
result in personal injuries.
Changing a Tire
WARNING - Failure to follow these
instructions may result in serious personal injuries to you or to bystanders.
If you have a flat tire, move a safe distance off the road. Turn the emergency flasher on and use other warning devices
to alert other motorists.
Passengers must not remain in the vehicle when it is jacked up. Before you change a tire, be sure the ground is level and firm. If necessary, use a board under the jack to ensure that the jack does not sink into the ground. Set the parking brake and block the wheels opposite the flat tire on the other
side of the vehicle.
The jack is only to be used for changing
a tire. Do not use it as a support to work
under the car.
Never jack the car up by the body or the bumpers.
Sequence of operations:
1.
Loosen all wheel nuts. Do not yet remove
nuts.
2.
Securely place the jack in the jack support
at the indicated point. Place the jack at an
angle so that the jack base rests firmly on
the ground. If the ground is not firm under
the jack, use a board.
Do not raise the vehicle until you are sure
the jack is securely engaged.
3.
Raise the car by turning the handle
clockwise. Only raise the car as much as is
needed to change a wheel.
4.
Fully unscrew wheel nuts and remove wheel.
5. After you have mounted the spare wheel, insert the wheel nuts and hand tighten them crosswise. Snug wheel nuts with socket wrench and breaker bar.
6. To lower the car, turn the handle
counterclockwise till tire touches ground.
7.
Then go crosswise from one nut to another
tightening them firmly with the socket
wrench and breaker bar.
8. Fully lower the vehicle and remove jack.
9. Correct the air pressure of the tire you have just put on. Have flat tire repaired at next service stop.
Correct tightness of the wheel nuts is
important. The torque of 94 ft Ib (130 Nm) can
be obtained with a socket wrenc
h and breaker bar by any person of average strength. If in
doubt about the correct tightness of the wheel
nuts, have it checked with a torque wrench by
your dealer or a service station.
87
Lifting Vehicle
The jack ports are located below the middle of the door underneath the left and right rocker
panels, hidden from view.
Lifting with car jack
The car jack must never be used as a
support to work underneath the vehicle. If
the jack is accidentally dislodged, you
could be seriously injured. When working
under the vehicle always use safety stands specifically designed for this purpose.
WARNING
Jacking at any other place may damage the vehicle or may result in personal injuries.
The vehicle should never be lifted or jacked up from underneath the engine oil pan, the transmission housing, or the front or rear axle. This could lead to serious
damage.
Lifting with workshop hoist
Make sure there is sufficient clearance
between pads and vehicle before driving
vehicle onto hoist, especially if the vehicle
has a large front panel or spoiler. The vehicle must be lifted only at the lift points illustrated.
The front lift points are located on the inboard
side members of the underbody.
The rear lift points are located on the side
reinforcement brackets of the underbody.
Take care to avoid damaging critical
components which are close to the lift
points.
WARNING
When removing components such as
engine block, transmission housing, fuel
tank, wheels, front or rear axle, anchor
vehicle to hoist or add corresponding
weights to maintain the center of gravity.
Otherwise the vehicle might tilt or slip off
the hoist, causing serious damage or
personal injury.
Lifting with floor jack
The same lift points as illustrated for the hoist
also apply when using a floor jack. To avoid
damage to the underbody or chassis frame, it
is necessary to insert a rubber pad between
the floor jack and the lift points.
88
Page 46 of 66
If it fails to light up, the fuse is defective and
must be replaced. Replace black plastic
cover.
The central electrical system contains plug in
relays for various electrical switching
functions.
Defective relays should be tested and
replaced by an authorized Porsche dealer.
To prevent damage to the electrical system
we recommend having all work - including the
installation of electrical accessories -carried
out by your authorized Porsche dealer. . ,
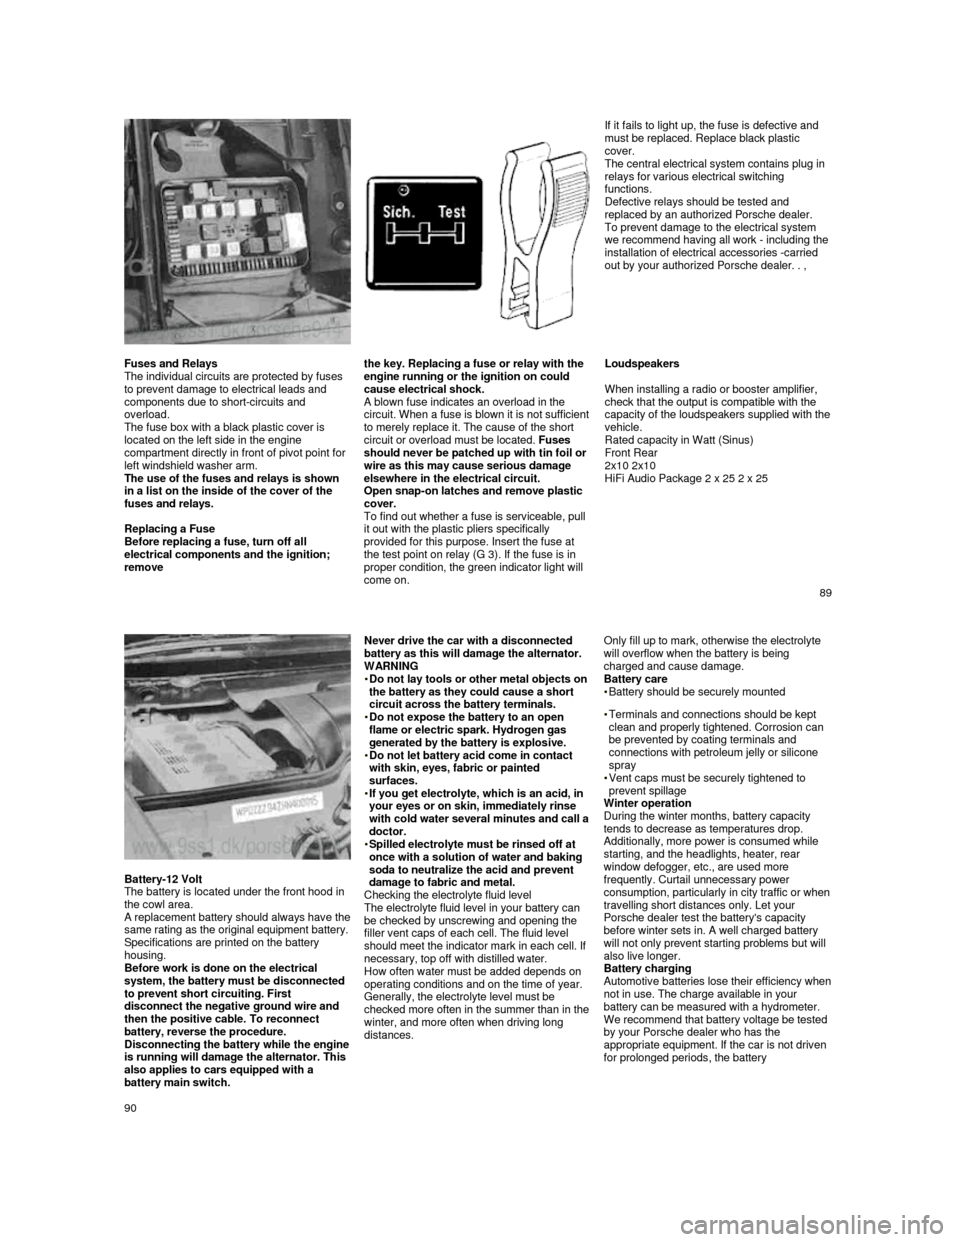
Fuses and Relays
The individual circuits are protected by fuses
to prevent damage to electrical leads and
components due to short-circuits and
overload.
The fuse box with a black plastic cover is
located on the left side in the engine
compartment directly in front of pivot point for
left windshield washer arm.
The use of the fuses and relays is shown
in a list on the inside of the cover of the
fuses and relays.
Replacing a Fuse
Before replacing a fuse, turn off all
electrical components and the ignition;
remove the key. Replacing a fuse or relay with the
engine running or the ignition on could
cause electrical shock.
A blown fuse indicates an overload in the circuit. When a fuse is blown it is not sufficient
to merely replace it. The cause of the short
circuit or overload must be located. Fuses
should never be patched up with tin foil or
wire as this may cause serious damage
elsewhere in the electrical circuit.
Open snap-on latches and remove plastic
cover.
To find out whether a fuse is serviceable, pull
it out with the plastic pliers specifically
provided for this purpose. Insert the fuse at
the test point on relay (G 3). If the fuse is in
proper condition, the green indicator light will
come on.
Loudspeakers
When installing a radio or booster amplifier,
check that the output is compatible with the
capacity of the loudspeakers supplied with the vehicle.
Rated capacity in Watt (Sinus)
Front Rear
2x10 2x10
HiFi Audio Package 2 x 25 2 x 25
89
Battery-12 Volt
The battery is located under the front hood in
the cowl area.
A replacement battery should always have the same rating as the original equipment battery.
Specifications are printed on the battery
housing.
Before work is done on the electrical
system, the battery must be disconnected
to prevent short circuiting. First
disconnect the negative ground wire and
then the positive cable. To reconnect
battery, reverse the procedure.
Disconnecting the battery while the engine is running will damage the alternator. This
also applies to cars equipped with a
battery main switch.
Never drive the car with a disconnected battery as this will damage the alternator. WARNING
Do not lay tools or other metal objects on the battery as they could cause a short
circuit across the battery terminals.
Do not expose the battery to an open flame or electric spark. Hydrogen gas
generated by the battery is explosive.
Do not let battery acid come in contact with skin, eyes, fabric or painted
surfaces.
If you get electrolyte, which is an acid, in your eyes or on skin, immediately rinse
with cold water several minutes and call a doctor. Spilled electrolyte must be rinsed off at once with a solution of water and baking
soda to neutralize the acid and prevent
damage to fabric and metal.
Checking the electrolyte fluid level
The electrolyte fluid level in your battery can
be checked by unscrewing and opening the
filler vent caps of each cell. The fluid level
should meet the indicator mark in each cell. If
necessary, top off with distilled water.
How often water must be added depends on
operating conditions and on the time of year.
Generally, the electrolyte level must be
checked more often in the summer than in the winter, and more often when driving long distances.
Only fill up to mark, otherwise the electrolyte will overflow when the battery is being charged and cause damage.
Battery care
Battery should be securely mounted
Terminals and connections should be kept
clean and properly tightened. Corrosion can
be prevented by coating terminals and
connections with petroleum jelly or silicone
spray
Vent caps must be securely tightened to
prevent spillage
Winter operation
During the winter months, battery capacity
tends to decrease as temperatures drop.
Additionally, more power is consumed while starting, and the headlights, heater, rear window defogger, etc., are used more
frequently. Curtail unnecessary power
consumption, particularly in city traffic or when travelling short distances only. Let your
Porsche dealer test the battery's capacity
before winter sets in. A well charged battery
will not only prevent starting problems but will
also live longer.
Battery charging
Automotive batteries lose their efficiency when not in use. The charge available in your
battery can be measured with a hydrometer.
We recommend that battery voltage be tested
by your Porsche dealer who has the
appropriate equipment. If the car is not driven
for prolonged periods, the battery
90
Page 56 of 66

Engine Design Specifications
Design
Operating cycle
Lubrication
Cylinder block
Cylinder head
Valve operation
Camshaft drive
Crankshaft
Fuel injection 4-cylinder, in-line engine, front mount with two ba
lance-shafts
4-stroke
Pressure oil circulation from oil sump,
full flow filter
Light metal
Light metal
Overhead camshaft
(944 S: 2 overhead camshafts)
Spur belt drive
Forged, 5 main bearings
AFC (Air Flow Control) Power Train
Manual transmission
Gear ratio
1st gear
2nd gear
3rd gear
4th gear
5th gear
Axle ratio Gear ratio 944
3.600:1
2.125:1
1.458:1
1.071:1
0.730:1
3.500:1
3.889:1 Gear ratio 944 S
3.500:1
2.059:1
1.400:1
1.034:1
0.829:1
3.500:1
3.889:1 Gear ratio 944 Turbo
3.500:1
2.059:1
1.400:1
1.034:1
0.829:1
3.500:1
3.375:1
Clutch
Power transmission Single plate dry disc, hydraulically operated
Double constant velocity joints and drive shaft
Automatic transmission 944
Gear ratio 1st gear
2nd gear
3rd gear
Reverse gear
Axle ratio
Clutch 2.714:1
1.500:1
1.000:1
2.429:1
3.455:1
Hydrodynamic torque converter
109
Filling Capacities
Engine oil With filter change approx. 6.34 (Turbo: approx. 6.87) U.S. qts. or 6 (Turbo: approx. 6.5) liters.
Check oil level with dipstick a few minutes after e ngine has stopped. The difference between
the max. and min. marks on the dipstick is approx. 1 U.S. qt. or 1 liter.
Only use brand name oil which has been tested and a pproved by Porsche.
Your authorized Porsche dealer will be glad to advi se you.
Porsche does not recommend the use of oil additives . See also "Engine Oils".
Cooling system with heating
Approx. 8,2 U.S. qts. or 7,8 liters. Factory filled to -31°F (-35°C). Only use phosphate-free
anti-freeze containing ethylene glycol recommended for aluminum engines and radiators.
Manual transmission
Approx. 0.53 U.S. gal. or 2.0 liters. Use hypoid oi l SAE 80 labeled "For Service API/GL4 or
Mil-L 2105".
Automatic transmission with
torque converter Approx. 1.72 U.S. gal. or 6.5 liters ATF Dexron®. At oil c hanges 3 U.S. qts. or 2.8 liters are
required.
Differential of automatic transmission
Approx. 1 U.S. qts. or 1 liter hypoid oil SAE 90 ac cording to API classification GL 5 or
Mil-L 2105 B.
Power steering
Approx. 0.63 U.S. qts. or 0.6 liter ATF Dexron®
Fuel tank Approx. 21.1 U.S. gals, or 80 liters including a re serve of 2.1 U.S. gals, or 8 liters.
Unleaded fuel only! Minimum octane rating 944 91 RO N (87 CLC or AKI ((R+M)/2) rating on fuel
pumps in U.S.A.), 944 S / 944 Turbo 95 RON (90 CLC or AKI ((R+M)/2) rating on fuel pumps in U.S.A.)
Brake fluid Approx. 0.42 U.S. pint or 0.2 liter. Only use brake fluid conforming to specifications
SAE J 1703, DOT 3 or DOT 4.
Windshield and headlight washer system
Approx. 1.59 U.S. gals, or 6.0 liters.
Refrigerant for air conditioning Approx. 33.5 oz or 950 g. Refrigerant R 12 (CCI2F2)
Cooling system mixing chart
(Approximate values)
Anti-freeze-Water
Consult your authorized dealer about
the approved anti-freeze mixtures. Temp, down to
-13° F (-25°C) -23° F (-30° C) -31° F (-35° C)
Anti-freeze
40%
45%
50% Water
60% 55% 50%
Anti-freeze
3.1 liters / 3.3 U.S. qts.3.5 liters / 3.7 U.S. qts.3.9 liters / 4.1 U.S. qts.
Water
4.7 liters / 5.0 U.S. qts.
4.3 liters / 4.5 U.S. qts. 3.9 liters / 4.1 U.S. qts.
110