torque PORSCHE 944 1987 1.G Owners Manual
[x] Cancel search | Manufacturer: PORSCHE, Model Year: 1987, Model line: 944, Model: PORSCHE 944 1987 1.GPages: 66, PDF Size: 3.3 MB
Page 28 of 66
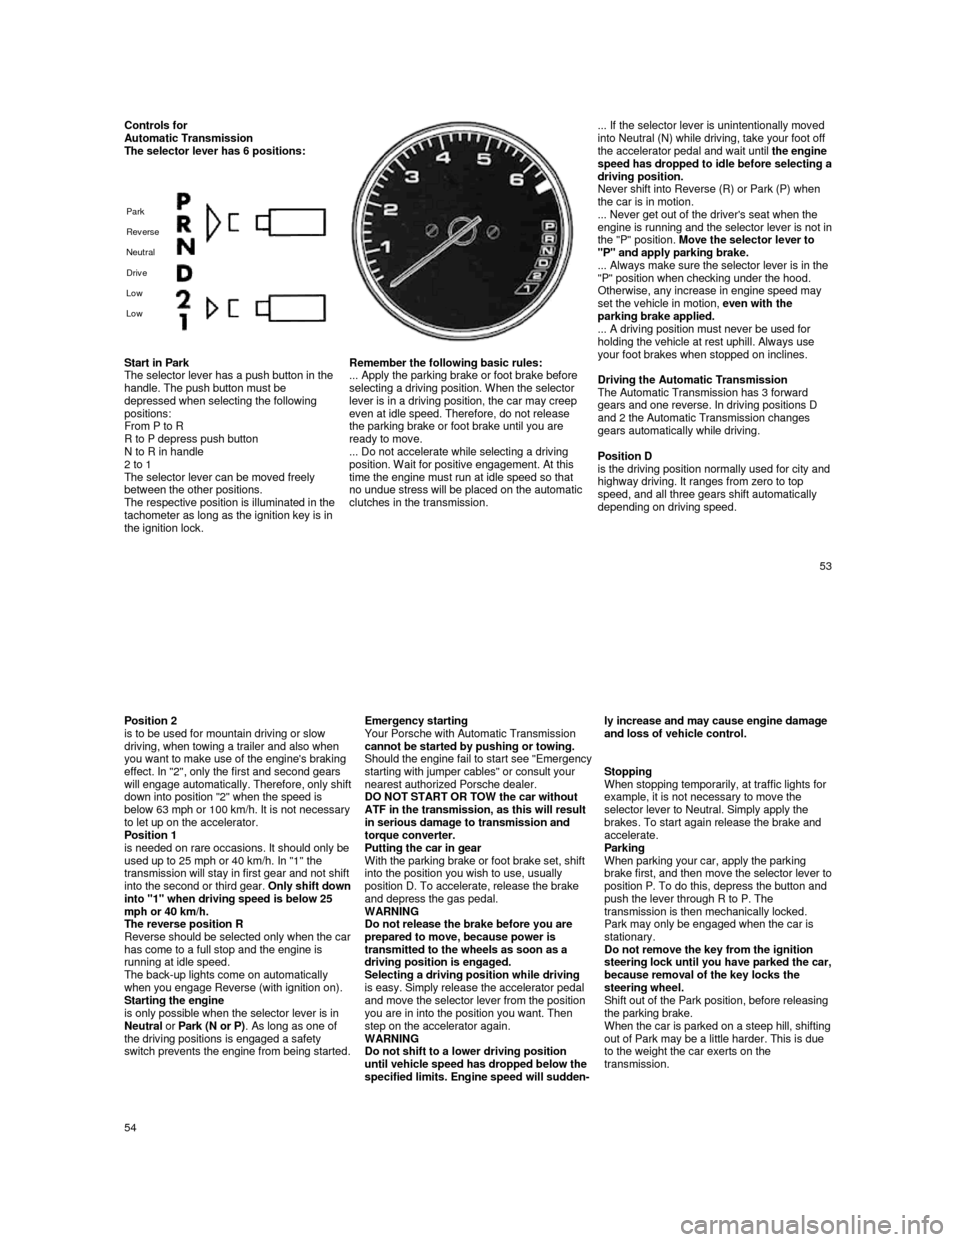
Controls for Automatic Transmission
The selector lever has 6 positions:
Park
Rev erse
Neutral
Driv e
Low
Low
... If the selector lever is unintentionally mo ved
into Neutral (N) while driving, take your foot off
the accelerator pedal and wait until the engine
speed has dropped to idle before selecting a driving position.
Never shift into Reverse (R) or Park (P) when
the car is in motion.
... Never get out of the driver's seat when the
engine is running and the selector lever is not in the "P" position. Move the selector lever to
"P" and apply parking brake.
... Always make sure the selector lever is in the
"P" position when checking under the hood.
Otherwise, any increase in engine speed may
set the vehicle in motion, even with the
parking brake applied.
... A driving position must never be used for
holding the vehicle at rest uphill. Always use
your foot brakes when stopped on inclines.
Driving the Automatic Transmission
The Automatic Transmission has 3 forward
gears and one reverse. In driving positions D
and 2 the Automatic Transmission changes
gears automatically while driving.
Position D
is the driving position normally used for city and highway driving. It ranges from zero to top
speed, and all three gears shift automatically
depending on driving speed.
Start in Park
The selector lever has a push button in the
handle. The push button must be
depressed when selecting the following
positions:
From P to R
R to P depress push button
N to R in handle
2 to 1
The selector lever can be moved freely
between the other positions.
The respective position is illuminated in the tachometer as long as the ignition key is in
the ignition lock.
Remember the following basic rules:
... Apply the parking brake or foot brake before
selecting a driving position. When the selector
lever is in a driving position, the car may creep
even at idle speed. Therefore, do not release
the parking brake or foot brake until you are
ready to move.
... Do not accelerate while selecting a driving
position. Wait for positive engagement. At this
time the engine must run at idle speed so that
no undue stress will be placed on the automatic
clutches in the transmission.
53
Position 2
is to be used for mountain driving or slow
driving, when towing a trailer and also when
you want to make use of the engine's braking
effect. In "2", only the first and second gears
will engage automatically. Therefore, only shift down into position "2" when the speed is below 63 mph or 100 km/h. It is not necessary to let up on the accelerator.
Position 1
is needed on rare occasions. It should only be
used up to 25 mph or 40 km/h. In "1" the
transmission will stay in first gear and not shift
into the second or third gear.
Only shift down into "1" when driving speed is below 25
mph or 40 km/h.
The reverse position R
Reverse should be selected only when the car has come to a full stop and the engine is
running at idle speed.
The back-up lights come on automatically
when you engage Reverse (with ignition on). Starting the engine
is only possible when the selector lever is in
Neutral or Park (N or P) . As long as one of
the driving positions is engaged a safety
switch prevents the engine from being started.
Emergency starting
Your Porsche with Automatic Transmission
cannot be started by pushing or towing.
Should the engine fail to start see "Emergency starting with jumper cables" or consult your
nearest authorized Porsche dealer.
DO NOT START OR TOW the car without
ATF in the transmission, as this will result
in serious damage to transmission and
torque converter.
Putting the car in gear
With the parking brake or foot brake set, shift
into the position you wish to use, usually
position D. To accelerate, release the brake
and depress the gas pedal.
WARNING
Do not release the brake before you are
prepared to move, because power is
transmitted to the wheels as soon as a
driving position is engaged.
Selecting a driving position while driving
is easy. Simply release the accelerator pedal
and move the selector lever from the position
you are in into the position you want. Then
step on the accelerator again.
WARNING
Do not shift to a lower driving position
until vehicle speed has dropped below the
specified limits. Engine speed will sudden-
ly increase and may cause engine damage and loss of vehicle control.
Stopping
When stopping temporarily, at traffic lights for
example, it is not necessary to move the
selector lever to Neutral. Simply apply the
brakes. To start again release the brake and
accelerate.
Parking
When parking your car, apply the parking
brake first, and then move the selector lever to position P. To do this, depress the button and
push the lever through R to P. The
transmission is then mechanically locked.
Park may only be engaged when the car is
stationary.
Do not remove the key from the ignition
steering lock until you have parked the car, because removal of the key locks the
steering wheel.
Shift out of the Park position, before releasing
the parking brake.
When the car is parked on a steep hill, shifting
out of Park may be a little harder. This is due
to the weight the car exerts on the
transmission.
54
Page 37 of 66
Changing Engine Oil
and Filter
High quality-multi-
grade oils are suitable for all year round driving. Seasonal oil changes are
therefore not necessary. Only if multi-grade
oils are not readily available, a single-
grade oil of the correct viscosity can be used.
Specifications of the various oils to be used
are detailed under "Filling Capacities and
Engine Oil". The use of oil additives is not
recommended by Porsche.
WARNING
When removing oil drain plug with your fingers, keep your arms as high as
possible. This will prevent hot oil from
running down your arm. Wear eye
protection.
Always use a new gasket when reinstalling the plug. Do not overtighten
the plug.
Before changing the engine oil yourself,
make sure that the disposal of the engine
oil and the oil filter, as special wastes, can
be carried out in the proper manner. Under absolutely no circumstance should used
oil find its way into the sewage system,
soil, rivers, ponds, or other
environmentally damaging areas. If there is no possibility of disposing of used oil in the proper manner
(when in doubt, consult local authorities),
please have the oil changed by your dealer or a service station.
Oil change intervals specified in the Warranty
& Maintenance booklet accompanying the
vehicle apply to normal operating conditions
and must be adhered to, including intervals for oil filter change.
If you drive mostly short distances, or if you
operate the vehicle in dusty areas, or under
predominantly stop-and-go traffic conditions,
or when temperatures remain below freezing
for extended periods, the engine oil should be
changed more frequently.
When chang
ing the engine oil and the oil filter, the splash shield under the car has to be
removed first.
Drain the oil when the engine is still warm.
71
The oil filter should be changed at the inter-
vals listed in your Maintenance Schedule.
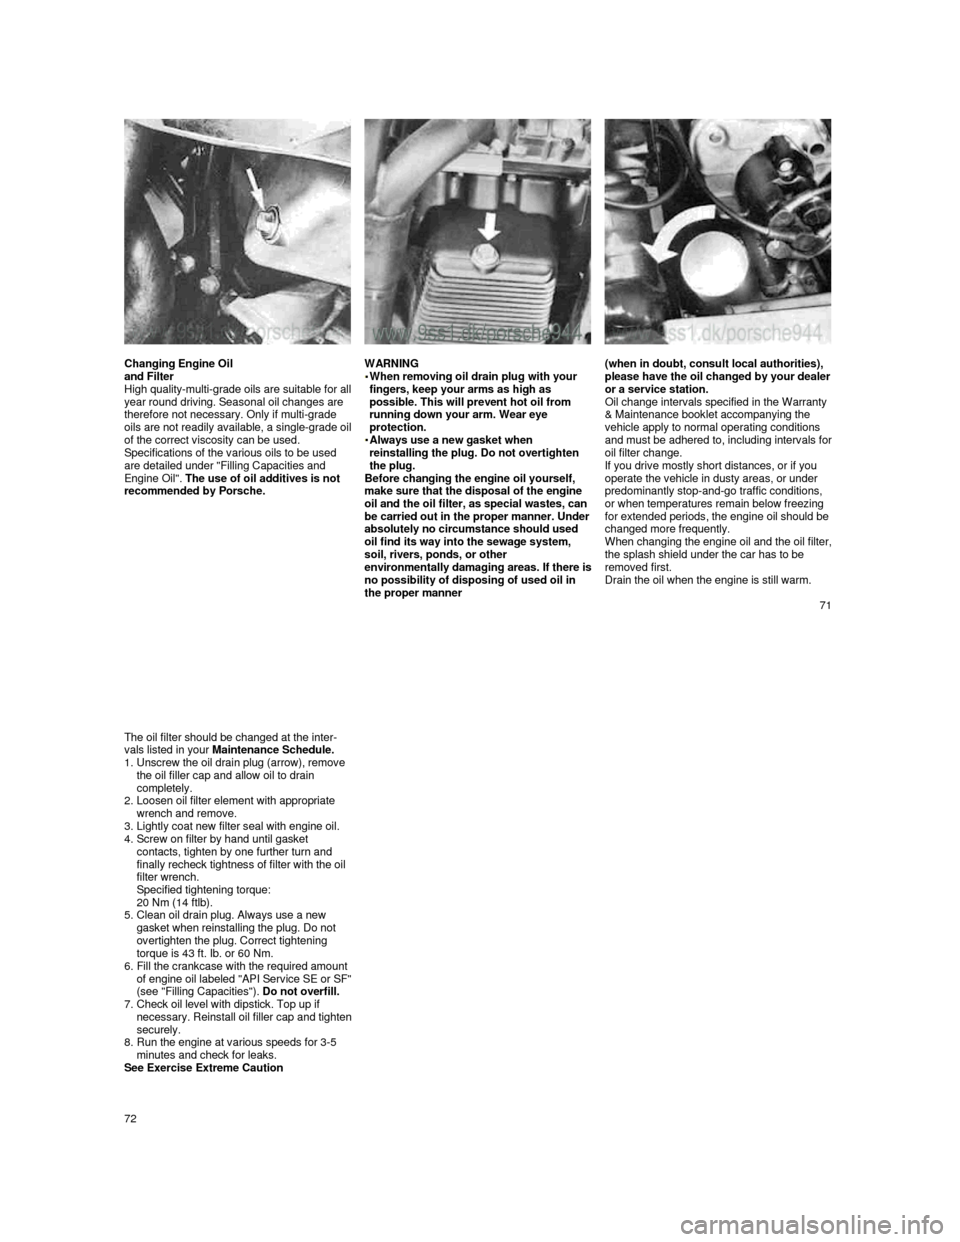
1. Unscrew the oil drain plug (arrow), remove the oil filler cap and allow oil to drain
completely.
2.
Loosen oil filter element with appropriate wrench and remove.
3. Lightly coat new filter seal with engine oil.
4. Screw on filter by hand until gasket
contacts, tighten by one further turn and
finally recheck tightness of filter with the oil
filter wrench.
Specified tightening torque:
20 Nm (14 ftlb).
5.
Clean oil drain plug. Always use a new
gasket when reinstalling the plug. Do not
overtighten the plug. Correct tightening
torque is 43 ft. Ib. or 60 Nm.
6.
Fill the crankcase with the required amount of engine oil labeled "API Service SE or SF" (see "Filling Capacities"). Do not overfill.
7. Check oil level with dipstick. Top up if necessary. Reinstall oil filler cap and tighten securely.
8. Run the engine at various speeds for 3-5
minutes and check for leaks.
See Exercise Extreme Caution
72
Page 39 of 66
When the engine is cold, the coolant level
should reach the minimum mark on the
expansion tank. When the engine is warm, the coolant level will be above the minimum mark. Since the closed cooling system loses almost
no coolant, topping up is normally not
required. An obvious loss of coolant indicates
leakage. In this case contact your dealer.
WARNING
Do not open the filler cap when the engine is hot because of the danger of
scalding. Allow the engine to cool down.
Protect your hands, arms and face.
Using a thick rag, open the cap carefully and only enough to allow excess
pressure to escape before removing the
cap.
To avoid damage to the engine, only add
cold antifreeze and cold water
to the cooling system when the engine is also cold. A warm engine should only be topped up if the coolant level has dropped appreciably below
the minimum mark. Too much added coolant
will escape through the pressure cap when coolant warms up.
If more than about 1.06 U.S qt or 1 liter must
be added, the cooling system should be bled.
Winter operation At the beginning of the winter season, have the coolant checked for anti-freeze
concentration.
The ratio between water and anti-freeze
necessary to prevent freezing depends on the
anticipated outside temperatures. The ratios
can be taken from the mixing chart listed
under "Filling Capacities" or from the container of the antifreeze manufacturer.
Increasing the anti-freeze in the coolant
further than shown on the container is not
only uneconomical, it is also detrimental to engine cooling.
75
944 Draining the coolant
Engine must be cold
1. Move temperature control lever to "warm".
2.
Remove filler cap from expansion tank.
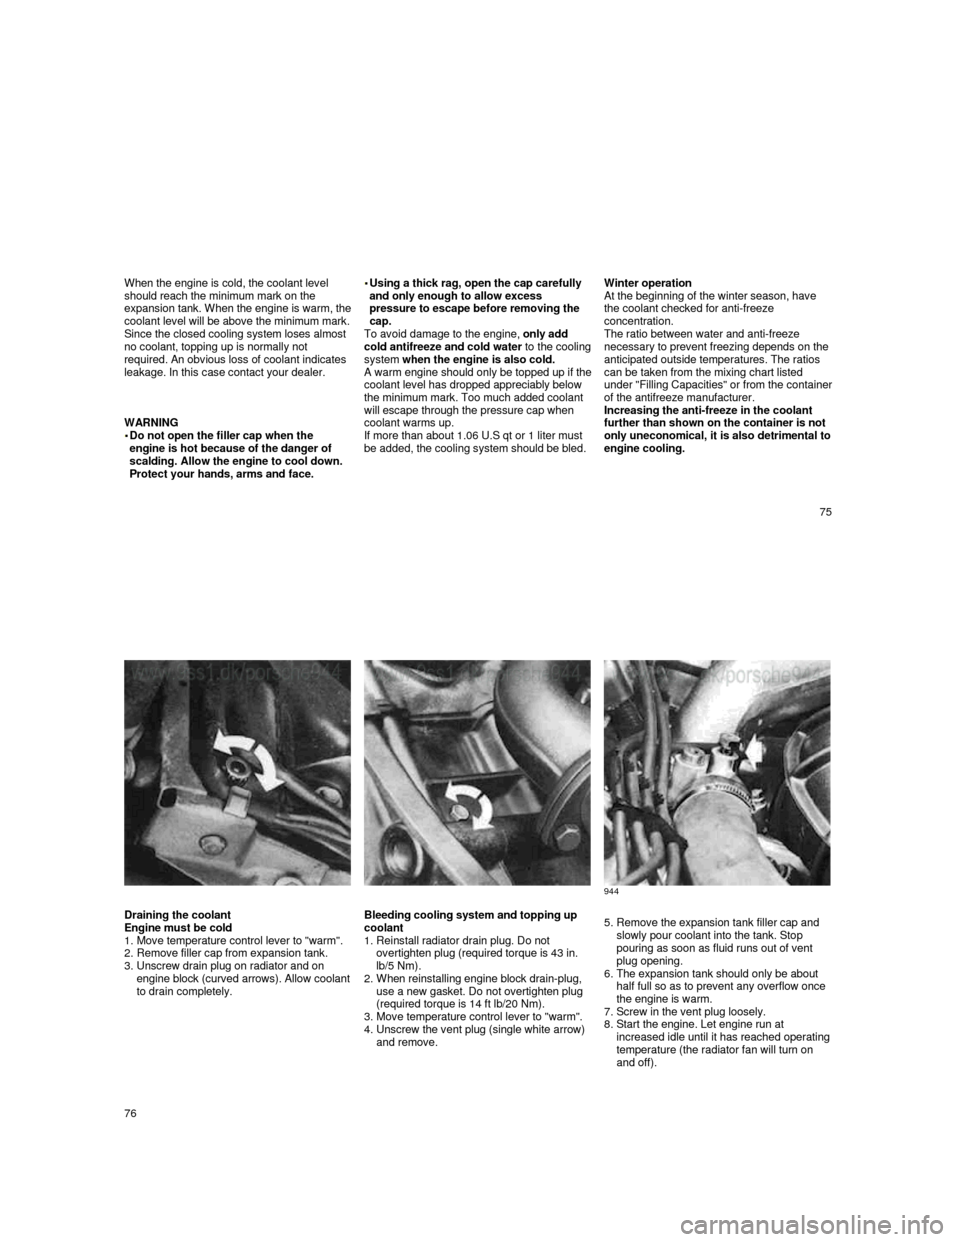
3. Unscrew drain plug on radiator and on engine block (curved arrows). Allow coolant to drain completely.
Bleeding cooling system and topping up
coolant
1. Reinstall radiator drain plug. Do not overtighten plug (required torque is 43 in.
lb/5 Nm).
2.
When reinstalling engine block drain-plug,
use a new gasket. Do not overtighten plug
(required torque is 14 ft lb/20 Nm).
3.
Move temperature control lever to "warm".
4. Unscrew the vent plug (single white arrow)
and remove.
5. Remove the expansion tank filler cap and
slowly pour coolant into the tank. Stop
pouring as soon as fluid runs out of vent
plug opening.
6.
The expansion tank should only be about
half full so as to prevent any overflow once
the engine is warm.
7.
Screw in the vent plug loosely.
8. Start the engine. Let engine run at increased idle until it has reached operating temperature (the radiator fan will turn on
and off).
76
Page 40 of 66
944 S
944 Turbo
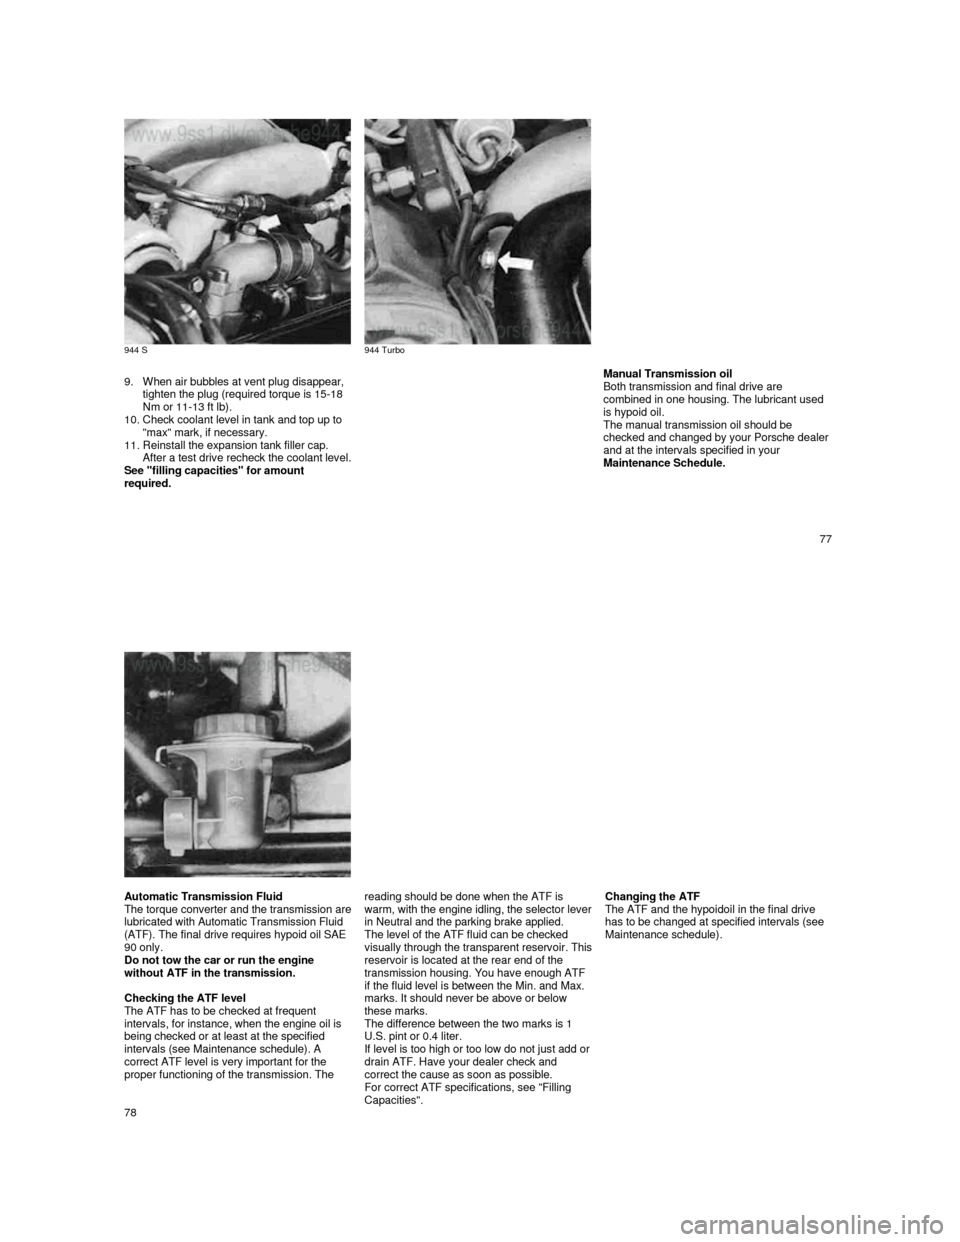
9. When air bubbles at vent plug disappear, tighten the plug (required torque is 15-18
Nm or 11-13 ft lb).
10.
Check coolant level in tank and top up to
"max" mark, if necessary.
11.
Reinstall the expansion tank filler cap. After a test drive recheck the coolant level. See "filling capacities" for amount
required.
Manual Transmission oil
Both transmission and final drive are
combined in one housing. The lubricant used
is hypoid oil.
The manual transmission oil should be
checked and changed by your Porsche dealer
and at the intervals specified in your
Maintenance Schedule.
77
Automatic Transmission Fluid The torque converter and the transmission are lubricated with Automatic Transmission Fluid
(ATF). The final drive requires hypoid oil SAE
90 only.
Do not tow the car or run the engine
without ATF in the transmission.
Checking the ATF level
The ATF has to be checked at frequent
intervals, for instance, when the engine oil is
being checked or at least at the specified
intervals (see Maintenance schedule). A
correct ATF level is very important for the
proper functioning of the transmission. The
reading should be done when the ATF is warm, with the engine idling, the selector lever in Neutral and the parking brake applied.
The level of the ATF fluid can be checked
visually through the transparent reservoir. This reservoir is located at the rear end of the
transmission housing. You have enough ATF
if the fluid level is between the Min. and Max.
marks. It should never be above or below
these marks.
The difference between the two marks is 1
U.S. pint or 0.4 liter.
If level is too high or too low do not just add or
drain ATF. Have your dealer check and
correct the cause as soon as possible.
For correct ATF specifications, see "Filling
Capacities".
Changing the ATF
The ATF and the hypoidoil in the final drive
has to be changed at specified intervals (see
Maintenance schedule).
78
Page 42 of 66
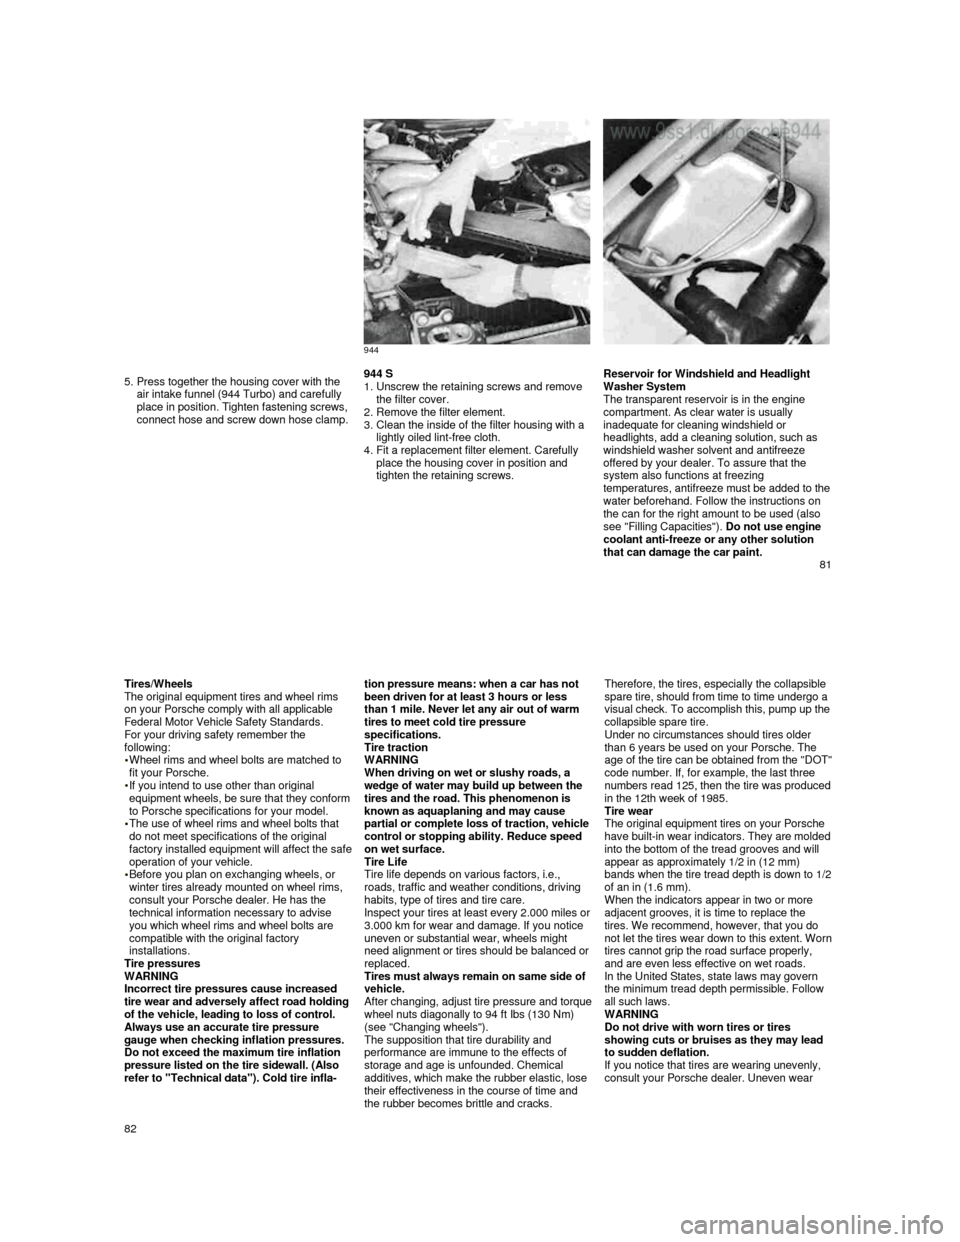
944
5. Press together the housing cover with the air intake funnel (944 Turbo) and carefully
place in position. Tighten fastening screws,
connect hose and screw down hose clamp.
944 S
1. Unscrew the retaining screws and remove
the filter cover.
2.
Remove the filter element.
3. Clean the inside of the filter housing with a
lightly oiled lint-free cloth.
4.
Fit a replacement filter element. Carefully
place the housing cover in position and
tighten the retaining screws.
Reservoir for Windshield and Headlight
Washer System
The transparent reservoir is in the engine
compartment. As clear water is usually
inadequate for cleaning windshield or
headlights, add a cleaning solution, such as
windshield washer solvent and antifreeze offered by your dealer. To assure that the
system also functions at freezing
temperatures, antifreeze must be added to the water beforehand. Follow the instructions on the can for the right amount to be used (also
see "Filling Capacities"). Do not use engine
coolant anti-freeze or any other solution
that can damage the car paint.
81
Tires/Wheels
The original equipment tires and wheel rims
on your Porsche comply with all applicable
Federal Motor Vehicle Safety Standards.
For your driving safety remember the
following:
Wheel rims and wheel bolts are matched to
fit your Porsche.
If you intend to use other than original equipment wheels, be sure that they conform to Porsche specifications for your model. The use of wheel rims and wheel bolts that
do not meet specifications of the original
factory installed equipment will affect the safe operation of your vehicle. Before you plan on exchanging wheels, or winter tires already mounted on wheel rims, consult your Porsche dealer. He has the
technical information necessary to advise
you which wheel rims and wheel bolts are
compatible with the original factory
installations.
Tire pressures
WARNING
Incorrect tire pressures cause increased
tire wear and adversely affect road holding of the vehicle, leading to loss of control.
Always use an accurate tire pressure
gauge when checking inflation pressures.
Do not exceed the maximum tire inflation
pressure listed on the tire sidewall. (Also
refer to "Technical data"). Cold tire infla-
tion pressure means: when a car has not been driven for at least 3 hours or less
than 1 mile. Never let any air out of warm
tires to meet cold tire pressure
specifications.
Tire traction
WARNING
When driving on wet or slushy roads, a
wedge of water may build up between the
tires and the road. This phenomenon is
known as aquaplaning and may cause
partial or com
plete loss of traction, vehicle control or stopping ability. Reduce speed
on wet surface.
Tire Life
Tire life depends on various factors, i.e.,
roads, traffic and weather conditions, driving
habits, type of tires and tire care.
Inspect your tires at least
every 2.000 miles or 3.000 km for wear and damage. If you notice
uneven or substantial wear, wheels might
need alignment or tires should be balanced or
replaced.
Tires must always remain on same side of
vehicle.
After changing, adjust tire pressure and torque wheel nuts diagonally to 94 ft Ibs (130 Nm) (see "Changing wheels").
The supposition that tire durability and
performance are immune to the effects of
storage and age is unfounded. Chemical
additives, which make the rubber elastic, lose
their effectiveness in the course of time and
the rubber becomes brittle and cracks.
Therefore, the tires, especially the collapsible
spare tire, should from time to time undergo a
visual check. To accomplish this,
pump up the collapsible spare tire.
Under no circumstances should tires older
than 6 years be used on your Porsche. The
age of the tire can be obtained from the "DOT" code number. If, for example, the last three
numbers read 125, then the tire was produced in the 12th week of 1985.
Tire wear
The original equipment tires on your Porsche
have built-
in wear indicators. They are molded into the bottom of the tread grooves and will
appear as approximately 1/2 in (12 mm)
bands when the tire tread depth is down to
1/2 of an in (1.6 mm).
When the indicators appear in two or more
adjacent grooves, it is time to replace the
tires. We recommend, however, that you do
not let the tires wear down to this extent. Worn tires cannot grip the road surface properly,
and are even less effective on wet roads.
In the United States, state laws may govern
the minimum tread depth permissible. Follow
all such laws.
WARNING
Do not drive with worn tires or tires
showing cuts or bruises as they may lead
to sudden deflation.
If you notice that tires are wearing unevenly,
consult your Porsche dealer. Uneven wear
82
Page 45 of 66
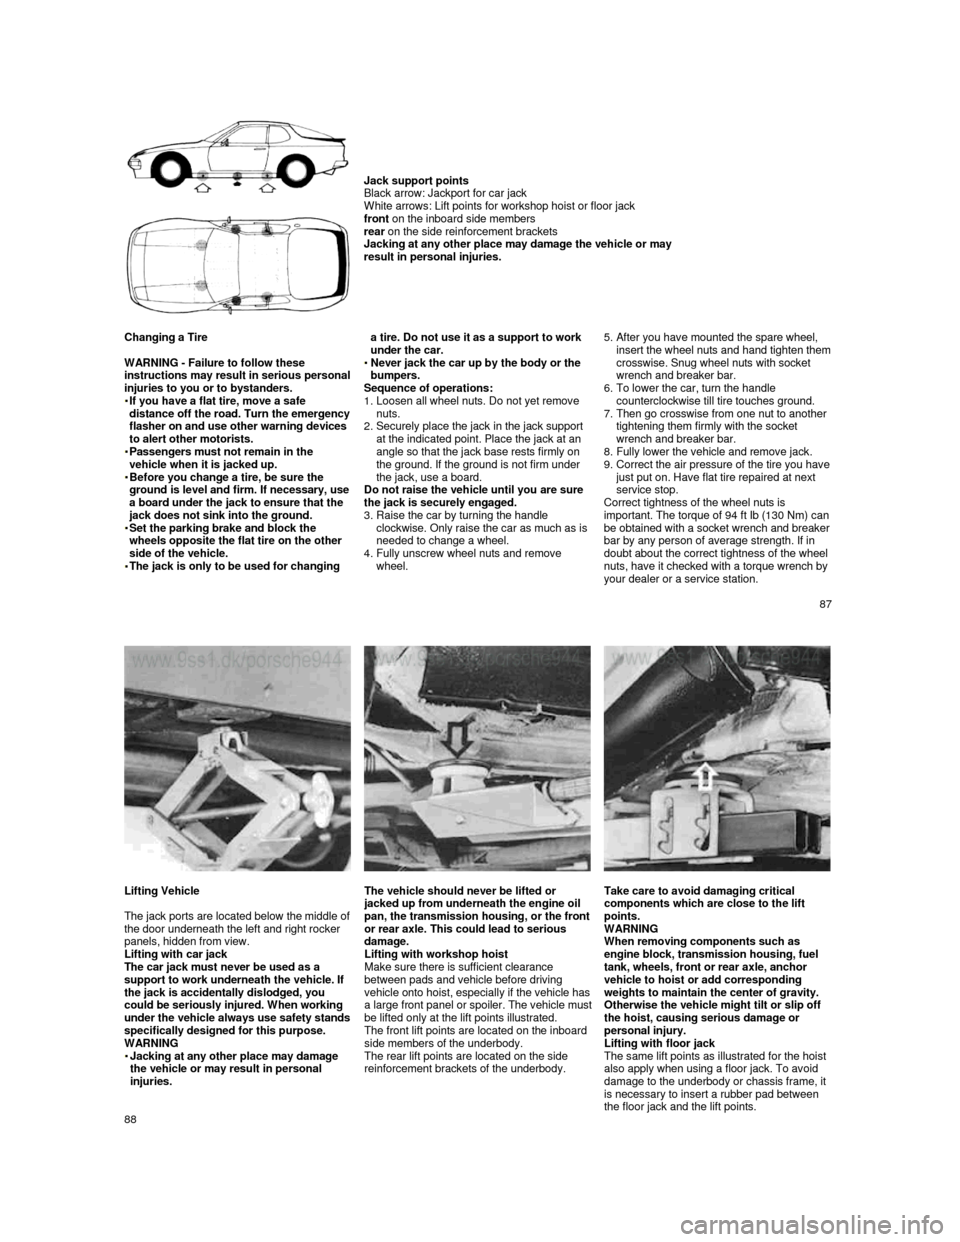
Jack support points
Black arrow: Jackport for car jack
White arrows: Lift points for workshop hoist or flo or jack
front on the inboard side members
rear on the side reinforcement brackets
Jacking at any other place may damage the vehicle o r may
result in personal injuries.
Changing a Tire
WARNING - Failure to follow these
instructions may result in serious personal injuries to you or to bystanders.
If you have a flat tire, move a safe distance off the road. Turn the emergency flasher on and use other warning devices
to alert other motorists.
Passengers must not remain in the vehicle when it is jacked up. Before you change a tire, be sure the ground is level and firm. If necessary, use a board under the jack to ensure that the jack does not sink into the ground. Set the parking brake and block the wheels opposite the flat tire on the other
side of the vehicle.
The jack is only to be used for changing
a tire. Do not use it as a support to work
under the car.
Never jack the car up by the body or the bumpers.
Sequence of operations:
1.
Loosen all wheel nuts. Do not yet remove
nuts.
2.
Securely place the jack in the jack support
at the indicated point. Place the jack at an
angle so that the jack base rests firmly on
the ground. If the ground is not firm under
the jack, use a board.
Do not raise the vehicle until you are sure
the jack is securely engaged.
3.
Raise the car by turning the handle
clockwise. Only raise the car as much as is
needed to change a wheel.
4.
Fully unscrew wheel nuts and remove wheel.
5. After you have mounted the spare wheel, insert the wheel nuts and hand tighten them crosswise. Snug wheel nuts with socket wrench and breaker bar.
6. To lower the car, turn the handle
counterclockwise till tire touches ground.
7.
Then go crosswise from one nut to another
tightening them firmly with the socket
wrench and breaker bar.
8. Fully lower the vehicle and remove jack.
9. Correct the air pressure of the tire you have just put on. Have flat tire repaired at next service stop.
Correct tightness of the wheel nuts is
important. The torque of 94 ft Ib (130 Nm) can
be obtained with a socket wrenc
h and breaker bar by any person of average strength. If in
doubt about the correct tightness of the wheel
nuts, have it checked with a torque wrench by
your dealer or a service station.
87
Lifting Vehicle
The jack ports are located below the middle of the door underneath the left and right rocker
panels, hidden from view.
Lifting with car jack
The car jack must never be used as a
support to work underneath the vehicle. If
the jack is accidentally dislodged, you
could be seriously injured. When working
under the vehicle always use safety stands specifically designed for this purpose.
WARNING
Jacking at any other place may damage the vehicle or may result in personal injuries.
The vehicle should never be lifted or jacked up from underneath the engine oil pan, the transmission housing, or the front or rear axle. This could lead to serious
damage.
Lifting with workshop hoist
Make sure there is sufficient clearance
between pads and vehicle before driving
vehicle onto hoist, especially if the vehicle
has a large front panel or spoiler. The vehicle must be lifted only at the lift points illustrated.
The front lift points are located on the inboard
side members of the underbody.
The rear lift points are located on the side
reinforcement brackets of the underbody.
Take care to avoid damaging critical
components which are close to the lift
points.
WARNING
When removing components such as
engine block, transmission housing, fuel
tank, wheels, front or rear axle, anchor
vehicle to hoist or add corresponding
weights to maintain the center of gravity.
Otherwise the vehicle might tilt or slip off
the hoist, causing serious damage or
personal injury.
Lifting with floor jack
The same lift points as illustrated for the hoist
also apply when using a floor jack. To avoid
damage to the underbody or chassis frame, it
is necessary to insert a rubber pad between
the floor jack and the lift points.
88
Page 54 of 66

Technical Data
105
Engine 944 Number of cylinders
4
Bore 3.94 in. / 100 mm
Stroke 3.11 in. / 78.9 mm
Displacement 151 cu. in. / 2479 cm
3
Compression ratio 9.7:1
SAE net-power 147 hp/ 110 kW at 5800 rpm
SAE net-torque 140 ft lb / 190 Nm at 3000 rpm
Output per liter 59,3 SAE net-hp / 44,4 SAE net-kW
Max. permissible rpm 6500
Fuel octane rating Unleaded fuel only 91 RON (87 CLC or AKI ((R+M)/2) rating on fuel pump s in U.S.A.)
Spark plugs Bosch WR 7 DC or
Champion RN 9 YC
Electrode gap 0.028 + 0.004 in. / 0.7 + 0.1 mm
Battery capacity 12 volts, 63 Ah
Alternator output 1610W/115A
Firing order 1-3-4-2
Ignition timing Self-adjusting DME (Digital-Motor-E lectronic)
Ignition Transistorized ignition system with breake r less distributor
Belt for alternator Polyrib K6 1000 Lw
Belt for servo pump 9.5 x 950 LA
Valve clearance Hydraulic valve clearance compensat ion
106
Page 55 of 66

Engine 944 S Number of cylinders
4
Bore 3.94 in. / 100 mm
Stroke 3.11 in. / 78.9 mm
Displacement 151 cu. in. / 2479 cm
3
Compression ratio 10.9:1
SAE net-power 188 hp/ 140 kW at 6000 rpm
SAE net-torque 170 ft lb / 230 Nm at 4300 rpm
Output per liter 75,8 SAE net-hp / 56,5 SAE net-kW
Max. permissible rpm 6800
Fuel octane rating Unleaded fuel only 95 RON (90 CLC or AKI ((R+M)/2) rating on fuel pump s in U.S.A.)
Spark plugs Bosch WR 7 DC
Electrode gap 0.028 + 0.004 in. / 0.7 + 0.1 mm
Battery capacity 12 volts, 63 Ah
Alternator output 1610W/115A
Firing order 1-3-4-2
Ignition timing Self-adjusting DME (Digital-Motor-E lectronic)
Ignition Transistorized ignition system with breake r less distributor
Belt for alternator Polyrib K6 1000 Lw
Belt for servo pump 9.5 x 950 LA
Valve clearance Hydraulic valve clearance compensat ion
107
Engine 944 Turbo
Number of cylinders
4
Bore 3.94 in. / 100 mm
Stroke 3.11 in. / 78.9 mm
Displacement 151 cu. in. / 2479 cm
3
Compression ratio 8.0:1
SAE net-power 217 hp/ 162 kW at 5800 rpm
SAE net-torque 243 ft lb / 330 Nm at 3500 rpm
Output per liter 87,5 SAE net-hp / 65,3 SAE net-kW
Max. permissible rpm 6500
Fuel octane rating Unleaded fuel only 90 RON (90 CLC or AKI ((R+M)/2) rating on fuel pump s in U.S.A.)
Spark plugs Bosch WR 7 DC
Electrode gap 0.028 + 0.004 in. / 0.7 + 0.1 mm
Battery capacity 12 volts, 63 Ah
Alternator output 1610W/115A
Firing order 1-3-4-2
Ignition timing Self-adjusting DME (Digital-Motor-E lectronic)
Ignition Transistorized ignition system with breake r less distributor
Belt for alternator Polyrib K6 1000 Lw
Belt for servo pump 9.5 x 950 LA
Valve clearance Hydraulic valve clearance compensat ion
108
Page 56 of 66

Engine Design Specifications
Design
Operating cycle
Lubrication
Cylinder block
Cylinder head
Valve operation
Camshaft drive
Crankshaft
Fuel injection 4-cylinder, in-line engine, front mount with two ba
lance-shafts
4-stroke
Pressure oil circulation from oil sump,
full flow filter
Light metal
Light metal
Overhead camshaft
(944 S: 2 overhead camshafts)
Spur belt drive
Forged, 5 main bearings
AFC (Air Flow Control) Power Train
Manual transmission
Gear ratio
1st gear
2nd gear
3rd gear
4th gear
5th gear
Axle ratio Gear ratio 944
3.600:1
2.125:1
1.458:1
1.071:1
0.730:1
3.500:1
3.889:1 Gear ratio 944 S
3.500:1
2.059:1
1.400:1
1.034:1
0.829:1
3.500:1
3.889:1 Gear ratio 944 Turbo
3.500:1
2.059:1
1.400:1
1.034:1
0.829:1
3.500:1
3.375:1
Clutch
Power transmission Single plate dry disc, hydraulically operated
Double constant velocity joints and drive shaft
Automatic transmission 944
Gear ratio 1st gear
2nd gear
3rd gear
Reverse gear
Axle ratio
Clutch 2.714:1
1.500:1
1.000:1
2.429:1
3.455:1
Hydrodynamic torque converter
109
Filling Capacities
Engine oil With filter change approx. 6.34 (Turbo: approx. 6.87) U.S. qts. or 6 (Turbo: approx. 6.5) liters.
Check oil level with dipstick a few minutes after e ngine has stopped. The difference between
the max. and min. marks on the dipstick is approx. 1 U.S. qt. or 1 liter.
Only use brand name oil which has been tested and a pproved by Porsche.
Your authorized Porsche dealer will be glad to advi se you.
Porsche does not recommend the use of oil additives . See also "Engine Oils".
Cooling system with heating
Approx. 8,2 U.S. qts. or 7,8 liters. Factory filled to -31°F (-35°C). Only use phosphate-free
anti-freeze containing ethylene glycol recommended for aluminum engines and radiators.
Manual transmission
Approx. 0.53 U.S. gal. or 2.0 liters. Use hypoid oi l SAE 80 labeled "For Service API/GL4 or
Mil-L 2105".
Automatic transmission with
torque converter Approx. 1.72 U.S. gal. or 6.5 liters ATF Dexron®. At oil c hanges 3 U.S. qts. or 2.8 liters are
required.
Differential of automatic transmission
Approx. 1 U.S. qts. or 1 liter hypoid oil SAE 90 ac cording to API classification GL 5 or
Mil-L 2105 B.
Power steering
Approx. 0.63 U.S. qts. or 0.6 liter ATF Dexron®
Fuel tank Approx. 21.1 U.S. gals, or 80 liters including a re serve of 2.1 U.S. gals, or 8 liters.
Unleaded fuel only! Minimum octane rating 944 91 RO N (87 CLC or AKI ((R+M)/2) rating on fuel
pumps in U.S.A.), 944 S / 944 Turbo 95 RON (90 CLC or AKI ((R+M)/2) rating on fuel pumps in U.S.A.)
Brake fluid Approx. 0.42 U.S. pint or 0.2 liter. Only use brake fluid conforming to specifications
SAE J 1703, DOT 3 or DOT 4.
Windshield and headlight washer system
Approx. 1.59 U.S. gals, or 6.0 liters.
Refrigerant for air conditioning Approx. 33.5 oz or 950 g. Refrigerant R 12 (CCI2F2)
Cooling system mixing chart
(Approximate values)
Anti-freeze-Water
Consult your authorized dealer about
the approved anti-freeze mixtures. Temp, down to
-13° F (-25°C) -23° F (-30° C) -31° F (-35° C)
Anti-freeze
40%
45%
50% Water
60% 55% 50%
Anti-freeze
3.1 liters / 3.3 U.S. qts.3.5 liters / 3.7 U.S. qts.3.9 liters / 4.1 U.S. qts.
Water
4.7 liters / 5.0 U.S. qts.
4.3 liters / 4.5 U.S. qts. 3.9 liters / 4.1 U.S. qts.
110
Page 65 of 66
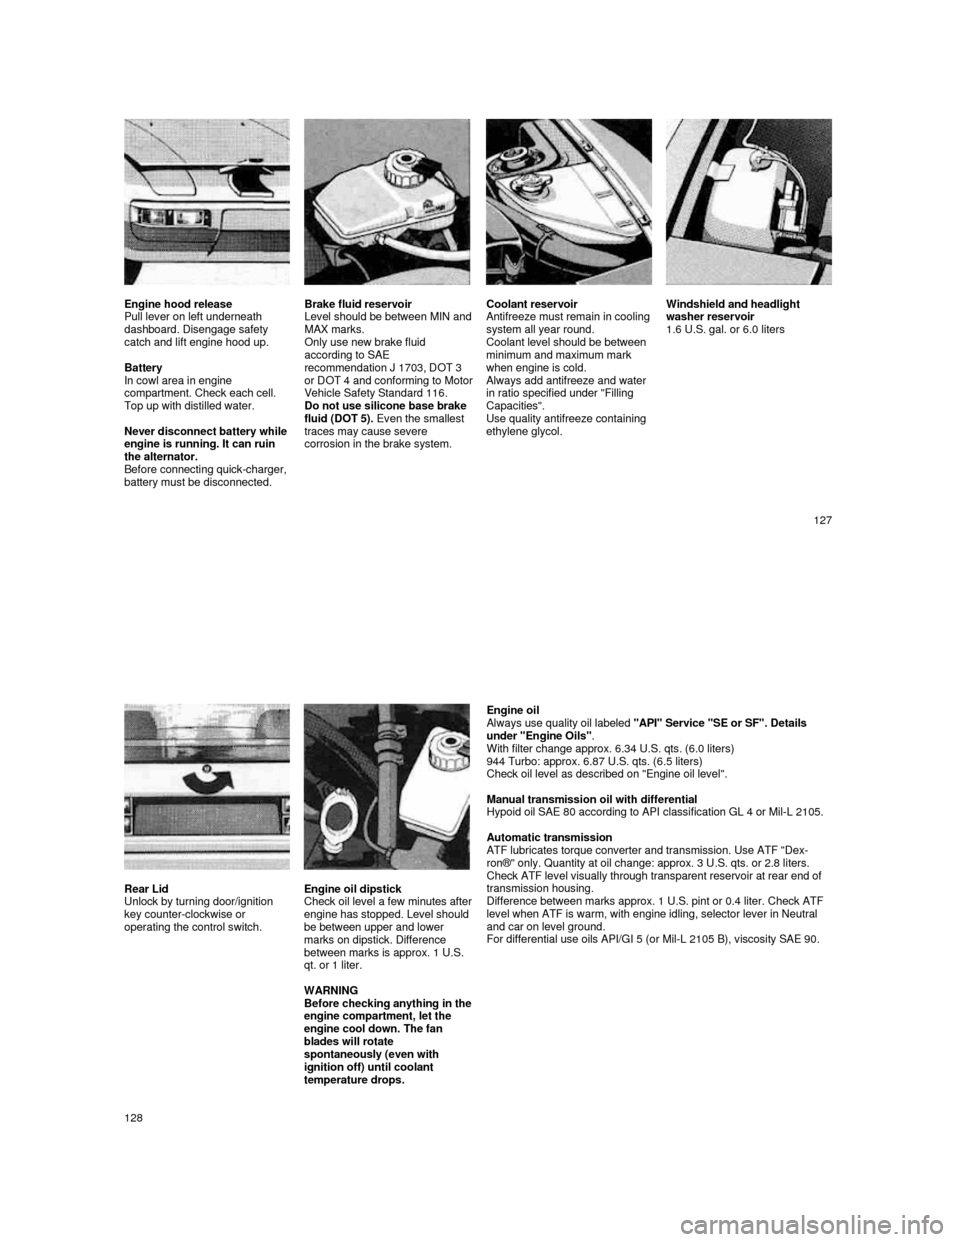
Engine hood release
Pull lever on left underneath
dashboard. Disengage safety
catch and lift engine hood up.
Battery
In cowl area in engine
compartment. Check each cell.
Top up with distilled water.
Never disconnect battery while
engine is running. It can ruin
the alternator.
Before connecting quick-charger,
battery must be disconnected. Brake fluid reservoir
Level should be between MIN and MAX marks.
Only use new brake fluid
according to SAE
recommendation J 1703, DOT 3
or DOT 4 and conforming to Motor Vehicle Safety Standard 116.
Do not use silicone base brake
fluid (DOT 5). Even the smallest
traces may cause severe
corrosion in the brake system.
Coolant reservoir
Antifreeze must remain in cooling
system all year round.
Coolant level should be between
minimum and maximum mark
when engine is cold. Always add antifreeze and water in ratio specified under "Filling
Capacities".
Use quality antifreeze containing
ethylene glycol.
Windshield and headlight
washer reservoir
1.6 U.S. gal. or 6.0 liters
127
Rear Lid
Unlock by turning door/ignition
key counter-clockwise or
operating the control switch.
Engine oil dipstick
Check oil level a few minutes after engine has stopped. Level should
be between upper and lower
marks on dipstick. Difference
between marks is approx. 1 U.S.
qt. or 1 liter.
WARNING
Before checking anything in
the engine compartment, let the
engine cool down. The fan
blades will rotate
spontaneously (even with
ignition off) until coolant
temperature drops.
Engine oil Always use quality oil labeled "API" Service "SE or SF". Details
under "Engine Oils" .
With filter change approx. 6.34 U.S. qts. (6.0 lite rs)
944 Turbo: approx. 6.87 U.S. qts. (6.5 liters)
Check oil level as described on "Engine oil level".
Manual transmission oil with differential
Hypoid oil SAE 80 according to API classification G L 4 or Mil-L 2105.
Automatic transmission
ATF lubricates torque converter and transmission. U se ATF "Dex-
ron®" only. Quantity at oil change: approx. 3 U.S. qts. or 2.8 liters.
Check ATF level visually through transparent reserv oir at rear end of
transmission housing.
Difference between marks approx. 1 U.S. pint or 0.4 liter. Check ATF
level when ATF is warm, with engine idling, selecto r lever in Neutral
and car on level ground.
For differential use oils API/GI 5 (or Mil-L 2105 B ), viscosity SAE 90.
128