fuel cap PORSCHE BOXSTER 2005 2.G Owners Manual
[x] Cancel search | Manufacturer: PORSCHE, Model Year: 2005, Model line: BOXSTER, Model: PORSCHE BOXSTER 2005 2.GPages: 276, PDF Size: 4.05 MB
Page 12 of 276

12
Controls, Instruments
Dear Porsche Owner A lot has gone into the manufacture of your
Porsche, including advanced engineering, rigid
quality control and demanding inspections.
These engineering and safety features will be
enhanced by you... the safe driver... – who knows his car and all controls,
– who maintains the vehicle properly,
– who uses driving skills wisely, and always
drives within her/his own capabilities and the
level of familiarity with the vehicle.
You will find helpful hints in this manual on how to
perform most of the checks listed on the following
pages.
If in doubt, have these checks performed by your
authorized Porsche dealer.
Before driving off... Check the following items first fTurn the engine off before you attempt any
checks or repairs on the vehicle.
fBe sure the tires are inflated correctly.
Check tires for damage and tire wear.
fSee that wheel bolts are properly tightened
and not loose or missing.
fCheck engine oil level, add if necessary.
Make it a habit to have engine oil checked with
every fuel filling.
fCheck all fluid levels such as windshield was-
her and brake fluid levels.
fBe sure the vehicle battery is well charged and
cranks the engine properly.
fCheck all doors and lids for proper operation
and latch them properly.
fCheck and if necessary replace worn or cra-
cked wiper blades.
fSee that all windows are clear and unobstruc-
ted.
fCheck air intake slots and area between front
lid and windshield are free of snow and ice, so
the heater and the windshield wipers work pro-
perly. fIf a child will be riding in the vehicle, check
child seat/child seat restraint system to ensure
that restraints are properly adjusted.
fCheck all exterior and interior lights for opera-
tion and that the lenses are clean.
fCheck the headlights for proper aim, and if ne-
cessary, have them adjusted.
fCheck under the vehicle for leaks.
fBe sure all luggage is stowed securely.
Emergency equipment It is good practice to carry emergency equipment
in your vehicle.
Some of the items you should have are:
window scraper, snow brush, container or bag of
sand or salt, emergency light, small shovel, first-
aid kit, etc.
Page 82 of 276
82
Controls, Instruments
Level gauge
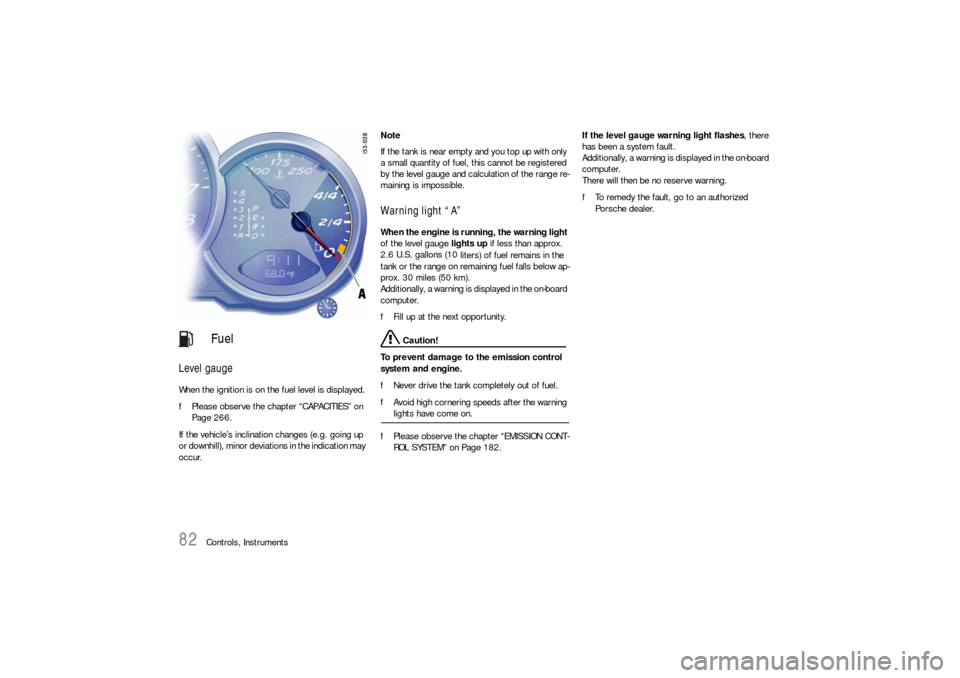
When the ignition is on the fuel level is displayed.
fPlease observe the chapter “CAPACITIES” on
Page 266.
If the vehicle’s inclination changes (e.g. going up
or downhill), minor deviations in the indication may
occur. Note
If the tank is near empty and you top up with only
a small quantity of fuel, this cannot be registered
by the level gauge and calculation of the range re-
maining is impossible.
Warning light “A” When the engine is running, the warning light
of the level gauge lights up if less than approx.
2.6 U.S. gallons (10
liters) of fuel remains in the
tank or the range on remaining fuel falls below ap-
prox. 30 miles (50 km).
Additionally, a warning is displayed in the on-board
computer.
fFill up at the next opportunity.
Caution!
To prevent damage to the emission control
system and engine.
fNever drive the tank completely out of fuel.
fAvoid high cornering speeds after the warning lights have come on.
fPlease observe the chapter “EMISSION CONT-
ROL SYSTEM” on Page 182.If the level gauge warning light flashes, there
has been a system fault.
Additionally, a warning is displayed in the on-board
computer.
There will then be no reserve warning.
fTo remedy the fault, go to an authorized
Porsche dealer.
Fuel
Page 84 of 276
84
Controls, Instruments If the battery voltage drops abruptly, a warning
m e s s a g e w i l l b e d i s p l a y e d b y t h e o n - b o a rd c o m p u -
ter.
If the warning is displayed by the on-board
computer while the engine is running or while
driving:
fStop the car in a safe place and stop the
engine.
Possible causes
– Defect in the battery charging system.
– Broken drive belt. Warning!
Risk of an accident and risk of engine dam-
age.
A broken drive belt means there is no power
assistance to the steering (more effort is re-
quired to steer) and coolant pump function
will stop.
fDo not continue driving.
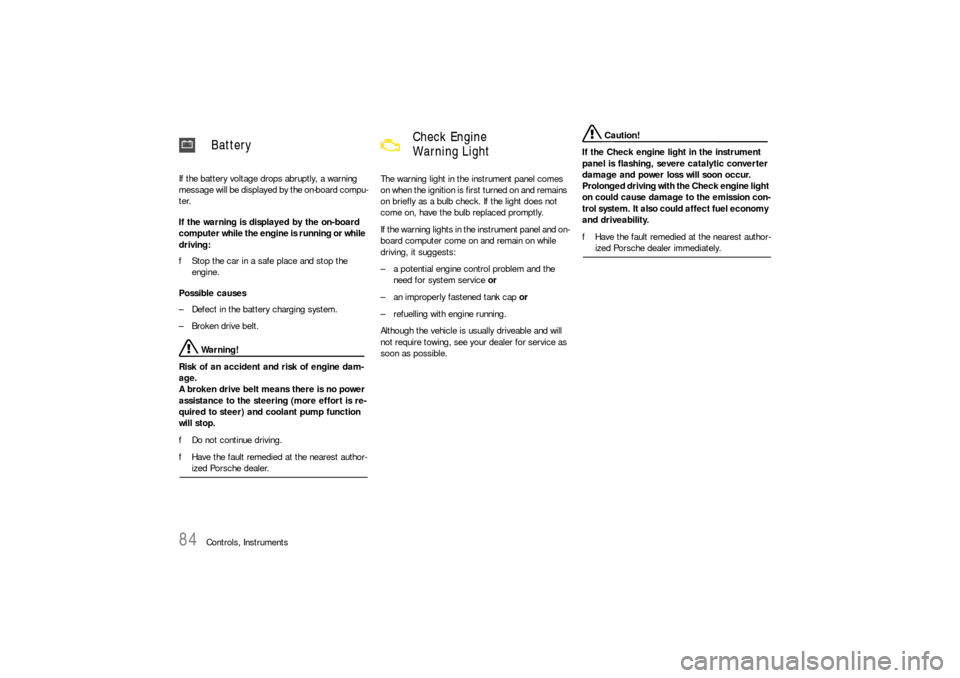
fHave the fault remedied at the nearest author-ized Porsche dealer. The warning light in the instrument panel comes
on when the ignition is first turned on and remains
on briefly as a bulb check. If the light does not
come on, have the bulb replaced promptly.
If the warning lights in the instrument panel and on-
board computer come on and remain on while
driving, it suggests:
– a potential engine control problem and the
need for system service or
– an improperly fastened tank cap or
– refuelling with engine running.
Although the vehicle is usually driveable and will
not require towing, see your dealer for service as
soon as possible.
Caution!
If the Check engine light in the instrument
panel is flashing, severe catalytic converter
damage and power loss will soon occur.
Prolonged driving with the Check engine light
on could cause damage to the emission con-
trol system. It also could affect fuel economy
and driveability.
fHave the fault remedied at the nearest author-ized Porsche dealer immediately.
Battery
Check Engine
Warning Light
Page 173 of 276
Maintenance, Car Care
173
Engine Oil Level fPlease observe the chapter “EXERCISE EXTRE-
ME CAUTION WHEN WORKING ON YOUR VE-
HICLE” on Page 168.
fRegularly check the oil level using the on-board
computer after the vehicle is refuelled.
Please observe the chapter “OIL DISPLAY AND
MEASUREMENT OF THE ENGINE OIL LEVEL”
on Page 97.
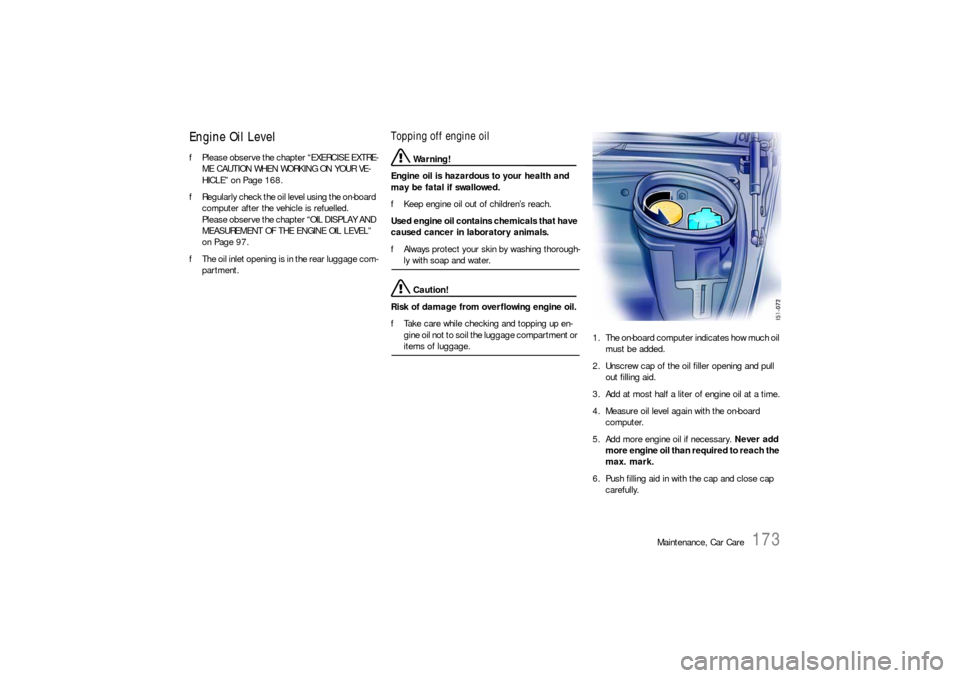
fThe oil inlet opening is in the rear luggage com-
partment.
Topping off engine oil
Warning!
Engine oil is hazardous to your health and
may be fatal if swallowed.
fKeep engine oil out of children’s reach.
Used engine oil contains chemicals that have
caused cancer in laboratory animals.
fAlways protect your skin by washing thorough-ly with soap and water. Caution!
Risk of damage from overflowing engine oil.
fTake care while checking and topping up en-
gine oil not to soil the luggage compartment or items of luggage. 1. The on-board computer indicates how much oil
must be added.
2. Unscrew cap of the oil filler opening and pull
out filling aid.
3. Add at most half a liter of engine oil at a time.
4. Measure oil level again with the on-board
computer.
5. Add more engine oil if necessary. Never add
more engine oil than required to reach the
max. mark.
6. Push filling aid in with the cap and close cap
carefully.
Page 178 of 276
178
Maintenance, Car Care
Fuel
Warning!
Fuel is highly flammable and harmful to
health.
fFire, open flame and smoking are prohibited
when handling fuel.
fAvoid contact with skin or clothing.
fDo not inhale fuel vapors.
To prevent damage to the emission control
system and engine:
fNever drive the tank completely out of fuel.
fAvoid high cornering speeds after the warning lights have come on.
fPlease observe the chapter “FUEL ECONOMY”
on Page 177.
fPlease observe the chapter “EMISSION CONT-
ROL SYSTEM” on Page 182.
fPlease observe the chapter “FUEL” on Page
82.
Check engine warning light
If the warning lights in the instrument panel and on-
board computer come on and remain on while
driving, it suggests:
– an improperly fastened tank cap or
– refuelling with engine running.
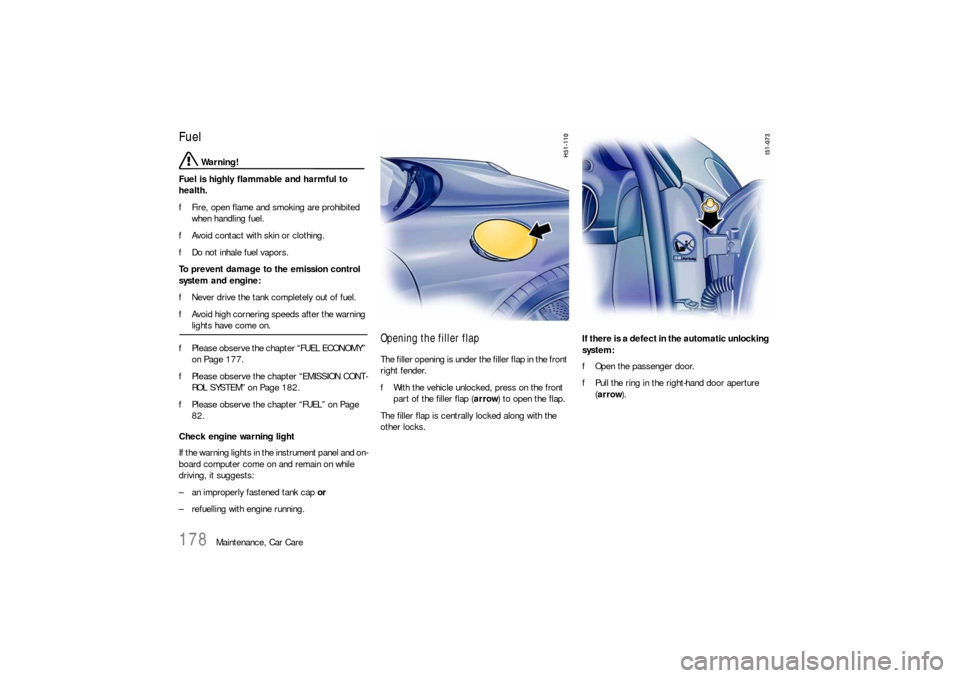
Opening the filler flap The filler opening is under the filler flap in the front
right fender.
fWith the vehicle unlocked, press on the front
part of the filler flap (arrow) to open the flap.
The filler flap is centrally locked along with the
other locks. If there is a defect in the automatic unlocking
system:
fOpen the passenger door.
fPull the ring in the right-hand door aperture
(arrow).
Page 179 of 276
Maintenance, Car Care
179
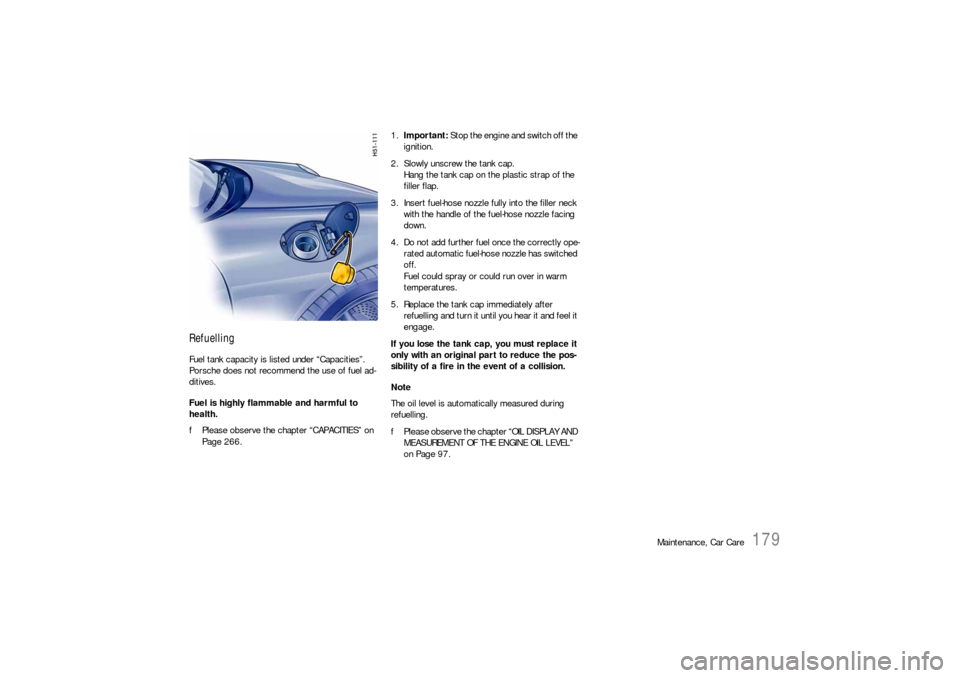
Refuelling Fuel tank capacity is listed under “Capacities”.
Porsche does not recommend the use of fuel ad-
ditives.
Fuel is highly flammable and harmful to
health.
fPlease observe the chapter “CAPACITIES” on
Page 266.1.Important: Stop the engine and switch off the
ignition.
2. Slowly unscrew the tank cap.
Hang the tank cap on the plastic strap of the
filler flap.
3. Insert fuel-hose nozzle fully into the filler neck
with the handle of the fuel-hose nozzle facing
down.
4. Do not add further fuel once the correctly ope-
rated automatic fuel-hose nozzle has switched
off.
Fuel could spray or could run over in warm
temperatures.
5. Replace the tank cap immediately after
refuelling and turn it until you hear it and feel it
engage.
If you lose the tank cap, you must replace it
only with an original part to reduce the pos-
sibility of a fire in the event of a collision.
Note
The oil level is automatically measured during
refuelling.
fPlease observe the chapter “OIL DISPLAY AND
MEASUREMENT OF THE ENGINE OIL LEVEL”
on Page 97.
Page 184 of 276
184
Maintenance, Car Care
Fuel Evaporation Control Fuel tank venting The evaporation chamber and the carbon canister
prevent fuel from escaping to the atmosphere at
extreme high outside temperatures, when driving
abruptly around curves and when the car is parked
at an incline or in any other nonlevel position. Vapor control system and storage When the fuel tank is filled, vapors are collected in
the evaporation chamber by a vent line leading the
vapors to the carbon canister where they are
stored as long as the engine does not run. Purge system When the engine is running, the fuel vapors from
the canister will be mixed with fresh air from the
ambient air of the canister. This mixture will be di-
rected to the intake air housing by the tank vent
line, mixed with the intake air and burned during
normal combustion.
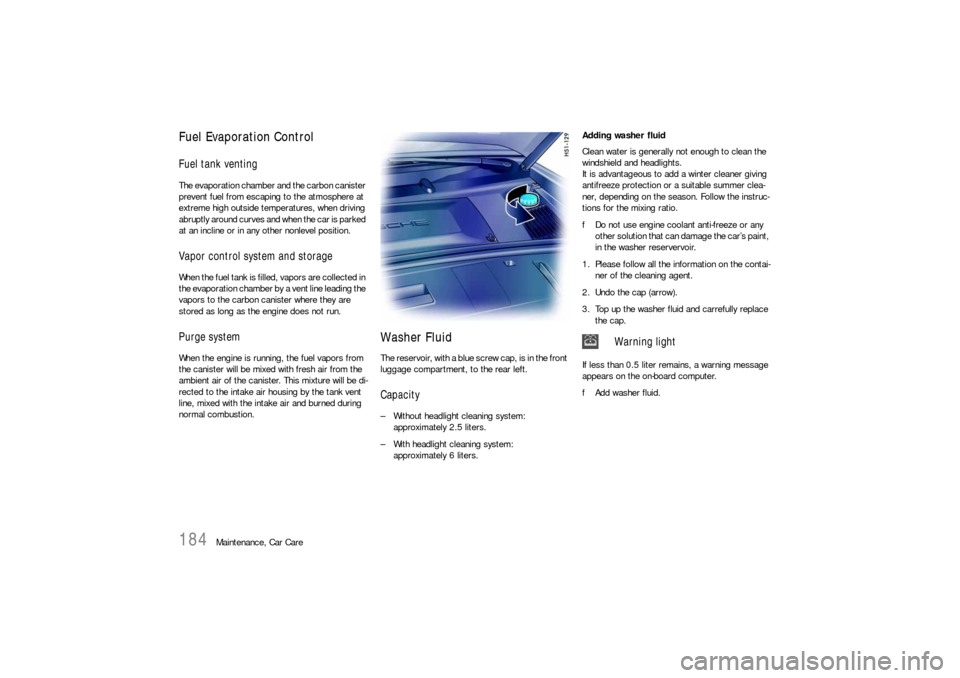
Washer Fluid The reservoir, with a blue screw cap, is in the front
luggage compartment, to the rear left. Capacity – Without headlight cleaning system:
approximately 2.5 liters.
– With headlight cleaning system:
approximately 6 liters. Adding washer fluid
Clean water is generally not enough to clean the
windshield and headlights.
It is advantageous to add a winter cleaner giving
antifreeze protection or a suitable summer clea-
ner, depending on the season. Follow the instruc-
tions for the mixing ratio.
fDo not use engine coolant anti-freeze or any
other solution that can damage the car’s paint,
in the washer reservervoir.
1. Please follow all the information on the contai-
ner of the cleaning agent.
2. Undo the cap (arrow).
3. Top up the washer fluid and carrefully replace
the cap.
If less than 0.5 liter remains, a warning message
appears on the on-board computer.
fAdd washer fluid.
Warning light
Page 209 of 276

Practical Tips, Emergency Service
209
Tire care fAvoid damaging tires and wheel rims.
fIf you must drive over a curb or other obstacle,
drive slowly and at an obtuse angle.
fCheck tires for uneven wear and damage
before driving off.
fRemove imbedded material.
fReplace worn or damaged tires immediately.
fKeep oil, fuel, brake fluid, etc. away from tires.
fReplace missing valve stem caps.
fKeep tires inflated correctly.
fWash tires when washing the vehicle.
Also clean inner side of wheels.
fDo not use abrasive cleaners when washing
the wheels.
fCheck wheel rims for corrosion.
fRemove road salt, if driving in winter.
Tire damage, puncture fCheck tires for imbedded material, cuts, punc-
tures, cracks and bulges (side wall) before driv-
ing off.
In case of tire damage, where it is uncertain wheth-
er there is a break in the ply with all its conse-
quences or tire damage caused by thermal or me-
chanical overloading due to loss of pressure or
any other prior damage, we recommend that the
tire be replaced for safety reasons.
If one faulty tire is replaced it should be noted that
the difference in tread depth on one axle must not
exceed 30 %.
Handling inconsistencies may result.
fPerform a visual inspection if necessary.
Danger!
Risk of serious personal injury or death.
Driving the vehicle with low tire pressure
increases risk of a tire failure and resulting
loss of control. Furthermore, low tire pres-
sure increases rate of wear of the affected
tires.
fCheck tires – including sidewalls – regularly for
foreign bodies, nicks, cuts, cracks and bulges.
fAfter driving off road, examine tires for signs
of damage such as cuts, tears, bulges or for-
eign objects stuck in the tread. Replace a dam-
aged tire if necessary.
fCross curb edges slowly and at right angles if
possible.
Avoid driving over steep or sharp curbs.
fIn cases of doubt, have the wheel (particularly
the inner side) checked by an authorized Porsche dealer.
Page 266 of 276

266
Vehicle Identification, Technical Data
Capacities Use only fluids and fuels authorized by Porsche. Your authorized Porsche dealer will gladly advise you.
Your Porsche has been designed so that it is not necessary to mix any additives with oils or fuels.
EngineOil change quantity without oil filter approx. 1.98 U.S.gallons/7.5liters
Oil change quantity with oil filter approx. 2.05 U.S.gallons/7.75 liters
Please observe the chapter “ENGINE OIL RECOMMENDATION” on Page 174.
Coolant Boxster
Manual transmission: approx. 5.86 U.S. gallons/22.2 liters
Tiptronic S: approx. 6.37 U.S. gallons/24.1 liters
Boxster S
Manual transmission: approx. 5.94 U.S. gallons/22.5 liters
Tiptronic S: approx. 6.42 U.S. gallons/24.3 liters
Manual transmission and differential 5-speed: approx. 2.4 quarts/2.25 liters, 6-speed: approx. 3 quarts/2.8 liters
Tiptronic Sapprox. 2.51 U.S. gallons/9.5 liters
Differential with Tiptronic Sapprox. 0.21 U.S. gallons/0.8 liters
Power steeringapprox. 1.1 quarts/1 liter hydraulic fluid Pentosin CHF 11 S
®
Brake fluidapprox. 0.4 quarts/0.39 liters; use only Original Porsche brake fluid
Windshield washerapprox. 0.66 U.S. gallons/2.5 liters without headlight washer
approx. 1.59 U.S. gallons/6 liters with headlight washer
Fuel tankRefill volume approx. 16.9 U.S. gallons/64 liters, including approx. 2.6 U.S.gallons/10 liters reserve.
Fuel qualityYour engine is designed to provide optimum performance and fuel economy using unleaded premium fuel with
an octane rating of 98 RON (93 CLC or AKI).
Porsche therefore recommends the use of these fuels in your vehicle.
Porsche also recognizes that these fuels may not always be available. Be assured that your vehicle will operate
properly on unleaded premium fuels with octane numbers of at least 95 RON (90 CLC or AKI), since the engine’s
“Electronic Oktane™ knock control” will adapt the ignition timing, if necessary.
Page 273 of 276

Index
273
Level.................................................. 170
Temperature gauge.............................. 80
Warning light ........................................ 80
Cooling system .....................................80
, 170
Cruise control ............................................... 76
Cupholder .................................................. 128
DDashboard ................................................... 65
Data bank .................................................. 258
Defrosting windows .............................114
, 117
Diagnostic socket .................................15, 227
Diagrams ................................................... 268
Dimensions ................................................ 267
Dipped beam .............................................. 241
Door ............................................................ 25
Guard lights ........................................ 251
Handles................................................ 25
Locks...........................................25, 194
Mirror heating ....................................... 33
Windows ....................... 25
, 28, 154
, 196
Driving hints ................................................. 12
Driving in winter .......................................... 152
Driving performance ................................... 265
Drop-center rim .......................................... 215
DVD Navigation........................................... 136
EElectrical system ........................................ 226
Emergency flasher ...................................... 121
Emergency operation
Central locking................................19
, 22
Convertible top ................................... 157Lids ...................................................228
Tank cap ............................................179
Emergency program, Tiptronic .....................152
Emergency service......................................202
Emergency starting with jump leads .............236
Emergenzy operation....................................22
Emission control system ........... 7
, 84, 182
, 183
Engine
Checking the oil level .............................97
Exhaust ..................................................8
Number ..............................................259
Oil consumption ....................................14
Oil level indicator...................................97
Oils ....................................................266
Speeds ................................................14
Starting ................................................67
Switching off.........................................67
Engine compartment
Blower .......................................... 70, 80
Lid ............................................ 135, 185
Lid warning light ..................................134
Environment ...................................................6
FFire extinguisher .........................................131
Flat tire ......................................................219
Floor mats ..................................................199
Fog lights .................................. 108
, 246
, 249
Footwell light ..............................................250
Front lid......................................................135
Fuel ................................................ 4
, 82, 178
Containers ..............................................8
Economy ............................................177
Evaporation ........................................184Level gauge ......................................... 82
Level warning light................................ 82
Portable Containers ............................ 181
Recommendation ....................... 180
, 181
Tank.......................................... 178, 179
Function keys ............................................... 40
Fuses ........................................................ 227
GGarage door opener................................... 142
Garage lift ................................................. 218
Gearchanging ............................................ 145
Glove compartment .................................... 127
Gong .............................. 68
, 69, 88, 107
, 108
Ground clearance ........................................... 8
HHandbrake ................................................... 51
Hardtop ..................................................... 162
Headlights ......................................... 109
, 241
Adjusting ................................... 252, 253
Cleaning system ................. 110
, 184
, 266
Heated rear window...................... 33
, 165
, 166
Heating ............................................. 114, 117
High beam
Indicator light ....................................... 79
Lever......................................... 108, 109
Home mode............................................... 108
HomeLink .................................................. 142
Hoods ............................................... 132, 135
Horn ..................................................... 15, 21