brake light PORSCHE BOXSTER 2006 2.G Owner's Manual
[x] Cancel search | Manufacturer: PORSCHE, Model Year: 2006, Model line: BOXSTER, Model: PORSCHE BOXSTER 2006 2.GPages: 296, PDF Size: 4.12 MB
Page 168 of 296
168
Shifting Gear Manual mode failure
If manual mode fails, the control electronics
switch to automatic mode. In this event, the
instrument cluster will display selector lever
position D.
fHave the fault remedied.
Consult an authorized Porsche dealer.
Stopping fFor a brief stop, e.g. at a traffic light, leave the
selector lever in drive position and hold the ve-
hicle with the brake pedal.
fFor a longer stop with the engine running,
select position N (neutral).
fDo not hold the car on a slope using the
accelerator. Use the brake pedal or the hand-
brake instead.
fBefore leaving the vehicle, always apply the
handbrake and move the selector lever to
position P.
Parking fGo easy on the accelerator.
fWhen parking or maneuvring in a small space,
control the speed by careful use of the footbra-
ke. Driving in winter In wintery road conditions it is advisable to take
steep inclines in manual mode. This prevents the
occurrence of gear changes that could cause
wheelspin. Tow-starting, towing fPlease observe the chapter “TOWING” on Page
274.
Emergency program
Warning!
Reverse gear lock monitoring is disabled in
the emergency running program.
Damage to the vehicle may result as well as
loss of control, if the vehicle is moving for-
w a r d f a s t e n o u g h t o c a u s e r e a r w h e e l l o c k u p .
fDo not shift into R while the vehicle is moving forward.
A transmission fault is indicated by the following
symptoms:
–The 4th-gear display flashes.
– The warning “Tiptronic emergency run”
appears in the on-board computer.
– The transmission no longer shifts.
Regardless of selector lever position, 4th is
the only forward gear still available.
fAdapt your driving style to the changed hand-
ling.
fTo remedy the fault, please consult an authori-
zed Porsche dealer.
Page 192 of 296
192
Maintenance, Car Care
Brake Fluid Level fPlease observe the chapter “EXERCISE EXTRE-
ME CAUTION WHEN WORKING ON YOUR VE-
HICLE” on Page 184.
fUse only new (unused) Original Porsche
brake fluid.
Warning!
Brake fluid is hazardous to your health, and
may be fatal if swallowed.
Brake fluid also attacks paintwork.
fKeep brake fluid out of children’s reach.
fTake care while topping off brake fluid not to
soil the luggage compartment or items of lug-gage.
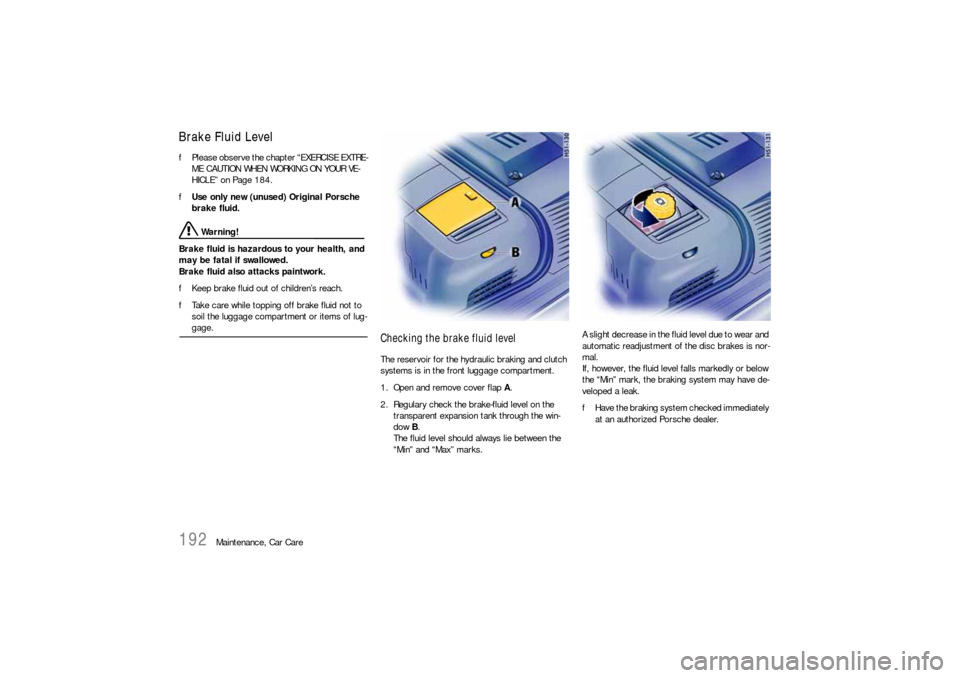
Checking the brake fluid level The reservoir for the hydraulic braking and clutch
systems is in the front luggage compartment.
1. Open and remove cover flap A.
2. Regulary check the brake-fluid level on the
transparent expansion tank through the win-
dow B.
The fluid level should always lie between the
“Min” and “Max” marks. A slight decrease in the fluid level due to wear and
automatic readjustment of the disc brakes is nor-
mal.
If, however, the fluid level falls markedly or below
the “Min” mark, the braking system may have de-
veloped a leak.
fHave the braking system checked immediately
at an authorized Porsche dealer.
Page 193 of 296
Maintenance, Car Care
193
Changing the brake fluid Brake fluid absorbs moisture from the air over ti-
me. This accumulation of water lowers the boiling
point and, under certain operating con ditions,
can affect the braking action.
Therefore have the brake fluid changed in accor-
dance with the change intervals stated in the bro-
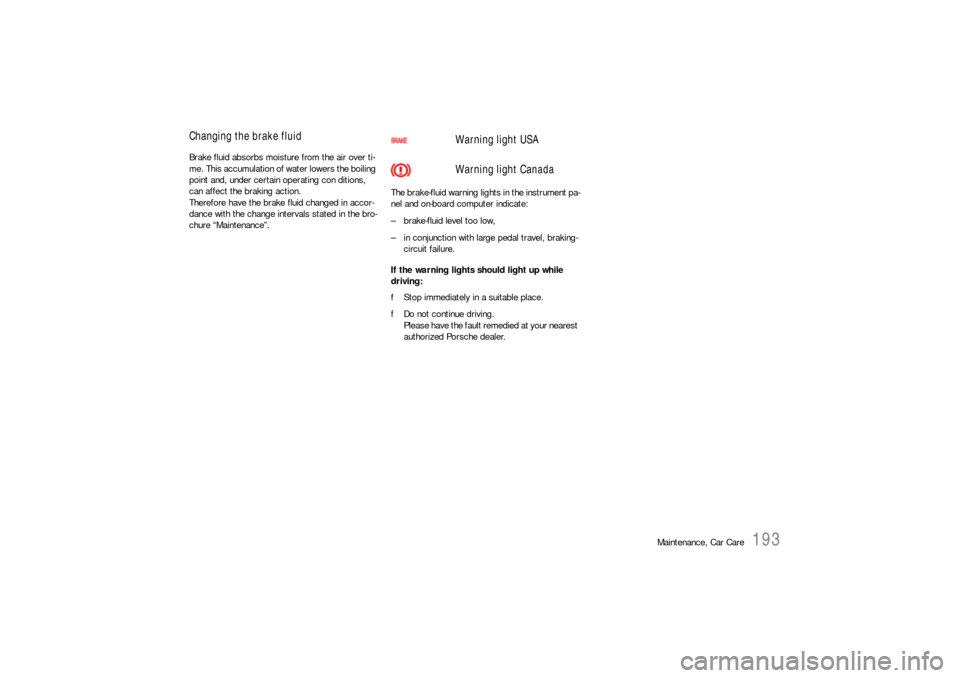
chure “Maintenance”. The brake-fluid warning lights in the instrument pa-
nel and on-board computer indicate:
– brake-fluid level too low,
– in conjunction with large pedal travel, braking-
circuit failure.
If the warning lights should light up while
driving:
fStop immediately in a suitable place.
fDo not continue driving.
Please have the fault remedied at your nearest
authorized Porsche dealer.
Warning light USA
Warning light Canada
Page 210 of 296
210
Maintenance, Car Care
Washing The best method of protecting your car from the
damaging effects of the environment is frequent
washing and the application of a preservative. The
underside of your vehicle should also be tho-
roughly washed for cinders, salt or sanding at win-
ter’s end.
The longer salt, road dust and industrial dust,
dead insects, bird droppings or substances from
trees (resin, pollen) are allowed to remain on the
bodywork, the more serious is their harmful ef-
fect.
New cars should be washed carefully with plenty
of clear water to protect the new paint work. Dark
paint finishes show up the smallest of surface da-
mage (e.g., scratches) more readily than lighter
colors.
Dark colors are also more susceptible to scrat-
ching because of the composition of their pig-
ments and require particularly careful paint care.
fDo not wash your car in bright sunlight or while
the bodywork is still hot.
fWhen washing by hand, use abundant water, a
soft sponge or wash brush, and Porsche car
shampoo.
fBegin by spraying the body thoroughly with wa-
ter to rinse away loose dirt. fAfter washing, rinse the car with plenty of wa-
ter and then dry with a chamois leather.
Do not use the same chamois leather for
drying as you use for cleaning the windshield
and windows.
Warning!
Moisture which gets on to the brakes during
a car wash can reduce braking efficiency or
make the brakes pull unevenly which could
increase the danger of an accident, causing
serious personal injuries or death.
fAlways apply the brakes a few times after was-
hing the car to test braking efficiency and dry
the brake discs.
When doing this, take care not to hamper other
road users behind you (traffic conditions per-mitting).
Page 216 of 296
216
Maintenance, Car Care
Light alloy wheels fPlease observe the chapter “WASHING” on
Page 210.
Warning!
Danger of accident if cleaning agents (e.g.
wheel cleaning agents) come into contact
with the brake discs. The resulting film on the
brake discs can impair braking perfor-
mance.
fMake sure that no cleaning agent comes into
contact with the brake discs.
fIf cleaning agent has come into contact with
the brake discs, thoroughly clean the brake
discs with a strong jet of water.
fPaying attention to any road users behind you,
dry the brake discs by applying the brakes at short intervals.
Pitting may occur if metallic particles which cause
contact corrosion (e.g. brass or copper in brake
dust) are allowed to remain on the aluminum for
too long.
fIf possible, wash the wheels with a sponge or
wash brush about every two weeks. In areas
where salt is spread on winter roads or there is
a lot of airborne industrial dust, it is best to
clean the wheels weekly.
The Porsche Light Alloy Wheel Cleaner
(ph-value 9.5) can be used for this purpo-
se.If the ph-value of the detergent is incor-
rect, the protective coating on the wheels
will be destroyed.
Polishes which dissolve oxides, such as
those frequently used for other metals, or
abrasive tools or agents are unsuitable
because they break down the oxide film of
the protective coating and will cause dis-
coloration of the wheel.
fEvery three months, after cleaning, coat the
wheels with a car wax or non-corrosive grease
(vaseline).
Using a clean cloth thoroughly rub the grease
into the surface.
Leather Characteristics and special features
The natural surface markings of leather, e.g. cre-
ases, healed scars, insect sting marks, structural
differences and slight variations in shade and
grain add to the attractiveness of the natural lea-
ther product.
A special mention must be made here of natural le-
ather.
For natural leather, carefully selected hides of the
highest quality are used. It is not covered comple-
tely with dye on production.
“Nature’s signature” is therefore easily recogniz-
able.
This fine material is distinguished by an outstan-
ding seating comfort, special suppleness and a ty-
pical patina. Leather care and treatment
fClean all types of leather regularly to remove
fine dust using a soft, damp, white woollen
cloth or a commercially available microfibre
cloth.
fRemove heavy contamination with Porsche le-
ather cleaner.
Please always follow the instructions for use gi-
ven on the containers.
Caustic cleaners and hard cleaning objects
must not be used.
Perforated leather must under no circum-
stances get wet on its reverse side.
Once cleaned, leather (particularly the heavily
stressed leather seats) must be treated only with
Porsche leather care liquid.
Page 219 of 296
Practical Tips, Emergency Service
219 Practical Tips, Emergency Service
Exercise Extreme Caution when
Working on your Vehicle ............................. 220
Tires/Wheels ............................................ 221
Loading Information ................................... 235
Lifting the Vehicle with a Lifting Platform
or Garage Lift ........................................... 237
Flat Tire .................................................... 238
Wheel Bolts ............................................. 241
Spacers ................................................... 244
Electrical System ..................................... 246
Battery .................................................... 249
Jump lead starting .................................... 256
Replacing bulbs ......................................... 258
Headlights ................................................ 261
Turn signal light ......................................... 265
Side marker light ....................................... 268
Tail light .................................................... 269
Additional brake light ................................. 270
Luggage compartment/footwell lights ......... 270
Interior light .............................................. 271
Adjusting Headlights .................................. 272
Towing ..................................................... 274
Page 242 of 296
242
Practical Tips, Emergency Service
Changing a wheel
Warning!
Risk of injury. The car may slip off the jack.
fMake sure that no one is in the vehicle when
jacking up and changing a wheel.
fAlways place the car on stable supports if work
has to be carried out under the car.
Risk of damage to the brake discs of the
Porsche Ceramic Composite Brake (PCCB).
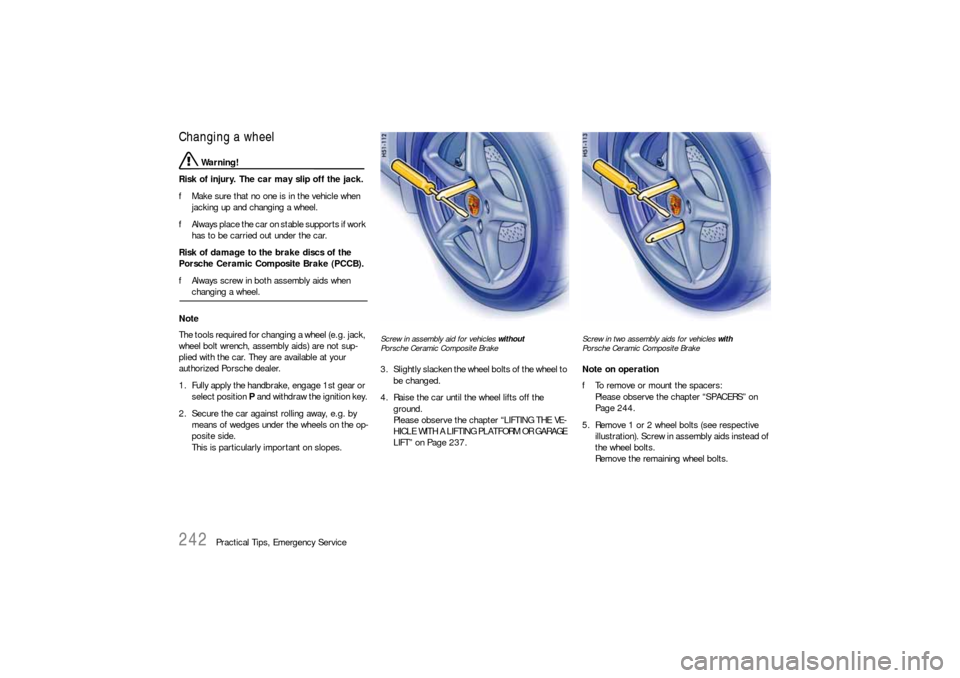
fAlways screw in both assembly aids when changing a wheel.
Note
The tools required for changing a wheel (e.g. jack,
wheel bolt wrench, assembly aids) are not sup-
plied with the car. They are available at your
authorized Porsche dealer.
1. Fully apply the handbrake, engage 1st gear or
select position P and withdraw the ignition key.
2. Secure the car against rolling away, e.g. by
means of wedges under the wheels on the op-
posite side.
This is particularly important on slopes.
Screw in assembly aid for vehicles without
Porsche Ceramic Composite Brake3. Slightly slacken the wheel bolts of the wheel to
be changed.
4. Raise the car until the wheel lifts off the
ground.
Please observe the chapter “LIFTING THE VE-
HICLE WITH A LIFTING PLATFORM OR GARAGE
LIFT” on Page 237.
Screw in two assembly aids for vehicles with
Porsche Ceramic Composite BrakeNote on operation
fTo remove or mount the spacers:
Please observe the chapter “SPACERS” on
Page 244.
5. Remove 1 or 2 wheel bolts (see respective
illustration). Screw in assembly aids instead of
the wheel bolts.
Remove the remaining wheel bolts.
Page 259 of 296

Practical Tips, Emergency Service
259
Bulb chart
Ty p e , r a t i n g
Halogen low beam H7, 55 W
Low beam with Bi-Xenon headligh Philips, D2S 35W
Halogen high beam H 9, 65W
Additional high beam with Bi-Xenon headlight H 11, 55W
Fog light H8, 35W
Tail light, rear fog light, brake light, tail light P21, 4W
Tail light, reflector P21, 5W
Reversing light P21W
Turn signal light, front and rear LL PY21W (long-life)
Door guard,/curb light/footwell light/
luggage compartment lihgtW5W
Parking light W5W Blue-Vision
License plate light C5W
Side marker Light W3W
Page 269 of 296

Practical Tips, Emergency Service
269
Tail light, leftTail lightChanging bulbs1. Remove carpeting covering the tail light.
Unscrew the securing nuts to do this.
2. Press the mounting of the lamp bracket
upwards (arrow) and remove the bulb holder.
A - Turn signal light
B - Reversing light
C - Rear fog light, rear light
D - Tail light
E - Brake light, rear light3. Replace the defective bulb (bayonet fitting).
4. Reassemble in reverse order.
Check operation of the light.
License plate lightsChanging bulb 1. Unscrew both screws A and remove the lens.
2. Remove defective bulb from between the
contact springs and replace.
3. Reassemble in reverse order.
Check operation of the light.
Page 270 of 296

270
Practical Tips, Emergency Service
Additional brake lightThe light-emitting diodes of the additional brake
light cannot be replaced individually.
fHave the defective brake light replaced in a
qualified specialist workshop.
We recommend a Porsche partner for this
work as they have trained workshop personnel
and the necessary parts and tools.
Luggage compartment/footwell
lightsChanging bulb
1. With a screwdriver (arrow), carefully press light
out of the cutout in the lining.
2. Remove defective bulb from between the
contact springs and replace.
3. Insert the light into the cut-out first from one
side then from the other. Check operation.