stop start PORSCHE CAYMAN 2006 1.G User Guide
[x] Cancel search | Manufacturer: PORSCHE, Model Year: 2006, Model line: CAYMAN, Model: PORSCHE CAYMAN 2006 1.GPages: 280, PDF Size: 4.89 MB
Page 100 of 280

100
Controls, Instruments Continue timing
After timing has been stopped, the on-board com-
puter display changes to the “Continue/Reset” se-
lection.
fPush operating lever forward.
The stopwatch displays continue the timing.
The on-board computer display returns to the
“Stop timing/Intermediate time” selection. You
can stop the stopwatch or measure an inter-
mediate time.Resetting the time
After timing has been stopped, the on-board com-
puter display changes to the “Continue/Reset” se-
lection.
fSelect “Reset” with the operating lever.
fPush operating lever forward.
The display returns to the “Start timing”
selection.
The stopwatch displays in the instrument panel
and the on-board computer are reset to zero.
Page 101 of 280

Controls, Instruments
101
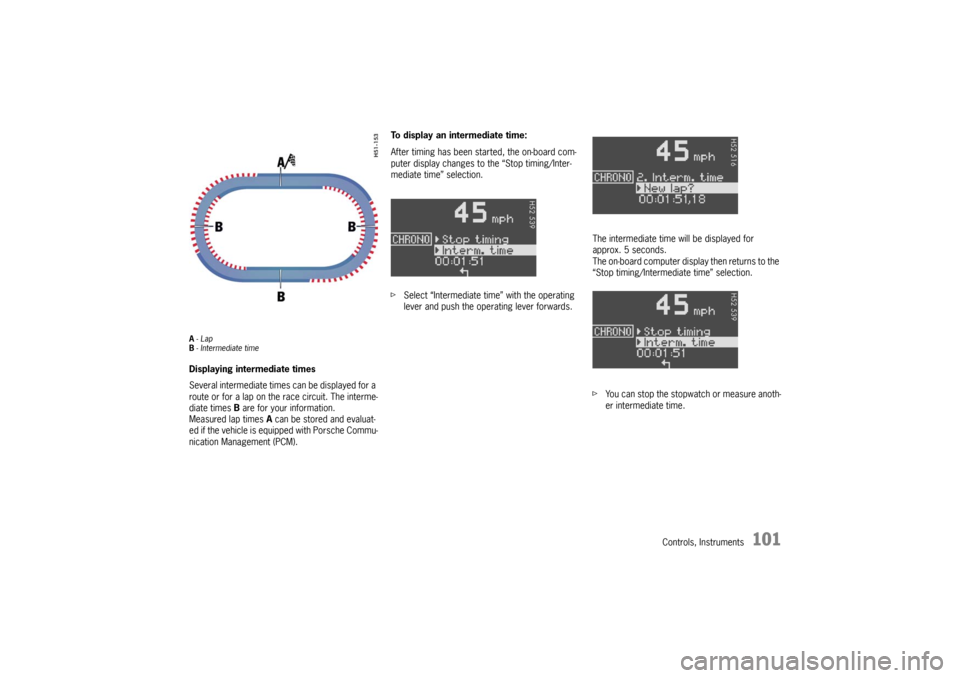
A-Lap
B- Intermediate timeDisplaying intermediate times
Several intermediate times can be displayed for a
route or for a lap on the race circuit. The interme-
diate times B are for your information.
Measured lap times A can be stored and evaluat-
ed if the vehicle is equipped with Porsche Commu-
nication Management (PCM).To display an intermediate time:
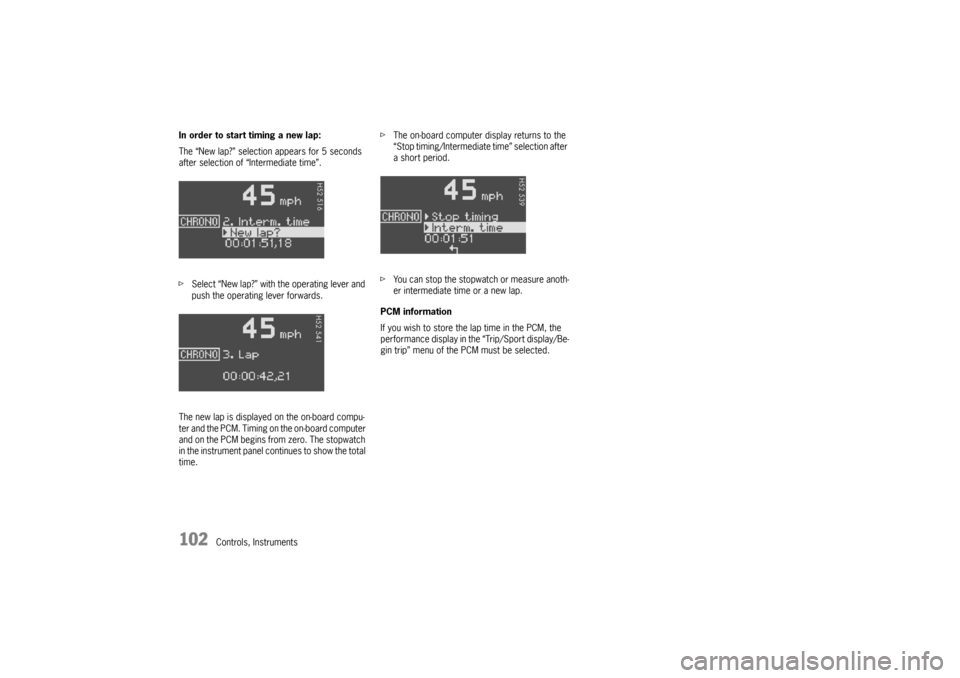
After timing has been started, the on-board com-
puter display changes to the “Stop timing/Inter-
mediate time” selection.
fSelect “Intermediate time” with the operating
lever and push the operating lever forwards.The intermediate time will be displayed for
approx. 5 seconds.
The on-board computer display then returns to the
“Stop timing/Intermediate time” selection.
fYou can stop the stopwatch or measure anoth-
er intermediate time.
Page 102 of 280

102
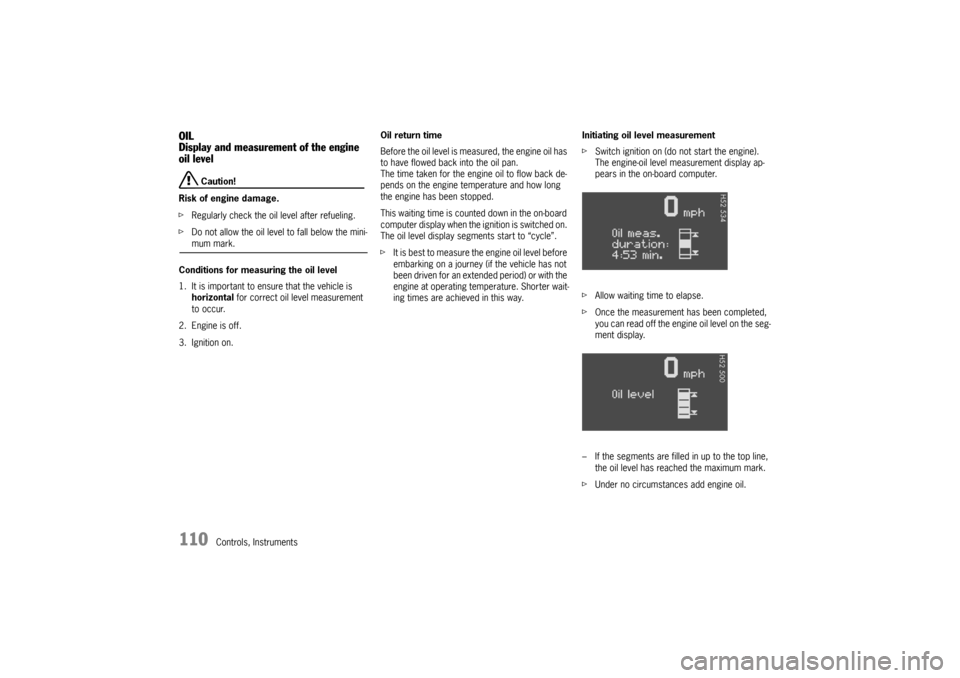
Controls, Instruments In order to start timing a new lap:
The “New lap?” selection appears for 5 seconds
after selection of “Intermediate time”.
fSelect “New lap?” with the operating lever and
push the operating lever forwards.
The new lap is displayed on the on-board compu-
ter and the PCM. Timing on the on-board computer
and on the PCM begins from zero. The stopwatch
in the instrument panel continues to show the total
time.fThe on-board computer display returns to the
“Stop timing/Intermediate time” selection after
a short period.
fYou can stop the stopwatch or measure anoth-
er intermediate time or a new lap.
PCM information
If you wish to store the lap time in the PCM, the
performance display in the “Trip/Sport display/Be-
gin trip” menu of the PCM must be selected.
Page 110 of 280

110
Controls, Instruments
OIL
Display and measurement of the engine
oil level
Caution!
Risk of engine damage.
fRegularly check the oil level after refueling.
fDo not allow the oil level to fall below the mini-mum mark.
Conditions for measuring the oil level
1. It is important to ensure that the vehicle is
horizontal for correct oil level measurement
to occur.
2. Engine is off.
3. Ignition on.Oil return time
Before the oil level is measured, the engine oil has
to have flowed back into the oil pan.
The time taken for the engine oil to flow back de-
pends on the engine temperature and how long
the engine has been stopped.
This waiting time is counted down in the on-board
computer display when the ignition is switched on.
The oil level display segments start to “cycle”.
fIt is best to measure the engine oil level before
embarking on a journey (if the vehicle has not
been driven for an extended period) or with the
engine at operating temperature. Shorter wait-
ing times are achieved in this way.Initiating oil level measurement
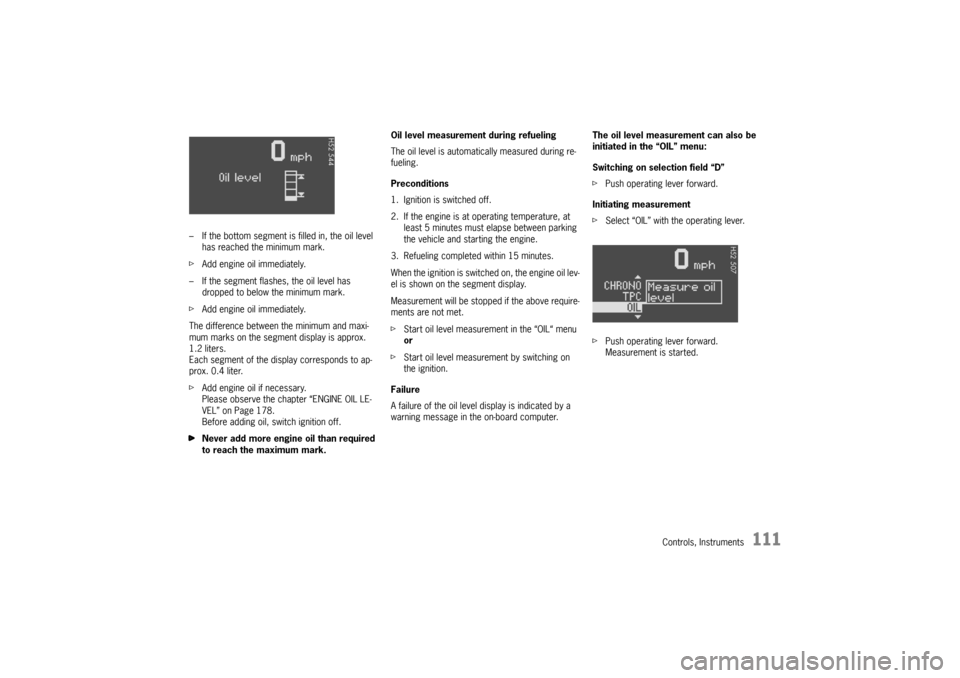
fSwitch ignition on (do not start the engine).
The engine-oil level measurement display ap-
pears in the on-board computer.
fAllow waiting time to elapse.
fOnce the measurement has been completed,
you can read off the engine oil level on the seg-
ment display.
– If the segments are filled in up to the top line,
the oil level has reached the maximum mark.
fUnder no circumstances add engine oil.
Page 111 of 280

Controls, Instruments
111
– If the bottom segment is filled in, the oil level
has reached the minimum mark.
fAdd engine oil immediately.
– If the segment flashes, the oil level has
dropped to below the minimum mark.
fAdd engine oil immediately.
The difference between the minimum and maxi-
mum marks on the segment display is approx.
1.2 liters.
Each segment of the display corresponds to ap-
prox. 0.4 liter.
fAdd engine oil if necessary.
Please observe the chapter “ENGINE OIL LE-
VEL” on Page 178.
Before adding oil, switch ignition off.
fNever add more engine oil than required
to reach the maximum mark.Oil level measurement during refueling
The oil level is automatically measured during re-
fueling.
Preconditions
1. Ignition is switched off.
2. If the engine is at operating temperature, at
least 5 minutes must elapse between parking
the vehicle and starting the engine.
3. Refueling completed within 15 minutes.
When the ignition is switched on, the engine oil lev-
el is shown on the segment display.
Measurement will be stopped if the above require-
ments are not met.
fStart oil level measurement in the “OIL“ menu
or
fStart oil level measurement by switching on
the ignition.
Failure
A failure of the oil level display is indicated by a
warning message in the on-board computer.The oil level measurement can also be
initiated in the “OIL” menu:
Switching on selection field “D”
fPush operating lever forward.
Initiating measurement
fSelect “OIL” with the operating lever.
fPush operating lever forward.
Measurement is started.
Page 116 of 280

116
Controls, Instruments
Check engine oil level Start engine oil level measurement in the
on-board computer.
The vehicle must be horizontal and the ignition
must be switched on.
Engine oil pressure too low Stop immediately at a suitable place, measure
oil level with the on-board computer and, if ne-
cessary, add engine oil.
Warning light
Temperature gau-
geEngine temperature too high Switch engine off and let it cool.
Check coolant level and, if necessary,
add coolant.
Temperature gau-
ge warning light
flashesCheck coolant level Switch engine off and let it cool.
Check coolant level and, if necessary, add
coolant.
Engine diagnostics – workshop Consult your authorized Porsche dealer.
Reduced engine power Consult your authorized Porsche dealer.
Temperature gau-
ge warning light
flashesFailure of
engine compartment blowerConsult your authorized Porsche dealer.
Warning Battery/generator Stop at a safe place and switch the engine off.
Do not continue driving.
Have the fault remedied at an authorized
Porsche dealer.
Oil pressure gauge faulty Have the fault remedied at an authorized
Porsche dealer.
Oil level display faulty Have the fault remedied at an authorized
Porsche dealer.
Oil temperature gauge faulty Have the fault remedied at an authorized
Porsche dealer.
Instrument
panelOn-board
computerText display on on-board
computerMeaning/measure
Page 170 of 280

170
Shifting Gear Manual mode failure
If manual mode fails, the control electronics
switch to automatic mode. In this event, the
instrument cluster will display selector lever
position D.
fHave the fault remedied.
Consult an authorized Porsche dealer.
Stopping fFor a brief stop, e.g. at a traffic light, leave the
selector lever in drive position and hold the ve-
hicle with the brake pedal.
fFor a longer stop with the engine running,
select position N (neutral).
fDo not hold the car on a slope using the
accelerator. Use the brake pedal or the hand-
brake instead.
fBefore leaving the vehicle, always apply the
handbrake and move the selector lever to
position P.
Parking fGo easy on the accelerator.
fWhen parking or maneuvering in a small
space, control the speed by careful use of the
footbrake. Driving in winter In wintery road conditions it is advisable to take
steep inclines in manual mode. This prevents the
occurrence of gear changes that could cause
wheelspin. Tow-starting, towing fPlease observe the chapter “TOWING” on Page
260.
Emergency program
Warning!
Reverse gear lock monitoring is disabled in
the emergency running program.
Damage to the vehicle may result as well as
loss of control, if the vehicle is moving for-
w a r d f a s t e n o u g h t o c a u s e r e a r w h e e l l o c k u p .
fDo not shift into R while the vehicle is moving forward.
A transmission fault is indicated by the following
symptoms:
–The 4th-gear display flashes.
– The warning “Tiptronic emergency run”
appears in the on-board computer.
– The transmission no longer shifts.
Regardless of selector lever position, 4th is
the only forward gear still available.
fAdapt your driving style to the changed han-
dling.
fTo remedy the fault, please consult an author-
ized Porsche dealer.
Page 184 of 280

184
Maintenance, Car Care
Fuel Economy Fuel economy will vary depending on where,
when and how you drive, optional equipment
installed, and the general condition of your
car.
A car tuned to specifications and correctly
maintained, will help you to achieve optimal
fuel economy.
fHave your vehicle tuned to specifications.
Air cleaner should be dirt free to allow proper
engine “breathing”.
Battery should be fully charged.
Wheels should be properly aligned.
Tires should be inflated to the correct pres-
sure.
fAlways monitor your fuel consumption.
fDrive smoothly, avoid abrupt changes in speed
as much as possible.
fAvoid jack rabbit starts and sudden stops.
fDo not drive longer than necessary in the lower
gears. Shifting into a higher gear early without
lugging the engine will help save fuel.
fProlonged “warm up” idling wastes gas. Start
the vehicle just before you are ready to drive.
Accelerate slowly and smoothly.
fSwitch off the engine if stationary for longer
periods (traffic lights, jams, level crossings). fAny additional weight carried in the vehicle re-
duces fuel economy. Always keep cargo to a
minimum and remove all unnecessary items.
fOrganize your trips to take in several errands
in one trip.
fAll electrical accessories contribute to in-
creased fuel consumption.
fOnly switch on the air conditioning when neces-
sary.
The EPA estimated m.p.g. is to be used for
comparison purposes, actual mileage may
be different from the estimated m.p.g., de-
pending on your driving speed, weather con-
ditions and trip length. Your actual highway
mileage will probably be less than the esti-
mated m.p.g.
fPlease observe all local and national speed lim-
its.
Page 238 of 280

238
Practical Tips, Emergency Service
Putting vehicle into operationAfter the battery is connected or after an
completely discharged battery is charged, the
multifunctional PSM light lights up on the instru-
ment panel and a message appears on the on-
board computer to indicate a fault.
This fault can be remedied with a few simple
steps:
1. Start the engine.
2. With the vehicle stationary, perform a few
steering movements to the left and right and
then drive a short distance in a straight line
until the multifunctional PSM light goes out and
the message on the on-board computer
disappears.
3. If the warnings do not disappear, then:
Drive carefully to the nearest qualified
specialist workshop.
Have the fault remedied.
4. After the warnings disappear, stop the vehicle
in a suitable place, and perform adaptation of
the power windows.
To do this, close windows once with the rocker
switch.
Press front half of rocker switch upwards again
to store the final position of the windows in the
control unit. Ignition key/ignition lock
fDo not insert the ignition key into the ignition
lock if the vehicle battery is discharged.
The ignition key can no longer be removed.
The key cannot be removed until the vehicle elec-
trical system is supplied with power again.
fPlease observe the chapter “EMERGENCY UN-
LOCKING OF THE FRONT LUGGAGE COMPART-
MENT LID” on Page 234.
5. Please observe the chapter “JUMP LEAD
STARTING” on Page 242.
Page 279 of 280

Index
279
Rear fog light .....................................122
, 256
Rear lid ...................................................... 150
Rear view mirrors ......................................... 29
Rear window defogger.................................. 31
Rear wiper ................................................. 127
Replacing ........................................... 175
Relays ........................................................ 232
Release button ........................................... 165
Remote control ............................................. 18
Replacement key .......................................... 17
Replacing bulbs .......................................... 245
Replacing wiper blades................................ 173
Retractable rear spoiler ................................. 66
Rims
Diameter ............................................ 220
Rim width ........................................... 220
Roof load ................................................... 162
Roof Transport System........................162, 272
Running in .................................................... 14
SSafety belts ..........................................40
, 202
Warning light ........................................ 41
Safety compliance sticker ........................... 264
Sealing set ................................................. 225
Seals, care of ............................................. 200
Seat ............................................................ 32
Adjustment ........................................... 32
Heating ................................................ 36
Memory ............................................... 34
Selector lever ............................................. 165
Selector lever position indicator .............87, 167
Service flap ................................................ 151
Shifting gear............................................... 164Shiftlock .....................................................165
Side lights ..................................................256
Side marker light ............................... 122
, 253
Side storage compartments ........................144
Side vents ..................................................136
Snow chains .............................. 218
, 268
, 269
Snow tires ......................................... 217, 268
Sockets .....................................................140
Spacers .....................................................230
Spare key .....................................................17
Spare wheel ...............................................269
Speed code letter .......................................219
Speed control .............................. 82
, 129
, 130
Speed limit .......................................... 94, 219
Speedometer................................................84
Spoiler .........................................................66
Sport mode ..................................... 61
, 64, 65
Sports seat ..................................................32
Stability management system (PSM) ...............62
Starting ................................................. 74, 75
Starting and stopping the engine ....................74
Steering wheel
Adjustment ...........................................37
Buttons ................................................38
Lock ................................. 74
, 75, 76, 77
Rocker switches..................................165
Toggle switches ..................................165
Stopwatch ....................................................98
Storage options ..........................................141
Storing your Porsche..................................203
Sun visors ....................................................39
TTachometer ..................................................85Tail light ..................................................... 255
Tank .................................................. 186
, 187
Cap ................................................... 187
Ventilation system.............................. 191
Telephone .................................................. 157
Temperature setting........................... 130, 133
Temperature, outside indicator ...................... 89
Test stand, measurements ............................ 64
Theft protection ........................................... 16
Tie-down rings ........................................... 151
Tiptronic .................................................... 165
Indicator .............................................. 87
Tire filling compressor ................................ 149
Tire pressure monitoring ............................. 103
Tires ........................................... 14
, 207
, 268
Checking pressure............................. 227
Inscription .......................................... 219
Loading information ............................ 221
Pressure................................ 5
, 210
, 269
Pressure plate.................................... 265
Sealant .............................................. 225
Sidewall ............................................. 219
Size .................................................. 219
Tires and tire care ...................................... 207
Tools ......................................................... 149
Towing .............................................. 260, 261
TPC Tire pressure monitoring ...................... 103
Track ........................................................ 268
Transmission ............................. 163
, 164
, 267
Fluid .......................................... 194, 271
Trunk entrapment ....................................... 146
Turn signals ......................................... 85, 124