tow PORSCHE CAYMAN 2009 1.G Owner's Manual
[x] Cancel search | Manufacturer: PORSCHE, Model Year: 2009, Model line: CAYMAN, Model: PORSCHE CAYMAN 2009 1.GPages: 284, PDF Size: 5.94 MB
Page 215 of 284
Practical Tips, Emergency Service
213
Tires/Wheels The original equipment tires and wheel rims on
your Porsche comply with all applicable Federal
Motor Vehicle Safety Standards.
For your safety remember the following:
– Wheel rims and wheel bolts are matched to fit
your Porsche.
– If you intend to use other than original equip- ment wheels, be sure that they conform to
Porsche specifications for your model.
Only tires with the same make and with the
same specification code (e.g. “N0”, “N1”...)
can be mounted.
– The use of wheel rims and wheel bolts that do not meet specifications of the original factory
installed equipment will affect the safe opera-
tion of your vehicle.
– Before you plan on exchanging wheels, or snow tires already mounted on the wheel rims,
consult your authorized Porsche dealer. Your
dealer has the technical information necessary
to advise you which wheel rims and wheel bolts
are compatible with the original factory instal-
lations.
Danger!
Risk of loss of contro l and serious personal
injury or death.
f If while driving, your vehicle experiences a sud-
den vibration or ride disturbance, and/or you
suspect that possible damage to your tires or
vehicle has occurred, you should immediately
reduce your speed without excessive use of
the brakes.
f Stop the vehicle as soon as possible, and in-
spect the tires.
If you cannot determine the cause for the dis-
turbance, have your vehi cle towed to the near-
est Porsche or tire dealer to have your vehicle
or tire(s) inspected.
f Continuing to operate the vehicle without cor-
rection could result in a loss of control and serious personal injury.
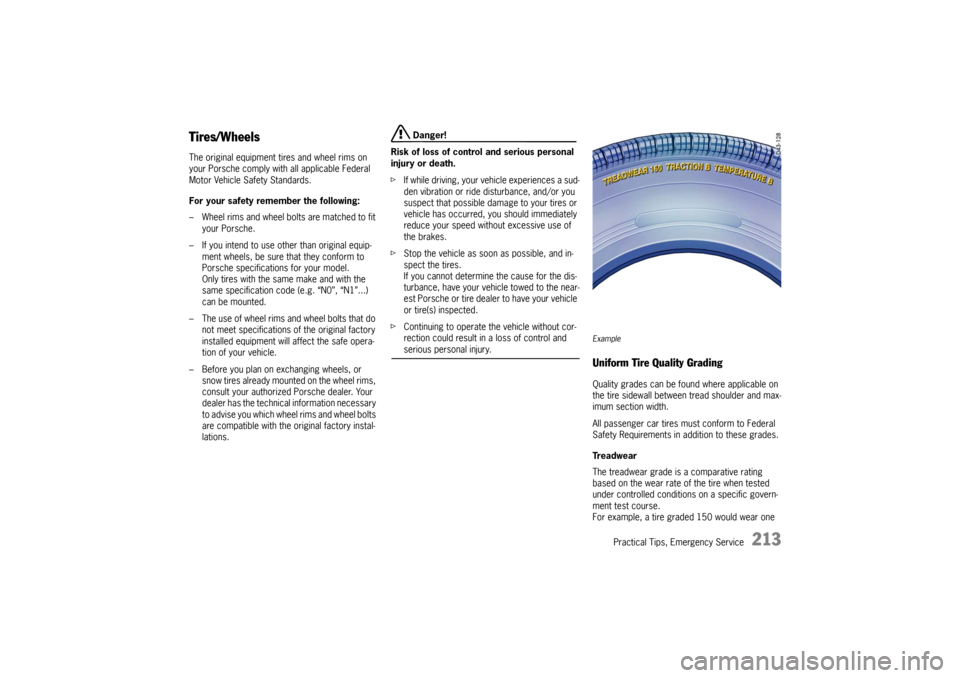
ExampleUniform Tire Quality GradingQuality grades can be fo und where applicable on
the tire sidewall between tread shoulder and max-
imum section width.
All passenger car tires must conform to Federal
Safety Requirements in a ddition to these grades.
Tr e a d w e a r
The treadwear grade is a comparative rating
based on the wear rate of the tire when tested
under controlled conditions on a specific govern-
ment test course.
For example, a tire graded 150 would wear one
Page 247 of 284

Practical Tips, Emergency Service
245
Emergency Starting with Jumper
Cables If the battery is discharged, e.g. in winter or after
the car has been parked for a long time, the bat-
tery of another car can be used for starting with
the help of jumper cables.
Make sure the voltage of both batteries is the
same. Both batteries must be 12 volt types.
The capacity (Ampere hours, Ah) of the booster
battery must not be substantially less than that of
the discharged battery.
The discharged battery must be correctly con-
nected to the vehicle’s electrical system.
f Please see the chapter “BATTERY” on
Page 239.
f Please see the chapter “EMERGENCY UNLO-
CKING OF THE FRONT LUGGAGE COMPART-
MENT LID” on Page 238.
Note
f Do not try to start the car by pushing or tow-
ing. Damage to the catalytic converters and
other components of the car may result.
Warning!
Risk of short circuit, damage and explosion,
resulting in serious personal injury or death.
f Use only jumper cables of adequate diameter
cross-section and fitted with completely insu-
lated alligator clips.
f Follow all warnings and instructions of the
jumper cable manufacturer.
f When connecting jumper cables, make sure
that they cannot get caught in any moving
parts in the engine compartment.
The jumper cables must be long enough so
that neither vehicles nor cables touch another.
f The vehicles must not be in contact, otherwise
current might flow as soon as the positive ter-
minals are connected.
f The cable clamps must not be allowed to con-
tact each other when one end of the jumper ca-
bles are connected to a battery.
f Ensure that tools or conductive jewelery (rings,
chains, watch straps) do not come into contact
with the positive jumper cable or the positive
battery post.
f Improper hook-up of jumper cables can ruin
the alternator. Danger of caustic burns from escaping acid.
f
Do not lean over the battery.
Danger of gas explosion.
f Improper use of booster battery to start a
vehicle may cause an explosion, resulting in
serious personal injury or death.
f Keep sources of ignition away from the bat-
tery, e.g. open flame, burning cigarettes or
sparking due to cable contact or welding work.
f A discharged battery can freeze even at 23 °F/
–5 °C.
Before connecting jumper cables, a frozen
battery must be thawed out.
Page 261 of 284
Practical Tips, Emergency Service
259
TowingCertain state statutes and local ordinances prohib-
it towing with a chain, rope or even a tow bar.
In addition, damage to your vehicle may result
from improper procedures.
Consult your authorized Porsche dealer for de-
tails. Vehicle towing Flat bed towing is the preferred type of towing to
be used on Porsche vehicles.
Under certain circumstances, wheel lifts may be
used when the vehicle will not roll.
The vehicle must be towed with all four
wheels off the ground, otherwise damage to
the vehicle may result.
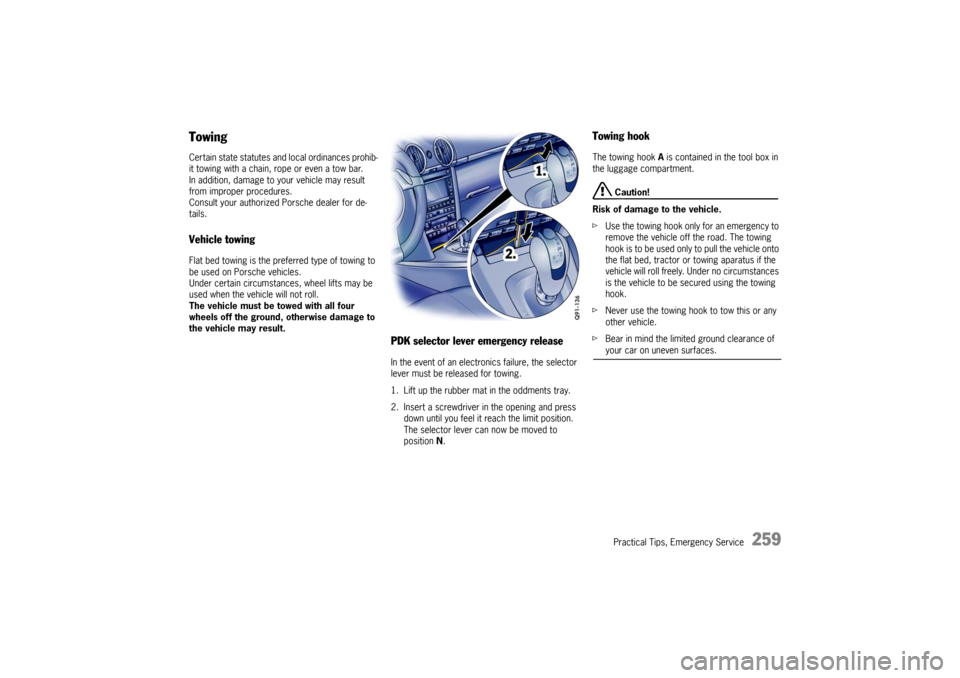
PDK selector lever emergency releaseIn the event of an electronics failure, the selector
lever must be released for towing.
1. Lift up the rubber mat in the oddments tray.
2. Insert a screwdriver in the opening and press down until you feel it reach the limit position.
The selector lever ca n now be moved to
position N .
Towing hook The towing hook A is contained in the tool box in
the luggage compartment.
Caution!
Risk of damage to the vehicle.
f Use the towing hook only for an emergency to
remove the vehicle off the road. The towing
hook is to be used only to pull the vehicle onto
the flat bed, tractor or towing aparatus if the
vehicle will roll freely. Under no circumstances
is the vehicle to be secured using the towing
hook.
f Never use the towing hook to tow this or any
other vehicle.
f Bear in mind the limited ground clearance of your car on uneven surfaces.
Page 262 of 284
260
Practical Tips, Emergency Service
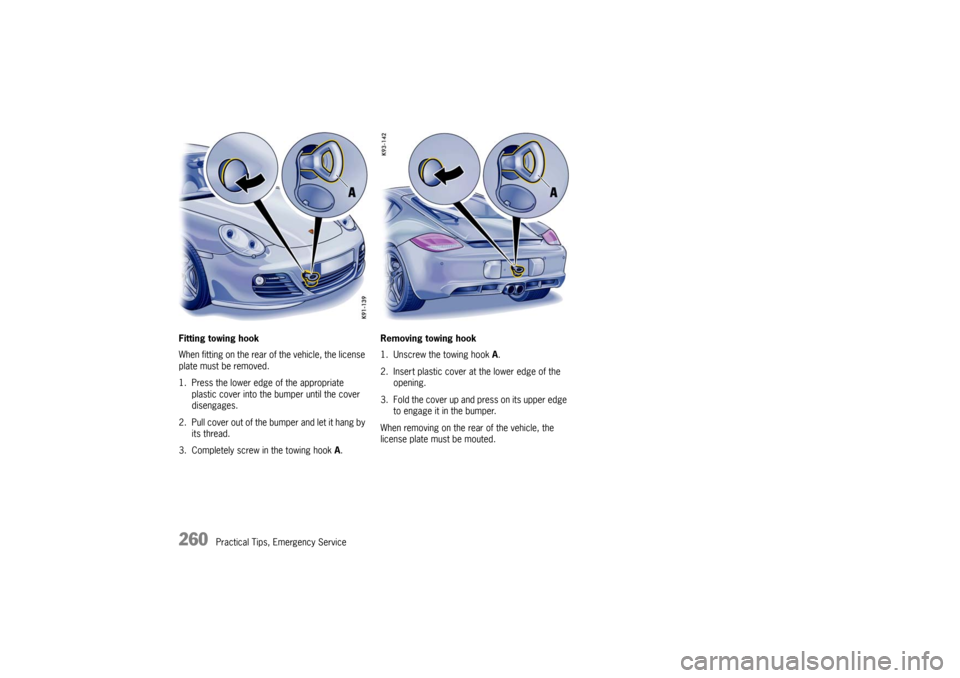
Fitting towing hook
When fitting on the rear of the vehicle, the license
plate must be removed.
1. Press the lower edge of the appropriate
plastic cover into the bumper until the cover
disengages.
2. Pull cover out of the bumper and let it hang by its thread.
3. Completely screw in the towing hook A. Removing towing hook
1. Unscrew the towing hook
A.
2. Insert plastic cover at the lower edge of the opening.
3. Fold the cover up and press on its upper edge to engage it in the bumper.
When removing on the rear of the vehicle, the
license plate must be mouted.
Page 263 of 284
Practical Tips, Emergency Service
261
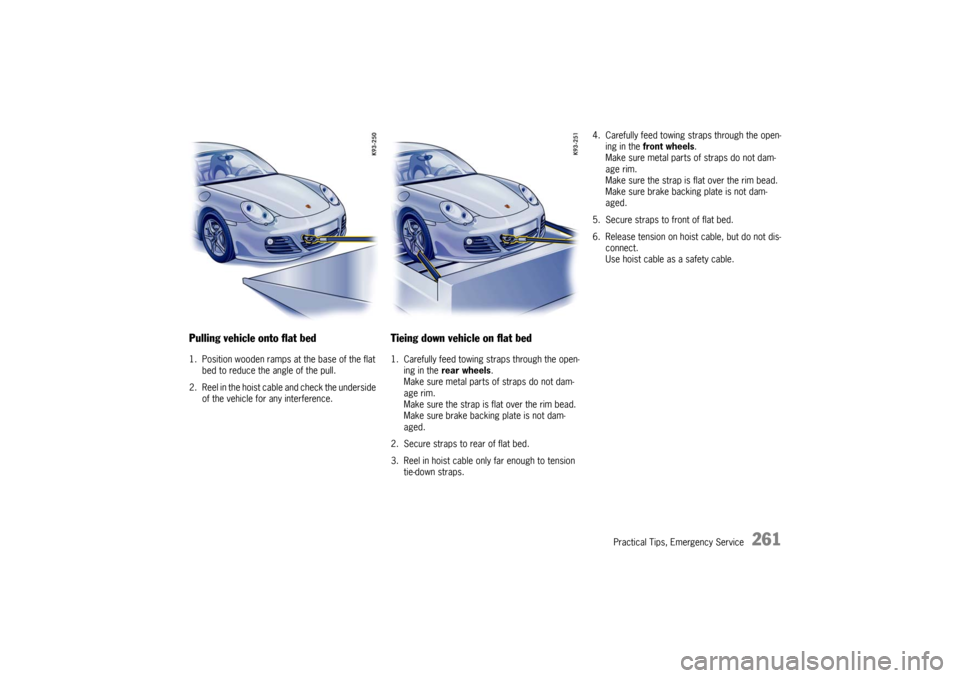
Pulling vehicle onto flat bed 1. Position wooden ramps at the base of the flat bed to reduce the angle of the pull.
2. Reel in the hoist cable and check the underside of the vehicle for any interference.
Tieing down vehicle on flat bed 1. Carefully feed towing straps through the open-ing in the rear wheels .
Make sure metal parts of straps do not dam-
age rim.
Make sure the strap is flat over the rim bead.
Make sure brake backing plate is not dam-
aged.
2. Secure straps to rear of flat bed.
3. Reel in hoist cable only far enough to tension
tie-down straps. 4. Carefully feed towing
straps through the open-
ing in the front wheels .
Make sure metal parts of straps do not dam-
age rim.
Make sure the strap is flat over the rim bead.
Make sure brake backing plate is not dam-
aged.
5. Secure straps to front of flat bed.
6. Release tension on hoist cable, but do not dis- connect.
Use hoist cable as a safety cable.
Page 283 of 284
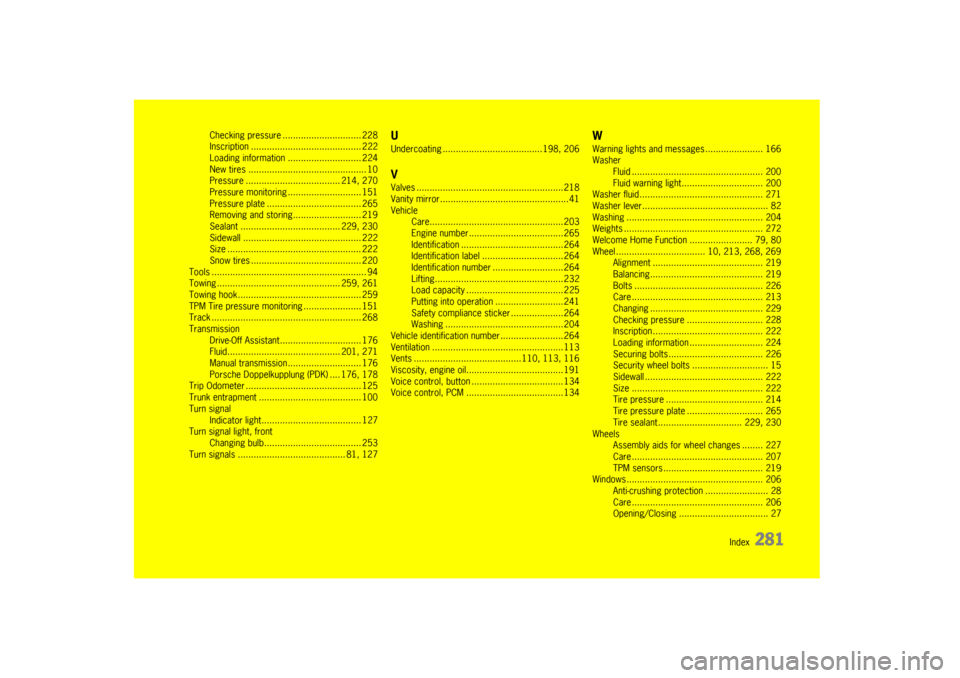
Index
281
Checking pressure .............................. 228
Inscription .......................................... 222
Loading information ............................ 224
New tires ............... .............................. 10
Pressure .................... ................ 214, 270
Pressure monitoring ............................ 151
Pressure plate ........ ............................ 265
Removing and storing.......................... 219
Sealant ...................... ................ 229, 230
Sidewall ..................... ........................ 222
Size ................................................... 222
Snow tires .............. ............................ 220
Tools ................ ........................................... 94
Towing ........................... .................... 259, 261
Towing hook............... ................................ 259
TPM Tire pressure moni toring ...................... 151
Track ............................. ............................ 268
Transmission Drive-Off Assistant... ............................ 176
Fluid........................... ................ 201, 271
Manual transmission ............................ 176
Porsche Doppelkupplung (PDK) .... 176, 178
Trip Odometer ............ ................................ 125
Trunk entrapment ....... ................................ 100
Turn signal Indicator light.......... ............................ 127
Turn signal light, front Changing bulb......... ............................ 253
Turn signals ......................................... 81, 127
UUndercoating ................ ......................198, 206VValves ........................................................218
Vanity mirror............. ....................................41
Vehicle Care......................... ..........................203
Engine number....................................265
Identification ......... ..............................264
Identification labe l ...............................264
Identification numbe r ...........................264
Lifting................... ..............................232
Load capacity ....... ..............................225
Putting into operat ion ..........................241
Safety compliance st icker ....................264
Washing ................... ..........................204
Vehicle identification number ........................264
Ventilation .................... ..............................113
Vents ................... ......................110, 113, 116
Viscosity, engine oil .....................................191
Voice control, button . ..................................134
Voice control, PCM ... ..................................134
WWarning lights and me ssages ...................... 166
Washer
Fluid ........................ .......................... 200
Fluid warning light. .............................. 200
Washer fluid ................................. .............. 271
Washer lever................................ ................ 82
Washing ...................... .............................. 204
Weights ........................................... .......... 272
Welcome Home Function ........................ 79, 80
Wheel ................. ................. 10, 213, 268, 269
Alignment ................ .......................... 219
Balancing........................................... 219
Bolts ....................... .......................... 226
Care ........................ .......................... 213
Changing ................. .......................... 229
Checking pressure ............................. 228
Inscription ............ .............................. 222
Loading information . ........................... 224
Securing bolts...... .............................. 226
Security wheel bolts ............................. 15
Sidewall ................... .......................... 222
Size .................................................. 222
Tire pressure ....... .............................. 214
Tire pressure plate ............... .............. 265
Tire sealant .............. .................. 229, 230
Wheels
Assembly aids for wheel changes ........ 227
Care ........................ .......................... 207
TPM sensors............ .......................... 219
Windows...................... .............................. 206
Anti-crushing protection ........................ 28
Care ........................ .......................... 206
Opening/Closing ...................... ............ 27