spare tire PORSCHE CAYNNE TURBO 2006 1.G Owners Manual
[x] Cancel search | Manufacturer: PORSCHE, Model Year: 2006, Model line: CAYENNE TURBO, Model: PORSCHE CAYENNE TURBO 2006 1.GPages: 387, PDF Size: 8.44 MB
Page 102 of 387
102
Controls, Safety, Instruments
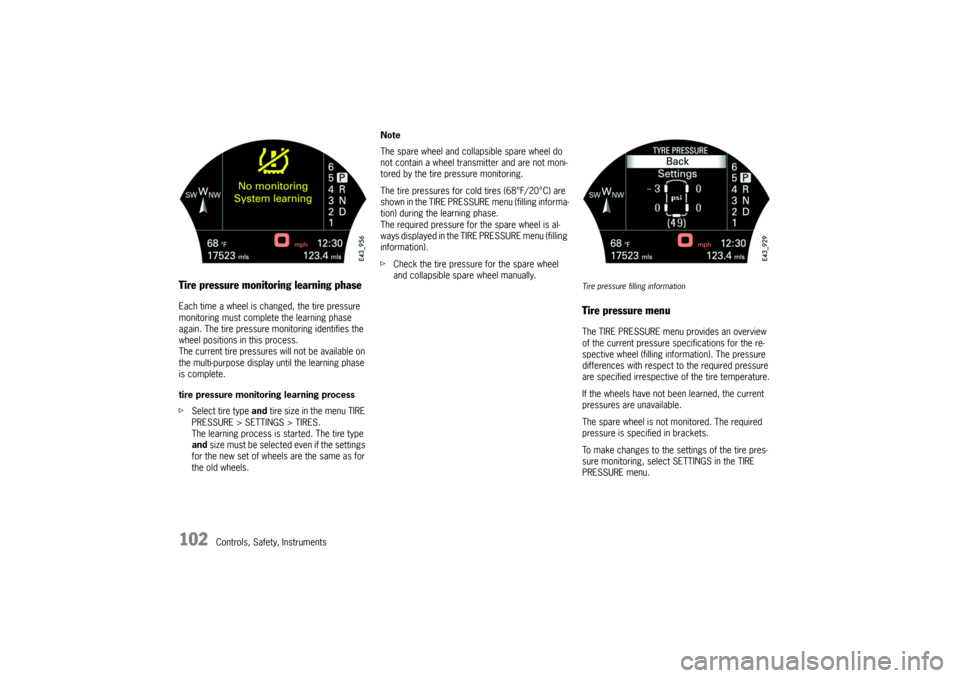
Tire pressure monitoring learning phaseEach time a wheel is changed, the tire pressure
monitoring must complete the learning phase
again. The tire pressure monitoring identifies the
wheel positions in this process.
The current tire pressures will not be available on
the multi-purpose display until the learning phase
is complete.
tire pressure monitoring learning process
fSelect tire type and tire size in the menu TIRE
PRESSURE > SETTINGS > TIRES.
The learning process is started. The tire type
and size must be selected e ve n if the se ttings
for the new set of wheels are the same as for
the old wheels.Note
The spare wheel and collapsible spare wheel do
not contain a wheel transmitter and are not moni-
tored by the tire pressure monitoring.
The tire pressures for cold tires (68°F/20°C) are
shown in the TIRE PRESSURE menu (filling informa-
tion) during the learning phase.
The required pressure for the spare wheel is al-
ways displayed in the TIRE PRESSURE menu (filling
information).
fCheck the tire pressure for the spare wheel
and collapsible spare wheel manually.
Tire pressure filling informationTire pressure menuThe TIRE PRESSURE menu provides an overview
of the current pressure specifications for the re-
spective wheel (filling information). The pressure
differences with respect to the required pressure
are specified irrespective of the tire temperature.
If the wheels have not been learned, the current
pressures are unavailable.
The spare wheel is not monitored. The required
pressure is specified in brackets.
To make changes to the settings of the tire pres-
sure monitoring, select SETTINGS in the TIRE
PRESSURE menu.
Page 103 of 387
Controls, Safety, Instruments
103
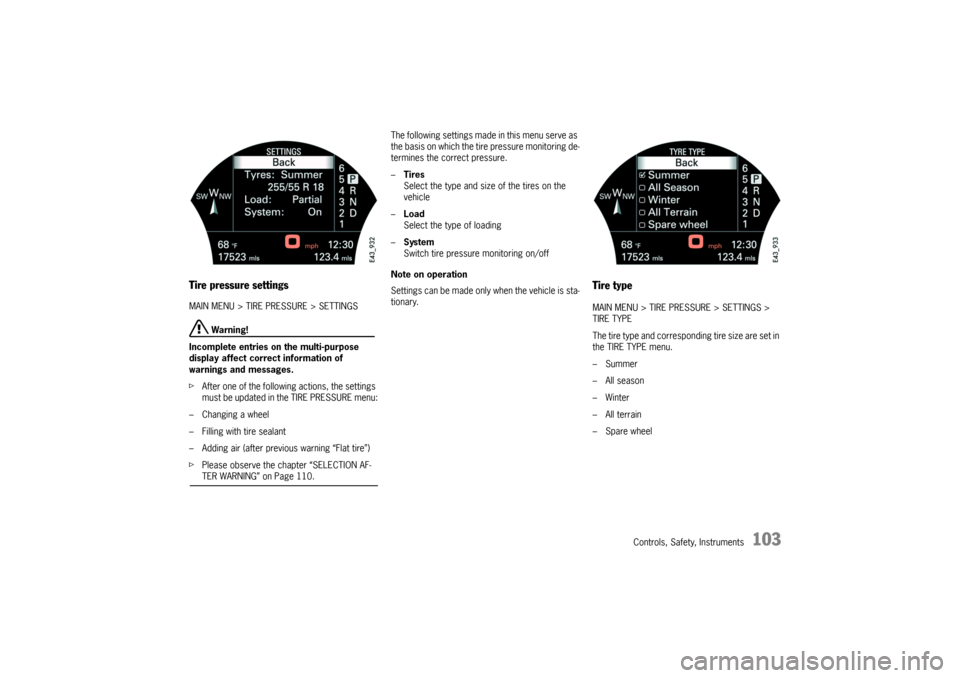
Tire pressure settingsMAIN MENU > TIRE PRESSURE > SETTINGS
Warning!
Incomplete entries on the multi-purpose
display affect correct information of
warnings and messages.
fAfter one of the following actions, the settings
must be updated in the TIRE PRESSURE menu:
– Changing a wheel
– Filling with tire sealant
– Adding air (after previous warning “Flat tire”)
fPlease observe the chapter “SELECTION AF-TER WARNING” on Page 110.The following settings made in this menu serve as
the basis on which the tire pressure monitoring de-
termines the correct pressure.
–Tires
Select the type and size of the tires on the
vehicle
–Load
Select the type of loading
–System
Switch tire pressure monitoring on/off
Note on operation
Settings can be made only when the vehicle is sta-
tionary.
Tire typeMAIN MENU > TIRE PRESSURE > SETTINGS >
TIRE TYPE
The tire type and corresponding tire size are set in
the TIRE TYPE menu.
–Summer
–All season
–Winter
– All terrain
–Spare wheel
Page 105 of 387
Controls, Safety, Instruments
105
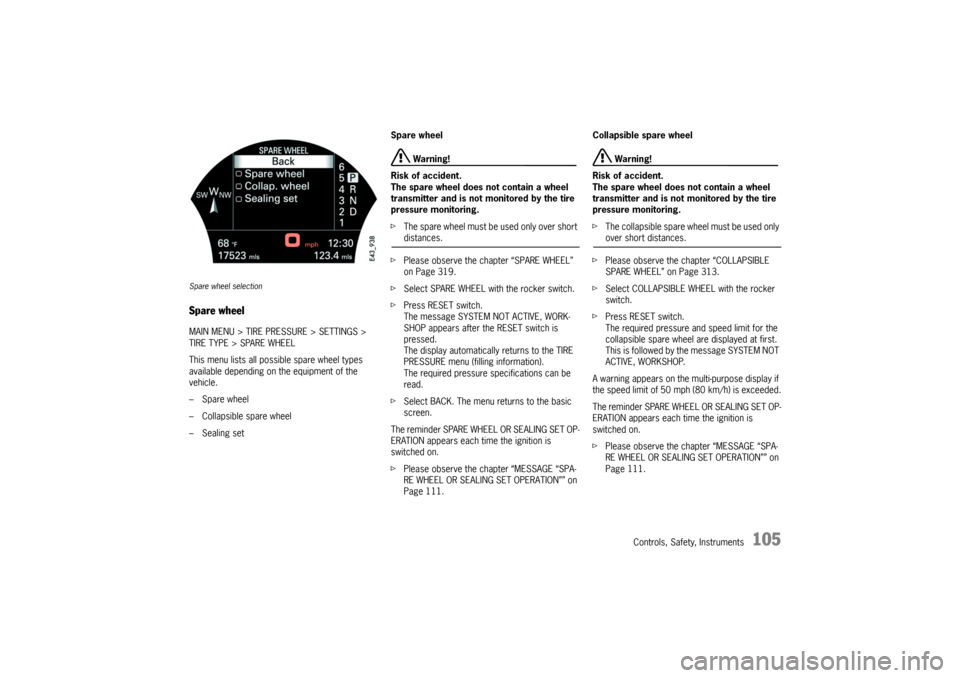
Spare wheel selectionSpare wheelMAIN MENU > TIRE PRESSURE > SETTINGS >
TIRE TYPE > SPARE WHEEL
This menu lists all possible spare wheel types
available depending on the equipment of the
vehicle.
–Spare wheel
– Collapsible spare wheel
– Sealing setSpare wheel
Warning!
Risk of accident.
The spare wheel does not contain a wheel
transmitter and is not monitored by the tire
pressure monitoring.
fThe spare wheel must be used only over short distances.
fPlease observe the chapter “SPARE WHEEL”
on Page 319.
fSelect SPARE WHEEL with the rocker switch.
fPress RESET switch.
The message SYSTEM NOT ACTIVE, WORK-
SHOP appears after the RESET switch is
pressed.
The display automatically returns to the TIRE
PRESSURE menu (filling information).
The required pressure specifications can be
read.
fSelect BACK. The menu returns to the basic
screen.
The reminder SPARE WHEEL OR SEALING SET OP-
ERATION appears each time the ignition is
switched on.
fPlease observe the chapter “MESSAGE “SPA-
RE WHEEL OR SEALING SET OPERATION”” on
Page 111.Collapsible spare wheel
Warning!
Risk of accident.
The spare wheel does not contain a wheel
transmitter and is not monitored by the tire
pressure monitoring.
fThe collapsible spare wheel must be used only over short distances.
fPlease observe the chapter “COLLAPSIBLE
SPARE WHEEL” on Page 313.
fSelect COLLAPSIBLE WHEEL with the rocker
switch.
fPress RESET switch.
The required pressure and speed limit for the
collapsible spare wheel are displayed at first.
This is followed by the message SYSTEM NOT
ACTIVE, WORKSHOP.
A warning appears on the multi-purpose display if
the speed limit of 50 mph (80 km/h) is exceeded.
The reminder SPARE WHEEL OR SEALING SET OP-
ERATION appears each time the ignition is
switched on.
fPlease observe the chapter “MESSAGE “SPA-
RE WHEEL OR SEALING SET OPERATION”” on
Page 111.
Page 106 of 387
106
Controls, Safety, Instruments Tire sealant/sealing set
Warning!
Risk of accident.
fHave the tire replaced by a specialist repair
shop as soon as possible.
fAvoid hard acceleration and high cornering
speeds.
fDo not exceed maximum speed of 50 mph
(80 km/h).
fPlease observe the safety and operating in-structions on compressor.
fPlease observe the chapter “TIRE SEALANT”
on Page 305.
fSelect SEALING SET with the rocker switch.
fPress RESET switch.
The display automatically returns to the
TIRE PRESSURE menu (filling information).
fInflate tires according to the displayed
pressure differences.
A warning appears on the multi-purpose display if
the speed limit of 50 mph (80 km/h) is exceeded.
SPARE WHEEL OR SEALING SET OPERATION ap-
pears each time the ignition is switched on.
fPlease observe the chapter “MESSAGE “SPA-
RE WHEEL OR SEALING SET OPERATION”” on
Page 111.
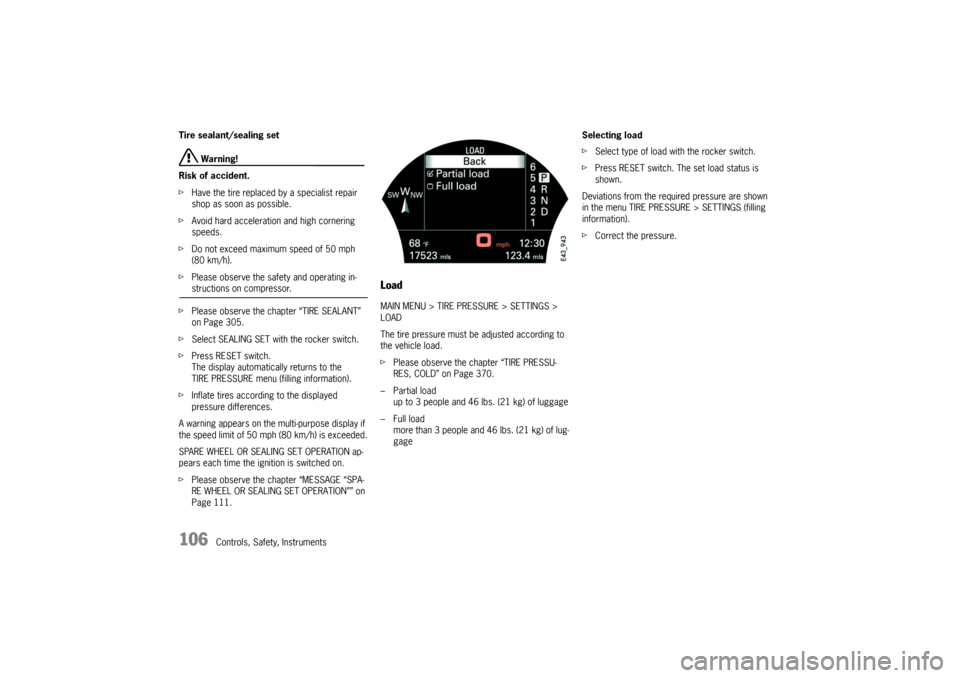
LoadMAIN MENU > TIRE PRESSURE > SETTINGS >
LOAD
The tire pressure must be adjusted according to
the vehicle load.
fPlease observe the chapter “TIRE PRESSU-
RES, COLD” on Page 370.
– Partial load
up to 3 people and 46 lbs. (21 kg) of luggage
– Full load
more than 3 people and 46 lbs. (21 kg) of lug-
gageSelecting load
fSelect type of load with the rocker switch.
fPress RESET switch. The set load status is
shown.
Deviations from the required pressure are shown
in the menu TIRE PRESSURE > SETTINGS (filling
information).
fCorrect the pressure.
Page 110 of 387
110
Controls, Safety, Instruments
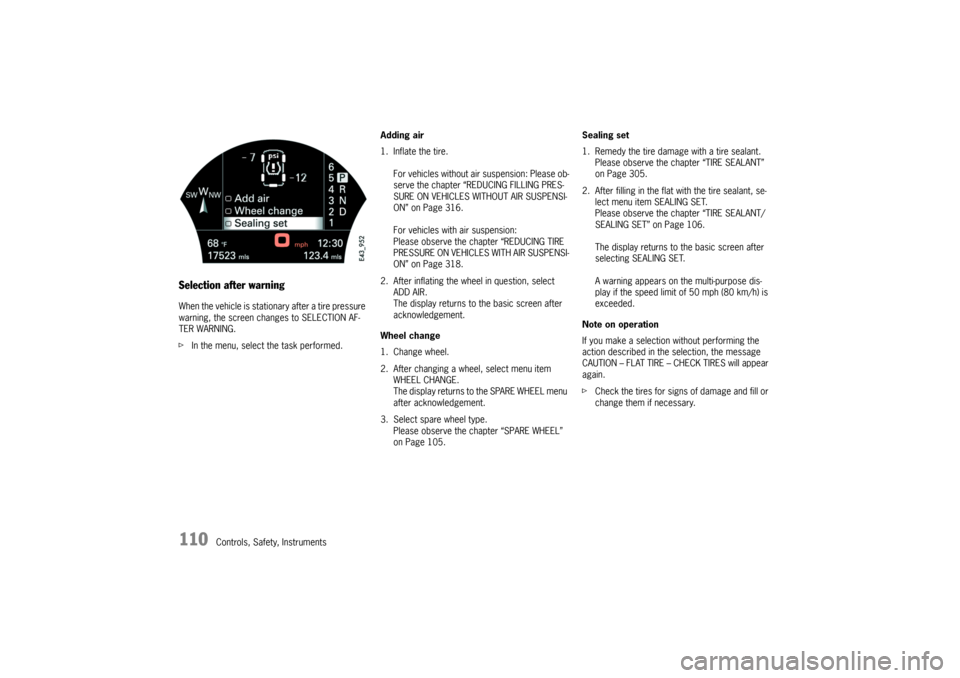
Selection after warningWhen the vehicle is stationary after a tire pressure
warning, the screen changes to SELECTION AF-
TER WARNING.
fIn the menu, select the task performed.Adding air
1. Inflate the tire.
For vehicles without air suspension: Please ob-
serve the chapter “REDUCING FILLING PRES-
SURE ON VEHICLES WITHOUT AIR SUSPENSI-
ON” on Page 316.
For vehicles with air suspension:
Please observe the chapter “REDUCING TIRE
PRES SU RE ON V EHICL ES WITH AIR S U SPENS I-
ON” on Page 318.
2. After inflating the wheel in question, select
ADD AIR.
The display returns to the basic screen after
acknowledgement.
Wheel change
1. Change wheel.
2. After changing a wheel, select menu item
WHEEL CHANGE.
The display returns to the SPARE WHEEL menu
after acknowledgement.
3. Select spare wheel type.
Please observe the chapter “SPARE WHEEL”
on Page 105.Sealing set
1. Remedy the tire damage with a tire sealant.
Please observe the chapter “TIRE SEALANT”
on Page 305.
2. After filling in the flat with the tire sealant, se-
lect menu item SEALING SET.
Please observe the chapter “TIRE SEALANT/
SEALING SET” on Page 106.
The display returns to the basic screen after
selecting SEALING SET.
A warning appears on the multi-purpose dis-
play if the speed limit of 50 mph (80 km/h) is
exceeded.
Note on operation
If you make a selection without performing the
action described in the selection, the message
CAUTION – FLAT TIRE – CHECK TIRES will appear
again.
fCheck the tires for signs of damage and fill or
change them if necessary.
Page 111 of 387
Controls, Safety, Instruments
111
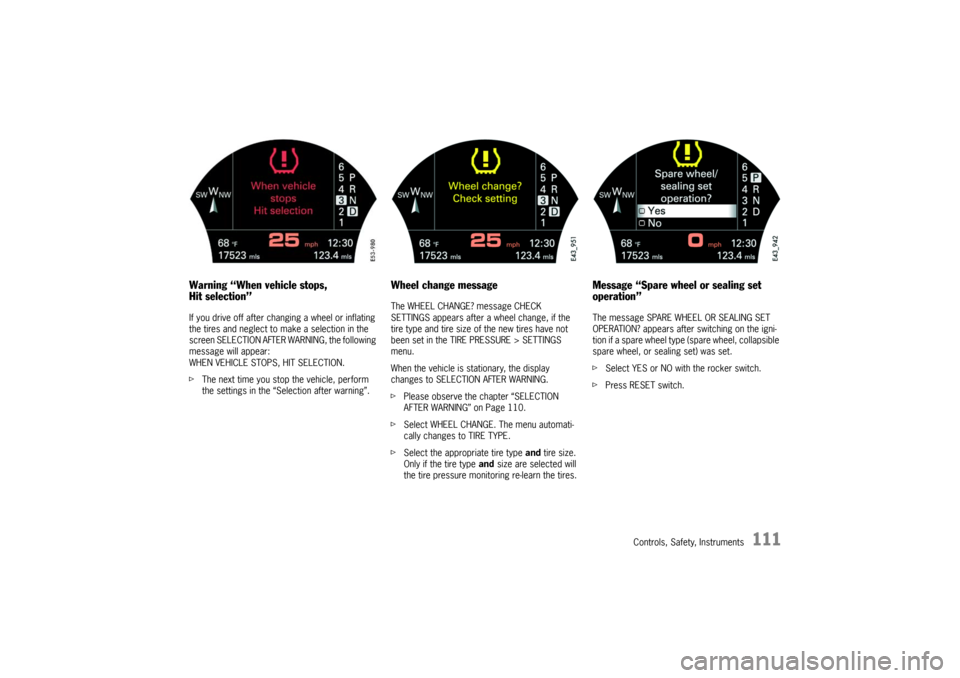
Warning “When vehicle stops,
Hit selection”If you drive off after changing a wheel or inflating
the tires and neglect to make a selection in the
screen SELECTION AFTER WARNING, the following
message will appear:
WHEN VEHICLE STOPS, HIT SELECTION.
fThe next time you stop the vehicle, perform
the settings in the “Selection after warning”.
Wheel change messageThe WHEEL CHANGE? message CHECK
SETTINGS appears after a wheel change, if the
tire type and tire size of the new tires have not
been set in the TIRE PRESSURE > SETTINGS
menu.
When the vehicle is stationary, the display
changes to SELECTION AFTER WARNING.
fPlease observe the chapter “SELECTION
AFTER WARNING” on Page 110.
fSelect WHEEL CHANGE. The menu automati-
cally changes to TIRE TYPE.
fSelect the appropriate tire type and tire size.
Only if the tire type and size are selected will
the tire pressure monitoring re-learn the tires.
Message “Spare wheel or sealing set
operation”The message SPARE WHEEL OR SEALING SET
OPERATION? appears after switching on the igni-
tion if a spare wheel type (spare wheel, collapsible
spare wheel, or sealing set) was set.
fSelect YES or NO with the rocker switch.
fPress RESET switch.
Page 112 of 387

112
Controls, Safety, Instruments Ye s :
– In case of sealing-set operation, the menu
changes directly to the basic screen. All
settings are retained.
– If the vehicle is operated with a collapsible
spare wheel or spare wheel, the warning mes-
sage “SYSTEM NOT ACTIVE, WORKSHOP” is
initially displayed for 10 seconds. The system
then returns to the basic screen.
No:
The display automatically returns to the menu TIRE
PRESSURE > SETTINGS.
fSet the mounted tire set with tire type and tire
size. The system will re-learn the tires.
No monitoringIn the event of faults the tire pressure monitoring
cannot monitor the tire pressure.
The warning light on the instrument panel and a
message on the multi-purpose display light up.
Monitoring is not active when:
– the tire pressure monitoring is faulty,
– wheel transmitters for the tire pressure
monitoring are not present,
– temporarily after changing a wheel,
– has detected too many wheel transmitters,
– there is external interference by other radio
sources, e.g., wireless headphones,
– Tire temperatures are too high.
fPlease observe the chapter “WARNING LIGHTS
AND WARNING MESSAGES” on Page 122.All warnings and messages in the tire pressure
monitoring are also indicated by the warning light
in the instrument panel.
The warning light goes out as soon as all faults are
remedied.
Tire pressure monitoring warning
light
Page 124 of 387

124
Controls, Safety, Instruments
Passenger's airbag deactivated Advanced Airbag - displays when the passenger's airbag deacti-
vates or displays for approx. 10 seconds with the passenger's
airbag deactivated after switching on the ignition
Checking passenger's seat settings Weight sensing is impaired on the passenger's seat (Advanced
Airbag).
Correct the seating position, set the backrest upright, do not
support weight on the armrests, or lift on the handles.
Safety belt Fasten safety belt.
Warning – Flat tire – Check tires Stop in a suitable place and check the tires. Change wheel if
necessary.
Check spare wheel – Required pressure:
50 psi/3,4 barAppears about every 6 months.
Check if the pressure of the mounted spare wheel matches the
required pressure, as it is not monitored electronically.
Tire pressure too low – Add air System detects a pressure loss of at least 2,9 psi/0,2 bar.
Correct tire pressure at the next opportunity.
Collapsible spare wheel/sealing set
max. 50 mph (80 km/h)Observe maximum permitted speed.
Collapsible spare wheel/51 psi/3,5 bar
max. 50 mph (80 km/h)Information on driving with a collapsible spare wheel.
Observe maximum speed of max 50 mph or 80 km/h and
required pressure of 51 psi or 3,5 bar.
System not activeIndication when spare wheel or collapsible spare wheel is used
or tire pressure monitoring is faulty.
Consult a qualified specialist workshop.
Select new set of wheels in the Tire pressure menu after chang-
ing the wheels.
System not active – Brief disturbance External interference of excessive temperature at the wheel
transmitters. System will reactivate itself.
Instrument
panelMulti-purpose
displayText display Meaning/measures
Page 174 of 387
174
Controls, Safety, Instruments
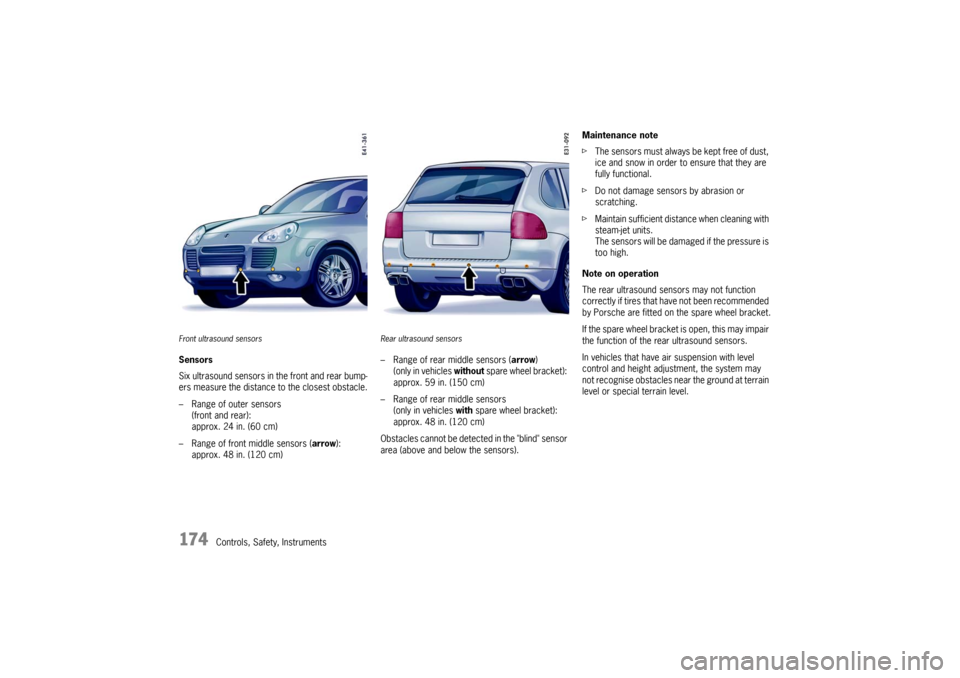
Front ultrasound sensorsSensors
Six ultrasound sensors in the front and rear bump-
ers measure the distance to the closest obstacle.
– Range of outer sensors
(front and rear):
approx. 24 in. (60 cm)
– Range of front middle sensors (arrow):
approx. 48 in. (120 cm)
Rear ultrasound sensors– Range of rear middle sensors (arrow)
(only in vehicles without spare wheel bracket):
approx. 59 in. (150 cm)
– Range of rear middle sensors
(only in vehicles with spare wheel bracket):
approx. 48 in. (120 cm)
Obstacles cannot be detected in the "blind" sensor
area (above and below the sensors).Maintenance note
fThe sensors must always be kept free of dust,
ice and snow in order to ensure that they are
fully functional.
fDo not damage sensors by abrasion or
scratching.
fMaintain sufficient distance when cleaning with
steam-jet units.
The sensors will be damaged if the pressure is
too high.
Note on operation
The rear ultrasound sensors may not function
correctly if tires that have not been recommended
by Porsche are fitted on the spare wheel bracket.
If the spare wheel bracket is open, this may impair
the function of the rear ultrasound sensors.
In vehicles that have air suspension with level
control and height adjustment, the system may
not recognise obstacles near the ground at terrain
level or special terrain level.
Page 207 of 387

Controls, Safety, Instruments
207
Loading InformationDefinitionsThe towing capacity (gross weight of the trailer)
is the sum of the trailer's empty weight and the
weight of the load.
The vertical coupling load is the weight that the
trailer drawbar exerts on the trailer coupling of the
vehicle.
The rear-axle load is the vehicle weight on the
rear axle plus the weight of the transported load
and the vertical coupling load of the trailer.
The gross weight of the vehicle and trailer is
the sum of the weight of the towing vehicle and the
weight of the trailer.
The Curb weight - actual weight of your vehicle -
vehicle weight including standard and optional
equipment, fluids, emergency tools, and spare tire
assembly. This weight does not include passen-
gers and cargo.
The Gross Vehicle Weight is sum of the curb
weight and the weight of passengers and cargo
combined.
The Gross Vehicle Weight Rating is the maxi-
mum total weight of vehicle, passengers, lug-
gage, hitch, trailer tongue load and optional equip-
ment.The Gross Axle Weight Rating is the maximum
load limit for the front or the rear axle. This infor-
mation is located on the safety comliance sticker
located in the driver’s side door jamb.
For determining the compatibility of the tire and
vehicle load capabilities:
fPlease observe the chapter “TIRES, RIMS,
TRACKS” on Page 368.
The load capacity coefficient (e.g. “106”) is a min-
imum requirement. For more information:
fPlease observe the chapter “INSCRIPTION ON
RADIAL TIRE” on Page 297.
The Gross Combined Weight Rating is the
maximum total weight rating of vehicle, passen-
gers, cargo and trailer.
The Vehicle Capacity Weight - Load Limit - is
the maximum total weight limit specified of the
load (passengers and cargo) for the vehicle. This
is the maximum weight of passengers and cargo
that can be loaded into the vehicle. This informa-
tion can be found on the tire pressure plate.
If a trailer is being towed, the trailer tongue weight
must be included as part of the cargo load.
The maximum loaded vehicle weight is the
sum of curb weight, accessory weight, vehicle ca-
pacity weight and production options weight.
The load rating is the maximum load that a tire
is rated to carry for a given inflation pressure.The maximum load rating is the load rating for
a tire at the maximum permissble inflation pressu-
re.
The cargo capacity is the permissible weight of
cargo, the substracted weight of passengers from
the load limit.
fNever exceed the permissible limits.
Danger!
Risk of personal injury or death.
Injuries are much more likely in an accident
if persons ride in the cargo area.
fPersons must ride only on the seats provided
for this purpose.
fMake sure that everybody fastens their safety
belts.
Risk of personal injury, loss of control and
damage to vehicle.
fNever exceed the specified axle loads.Over-
loading can shorten the service life of the tires
and car, as well as lead to dangerous vehicle
reactions and long braking distances. Damage
due to overloading is not covered by the vehi-cle warranty.