Engine Ram 1500 2015 Owner's Manual
[x] Cancel search | Manufacturer: RAM, Model Year: 2015, Model line: 1500, Model: Ram 1500 2015Pages: 871, PDF Size: 24.83 MB
Page 781 of 871
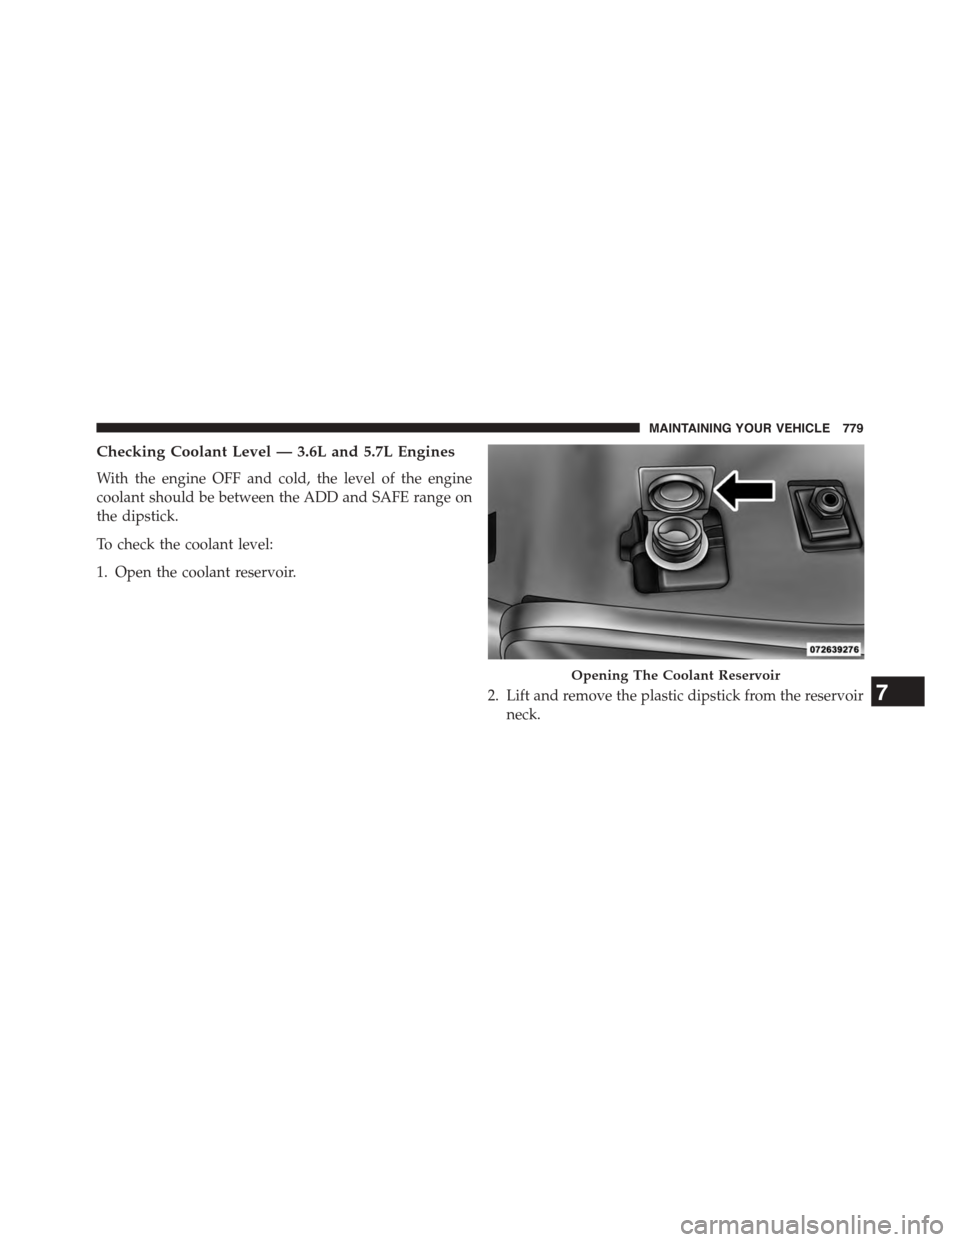
Checking Coolant Level — 3.6L and 5.7L Engines
With the engine OFF and cold, the level of the engine
coolant should be between the ADD and SAFE range on
the dipstick.
To check the coolant level:
1. Open the coolant reservoir.
2. Lift and remove the plastic dipstick from the reservoir
neck.
Opening The Coolant Reservoir
7
MAINTAINING YOUR VEHICLE 779
Page 782 of 871
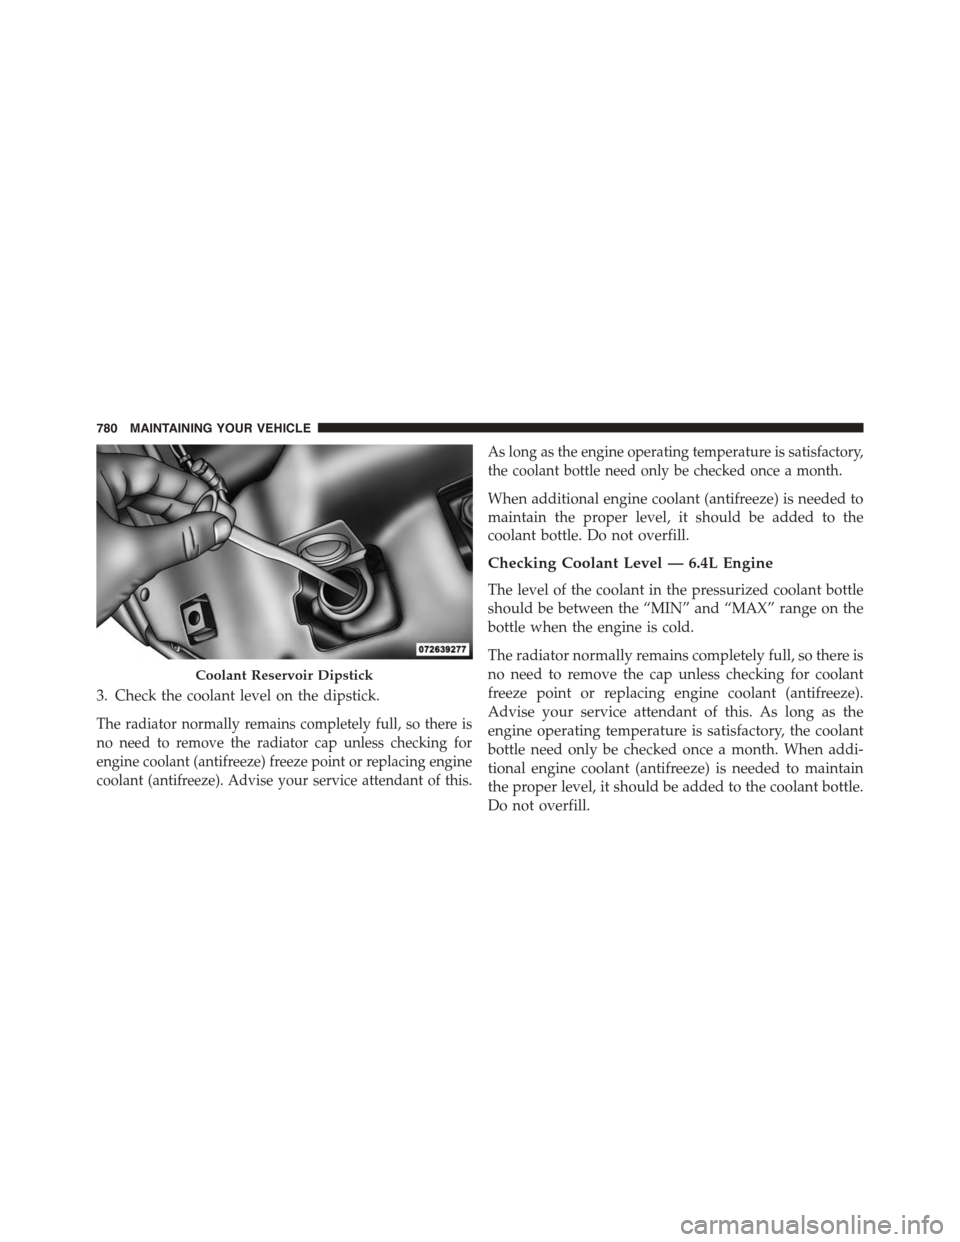
3. Check the coolant level on the dipstick.
The radiator normally remains completely full, so there is
no need to remove the radiator cap unless checking for
engine coolant (antifreeze) freeze point or replacing engine
coolant (antifreeze). Advise your service attendant of this.
As long as the engine operating temperature is satisfactory,
the coolant bottle need only be checked once a month.
When additional engine coolant (antifreeze) is needed to
maintain the proper level, it should be added to the
coolant bottle. Do not overfill.
Checking Coolant Level — 6.4L Engine
The level of the coolant in the pressurized coolant bottle
should be between the “MIN” and “MAX” range on the
bottle when the engine is cold.
The radiator normally remains completely full, so there is
no need to remove the cap unless checking for coolant
freeze point or replacing engine coolant (antifreeze).
Advise your service attendant of this. As long as the
engine operating temperature is satisfactory, the coolant
bottle need only be checked once a month. When addi-
tional engine coolant (antifreeze) is needed to maintain
the proper level, it should be added to the coolant bottle.
Do not overfill.
Coolant Reservoir Dipstick
780 MAINTAINING YOUR VEHICLE
Page 783 of 871
Points To Remember
NOTE:When the vehicle is stopped after a few miles/
kilometers of operation, you may observe vapor coming
from the front of the engine compartment. This is nor-
mally a result of moisture from rain, snow, or high
humidity accumulating on the radiator and being vapor-
ized when the thermostat opens, allowing hot engine
coolant (antifreeze) to enter the radiator.
If an examination of your engine compartment shows no
evidence of radiator or hose leaks, the vehicle may be
safely driven. The vapor will soon dissipate.
•Do not overfill the coolant expansion bottle.
•Check the coolant freeze point in the radiator and in the
coolant expansion bottle. If engine coolant (antifreeze)
needs to be added, the contents of the coolant expansion
bottle must also be protected against freezing.
•If frequent engine coolant (antifreeze) additions are
required, the cooling system should be pressure tested
for leaks.
•Maintain engine coolant (antifreeze) concentration at a
minimum of 50% OAT coolant (conforming to MS-12106)
and distilled water for proper corrosion protection of
your engine which contains aluminum components.
•Make sure that the coolant expansion bottle overflow
hoses are not kinked or obstructed.
•Keep the front of the radiator clean. If your vehicle is
equipped with air conditioning, keep the front of the
condenser clean.
•Do not change the thermostat for Summer or Winter
operation. If replacement is ever necessary, install
ONLY the correct type thermostat. Other designs may
result in unsatisfactory engine coolant (antifreeze)
performance, poor gas mileage, and increased emis-
sions.
7
MAINTAINING YOUR VEHICLE 781
Page 785 of 871
WARNING!
•Use only manufacturer’s recommended brake
fluid. Refer to “Fluids, Lubricants, and Genuine
Parts” in “Maintaining Your Vehicle” for further
information. Using the wrong type of brake fluid
can severely damage your brake system and/or
impair its performance. The proper type of brake
fluid for your vehicle is also identified on the
original factory installed hydraulic master cylinder
reservoir.
(Continued)
WARNING!(Continued)
•To avoid contamination from foreign matter or
moisture, use only new brake fluid or fluid that has
been in a tightly closed container. Keep the master
cylinder reservoir cap secured at all times. Brake
fluid in a open container absorbs moisture from the
air resulting in a lower boiling point. This may
cause it to boil unexpectedly during hard or pro-
longed braking, resulting in sudden brake failure.
This could result in a collision.
•Overfilling the brake fluid reservoir can result in
spilling brake fluid on hot engine parts, causing
the brake fluid to catch fire. Brake fluid can also
damage painted and vinyl surfaces, care should be
taken to avoid its contact with these surfaces.
(Continued)
7
MAINTAINING YOUR VEHICLE 783
Page 788 of 871
Automatic Transmission
Selection Of Lubricant
It is important to use the proper transmission fluid to
ensure optimum transmission performance and life. Use
only the manufacturer ’s specified transmission fluid.
Refer to “Fluids, Lubricants, and Genuine Parts” in this
section for fluid specifications. It is important to maintain
the transmission fluid at the correct level using the
recommended fluid. No chemical flushes should be used
in any transmission; only the approved lubricant should
be used.
CAUTION!
Using a transmission fluid other than the manufac-
turer ’s recommended fluid may cause deterioration
in transmission shift quality and/or torque converter
(Continued)
CAUTION!(Continued)
shudder, and will require more frequent fluid and
filter changes. Refer to “Fluids, Lubricants, and
Genuine Parts” in this section for fluid specifica-
tions.
Special Additives
The manufacturer strongly recommends against using
any special additives in the transmission. Automatic
Transmission Fluid (ATF) is an engineered product and
its performance may be impaired by supplemental addi-
tives. Therefore, do not add any fluid additives to the
transmission. The only exception to this policy is the use
of special dyes for diagnosing fluid leaks. Avoid using
transmission sealers as they may adversely affect seals.
786 MAINTAINING YOUR VEHICLE
Page 790 of 871
Use the following procedure to check the transmission
fluid level properly:
1. Monitor the transmission temperature using the
EVIC/DID screen, and operate the vehicle as required
to reach the normal operating temperature. If the
transmission is not functioning properly, or the vehicle
cannot be driven, see the NOTE and CAUTION below
about checking the fluid level at colder temperatures.
2. Park the vehicle on level ground.
3. Run the engine at normal idle speed for at least 60
seconds, and leave the engine running for the rest of
this procedure.
4. Fully apply the parking brake, and press the brake
pedal.
5.Place the shift lever momentarily into each gear position
(allowing time for the transmission to fully engage in
each position), ending with the transmission in PARK.
6. Remove the dipstick, wipe it clean and reinsert it until
seated.
7. Remove the dipstick again and note the fluid level on
both sides. The fluid level reading is only valid if there
is a solid coating of oil on both sides of the dipstick.
Note that the holes in the dipstick will be full of fluid
if the actual level is at or above the hole. The fluid level
should be between the “HOT” (upper) reference holes
on the dipstick at normal operating temperature. If the
fluid level is low, add fluid through the dipstick tube
to bring it to the proper level.Do not overfill.Use
ONLY the specified fluid (see#Fluids, Lubricants, and
Genuine Parts#for fluid specifications). After adding
any quantity of oil through the dipstick tube, wait a
minimum of two minutes for the oil to fully drain into
the transmission before rechecking the fluid level.
788 MAINTAINING YOUR VEHICLE
Page 791 of 871

NOTE:If it is necessary to check the transmissionbelow
the operating temperature, the fluid level should be
between the two “COLD” (lower) holes on the dipstick
with the fluid at 60-70°F / 16-21°C. Only use the COLD
region of the dipstick as a rough reference when setting
the fluid level after a transmission service or fluid
change. Re-check the fluid level, and adjust as required,
once the transmission reaches normal operating tempera-
ture.
CAUTION!
If the fluid temperature is below 50°F (10°C) it may
not register on the dipstick. Do not add fluid until
the temperature is elevated enough to produce an
accurate reading. Run the engine at idle, in PARK, to
warm the fluid.
8. Reinsert the dipstick. Check for leaks. Release the
parking brake.
NOTE:To prevent dirt and water from entering the
transmission after checking or replenishing fluid, make
sure that the dipstick cap is properly reseated. It is
normal for the dipstick cap to spring back slightly from
its fully seated position, as long as its seal remains
engaged in the dipstick tube.
Fluid And Filter Changes — Eight-Speed
Transmission
Under normal operating conditions, the fluid installed at
the factory will provide satisfactory lubrication for the
life of the vehicle.
Routine fluid and filter changes are not required. How-
ever, change the fluid and filter if the fluid becomes
contaminated (with water, etc.), or if the transmission is
disassembled for any reason.
7
MAINTAINING YOUR VEHICLE 789
Page 800 of 871
WARNING!(Continued)
•Before replacing a fuse, make sure that the ignition
is off and that all the other services are switched off
and/or disengaged.
•If the replaced fuse blows again, contact an autho-
rized dealer.
•If a general protection fuse for safety systems (air
bag system, braking system), power unit systems
(engine system, gearbox system) or steering system
blows, contact an authorized dealer.
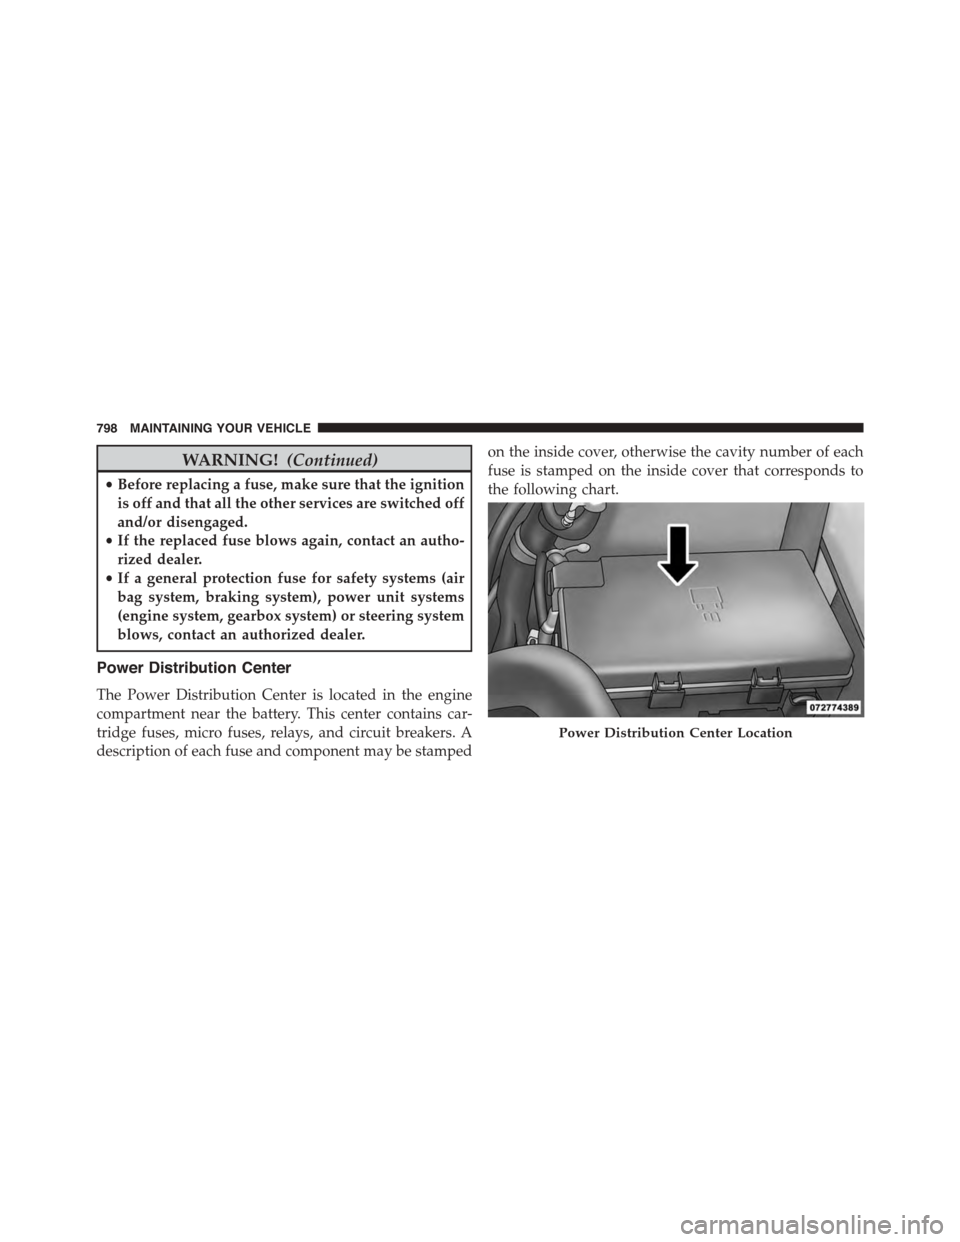
Power Distribution Center
The Power Distribution Center is located in the engine
compartment near the battery. This center contains car-
tridge fuses, micro fuses, relays, and circuit breakers. A
description of each fuse and component may be stamped
on the inside cover, otherwise the cavity number of each
fuse is stamped on the inside cover that corresponds to
the following chart.
Power Distribution Center Location
798 MAINTAINING YOUR VEHICLE
Page 803 of 871
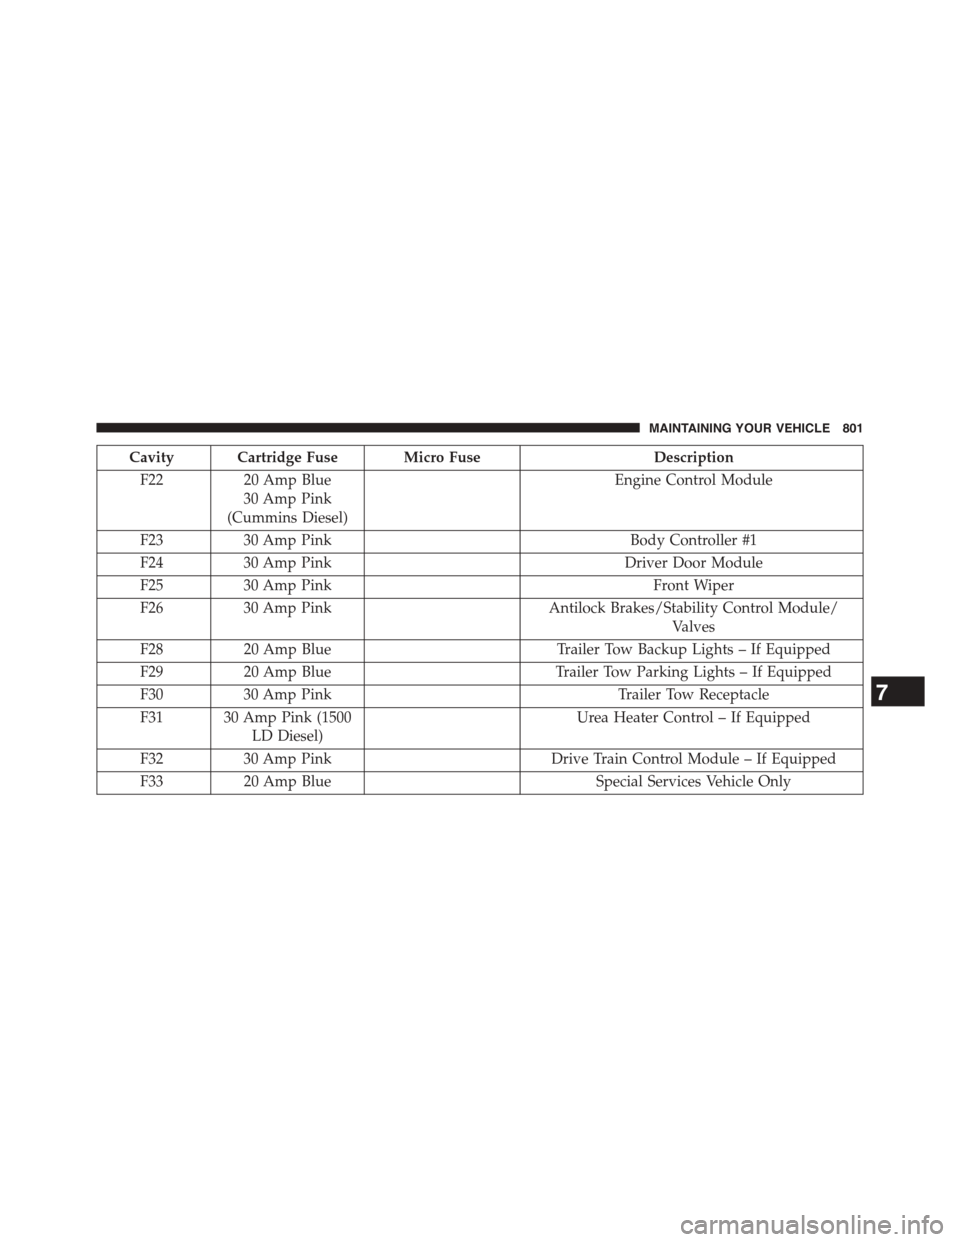
Cavity Cartridge Fuse Micro FuseDescription
F2220 Amp Blue
30 Amp Pink
(Cummins Diesel)
Engine Control Module
F2330 Amp PinkBody Controller #1
F2430 Amp PinkDriver Door Module
F2530 Amp PinkFront Wiper
F2630 Amp PinkAntilock Brakes/Stability Control Module/
Valves
F2820 Amp BlueTrailer Tow Backup Lights – If Equipped
F2920 Amp BlueTrailer Tow Parking Lights – If Equipped
F3030 Amp PinkTrailer Tow Receptacle
F31 30 Amp Pink (1500
LD Diesel)
Urea Heater Control – If Equipped
F3230 Amp PinkDrive Train Control Module – If Equipped
F3320 Amp BlueSpecial Services Vehicle Only
7
MAINTAINING YOUR VEHICLE 801
Page 806 of 871

Cavity Cartridge Fuse Micro FuseDescription
F6510 Amp RedUSB interface
F6610 Amp Red Sunroof / Passenger Window Switches / Rain
Sensor
F6710 Amp Red CD / DVD / Bluetooth Hands-free Module – If
Equipped
F6915 Amp Blue Mod SCR 12V (Cummins Diesel) – If Equipped
F7030 Amp GreenFuel Pump Motor
F7125 Amp ClearAmplifier
F7210 Amp Red Voltage Stabilizer Modules – If Equipped
F7320 Amp Yellow Fuel Transfer Pump (HD Only) – If Equipped
F7420 Amp Yellow
(Gas Engine & 1500
LD Diesel)
10 Amp Red (Cum-
mins Diesel Engine)
Brake Vacuum Pump Gas/Diesel – If Equipped
F7510 Amp RedCoolant Temperature Valve Actuator
804 MAINTAINING YOUR VEHICLE