hood release Ram 1500 2018 User Guide
[x] Cancel search | Manufacturer: RAM, Model Year: 2018, Model line: 1500, Model: Ram 1500 2018Pages: 372, PDF Size: 7.1 MB
Page 52 of 372

will close fully and stop automatically. This is
called “Express Close”. During Express Close
operation, any other actuation of the switch
will stop the sunroof.
Manual
To close the sunroof, push and hold the
switch in the forward position. Any release of
the switch will stop the movement and the
sunroof will remain in a partially closed con-
dition until the sunroof switch is pushed
again.
Wind Buffeting
Wind buffeting can be described as the per-
ception of pressure on the ears or a
helicopter-type sound in the ears. Your ve-
hicle may exhibit wind buffeting with the
windows down, or the sunroof (if equipped) in
certain open or partially open positions. This
is a normal occurrence and can be mini-
mized. If the buffeting occurs with the rear
windows open, then open the front and rear
windows together to minimize the buffeting.
If the buffeting occurs with the sunroof open,
adjust the sunroof opening to minimize the
buffeting or open any window.
Pinch Protect Feature
This feature will detect an obstruction in the
closing of the sunroof during the Express
Close operation. If an obstruction in the path
of the sunroof is detected, the sunroof will
automatically retract. Remove the obstruc-
tion if this occurs.
NOTE:
If three consecutive sunroof close attempts
result in Pinch Protect reversals, Pinch Pro-
tect will disable and the sunroof must be
closed in Manual Mode.
Venting Sunroof — Express
Push and release the Vent button within one
half second and the sunroof will open to the
vent position. This is called “Express Vent”
and it will occur regardless of sunroof posi-
tion. During Express Vent operation, any
movement of the switch will stop the sunroof.
HOOD
To Open The Hood
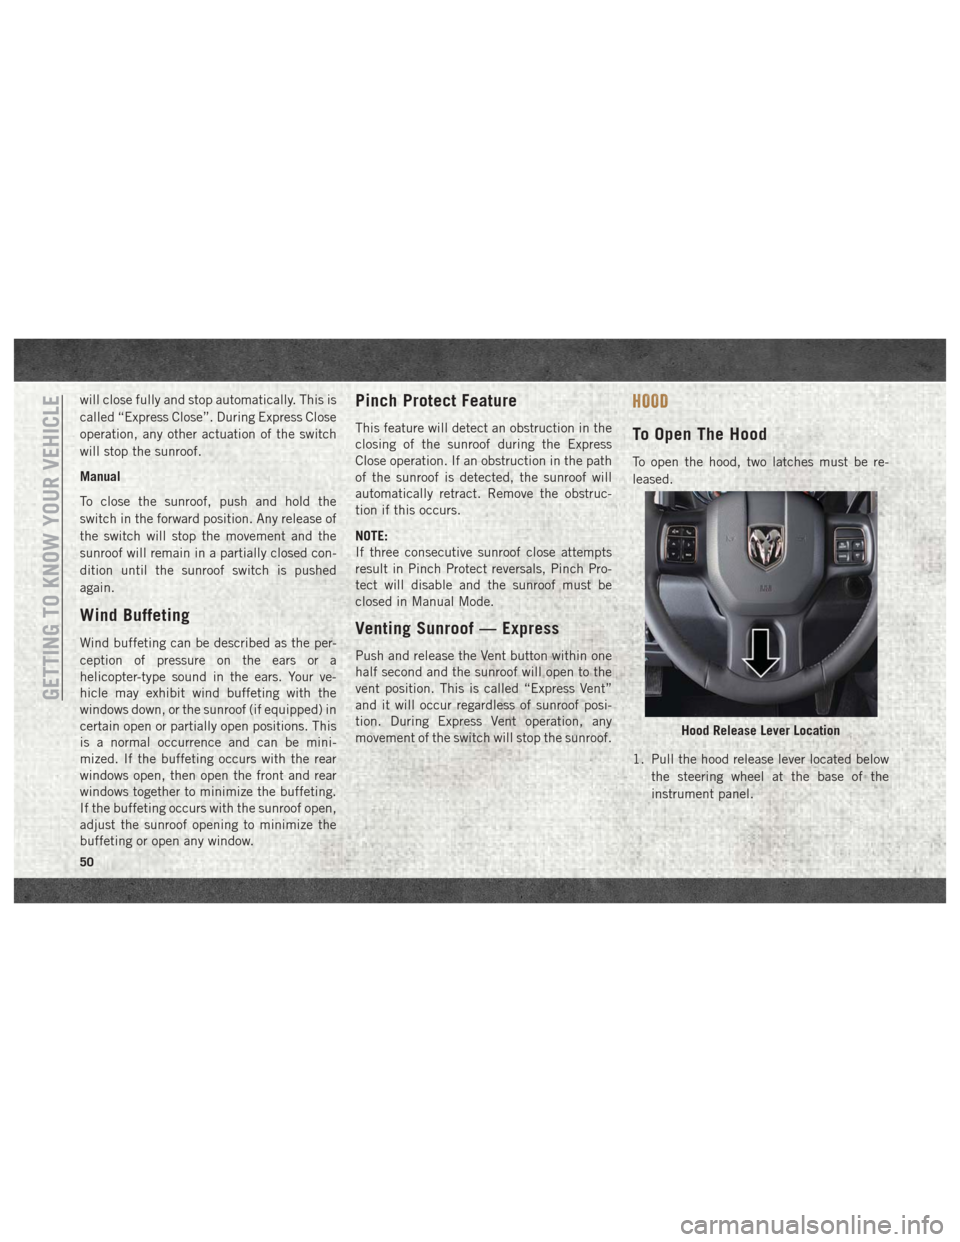
To open the hood, two latches must be re-
leased.
1. Pull the hood release lever located belowthe steering wheel at the base of the
instrument panel.
Hood Release Lever Location
GETTING TO KNOW YOUR VEHICLE
50
Page 53 of 372

2. Reach into the opening beneath the cen-ter of the hood and push the safety latch
lever to the left to release it, before raising
the hood.
To Close The Hood
Lower the hood to approximately 12 inches
(30 cm) from the engine compartment and
drop it. Make sure that the hood is completely
closed.
WARNING!
Be sure the hood is fully latched before
driving your vehicle. If the hood is not fully
latched, it could open when the vehicle is
in motion and block your vision. Failure to
follow this warning could result in serious
injury or death.
CAUTION!
To prevent possible damage, do not slam
the hood to close it. Use a firm downward
push at the front center of the hood to
ensure that both latches engage.
UNIVERSAL GARAGE DOOR OPENER
(HOMELINK)
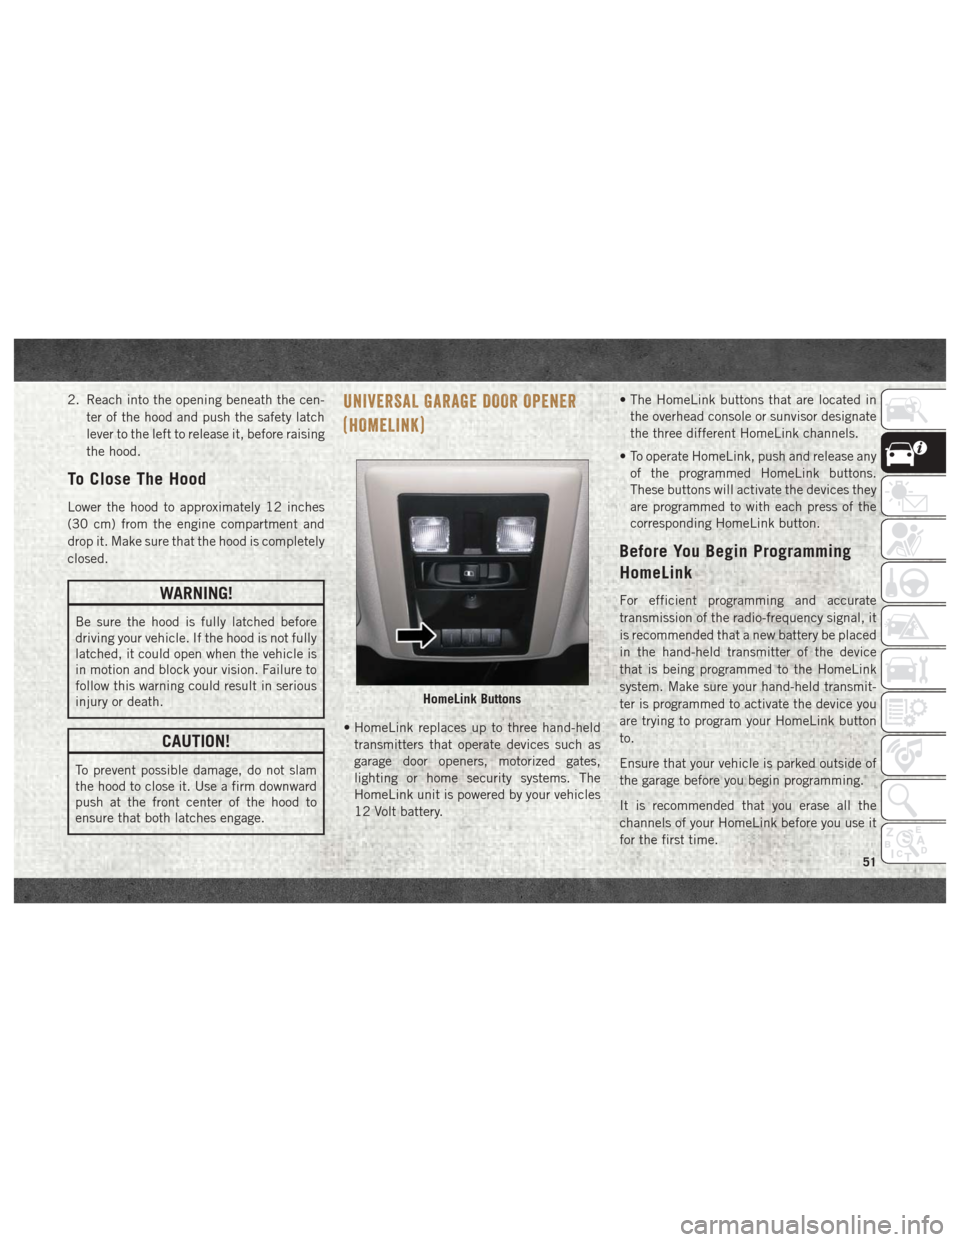
• HomeLink replaces up to three hand-heldtransmitters that operate devices such as
garage door openers, motorized gates,
lighting or home security systems. The
HomeLink unit is powered by your vehicles
12 Volt battery. • The HomeLink buttons that are located in
the overhead console or sunvisor designate
the three different HomeLink channels.
• To operate HomeLink, push and release any of the programmed HomeLink buttons.
These buttons will activate the devices they
are programmed to with each press of the
corresponding HomeLink button.
Before You Begin Programming
HomeLink
For efficient programming and accurate
transmission of the radio-frequency signal, it
is recommended that a new battery be placed
in the hand-held transmitter of the device
that is being programmed to the HomeLink
system. Make sure your hand-held transmit-
ter is programmed to activate the device you
are trying to program your HomeLink button
to.
Ensure that your vehicle is parked outside of
the garage before you begin programming.
It is recommended that you erase all the
channels of your HomeLink before you use it
for the first time.
HomeLink Buttons
51
Page 150 of 372

ignition from OFF or ACC to RUN, and will
illuminate the "Wait To Start" telltale. The
engine will not immediately crank, this is
normal operation.
2. The “Wait To Start" telltale will remain on for a period of time that varies depending
on the engine temperature.
3. While the "Wait to Start" telltale is on, the instrument cluster will additionally dis-
play a gauge or bar whose initial length
represents the full "Wait to Start" time
period. Its length will decrease until it
disappears when the "Wait to Start" time
has elapsed.
CAUTION!
If the “Water in Fuel Indicator Light” re-
mains on, DO NOT START engine before
you drain the water from the fuel filters to
avoid engine damage. Refer to “Draining
Fuel/Water Separator Filter” in “Dealer
Service” under “Servicing And Mainte-
nance” for further information. 4. After the engine “Wait To Start” telltale
goes off, the engine will automatically
crank.
CAUTION!
Do not crank engine for more than 15 sec-
onds at a time or starter motor damage
may result. Turn the ignition switch to the
OFF position and wait at least two minutes
for the starter to cool before repeating start
procedure.
5. After engine start-up, check to see that there is oil pressure.
6. Allow the engine to idle about three min- utes until the manifold heaters have com-
pleted the post-heat cycle.
7. Release the parking brake and drive.
NOTE:
• Engine idle speed will automatically in- crease to 1,000 RPM and engage the Vari-
able Geometry Turbocharger at low coolant
temperatures to improve engine warm-up. • The engine may not automatically crank
after the engine "Wait To Start" telltale goes
off if a door or the hood is ajar.
• If the engine stalls, or if the ignition switch is left ON for more than two minutes after
the “Wait To Start Light” goes out, reset the
grid heaters by turning the ignition switch
to the OFF position for at least five seconds
and then back ON. Repeat steps 1 through
7 of “Keyless Enter-N-Go Starting Proce-
dure – Engine Manifold Air Temperature
Below 66° F (19° C).”
Extreme Cold Weather
The Cummins diesel engine is equipped with
several features designed to assist cold
weather starting and operation:
• The engine block heater is a resistance
heater installed in the water jacket of the
engine just above and behind the oil filter.
It requires a 110–115 Volt AC electrical
outlet with a grounded, three-wire exten-
sion cord.STARTING AND OPERATING
148
Page 223 of 372

WARNING!
You or others can be badly burned by hot
engine coolant (antifreeze) or steam from
your radiator. If you see or hear steam
coming from under the hood, do not open
the hood until the radiator has had time to
cool. Never try to open a cooling system
pressure cap when the radiator or coolant
bottle is hot.
CAUTION!
Driving with a hot cooling system could
damage your vehicle. If the temperature
gauge reads HOT (H), pull over and stop
the vehicle. Idle the vehicle with the air
conditioner turned off until the pointer
drops back into the normal range. If the
pointer remains on HOT (H), and you hear
continuous chimes, turn the engine off
immediately and call for service.
GEAR SELECTOR OVERRIDE —
6-SPEED TRANSMISSION
If a malfunction occurs and the gear selector
cannot be moved out of the PARK position,
you can use one of the following procedures
to temporarily move the gear selector.
Column Gear Selector — If
Equipped
1. Turn the engine OFF.
2. Firmly apply the parking brake.
3. Tilt the steering wheel to the full upposition.
4. Press and maintain firm pressure on the brake pedal.
5. Insert a screwdriver or similar tool into the access port (ringed circle) on the bottom
of the steering column, and push and hold
the override release lever up. 6. Move the gear selector to the NEUTRAL
position.
7. The vehicle may then be started in NEUTRAL.
Shift Lock Manual Override Access Port
221
Page 361 of 372

FlashersTurn Signal ........32, 33, 83, 136
Flash-To-Pass .................32
Flat Tire Stowage ..............214
Fluid, Brake ..............282, 284
Fluid Capacities ...........278, 279
Fluid Leaks ..................136
Fluids And Lubricants . . . .280, 283, 285
Fog Lights .................32, 82
Folding Rear Seat ...............22
Four-Way Hazard Flasher ..........202
Four Wheel Drive ..............162
Freeing A Stuck Vehicle ..........224
Fuel Adding ...........181, 182, 186
Additives .................182
Diesel ...............283, 285
Filter ................249, 253
Light ....................81
Materials Added ............182
Octane Rating ..............280
Requirements ..............278
Tank Capacity ..........278, 279
Fueling .................182, 186
Fuses .....................203
Garage Door Opener (HomeLink) ......51Gauges
Voltmeter .............149, 151
Gear Select Lever Override ........221
General Information .............93
Guide, Body Builders .............2
Hands-Free Phone (Uconnect) ......332
Hazard Warning Flasher ..........202
Headlight ....................32
Headlights Automatic .................33
Delay ....................32
High Beam ................32
High Beam/Low Beam Select Switch .32
Lights On Reminder ...........32
Passing ..................32
Switch ...................32
Time Delay ................
32
Head Restraints ................27
High Beam/Low Beam Select (Dimmer) Switch ....................32
Hoisting ....................257
HomeLink (Garage Door Opener) ......51
Hood Prop ...................50
Hood Release .................50
Hub Caps ...................217 Idle Up Feature
...............152
Instrument Cluster ..............83
Integrated Trailer Brake Controls .....192
Intermittent Wipers (Delay Wipers) ....35
Intervention Regeneration Strategy . .67, 70
Introduction ...................1
Inverter Outlet (115V) ............56
iPod/USB/MP3 Control Bluetooth Streaming Audio ......332
Jump Starting ................218
Key Fob Panic Alarm ................15
Keyless Enter-N-Go ..........19, 146
Passive Entry ...............19
Passive Entry Programming .......19
Keys .......................13
Lane Change And Turn Signals . . . .32, 33
Lane Change Assist ...........32, 34
Latches ....................136
Hood ....................50
Leaks, Fluid .................136
Life Of Tires .................267
Light Bulbs ..............136, 202
Lights .....................136
359
Page 363 of 372

Phone (Uconnect)..............332
Pickup Box ..............57, 59, 63
Placard, Tire And Loading Information .261
Power Distribution Center (Fuses) ......203
Outlet (Auxiliary Electrical
Outlet) ................55, 56
Sunroof ..................49
Power Steering Fluid ............282
Pregnant Women And Seat Belts .....101
Pretensioners Seat Belts ................102
Radial Ply Tires ...............266
Radio Presets ........293, 296, 301, 310
Radio 3.0 ...................292
Radio Frequency General Information ......16, 18, 21
Radio Operation ...............300
Radio Screens ................306
Radio (Sound Systems) ..........300
Rear Cargo Area Utility Rails ........62
Rear ParkSense System ..........179
Rear Seat, Folding ..............22
Recreational Towing .............196 Shifting Into Transfer Case
Neutral (N)
...............198
Shifting Out Of Transfer Case
Neutral (N) ...............199
Release, Hood .................50
Reminder, Lights On .............32
Reminder, Seat Belt .............94
Remote Keyless Entry ............15
Panic Alarm ................15
Remote Starting Exit Remote Start Mode ........18
Replacement Bulbs .............202
Replacement Tires .............267
Reporting Safety Defects ..........354
Resetting Perform Service Indicator . . .239
Restraint, Head ................27
Restraints, Child ...............115
Safety Checks Inside Vehicle .......134
Safety Checks Outside Vehicle ......136
Safety Defects, Reporting .........354
Safety, Exhaust Gas .............134
Safety
Information, Tire ..........257
Safety Tips ..................134
Schedule, Maintenance .......230, 234
SD Card Port .................325 Seat Belt
Adjustable Upper Shoulder Belt
Anchorage .................98
Automatic Locking Retractor (ALR) .102
Energy Management Feature .....102
Lap/Shoulder Belt Operation ......97
Lap/Shoulder Belt Untwisting .....98
Pregnant Women ............101
Seat Belt Extender ...........101
Seat Belt Pretensioner ........102
Seat Belt Reminder ............94
Seat Belt Reminder ..............94
Seat Belts ................94, 134
Adjustable Shoulder Belt ........98
Adjustable Upper Shoulder
Anchorage .................98
Child Restraint .............115
Extender .................101
Front Seat ..............94, 97
Inspection ................134
Operating Instructions .........97
Pregnant Women ............101
Pretensioners ..............102
Reminder .................76
Untwisting Procedure ..........98
Seats ......................22
Adjustment ................22
361