window Ram 2500 2019 Owner's Manual
[x] Cancel search | Manufacturer: RAM, Model Year: 2019, Model line: 2500, Model: Ram 2500 2019Pages: 696, PDF Size: 13.89 MB
Page 6 of 696

4
CLIMATE CONTROLS ..................................................... 79
Climate Controls Without A Touchscreen
Overview ...................................................................... 79
Climate Controls With A Touchscreen Overview .... 83
Climate Control Functions ........................................... 90
Automatic Temperature Control (ATC) ................... 91
Operating Tips .............................................................. 91
WINDOWS .......................................................................... 94
Power Windows ........................................................... 94
Wind Buffeting .............................................................. 97
POWER SUNROOF — IF EQUIPPED ........................... 97
Single Pane Power Sunroof — If Equipped ............. 97
HOOD ............................................................................. 101
To Open The Hood ..................................................... 101
To Close The Hood...................................................... 102
TAILGATE ......................................................................... 102
Opening ........................................................................ 102
Closing .......................................................................... 103
Bed Step — If Equipped ............................................. 103
GARAGE DOOR OPENER — IF EQUIPPED ............ 104
Before You Begin Programming HomeLink ........... 105
Canadian/Gate Operator Programming ................. 108
Using HomeLink ......................................................... 110
Security ......................................................................... 110
Troubleshooting Tips .................................................. 110
General Information .................................................... 110
INTERNAL EQUIPMENT ...............................................111
Storage ...........................................................................111
Cupholders ..................................................................122
Electrical Power Outlets ............................................124
Power Inverter — If Equipped ................................. 126
Wireless Charging Pad — If Equipped ...................129
Overhead Sunglass Storage........................................130
PICKUP BOX .....................................................................130
Cargo Camera — If Equipped ...................................132
RAMBOX — IF EQUIPPED .............................................134
RamBox Integrated Box Side Storage Bins............... 134
RamBox Safety Warning .............................................137
Bed Divider — If Equipped........................................138
Bed Rail Tie-Down System .......................................142
SLIDE-IN CAMPERS .......................................................144
Camper Applications ..................................................144
EASY-OFF TAILGATE ....................................................144
Disconnecting The Rear Camera And Remote
Keyless Entry ................................................................144
Removing The Tailgate ...............................................146
Locking Tailgate........................................................... 146
TRI-FOLD TONNEAU COVER — IF EQUIPPED ....... 147
Tri-Fold Tonneau Cover Removal.............................147
Tri-Fold Tonneau Cover Installation ........................ 153
Tri-Fold Tonneau Cover Cleaning ............................159
Page 28 of 696

26 GETTING TO KNOW YOUR VEHICLE
(Continued)
ACC
• Engine is not started.
• Some electrical devices are available.
RUN
• Driving position.
• All the electrical devices are available.
START
• The engine will start.
The engine only runs in the ON/RUN ignition position or
from a remote start request.
In case the ignition switch does not change with the push of
a button, the key fob may have a low or dead battery. In this
situation, a back up method can be used to operate the igni-
tion switch. Put the nose side (side opposite of the emer -
gency key) of the key fob against the ENGINE START/STOP
button and push to operate the ignition switch.
WARNING!
• When exiting the vehicle, always remove the key fob from the vehicle and lock your vehicle.
• Never leave children alone in a vehicle, or with access to an unlocked vehicle.
• Allowing children to be in a vehicle unattended is dangerous for a number of reasons. A child or others
could be seriously or fatally injured. Children should
be warned not to touch the parking brake, brake pedal
or the gear selector.
• Do not leave the key fob in or near the vehicle, or in alocation accessible to children, and do not leave the
ignition of a vehicle equipped with Keyless
Enter-N-Go in the ON/RUN mode. A child could
operate power windows, other controls, or move the
vehicle.
• Do not leave children or animals inside parked vehicles in hot weather. Interior heat build-up may cause
serious injury or death.
CAUTION!
An unlocked vehicle is an invitation for thieves. Always
remove key fob from the vehicle and lock all doors when
leaving the vehicle unattended.
WARNING! (Continued)
Page 30 of 696

28 GETTING TO KNOW YOUR VEHICLE
Remote Start Abort Message
The following messages will display in the instrument
cluster display if the vehicle fails to remote start or exits
remote start prematurely:
• Remote Start Cancelled — Door Open
• Remote Start Cancelled — Hood Open
• Remote Start Cancelled — Fuel Low
• Remote Start Cancelled — System Fault
• Remote Start Disabled — Start Vehicle to Reset
The instrument cluster display message stays active until the
ignition is turned to the ON/RUN position.
To Enter Remote Start Mode
Push and release the Remote Start button on the key
fob twice within five seconds. The parking lights
will flash, vehicle doors will lock, and the horn will
chirp twice (if programmed). Once the vehicle has started,
the engine will run for 15 minutes.
NOTE:
• If your power door locks were unlocked, Remote Start will automatically lock the doors.
• If an engine fault is present or fuel level is low, the vehicle will start and then shut down in 10 seconds.
• The park lamps will turn on and remain on during Remote Start mode.
• For security, power window and power sunroof operation (if equipped) are disabled when the vehicle is in the
Remote Start mode.
• The engine can be started two consecutive times (two 15-minute cycles) with the key fob. However, the ignition
must be placed in the ON/RUN position before you can
repeat the start sequence for a third cycle.
• Keep key fobs away from children. Operation of the
Remote Start System, windows, door locks or other
controls could cause serious injury or death.
WARNING! (Continued)
Page 36 of 696

34 GETTING TO KNOW YOUR VEHICLE
(Continued)
The emergency key will unlock the driver door lock on your
vehicle.
WARNING!
• Do not leave children or animals inside parked vehicles in hot weather. Interior heat build-up may cause
serious injury or death.
• For personal security and safety in the event of an colli -
sion, lock the vehicle doors as you drive as well as
when you park and leave the vehicle.
• Before exiting a vehicle, always shift the automatic transmission into PARK, apply the parking brake, turn
the vehicle OFF, remove the key fobs from vehicle, and
lock all doors. and lock your vehicle.
• Never leave children alone in a vehicle, or with access to an unlocked vehicle. Leaving children in a vehicle
unattended is dangerous for a number of reasons. A
child or others could be seriously or fatally injured.
Children should be warned not to touch the parking
brake, brake pedal or the gear selector.
• Allowing children to be in a vehicle unattended isdangerous for a number of reasons. A child or others
could be seriously or fatally injured. Children should
be warned not to touch the parking brake, brake pedal
or the gear selector.
• Do not leave the key fob in or near the vehicle, or in a location accessible to children, and do not leave the
ignition of a vehicle equipped with Keyless
Enter-N-Go in the ACC or ON/RUN mode. A child
could operate power windows, other controls, or move
the vehicle.
WARNING! (Continued)
Page 42 of 696

40 GETTING TO KNOW YOUR VEHICLE
To use the system, open each rear door, use a flat blade
screwdriver (or emergency key) and rotate the dial to engage
and disengage the Child-Protection locks. When the system
on a door is engaged, that door can only be opened by using
the outside door handle even if the inside door lock is in the
unlocked position.Child Lock Control NOTE:
• After setting the Child-Protection Door Lock system,
always test the door from the inside to make certain it is in
the desired position.
• For emergency exit with the system engaged, move the door lock switch to the unlock position, roll down the
window, and open the door with the outside door handle.
SEATS
Seats are a part of the Occupant Restraint System of the
vehicle.
WARNING!
Avoid trapping anyone in the vehicle in a collision.
Remember that the sliding doors cannot be opened from
the inside door handle when the Child Protection Door
Locks are engaged.
WARNING!
• It is dangerous to ride in a cargo area, inside or outside of a vehicle. In a collision, people riding in these areas
are more likely to be seriously injured or killed.
• Do not allow people to ride in any area of your vehicle that is not equipped with seats and seat belts. In a colli -
sion, people riding in these areas are more likely to be
seriously injured or killed.
• Be sure everyone in your vehicle is in a seat and using a seat belt properly.
Page 59 of 696

GETTING TO KNOW YOUR VEHICLE 57
• For vehicles equipped with Driver Memory Seat, you canuse your remote keyless entry key fob or the memory
switch on the driver’s door trim panel to return the adjust -
able pedals to pre-programmed positions. Refer to “Driver
Memory Seat” in “Getting To Know Your Vehicle” for
further information.MIRRORS
Inside Day/Night Mirror — If Equipped
The mirror head can be adjusted up, down, left, and right for
various drivers. The mirror should be adjusted to center on
the view through the rear window.
Headlight glare from vehicles behind you can be reduced by
moving the small control under the mirror to the night posi -
tion (toward the rear of the vehicle). The mirror should be
adjusted while set in the day position (toward the wind -
shield).
Adjusting Rearview Mirror
WARNING!
Do not adjust the pedals while the vehicle is moving.
You could lose control and have an accident. Always
adjust the pedals while the vehicle is parked.
CAUTION!
Do not place any article under the adjustable pedals or
impede its ability to move, as it may cause damage to the
pedal controls. Pedal travel may become limited if
movement is stopped by an obstruction in the adjustable
pedal's path.
2
Page 60 of 696

58 GETTING TO KNOW YOUR VEHICLE
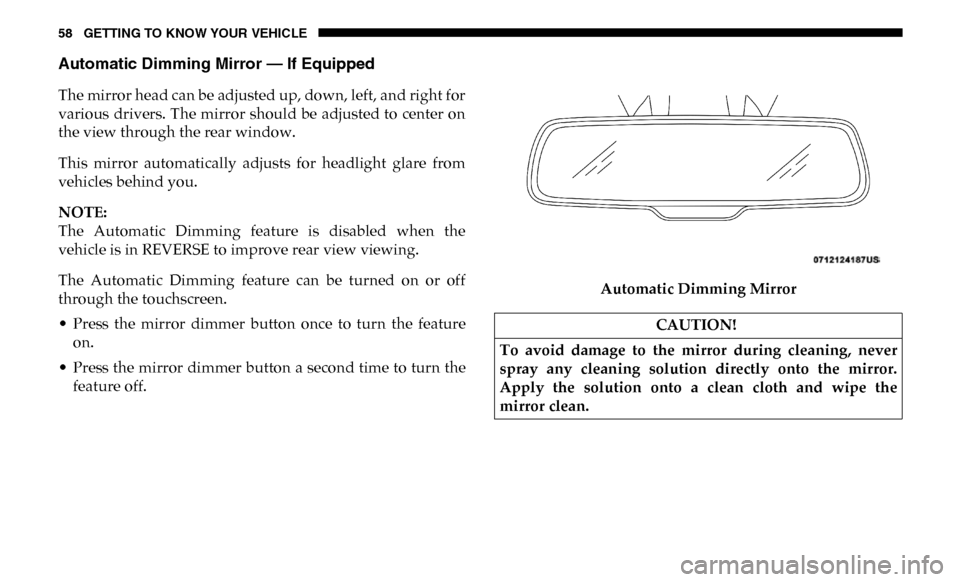
Automatic Dimming Mirror — If Equipped
The mirror head can be adjusted up, down, left, and right for
various drivers. The mirror should be adjusted to center on
the view through the rear window.
This mirror automatically adjusts for headlight glare from
vehicles behind you.
NOTE:
The Automatic Dimming feature is disabled when the
vehicle is in REVERSE to improve rear view viewing.
The Automatic Dimming feature can be turned on or off
through the touchscreen.
• Press the mirror dimmer button once to turn the featureon.
• Press the mirror dimmer button a second time to turn the feature off. Automatic Dimming Mirror
CAUTION!
To avoid damage to the mirror during cleaning, never
spray any cleaning solution directly onto the mirror.
Apply the solution onto a clean cloth and wipe the
mirror clean.
Page 61 of 696

GETTING TO KNOW YOUR VEHICLE 59
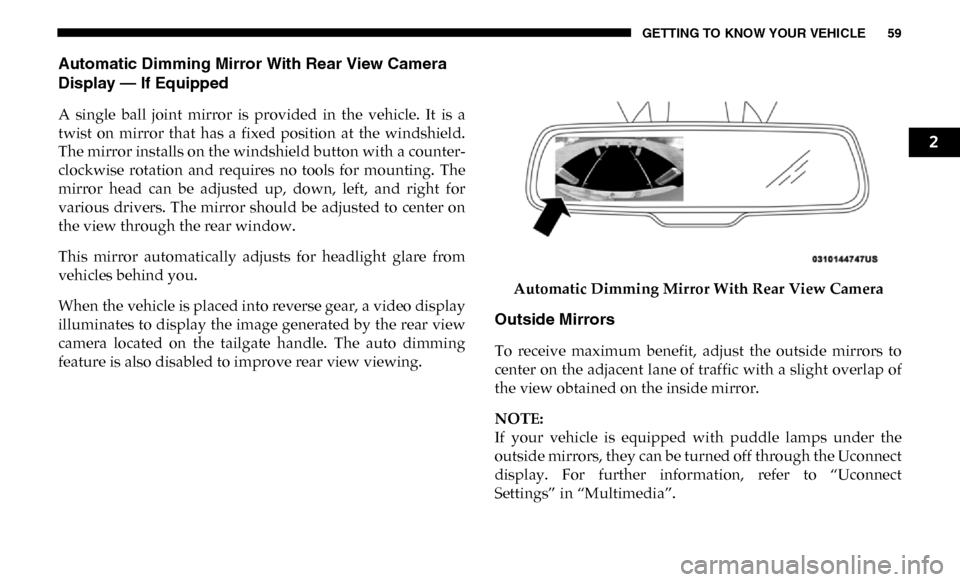
Automatic Dimming Mirror With Rear View Camera
Display — If Equipped
A single ball joint mirror is provided in the vehicle. It is a
twist on mirror that has a fixed position at the windshield.
The mirror installs on the windshield button with a counter-
clockwise rotation and requires no tools for mounting. The
mirror head can be adjusted up, down, left, and right for
various drivers. The mirror should be adjusted to center on
the view through the rear window.
This mirror automatically adjusts for headlight glare from
vehicles behind you.
When the vehicle is placed into reverse gear, a video display
illuminates to display the image generated by the rear view
camera located on the tailgate handle. The auto dimming
feature is also disabled to improve rear view viewing. Automatic Dimming Mirror With Rear View Camera
Outside Mirrors
To receive maximum benefit, adjust the outside mirrors to
center on the adjacent lane of traffic with a slight overlap of
the view obtained on the inside mirror.
NOTE:
If your vehicle is equipped with puddle lamps under the
outside mirrors, they can be turned off through the Uconnect
display. For further information, refer to “Uconnect
Settings” in “Multimedia”.
2
Page 65 of 696

GETTING TO KNOW YOUR VEHICLE 63
A small blindspot mirror is located next to main mirror and
can be adjusted separately.Blindspot Mirror
Heated Mirrors — If Equipped
These mirrors are heated to melt frost or ice. This
feature will be activated whenever you turn on the
rear window defroster (if equipped).
Refer to “Climate Controls” in this section for further infor -
mation.
Tilt Side Mirrors In Reverse — If Equipped
Tilt Side Mirrors In Reverse provides automatic outside
mirror positioning which will aid the driver’s view of the
ground rearward of the front doors. The outside mirrors will
move slightly downward from the present position when the
vehicle is shifted into REVERSE. The outside mirrors will
then return to the original position when the vehicle is
shifted out of the REVERSE position. Each stored memory
setting will have an associated Tilt Side Mirrors In Reverse
position.
NOTE:
The Tilt Side Mirrors In Reverse feature is not turned on
when delivered from the factory.
This feature can be programmed through the Uconnect
system. Refer to “Uconnect Settings” in “Multimedia” for
further information.
2
Page 82 of 696

80 GETTING TO KNOW YOUR VEHICLE
Manual Climate Control DescriptionsIcon Description
MAX A/C Setting
Rotate the temperature control knob until it is set to MAX A/C. This is the coldest setting and puts the
A/C to maximum power.
A/C Button
Push the A/C button to engage the Air Conditioning (A/C). A LED will illuminate when the A/C
system is engaged.
Recirculation Button
Press and release this button on the touchscreen, or push the button on the faceplate, to change the
system between recirculation mode and outside air mode. Recirculation can be used when outside
conditions, such as smoke, odors, dust, or humidity are present. Recirculation can be used in all
modes except for Defrost. Recirculation may be unavailable if conditions exist that could create
fogging on the inside of the windshield. The A/C can be deselected manually without disturbing the
mode control selection. Continuous use of the Recirculation mode may make the inside air stuffy and
window fogging may occur. Extended use of this mode is not recommended.
Temperature Control
Use this control knob to regulate the temperature of the air inside the passenger compartment.
Rotating the knob counterclockwise, from top center into the blue area of the scale, indicates cooler
temperatures. Rotating the knob clockwise, into the red area, indicates warmer temperatures.
Blower Control
There are seven blower speeds. Use this control knob to regulate the amount of air forced through the
system in any mode you select. The blower speed increases as you move the control clockwise from
the off position.