mirror Ram 2500 2019 User Guide
[x] Cancel search | Manufacturer: RAM, Model Year: 2019, Model line: 2500, Model: Ram 2500 2019Pages: 696, PDF Size: 13.89 MB
Page 66 of 696

64 GETTING TO KNOW YOUR VEHICLE
Power Folding Outside Mirrors For Standard And
Trailer Tow — If Equipped
If equipped with power folding mirrors, they can be electri-
cally folded rearward and unfolded into the drive position.
The switch for the power folding mirrors is located between
the power mirror switches L (left) and R (right). Push the
switch once and the mirrors will fold in, push the switch a
second time and the mirrors will return to the normal
driving position.
If the mirror is manually folded after electrically cycled, a
potential extra button push is required to get the mirrors
back to the home position. If the mirror does not electrically
fold, check for ice or dirt build up at the pivot area which can
cause excessive drag. Power Folding Mirror Switch
Resetting The Power Folding Outside Mirrors
You may need to reset the power folding mirrors if the
following occurs:
• The mirrors are accidentally blocked while folding.
• The mirrors are accidentally manually folded/unfolded.
• The mirrors come out of the unfolded position.
• The mirrors shake and vibrate at normal driving speeds.
Page 67 of 696

GETTING TO KNOW YOUR VEHICLE 65
To Reset The Power Folding Mirrors:
1. Using the power folding mirror switch, move the mirrorto its normal driving (home) position.
2. Using the power folding mirror switch, move the mirror to the full retract position (this may require multiple
button pushes). This resets them to their normal position.
NOTE:
• The power fold mirrors are designed to operate while the vehicle is stationary or traveling at moderate speeds. If you
attempt to power fold the mirrors at high speeds they may
not fully open or close. You should slow down to a
moderate speed and complete the operation.
• When pushing the power fold button 10 or more times in one minute the system shuts down for one minute to
protect the motors from over heating. Outside Mirrors Folding Feature
All outside mirrors are designed to be able to be manually
folded both forward and rearward to prevent damage.
Folding MirrorCAUTION!
It is recommended to fold the mirrors into the full
rearward position to resist damage when entering a car
wash or a narrow location.
2
Page 68 of 696

66 GETTING TO KNOW YOUR VEHICLE
Illuminated Vanity Mirror — If Equipped
Illuminated vanity mirrors are located on each sun visor. To
use the mirror, rotate the sun visor down and swing the
mirror cover upward. The lights will turn on automatically.
Closing the mirror cover turns off the light.Illuminated Vanity Mirror “Slide-On-Rod” Features Of Sun Visor — If Equipped
The sun visor “Slide-On-Rod” feature allows for additional
flexibility in positioning the visor to block out the sun.
To use the “Slide-On-Rod” feature, rotate the sun visor
downward and unclip it. Pull the sun visor along the
“Slide-On-Rod” until the sun visor is in the desired position.
“Slide-On-Rod” Extender
Page 70 of 696

68 GETTING TO KNOW YOUR VEHICLE
Daytime Running Lights (DRL) — If Equipped
The headlights on your vehicle will illuminate when the
engine is started and the transmission is in any gear except
PARK. This provides a constant "lights on" condition until
the ignition is turned OFF. The lights illuminate at less than
half of normal intensity. If the parking brake is applied, the
Daytime Running Lights (DRL) will turn off. Also, if a turn
signal is activated, the DRL lamp on the same side of the
vehicle may turn off for the duration of the turn signal acti-
vation. Once the turn signal is no longer active, the DRL
lamp will illuminate.
NOTE:
If allowed by law in the country in which the vehicle was
purchased, the Daytime Running Lights can be turned on
and off using the Uconnect System, refer to “Uconnect
Settings” in “Multimedia” for further information.
High/Low Beam Switch
Push the multifunction lever toward the instrument panel to
switch the headlights to high beam. Pulling the multifunc -
tion lever back toward the steering wheel will turn the low
beams back on, or shut the high beams off.
Automatic High Beam Headlamp Control — If
Equipped
The Automatic High Beam Headlamp Control system
provides increased forward lighting at night by automating
high beam control through the use of a digital camera
mounted on the inside rearview mirror. This camera detects
vehicle specific light and automatically switches from high
beams to low beams until the approaching vehicle is out of
view.
NOTE:
• The Automatic High Beam Headlamp Control can be turned on or off by selecting “ON” under “Auto Dim High
Beams” within your Uconnect settings, as well as turning
the headlight switch to the AUTO position. Refer to
“Uconnect Settings” in “Multimedia” for further informa -
tion.
• Broken, muddy, or obstructed headlights and taillights of vehicles in the field of view will cause headlights to remain
on longer (closer to the vehicle). Also, dirt, film, and other
obstructions on the windshield or camera lens will cause
the system to function improperly.
Page 71 of 696

GETTING TO KNOW YOUR VEHICLE 69
If the windshield or Automatic High Beam Headlamp
Control mirror is replaced, the mirror must be re-aimed to
ensure proper performance. See a local authorized dealer.
To Activate
1. The Automatic High Beams are enabled through theUconnect system. Refer to “Uconnect Settings” in “Multi -
media” for further information.
2. Turn the headlight switch to the AUTO headlight posi -
tion.
3. Push the multifunction lever away from you (toward front of vehicle) to engage the high beam mode.
NOTE:
The Automatic High Beams will not activate until the vehicle
is at or above 12 mph (20 km/h).
To Deactivate
1. Pull the multifunction lever toward you (or rearward in vehicle) to manually deactivate the system (normal oper -
ation of low beams).
2. Push back on the multifunction lever to reactivate the system. The Automatic High Beams can also be deactivated through
the Uconnect system. Refer to “Uconnect Settings” in “Multi
-
media” for further information.
Flash-To-Pass
You can signal another vehicle with your headlights by
lightly pulling the multifunction lever toward you. This will
cause the high beam headlights to turn on, and remain on,
until the lever is released.
Automatic Headlights — If Equipped
This system automatically turns your headlights on or off
based on ambient light levels. To turn the system on, turn the
headlight switch to the extreme clockwise position aligning
the indicator with the AUTO on the headlight switch. When
the system is on, the Headlight Time Delay feature is also on.
This means your headlights will stay on for up to 90 seconds
after you turn the ignition switch OFF. To turn the Auto -
matic System off, turn the headlight switch counterclockwise
to the O (off) position.
NOTE:
The engine must be running before the headlights will come
on in the Automatic mode.
2
Page 74 of 696

72 GETTING TO KNOW YOUR VEHICLE
Cargo Light With Bed Lights — If Equipped
The cargo light and bed lights (if equipped) and trailer
spotter lamps (if equipped) are turned on by pushing the
cargo lights button located on the lower half of the headlight
switch.Cargo/Bed Lights Button On Headlight Switch
If the vehicle’s speed is 0 mph (0 km/h), these lights can also
be turned on using the switch located just inside the pickup
box, on the lower part of the bed light lens. A telltale will illu-
minate in the instrument cluster display when these lights
are on. Pushing the switch a second time will turn the lights
off. Bed Light Switch In Truck Bed
The cargo light and bed lights (if equipped) will turn on for
approximately 30 seconds when a key fob unlock button is
pushed, as part of the Illuminated Entry feature.
NOTE:
For vehicles shipped to or sold in the states of California or
Mississippi, the Cargo, Bed, and Mirror Spotter lights will
not work while the vehicle is in motion. In every other state,
the Cargo and Mirror Spotter lights will turn off when the
vehicle is in motion, but the Bed Light will remain on. In all
states, including California and Mississippi, if a bed camera
is deactivated, the Bed Lights will turn back on.
Page 78 of 696

76 GETTING TO KNOW YOUR VEHICLE
Illuminated Entry
The courtesy lights will turn on when you use the key fob to
unlock the doors or open any door.
This feature also turns on the puddle lamps located beneath
the outside mirrors (if equipped).
The lights will fade to off after approximately 30 seconds, or
they will immediately fade to off once the ignition switch is
turned to ON/RUN from the OFF position.
The front courtesy overhead console and door courtesy
lights will not turn off if the Dome On button on the over-
head console is pushed.
The illuminated entry system will not operate if the Dome
Defeat button on the overhead console is pushed.
NOTE:
If your vehicle is equipped with Illuminated Approach lights
under the outside mirrors, they can also be turned off by
pushing the Dome Defeat button.
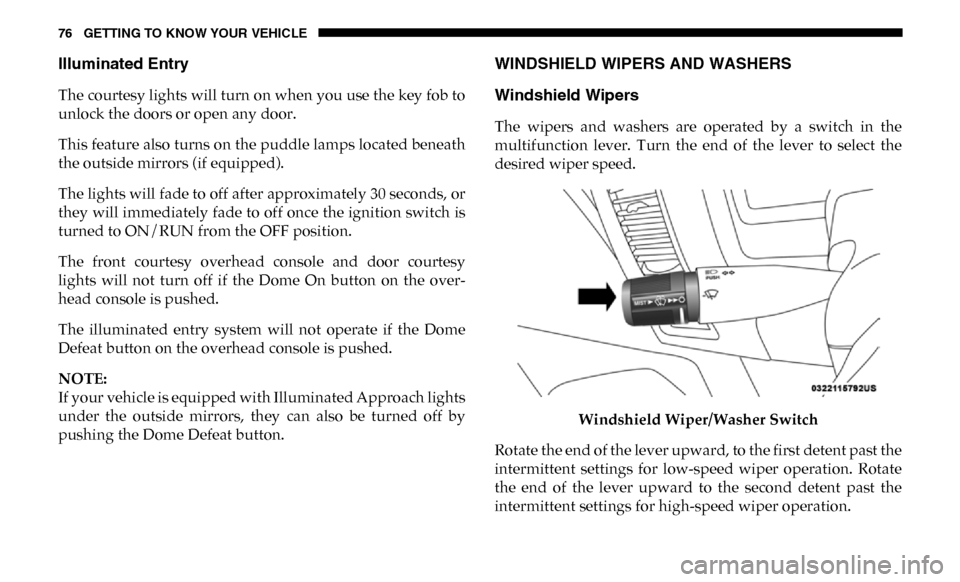
WINDSHIELD WIPERS AND WASHERS
Windshield Wipers
The wipers and washers are operated by a switch in the
multifunction lever. Turn the end of the lever to select the
desired wiper speed.
Windshield Wiper/Washer Switch
Rotate the end of the lever upward, to the first detent past the
intermittent settings for low-speed wiper operation. Rotate
the end of the lever upward to the second detent past the
intermittent settings for high-speed wiper operation.
Page 84 of 696

82 GETTING TO KNOW YOUR VEHICLE
Economy Mode
If ECONOMY mode is desired, push the A/C button to turn
off the LED indicator and the A/C compressor. Rotate the
temperature control knob to the desired temperature. Also,
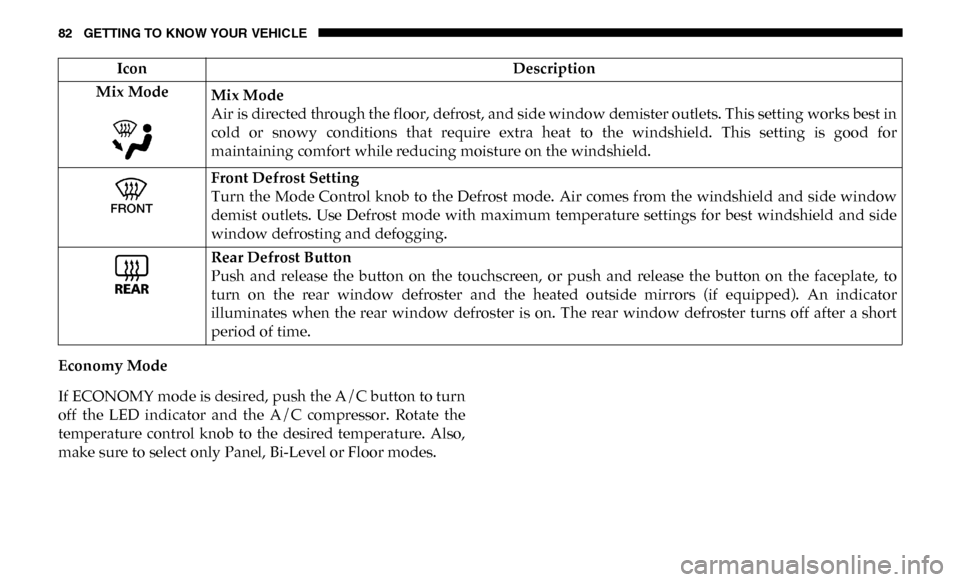
make sure to select only Panel, Bi-Level or Floor modes.Mix Mode
Mix Mode
Air is directed through the floor, defrost, and side window demister outlets. This setting works best in
cold or snowy conditions that require extra heat to the windshield. This setting is good for
maintaining comfort while reducing moisture on the windshield.
Front Defrost Setting
Turn the Mode Control knob to the Defrost mode. Air comes from the windshield and side window
demist outlets. Use Defrost mode with maximum temperature settings for best windshield and side
window defrosting and defogging.
Rear Defrost Button
Push and release the button on the touchscreen, or push and release the button on the faceplate, to
turn on the rear window defroster and the heated outside mirrors (if equipped). An indicator
illuminates when the rear window defroster is on. The rear window defroster turns off after a short
period of time.
Icon
Description
Page 88 of 696

86 GETTING TO KNOW YOUR VEHICLE
AUTO Control Knob
AUTO Button AUTO
Automatically controls the interior cabin temperature by adjusting airflow distribution and amount.
Toggling this function will cause the system to switch between manual mode and automatic modes.
Refer to “Automatic Operation” within this section for more information.
Front Defrost Button
Press and release the touchscreen button, or push and release the button on the faceplate, to change
the current airflow setting to Defrost mode. The indicator illuminates when this feature is on. Air
comes from the windshield and side window demist outlets. When the defrost button is selected, the
blower level may increase. Use Defrost mode with maximum temperature settings for best
windshield and side window defrosting and defogging. When toggling the front defrost mode
button, the climate system will return to previous setting.
Rear Defrost Button
Press and release the button on the touchscreen, or push and release the button on the faceplate, to
turn on the rear window defroster and the heated outside mirrors (if equipped). An indicator will
illuminate when the rear window defroster is on. The rear window defroster automatically turns off
after ten minutes.
Icon
Description
Page 180 of 696

178 GETTING TO KNOW YOUR INSTRUMENT PANEL
NOTE:
• The charging system is independent from load reduction.The charging system performs a diagnostic on the
charging system continuously.
• If the Battery Charge Warning Light is on it may indicate a problem with the charging system. Refer to “Battery
Charge Warning Light” in “Getting To Know Your Instru -
ment Panel” for further information.
The electrical loads that may be switched off (if equipped), and
vehicle functions which can be affected by load reduction:
• Heated Seats/Vented Seats/Heated Wheel
• Rear Defroster And Heated Mirrors
• HVAC System
• 115V AC Power Inverter System
• Audio and Telematics System
Loss of the battery charge may indicate one or more of the
following conditions:
• The charging system cannot deliver enough electrical power to the vehicle system because the electrical loads are
larger than the capability of charging system. The charging
system is still functioning properly. • Turning on all possible vehicle electrical loads (e.g. HVAC
to max settings, exterior and interior lights, overloaded
power outlets +12V, 115V AC, USB ports) during certain
driving conditions (city driving, towing, frequent stop -
ping).
• Installing options like additional lights, upfitter electrical accessories, audio systems, alarms and similar devices.
• Unusual driving cycles (short trips separated by long parking periods).
• The vehicle was parked for an extended period of time (weeks, months).
• The battery was recently replaced and was not charged completely.
• The battery was discharged by an electrical load left on when the vehicle was parked.
• The battery was used for an extended period with the engine not running to supply radio, lights, chargers, +12V
portable appliances like vacuum cleaners, game consoles
and similar devices.