accelerator Ram 2500 (Diesel) 2007 Owner's Manual
[x] Cancel search | Manufacturer: RAM, Model Year: 2007, Model line: 2500 (Diesel), Model: Ram 2500 (Diesel) 2007Pages: 552, PDF Size: 3.31 MB
Page 60 of 552
•Airbag deployment level (if applicable)
•Impact acceleration and angle
•Seatbelt status
•Brake status (service and parking brakes)
•Accelerator status (including vehicle speed)
•Engine control status (including engine speed)
•Transmission gear selection
•Cruise control status
•Traction/stability control status
•Tire pressure monitoring system status (if equipped)
Child Restraint
Everyone in your vehicle needs to be buckled up all the
time — babies and children, too. Every state in the United
States and all Canadian provinces require that small
children ride in proper restraint systems. This is the law,
and you can be prosecuted for ignoring it.
Children 12 years and under should ride properly buck-
led up in a rear seat, if available. According to crash
statistics, children are safer when properly restrained in
the rear seats rather than in the front.
60 THINGS TO KNOW BEFORE STARTING YOUR VEHICLE
Page 138 of 552
DRIVER ADJUSTABLE PEDALS — IF EQUIPPED
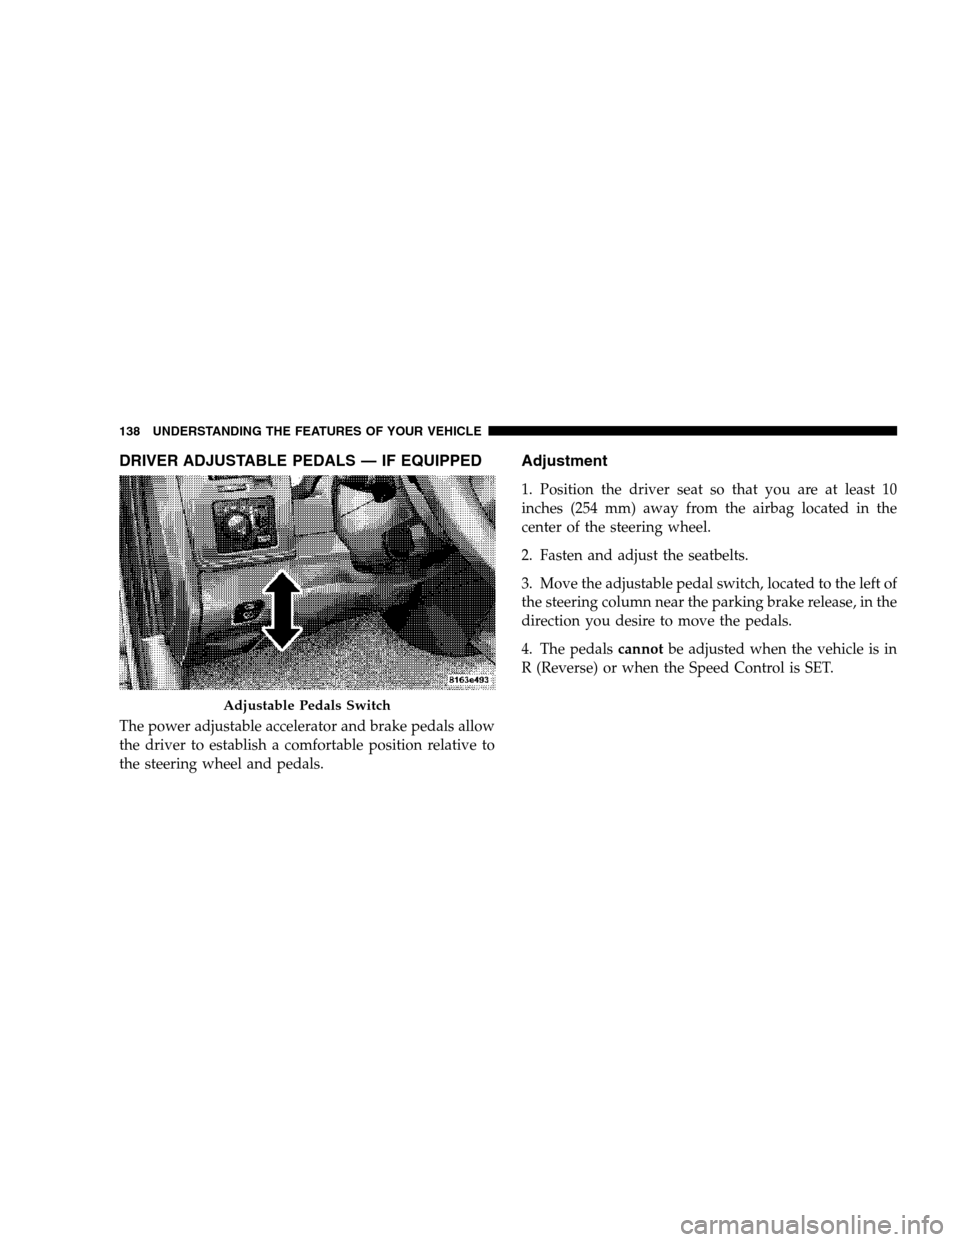
The power adjustable accelerator and brake pedals allow
the driver to establish a comfortable position relative to
the steering wheel and pedals.
Adjustment
1. Position the driver seat so that you are at least 10
inches (254 mm) away from the airbag located in the
center of the steering wheel.
2. Fasten and adjust the seatbelts.
3. Move the adjustable pedal switch, located to the left of
the steering column near the parking brake release, in the
direction you desire to move the pedals.
4. The pedalscannotbe adjusted when the vehicle is in
R (Reverse) or when the Speed Control is SET.
Adjustable Pedals Switch
138 UNDERSTANDING THE FEATURES OF YOUR VEHICLE
Page 139 of 552
CAUTION!
Do not place any article under the adjustable pedals
or impede its ability to move as it may cause damage
to the pedal controls. Pedal travel may become lim-
ited if movement is stopped by an obstruction in the
adjustable pedal’s path.
ELECTRONIC SPEED CONTROL — IF EQUIPPED
When engaged, this device takes over accelerator opera-
tion at speeds greater than 35 mph (56 km/h). The
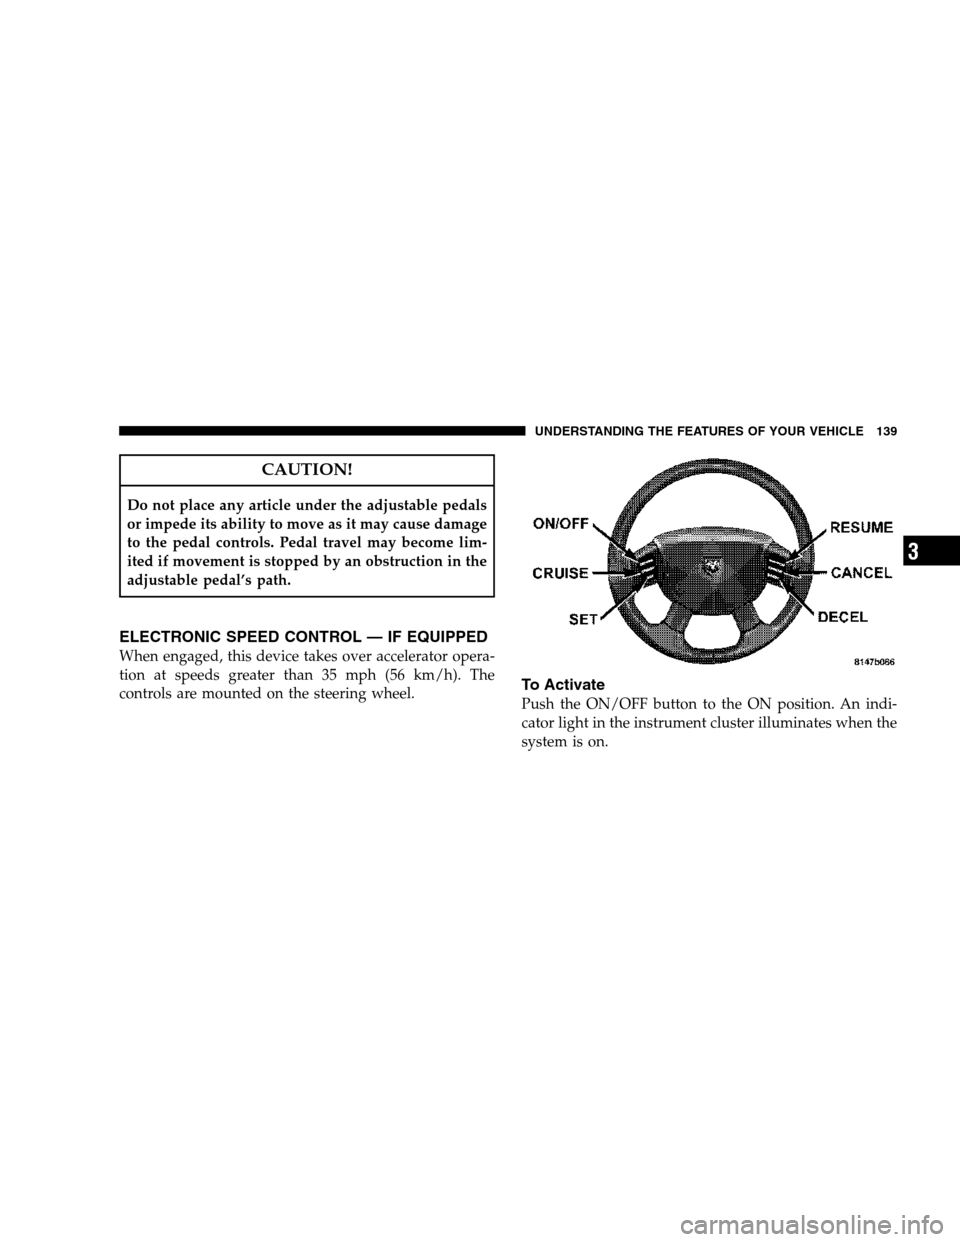
controls are mounted on the steering wheel.
To Activate
Push the ON/OFF button to the ON position. An indi-
cator light in the instrument cluster illuminates when the
system is on.
UNDERSTANDING THE FEATURES OF YOUR VEHICLE 139
3
Page 140 of 552
To Set At A Desired Speed
When the vehicle has reached the desired speed, press
and release the SET button. Release the accelerator and
the vehicle will operate at the selected speed.
To Deactivate
A soft tap on the brake pedal, normal braking, clutch
pressure while slowing the vehicle, or pressing the CAN-
CEL button will deactivate speed control without erasing
the memory. Pushing the ON/OFF button to the OFF
position or turning off the ignition erases the memory.
WARNING!
Leaving the Speed Control ON when not in use is
dangerous. You could accidentally set the system to
cause it to go faster than you want. You could lose
control and have an accident. Always leave the sys-
tem OFF when you aren’t using it.
To Resume Speed
To resume a previously set speed, push and release the
RESUME button. Resume can be used at any speed above
30 mph (50 km/h).
To Vary The Speed Setting
When the speed control is on, speed can be increased by
pressing and holding the ACCEL button. When the
button is released, a new set speed will be established.
Tapping the ACCEL button once will result ina2mph
(3km/h) speed increase. Each time the button is tapped,
speed increases so that tapping the button three times
will increase speed by 6 mph (10 km/h), etc.
Tapping the DECEL button once will result in a 1 mph (2
km/h) speed decrease. Each time the button is tapped,
speed will decrease. For example, tapping the button 3
times will decrease the speed by 3 mph (5 km/h), etc.
140 UNDERSTANDING THE FEATURES OF YOUR VEHICLE
Page 141 of 552

To decrease speed while the speed control is on, press
and hold the DECEL button. Release the button when the
desired speed is reached, and the new speed will be set.
To Accelerate For Passing
Depress the accelerator as you would normally. When the
pedal is released, the vehicle will return to the set speed.
NOTE:When driving uphill, at elevations above 2,000
ft. (610 meters), or when the vehicle is heavily loaded
(especially when towing) the vehicle may slow below the
SET speed. If the vehicle speed drops below 35 mph (56
km/h), the speed control will automatically disengage. If
this happens, you can push down on the accelerator
pedal to maintain the desired speed.
Vehicles equipped with a 6–speed manual transmission
should be operated in 4th or 5th gear under the above
conditions.Vehicles equipped with a 4–speed automatic transmis-
sion may exhibit several 4-3 downshifts under the above
conditions. To reduce the frequency of the downshifts
and to improve vehicle performance, it is advisable to
lock out overdrive by pressing the O/D OFF button
located at the end of the gear shifter.
WARNING!
Speed Control can be dangerous where the system
can’t maintain a constant speed. Your vehicle could
go too fast for the conditions, and you could lose
control. An accident could be the result. Don’t use
Speed Control in heavy traffic or on roads that are
winding, icy, snow-covered, or slippery.
UNDERSTANDING THE FEATURES OF YOUR VEHICLE 141
3
Page 156 of 552
•“COMPASS VARIANCE > 1” – Press the RESET
button to change the compass variance setting. Refer
to Compass Variance, in this section for additional
information.
•“COMPASS CALIBRATE > YES” – Press the RESET
button to calibrate the compass. Refer to Manual
Compass Calibration, in this section for additional
information.
•OIL CHANGE REQUIRED — If Equipped
Your vehicle is equipped with an engine oil change
indicator system. This system will alert you when it is
time to change your engine oil by displaying the
words “Oil Change Required” on your Electronic
Vehicle Information Center (EVIC).Oil Change Indicator – Reset (If Equipped)
To reset the oil change indicator system (after performing
the scheduled maintenance) refer to the following proce-
dure:
1. Turn the ignition switch to the ON position(Do not
start the engine)..
2. Fully depress the accelerator pedal slowly three
times within 10 seconds.
3. Turn the ignition switch to the OFF/LOCK position.
NOTE:If the indicator message illuminates when you
start the vehicle, the oil change indicator system did not
reset. If necessary repeat this procedure.
156 UNDERSTANDING THE FEATURES OF YOUR VEHICLE
Page 268 of 552
Summer Operation
Air conditioned vehicles must be protected with a high
quality antifreeze coolant during summer to provide
proper corrosion protection and to raise the boiling point
of the coolant for protection against overheating. A 50 %
concentration is recommended. Refer to Recommended
Fluids and Genuine Parts for the proper coolant type.
When using the air conditioner in extremely heavy traffic
in hot weather especially when towing a trailer, addi-
tional engine cooling may be required. If this situation is
encountered, operate the transmission in a lower gear to
increase engine RPM, coolant flow and fan speed. When
stopped in heavy traffic, it may be necessary to shift into
NEUTRAL and depress the accelerator slightly for fast
idle operation to increase coolant flow and fan speed.NOTE:On models equipped with Diesel engines, the
idle speed will automatically increase to 1000 rpm at
elevated coolant temperatures to improve engine cooling.
Your air conditioning system is also equipped with an
automatic recirculation system. When the system senses
a heavy load or high heat conditions, it may use partial
Recirculation A/C mode to provide additional comfort.
Winter Operation
When operating the system during the winter months,
make sure the air intake, located directly in front of the
windshield, is free of ice, slush, snow, or other obstruc-
tions.
268 UNDERSTANDING YOUR INSTRUMENT PANEL
Page 275 of 552
STARTING PROCEDURES – DIESEL ENGINES
Before starting your vehicle, adjust your seat, adjust both
inside and outside mirrors, and fasten your seat belts.
The starter should not be operated for more than 15-
second intervals. Waiting a few minutes between such
intervals will protect the starter from overheating.
WARNING!
Be sure to turn off the engine and remove the key
from the ignition switch if you want to rest or sleep
in your car. Accidents can be caused by inadvertently
moving the gear selection lever or by pressing the
accelerator pedal. This may cause excessive heat in
the exhaust system, resulting in overheating and
vehicle fire which may cause serious or fatal injuries.
WARNING!
Do not leave children or animals inside parked
vehicles in hot weather. Interior heat build up may
cause serious injury or death.
Manual Transmission – If Equipped
Apply the parking brake, place the gearshift control lever
in NEUTRAL and depress the clutch pedal to the floor
before starting the vehicle. This vehicle is equipped with
a clutch interlocking ignition system. It will not start
unless the clutch is fully depressed.
STARTING AND OPERATING 275
5
Page 277 of 552
CAUTION!
If WATER IN FUEL indicator light remains on DO
NOT START engine before you drain water from the
fuel filter to avoid engine damage. See Section 7 —
Maintaining Your Vehicle, for water drain
procedures.
4. Turn the ignition key to START and crank the engine.
Do not press the accelerator during starting.
CAUTION!
Do not crank engine for more than 15 seconds at a
time as starter motor damage may result. Turn key to
OFF and wait at least two minutes before trying
again.5. When the engine starts, release the key.
6. Check to see that there is oil pressure.
7. Release the parking brake.
Starting Procedure — Engine Manifold Air
Temperature Below 66°F (19°C)
NOTE:The temperature displayed on the overhead
console (if equipped) does not necessarily reflect the
engine manifold air temperature. When certain engine
temperatures fall below 66°F (19°C) the lamp will remain
on indicating the intake manifold heater system is active.
STARTING AND OPERATING 277
5
Page 278 of 552
Follow the steps in the Normal Starting Procedure ex-
cept:
CAUTION!
Do not crank engine for more than 15 seconds at a
time or starter motor damage may result. Turn key to
OFF and wait at least 2 minutes for starter to cool
before repeating start procedure.
•The WAIT TO START light will remain on for a period
of time (length of time depends on engine tempera-
ture).
•After the WAIT TO START light goes off, turn the
ignition key to START. Do not press the accelerator
during starting.
•After engine start-up, check to see that there is oil
pressure.
•Allow the engine to idle about three minutes until
the manifold heaters have completed the post-heat
cycle.
•Release the parking brake and drive.
NOTE:Engine idle speed will automatically increase to
1000 rpm at low coolant temperatures to improve engine
warm-up.
NOTE:If the engine stalls or if the ignition switch is left
On for more than 2 minutes after the WAIT TO START
light goes out, reset the grid heaters by turning the
ignition switch to Off for at least 5 seconds and then back
On. Repeat steps 3 through 7 of the normal starting
procedure.
For Extremely Cold Weather Starting — Engine
Manifold Air Temperature Below 0°F (- 18°C)
In extremely cold weather below 0°F (- 18°C) it may be
beneficial to cycle the manifold heaters twice before
278 STARTING AND OPERATING