tire type Ram 3500 2020 Owner's Guide
[x] Cancel search | Manufacturer: RAM, Model Year: 2020, Model line: 3500, Model: Ram 3500 2020Pages: 568
Page 442 of 568
440SERVICING AND MAINTENANCE
TIRE TYPES
All Season Tires — If Equipped
All Season tires provide traction for all seasons
(Spring, Summer, Autumn, and Winter). Traction
levels may vary between different all season
tires. All season tires can be identified by the
M+S, M&S, M/S or MS designation on the tire sidewall. Use all season tires only in sets of four;
failure to do so may adversely affect the safety
and handling of your vehicle.
Summer Or Three Season Tires — If
Equipped
Summer tires provide traction in both wet and dry
conditions, and are not intended to be driven in
snow or on ice. If your vehicle is equipped with
Summer tires, be aware these tires are not
designed for Winter or cold driving conditions.
Install Winter tires on your vehicle when ambient
temperatures are less than 40°F (5°C) or if
roads are covered with ice or snow. For more
information, contact an authorized dealer.
Summer tires do not contain the all season
designation or mountain/snowflake symbol on
the tire sidewall. Use Summer tires only in sets
of four; failure to do so may adversely affect the
safety and handling of your vehicle.
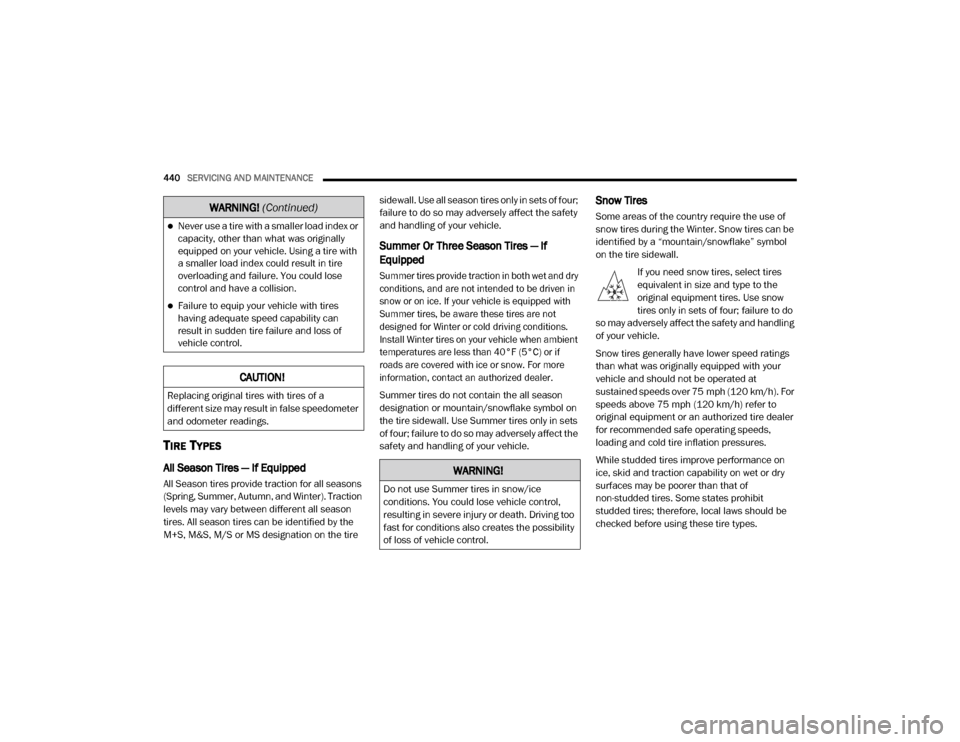
Snow Tires
Some areas of the country require the use of
snow tires during the Winter. Snow tires can be
identified by a “mountain/snowflake” symbol
on the tire sidewall.
If you need snow tires, select tires
equivalent in size and type to the
original equipment tires. Use snow
tires only in sets of four; failure to do
so may adversely affect the safety and handling
of your vehicle.
Snow tires generally have lower speed ratings
than what was originally equipped with your
vehicle and should not be operated at
sustained speeds over 75 mph (120 km/h). For
speeds above 75 mph (120 km/h) refer to
original equipment or an authorized tire dealer
for recommended safe operating speeds,
loading and cold tire inflation pressures.
While studded tires improve performance on
ice, skid and traction capability on wet or dry
surfaces may be poorer than that of
non-studded tires. Some states prohibit
studded tires; therefore, local laws should be
checked before using these tire types.Never use a tire with a smaller load index or
capacity, other than what was originally
equipped on your vehicle. Using a tire with
a smaller load index could result in tire
overloading and failure. You could lose
control and have a collision.
Failure to equip your vehicle with tires
having adequate speed capability can
result in sudden tire failure and loss of
vehicle control.
CAUTION!
Replacing original tires with tires of a
different size may result in false speedometer
and odometer readings.
WARNING! (Continued)
WARNING!
Do not use Summer tires in snow/ice
conditions. You could lose vehicle control,
resulting in severe injury or death. Driving too
fast for conditions also creates the possibility
of loss of vehicle control.
20_DJD2_OM_EN_USC_t.book Page 440
Page 446 of 568
444SERVICING AND MAINTENANCE
(Continued)
2500 Models
Install on rear tires only.
For LT245/70R17E, LT275/70R18E and
LT285/60R20E tires, use of a U-class snow
chain is recommended.
2500 Power Wagon Models
Install on rear tires only.
For a LT285/70R17D tire, use of a U-class
snow chain is recommended.
3500 (Single Rear Wheel) Models
Install on rear tires only.
For LT275/70R18E and LT285/60R20E
tires, use of a U-class snow chain is recom -
mended.
3500 (Dual Rear Wheel) Models
Install on front/rear tires.
For a LT235/80R17E tire, use of a U-class
snow chain is recommended.
TIRE ROTATION RECOMMENDATIONS
Tires on the front and rear axles of vehicles
operate at different loads and perform different
steering, driving, and braking functions. For
these reasons, they wear at unequal rates.
These effects can be reduced by timely rotation
of tires. The benefits of rotation are especially
worthwhile with aggressive tread designs such
as those on all season type tires. Rotation will
WARNING!
Using tires of different size and type (M+S,
Snow) between front and rear axles can
cause unpredictable handling. You could lose
control and have a collision.
CAUTION!
To avoid damage to your vehicle or tires,
observe the following precautions:
Because of restricted traction device clear -
ance between tires and other suspension
components, it is important that only trac-
tion devices in good condition are used.
Broken devices can cause serious damage.
Stop the vehicle immediately if noise
occurs that could indicate device breakage.
Remove the damaged parts of the device
before further use.
Install device as tightly as possible and
then retighten after driving about ½ mile
(0.8 km). Autosock traction devices do not
require retightening.
Do not exceed 30 mph (48 km/h).
Drive cautiously and avoid severe turns and
large bumps, especially with a loaded
vehicle.
Do not drive for a prolonged period on dry
pavement.
Observe the traction device manufacturer’s
instructions on the method of installation,
operating speed, and conditions for use.
Always use the suggested operating speed
of the device manufacturer if it is less than
30 mph (48 km/h).
Do not use traction devices on a compact
spare tire.
CAUTION! (Continued)
20_DJD2_OM_EN_USC_t.book Page 444
Page 451 of 568

SERVICING AND MAINTENANCE449
If you detect any stone chips or scratches in
the paint, touch them up immediately. The
cost of such repairs is considered the respon -
sibility of the owner.
If your vehicle is damaged due to a collision
or similar cause that destroys the paint and
protective coating, have your vehicle repaired
as soon as possible. The cost of such repairs
is considered the responsibility of the owner.
If you carry special cargo such as chemicals,
fertilizers, de-icer salt, etc., be sure that such
materials are well packaged and sealed.
If a lot of driving is done on gravel roads,
consider mud or stone shields behind each
wheel.
Use Mopar Touch Up Paint on scratches as
soon as possible. An authorized dealer has
touch up paint to match the color of your
vehicle.
Spray-On Bedliner – If Equipped
During ownership, the shine and luster of the
Spray-On Bedliner can fade from oxidation, road
dirt, heavy-duty hauling and hard water stains. Weathering and UV exposure will lead to fading,
dulling, and loss of gloss over time.
To help maintain the appearance of your
Spray-On Bedliner, the manufacturer
recommends you periodically rinse all loose dirt
from your truck bed and clean your truck at
least twice per year using the Mopar Spray-On
Bedliner Conditioner available at a local
authorized dealer.
To Help Maintain The Appearance Of Your
Spray-On Bedliner, Follow The Steps Below:
1. Rinse your truck bed out with water to remove any loose dirt and debris.
2. Mix a mild soap or detergent with water with a soft cloth or brush.
3. Rinse bedliner with water.
4. Once dry, apply a small amount of Mopar Spray-On Bedliner Conditioner to a moist
towel or sponge and wipe over the entire
surface of the truck bedliner. Spray-On Bedliners are chemically-resistant to
many different types of chemicals (including
gasoline, oil, hydraulic fluids) for short periods
of time. If a spill occurs on your Spray-On
Bedliner, rinse the truck out as soon as possible
to avoid permanent damage.
Repairing The Spray-On Bedliner
While extremely tough, it is possible to damage
a Spray-On Bedliner. One common condition is
when loading a heavy pallet and dragging that
pallet across the floor of the bed. If a nail or
sharp point is exposed under the weight of the
pallet a scratch or tear is possible. While not
covered by your new vehicle warranty, a
cosmetic fix to cover the metal exposed by the
scratch is required. To repair a tear or gouge,
follow the directions provided in the Mopar
Quick Repair Kit.
WARNING!
Do not use silicon-based protection products
to clean your bedliner. Silicon-based products
can become slippery and may result in
personal injury.
7
20_DJD2_OM_EN_USC_t.book Page 449
Page 454 of 568

452
TECHNICAL SPECIFICATIONS
IDENTIFICATION DATA
VEHICLE IDENTIFICATION NUMBER
The Vehicle Identification Number (VIN) is found
on the left front corner of the instrument panel,
visible through the windshield.
Vehicle Identification Number
NOTE:
It is illegal to remove or alter the VIN.
BRAKE SYSTEM
If power assist is lost for any reason (for
example, repeated brake applications with the
engine off), the brakes will still function. However, you will experience a substantial
increase in braking effort to stop the vehicle.
If either the front or rear hydraulic system loses
normal braking capability, the remaining
system will still function with some loss of
overall braking effectiveness. This will be
evident by increased pedal travel during
application, greater pedal force required to slow
or stop, and activation of the “Brake Warning
Light” and/or the “ABS Warning Light” during
brake use.
HYDRAULIC BRAKE ASSIST — IF
E
QUIPPED
The brake system power assist is provided by a
hydro-boost unit which shares fluid with the
power steering system. You may experience
some clicking or hissing noises from the
hydro-boost system during hard braking
conditions.
NOTE:
Under cold temperatures, pedal effort will be
higher than normal until the power steering fluid
reaches operating temperature.
WHEEL AND TIRE TORQUE SPECIFICATIONS
Proper lug nut/bolt torque is very important to
ensure that the wheel is properly mounted to
the vehicle. Any time a wheel has been removed
and reinstalled on the vehicle, the lug nuts/
bolts should be torqued using a properly
calibrated torque wrench using a high quality six
sided (hex) deep wall socket.
TORQUE SPECIFICATIONS
**Use only authorized dealer recommended
lug nuts/bolts and clean or remove any dirt or
oil before tightening.
Lug Nut/
Bolt
Torque Lug Nut/
Bolt Type **Lug
Nut/Bolt
SizeLug Nut/
Bolt
Socket
Size
130
Ft-Lbs
(176 N·m) Cone
M14 x
1.5022 mm
140
Ft-Lbs
(190 N·m) Flanged
20_DJD2_OM_EN_USC_t.book Page 452
Page 475 of 568
MULTIMEDIA473
ParkView Backup Camera Active
Guidelines On
Off
NOTE:
Your vehicle may be equipped with the ParkView Backup Camera Active Guidelines that allows you to see active guidelines over the ParkView Backup
camera display whenever the gear selector is put into REVERSE. The image will be displayed on the radio touchscreen display along with a caution
note to “check entire surroundings” across the top of the screen. After five seconds, this note disappears. Fixed Guidelines On Off
ParkView Backup Camera Delay On Off
NOTE:
When the vehicle is shifted out of REVERSE (with camera delay turned OFF), the rear camera mode is exited and the navigation or audio screen
appears again. When the vehicle is shifted out of REVERSE (with camera delay turned ON), the rear view image with dynamic grid lines will be
displayed for up to 10 seconds after shifting out of REVERSE unless the forward vehicle speed exceeds 8 mph (12 km/h), the transmission is shifted
into PARK or the ignition is switched to the OFF position. Forward Facing Camera Guidelines — If Equipped On
Off
NOTE:
The “Forward Facing Camera Guidelines” feature is an off-road type of feature that shows the path of the tires based on the steering wheel input. CHMSL (Center High Mounted Stop Lamp) Camera Dynamic Centerline — If Equipped On
Off
NOTE:
When the “CHMSL Camera Dynamic Centerline” feature is selected, it will assist in backing up for trailer alignment and hook up. This feature is only
available if your vehicle is equipped with Surround View Camera.
Setting Name Selectable Options
9
20_DJD2_OM_EN_USC_t.book Page 473
Page 491 of 568
MULTIMEDIA489
ParkView Backup Camera Delay OnOff
NOTE:
The “ParkView Backup Camera Delay” setting determines whether or not the screen will display the rear view image with dynamic grid lines for up to
10 seconds after the vehicle is shifted out of REVERSE. This delay will be canceled if the vehicle’s speed exceeds 8 mph (13 km/h), the transmission
is shifted into PARK, or the ignition is switched to the OFF position.
Active Parkview Backup Camera Guidelines OnOff
NOTE:
The “Active ParkView Backup Camera Guidelines” feature overlays the Rear Backup Camera image with active, or dynamic, grid lines to help illustrate
the width of the vehicle and its projected backup path, based on the steering wheel position when the option is checked. A dashed center line overlay
indicates the center of the vehicle to assist with parking or aligning to a hitch/receiver. Fixed Parkview Backup Camera Guidelines OnOff
Forward Facing Camera Guidelines — If Equipped On
Off
NOTE:
The “Forward Facing Camera Guidelines” feature is an off-road type of feature that shows the path of the tires based on the steering wheel input. CHMSL (Center High Mounted Stop Lamp)
Camera Dynamic Centerline — If Equipped On
Off
NOTE:
When the “CHMSL Camera Dynamic Centerline” feature is selected, it will assist in backing up for trailer alignment and hook up. This feature is only
available if your vehicle is equipped with Surround View Camera.
Setting Name Selectable Options
9
20_DJD2_OM_EN_USC_t.book Page 489
Page 493 of 568

MULTIMEDIA491
Active Parkview Backup Camera
Guidelines On
Off
NOTE:
The “Active ParkView Backup Camera Guidelines” feature overlays the Rear Backup Camera image with active or dynamic grid lines to help illustrate
the width of the vehicle and its projected backup path, based on the steering wheel position when the option is checked. A dashed center line overlay
indicates the center of the vehicle to assist with parking or aligning to a hitch/receiver. Fixed Parkview Backup Camera Guidelines On
Off
Forward Facing Camera Guidelines — If Equipped On
Off
NOTE:
The “Forward Facing Camera Guidelines” feature is an off-road type of feature that shows the path of the tires based on the steering wheel input. CHMSL (Center High Mounted Stop Lamp) Camera Dynamic Centerline — If Equipped On
Off
NOTE:
When the “CHMSL Camera Dynamic Centerline” feature is selected, it will assist in backing up for trailer alignment and hook up. This feature is only
available if your vehicle is equipped with Surround View Camera. Forward Collision Warning — If Equipped Off
Warning Only Warning & Braking
NOTE:
Sounds an audible warning for the driver to slow the vehicle in case of collision or sounds an audible warning and applies brakes.
Setting Name Selectable Options
9
20_DJD2_OM_EN_USC_t.book Page 491
Page 502 of 568

500MULTIMEDIA
NOTE:
For further information about Trailer Tire Pressure Monitoring, refer to “Auxiliary Driving Systems” in “Safety.”
Audio
After pressing the Audio button on the touchscreen, the following settings will be available:NOTE:
After pressing Next, the Tire Pressure screen appears. The default for this option is 50 PSI (344 kPa), however the range is selectable anywhere
between 25–125 PSI (172–862 kPa). Once PSI (kPa) is programmed, the pairing screen appears. Tire sensors must be paired in order shown.
Starting with Tire 1, deflate tire by 5 PSI (34 kPa) and wait for a horn chirp. Repeat process until complete. Do not exit the pairing screen until process
is complete. If pairing has been unsuccessful, a double horn chirp will sound, and a prompt on the touchscreen will allow you to retry the procedure;
“Retry” will only appear when setup fails. Each tire must be successfully paired during a single pairing process to receive the success screen.
Trailer Name List of Trailer Names
NOTE:
You can select and personalize your trailer name depending on the type of trailer you are hauling. Select the trailer name from the following list: trailer,
boat, car, cargo, dump, equipment, flatbed, gooseneck, horse, livestock, motorcycle, snowmobile, travel, utility, and 5th wheel.
Setting Name Selectable Options
Setting NameSelectable Options
Balance/FadeFrontRear LeftRight
NOTE:
The “Balance/Fade” feature allows you to adjust the Balance and Fade settings. Press and drag the Speaker icon or use the arrows to adjust, tap the
C icon to readjust to the center. Equalizer + –
NOTE:
When in the “Equalizer” display, you may adjust the Bass, Mid and Treble settings.
20_DJD2_OM_EN_USC_t.book Page 500
Page 512 of 568

510MULTIMEDIA
Parkview Camera Delay — If Equipped OnOff
NOTE:
The “Parkview Camera Delay” setting determines whether or not the screen will display the rear view image with dynamic grid lines for up to 10
seconds after the vehicle is shifted out of REVERSE. This delay will be canceled if the vehicle’s speed exceeds 8 mph (13 km/h), the transmission is
shifted into PARK, or the ignition is switched to the OFF position. Active Backup Camera Guidelines — If Equipped OnOff
NOTE:
The “Active Backup Camera Guidelines” feature overlays the Rear Backup Camera image with active or dynamic grid lines to help illustrate the width
of the vehicle, and its projected backup path, based on the steering wheel position when the option is checked. A dashed center line overlay indicates
the center of the vehicle to assist with parking or aligning to a hitch/receiver. Fixed Backup Camera Guidelines — If Equipped OnOff
Forward Facing Camera Guidelines — If Equipped On
Off
NOTE:
The “Forward Facing Camera Guidelines” feature is an off-road type of feature that shows the path of the tires based on the steering wheel input. CHMSL (Center High Mounted Stop Lamp)
Camera Dynamic Centerline — If Equipped On
Off
NOTE:
When the “CHMSL Camera Dynamic Centerline” feature is selected, it will assist in backing up for trailer alignment and hook up. This feature is only
available if your vehicle is equipped with Surround View Camera. Cargo Camera Dynamic Centerline — If Equipped On
Off
Setting Name Selectable Options
20_DJD2_OM_EN_USC_t.book Page 510
Page 521 of 568
MULTIMEDIA519
NOTE:
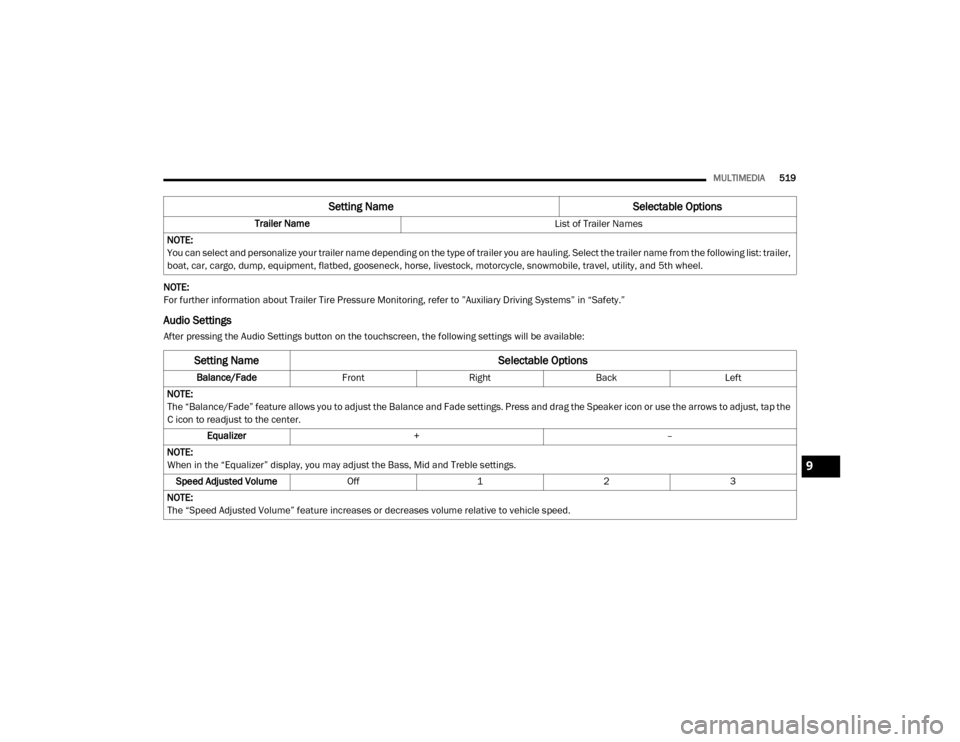
For further information about Trailer Tire Pressure Monitoring, refer to ”Auxiliary Driving Systems” in “Safety.”
Audio Settings
After pressing the Audio Settings button on the touchscreen, the following settings will be available: Trailer Name
List of Trailer Names
NOTE:
You can select and personalize your trailer name depending on the type of trailer you are hauling. Select the trailer name from the following list: trailer,
boat, car, cargo, dump, equipment, flatbed, gooseneck, horse, livestock, motorcycle, snowmobile, travel, utility, and 5th wheel.
Setting Name Selectable Options
Setting NameSelectable Options
Balance/FadeFrontRight Back Left
NOTE:
The “Balance/Fade” feature allows you to adjust the Balance and Fade settings. Press and drag the Speaker icon or use the arrows to adjust, tap the
C icon to readjust to the center. Equalizer + –
NOTE:
When in the “Equalizer” display, you may adjust the Bass, Mid and Treble settings. Speed Adjusted Volume Off123
NOTE:
The “Speed Adjusted Volume” feature increases or decreases volume relative to vehicle speed.
9
20_DJD2_OM_EN_USC_t.book Page 519