tow Ram 3500 Chassis Cab 2018 Manual Online
[x] Cancel search | Manufacturer: RAM, Model Year: 2018, Model line: 3500 Chassis Cab, Model: Ram 3500 Chassis Cab 2018Pages: 527, PDF Size: 5.83 MB
Page 362 of 527
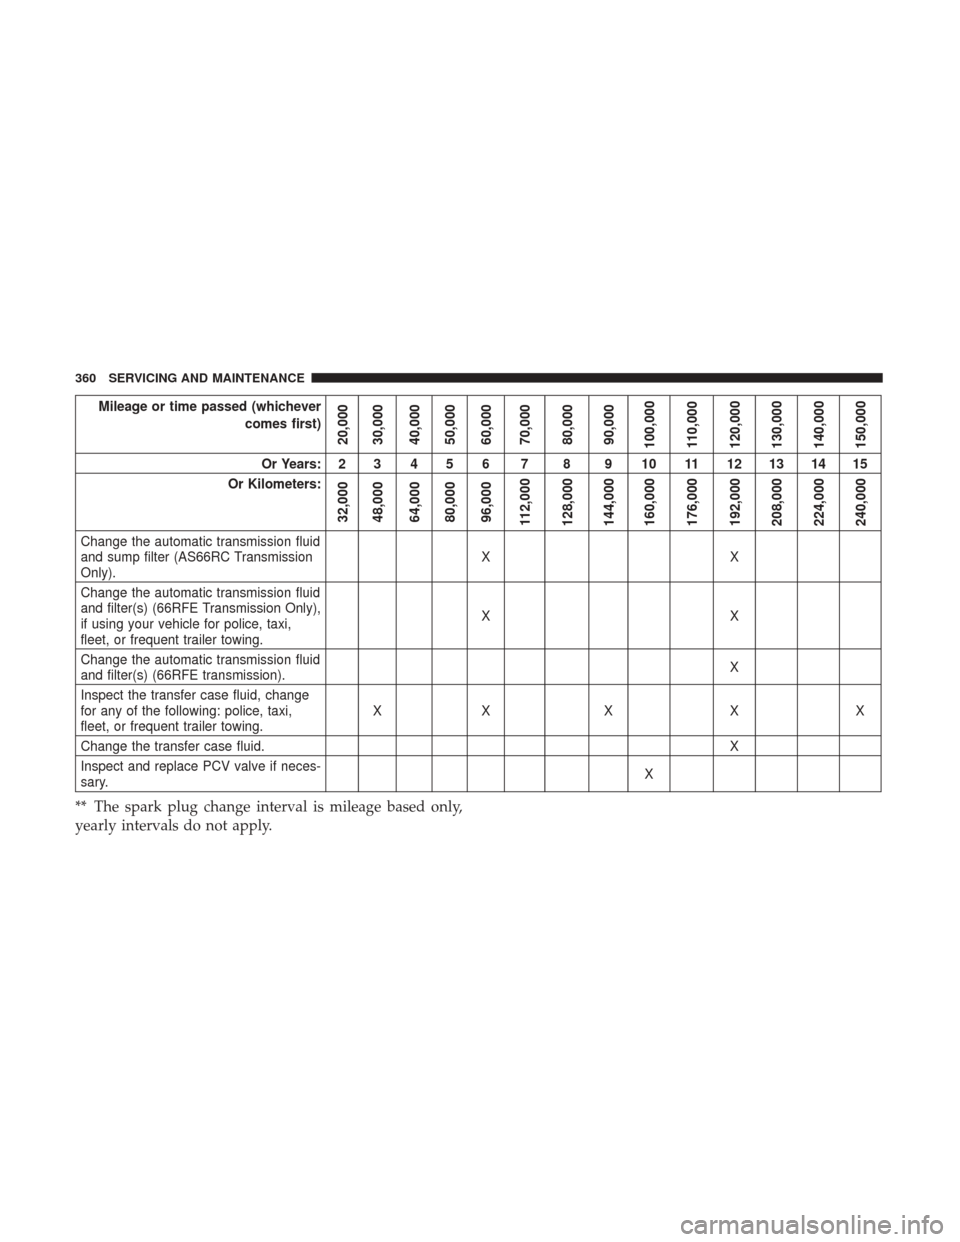
Mileage or time passed (whichevercomes first)
20,000
30,000
40,000
50,000
60,000
70,000
80,000
90,000
100,000
110,000
120,000
130,000
140,000
150,000
Or Years: 2 3 4 5 6 7 8 9 10 11 12 13 14 15
Or Kilometers:
32,000
48,000
64,000
80,000
96,000
112,000
128,000
144,000
160,000
176,000
192,000
208,000
224,000
240,000
Change the automatic transmission fluid
and sump filter (AS66RC Transmission
Only). XX
Change the automatic transmission fluid
and filter(s) (66RFE Transmission Only),
if using your vehicle for police, taxi,
fleet, or frequent trailer towing. XX
Change the automatic transmission fluid
and filter(s) (66RFE transmission). X
Inspect the transfer case fluid, change
for any of the following: police, taxi,
fleet, or frequent trailer towing. XX X X X
Change the transfer case fluid. X
Inspect and replace PCV valve if neces-
sary. X
** The spark plug change interval is mileage based only,
yearly intervals do not apply.
360 SERVICING AND MAINTENANCE
Page 365 of 527

Checking Oil Level — Gas Engine
To assure proper lubrication of your vehicle’s engine, the
engine oil must be maintained at the correct level. Check
the oil level at regular intervals, such as every fuel stop.
The best time to check the engine oil level is about five
minutes after a fully warmed up engine is shut off.
Checking the oil while the vehicle is on level ground will
improve the accuracy of the oil level readings. Always
maintain the oil level within the SAFE zone on the dipstick.
Adding one quart of oil when the reading is at the bottom
of the SAFE zone will result in a reading at the top of the
safe zone on these engines.
CAUTION!
Overfilling or underfilling will cause oil aeration or
loss of oil pressure. This could damage your engine.
Adding Washer Fluid
The fluid reservoir is located under the hood and should be
checked for fluid level at regular intervals. Fill the reservoir
with windshield washer solvent only (not radiator anti-
freeze). When refilling the washer fluid reservoir, take
some washer fluid and apply it to a cloth or towel and wipe
the wiper blades clean. This will help blade performance.To prevent freeze-up of your windshield washer system in
cold weather, select a solution or mixture that meets or
exceeds the temperature range of your climate. This rating
information can be found on most washer fluid containers.
WARNING!
Commercially available windshield washer solvents
are flammable. They could ignite and burn you. Care
must be exercised when filling or working around the
washer solution.
After the engine has warmed up, operate the defroster for
a few minutes to reduce the possibility of smearing or
freezing the fluid on the cold windshield. Windshield
washer solution used with water as directed on the con-
tainer, aids cleaning action, reduces the freezing point to
avoid line clogging, and is not harmful to paint or trim.
Maintenance-Free Battery
Your vehicle is equipped with a maintenance-free battery.
You will never have to add water, nor is periodic mainte-
nance required.
8
SERVICING AND MAINTENANCE 363
Page 372 of 527
Refrigerant Recovery And Recycling — R–1234yf
R–1234yf Air Conditioning Refrigerant is a hydrofluo-
roolefin (HFO) that is endorsed by the Environmental
Protection Agency and is an ozone-friendly substance with
a low global-warming potential. The manufacturer recom-
mends that air conditioning service be performed by an
authorized dealer using recovery and recycling equipment.
NOTE:Use only manufacturer approved A/C system
PAG compressor oil, and refrigerants.
Cabin Filter Replacement (A/C Air Filter)
Refer to the “Maintenance Plan” for the proper mainte-
nance intervals.
WARNING!
Do not remove the cabin air filter while the vehicle is
running, or while the ignition is in the ACC or ON/
RUN mode. With the cabin air filter removed and the
blower operating, the blower can contact hands and
may propel dirt and debris into your eyes, resulting in
personal injury. The cabin air filter is located in the fresh air inlet behind the
glove compartment. Perform the following procedure to
replace the filter:
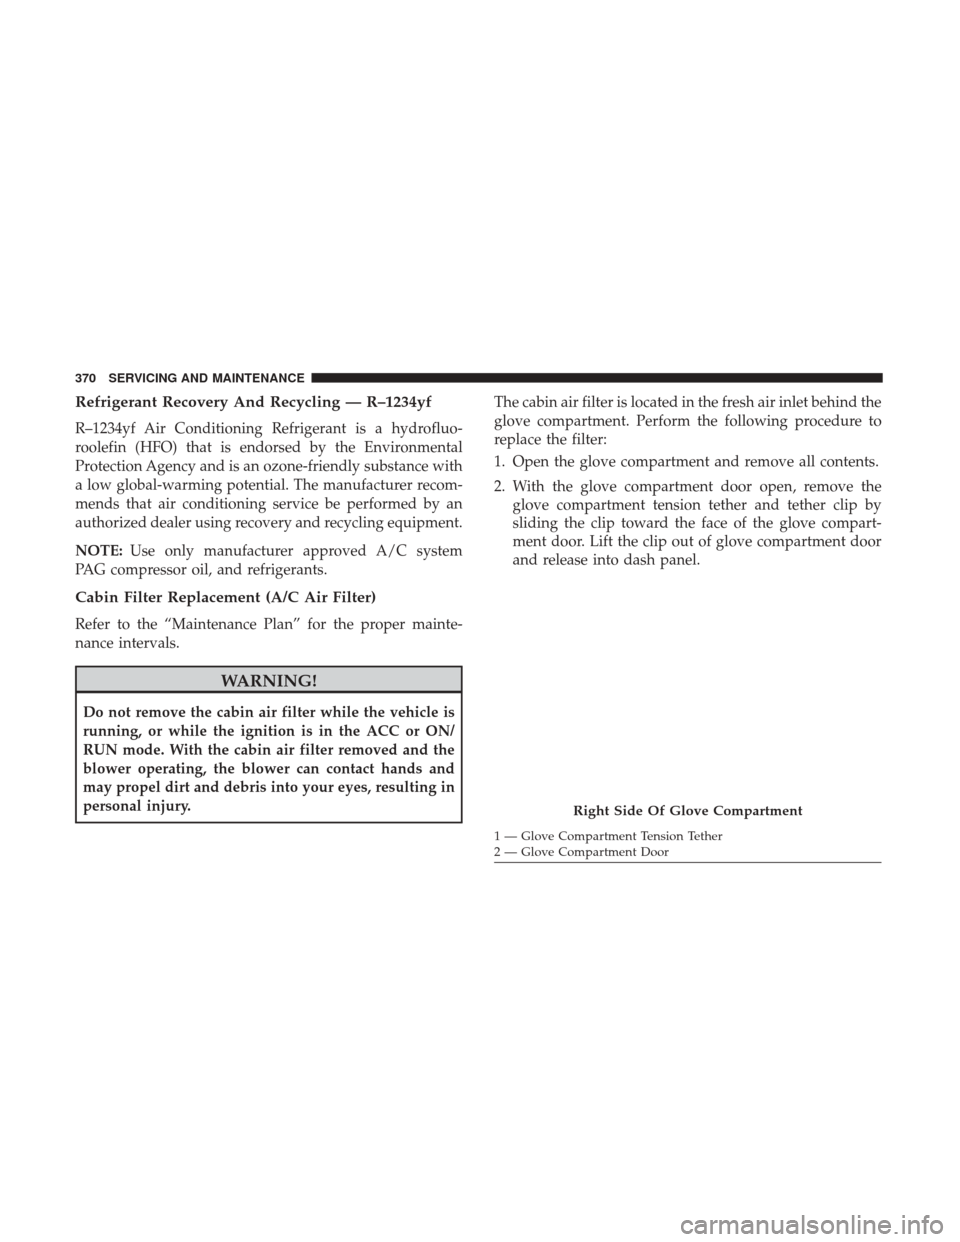
1. Open the glove compartment and remove all contents.
2. With the glove compartment door open, remove the
glove compartment tension tether and tether clip by
sliding the clip toward the face of the glove compart-
ment door. Lift the clip out of glove compartment door
and release into dash panel.
Right Side Of Glove Compartment
1 — Glove Compartment Tension Tether
2 — Glove Compartment Door
370 SERVICING AND MAINTENANCE
Page 373 of 527
3. There are glove compartment travel stops on both sidesof the glove compartment door, push inward on both
sides of the glove compartment to release the glove
compartment travel stops. 4. Disengage the glove compartment door from its hinges
by opening the glove compartment past the travel stop
and pulling it toward you.
5. Remove the filter cover by pushing in on the finger tabs on each end of the filter cover.
Glove Compartment
1 — Glove Compartment Travel Stops
2 — Glove Compartment Tension Tether
3 — Glove Compartment DoorFilter Cover
8
SERVICING AND MAINTENANCE 371
Page 375 of 527
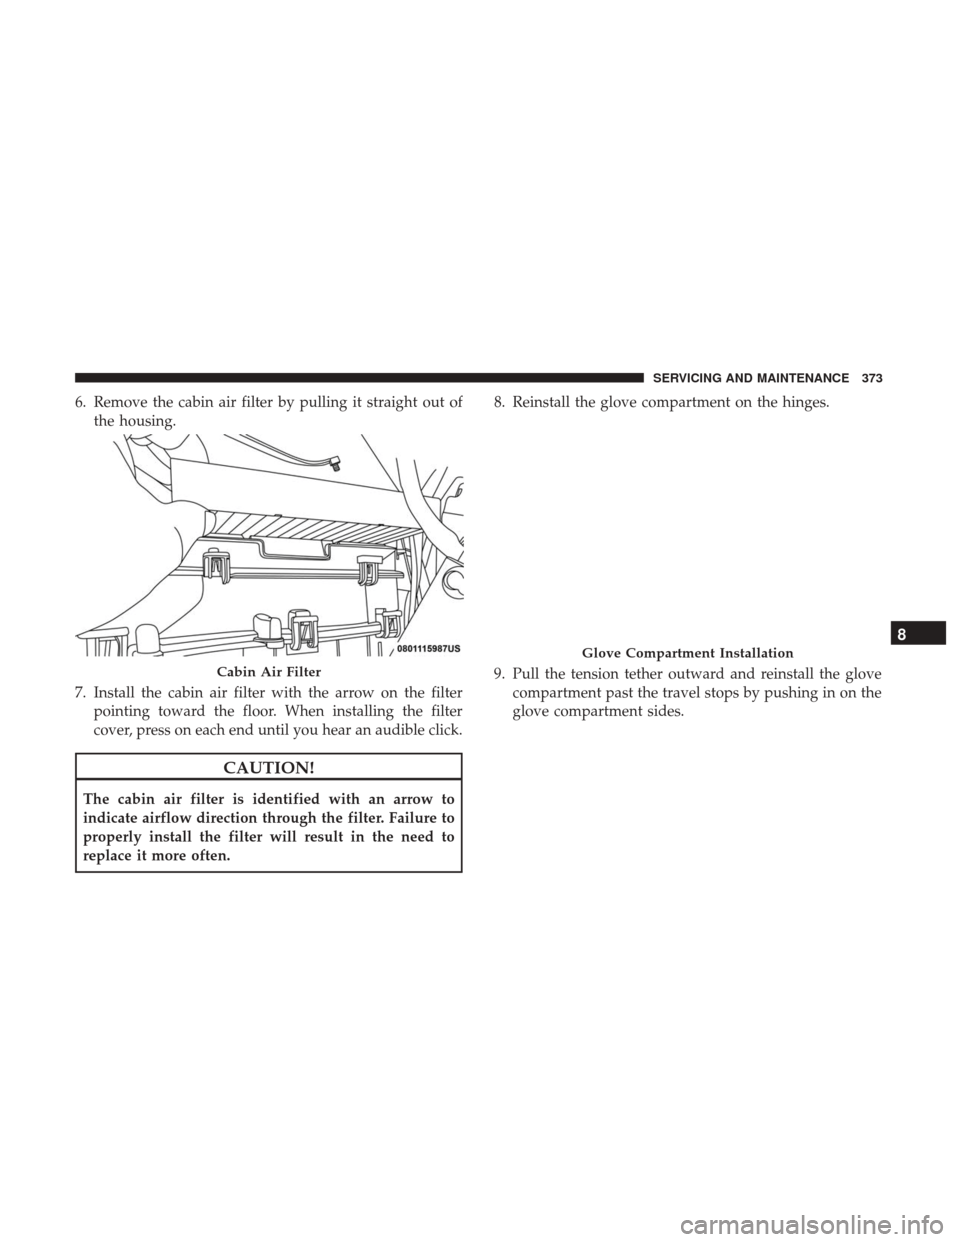
6. Remove the cabin air filter by pulling it straight out ofthe housing.
7. Install the cabin air filter with the arrow on the filter pointing toward the floor. When installing the filter
cover, press on each end until you hear an audible click.
CAUTION!
The cabin air filter is identified with an arrow to
indicate airflow direction through the filter. Failure to
properly install the filter will result in the need to
replace it more often. 8. Reinstall the glove compartment on the hinges.
9. Pull the tension tether outward and reinstall the glove
compartment past the travel stops by pushing in on the
glove compartment sides.
Cabin Air Filter
Glove Compartment Installation
8
SERVICING AND MAINTENANCE 373
Page 381 of 527
3. Tilt the lower end of the wiper blade away from the armand use one finger push the release tab toward the
wiper arm.
4. Slide the wiper blade down towards the base of the wiper arm. 5. With the wiper blade disengaged, remove the wiper
blade from the wiper arm by holding the wiper arm
with one hand and separating the wiper blade from the
wiper arm with the other hand (move the wiper blade
down toward the base of the wiper arm and away from
the J hook in the end of the wiper arm).
6. Gently lower the wiper arm onto the glass.
Wiper Disengaging
1 — Locking Tab
2—Wiper
3 — Release Tab
Removing Wiper From Wiper Arm
1—Wiper
2 — Locking Tab
3 — Wiper Arm J Hook
8
SERVICING AND MAINTENANCE 379
Page 383 of 527
CAUTION!
•The catalytic converter requires the use of unleaded
fuel only. Leaded gasoline will destroy the effective-
ness of the catalyst as an emissions control device
and may seriously reduce engine performance and
cause serious damage to the engine.
• Damage to the catalytic converter can result if your
vehicle is not kept in proper operating condition. In
the event of engine malfunction, particularly involv-
ing engine misfire or other apparent loss of perfor-
mance, have your vehicle serviced promptly. Contin-
ued operation of your vehicle with a severe
malfunction could cause the converter to overheat,
resulting in possible damage to the converter and
vehicle.
Under normal operating conditions, the catalytic converter
will not require maintenance. However, it is important to
keep the engine properly tuned to assure proper catalyst
operation and prevent possible catalyst damage.
NOTE: Intentional tampering with emissions control sys-
tems can result in civil penalties being assessed against
you. In unusual situations involving grossly malfunctioning
engine operation, a scorching odor may suggest severe and
abnormal catalyst overheating. If this occurs, stop the
vehicle, turn off the engine and allow it to cool. Service,
including a tune-up to manufacturer’s specifications,
should be obtained immediately.
To minimize the possibility of catalytic converter damage:
•
Do not interrupt the ignition when the transmission is in
gear and the vehicle is in motion.
• Do not try to start the vehicle by pushing or towing the
vehicle.
• Do not idle the engine with any ignition components
disconnected or removed, such as when diagnostic
testing, or for prolonged periods during very rough idle
or malfunctioning operating conditions.
8
SERVICING AND MAINTENANCE 381
Page 401 of 527
Tire And Loading Information Placard
This placard tells you important information about the:
1. Number of people that can be carried in the vehicle.
2. Total weight your vehicle can carry.
3. Tire size designed for your vehicle.
4. Cold tire inflation pressures for the front, rear, and sparetires.Loading
The vehicle maximum load on the tire must not exceed the
load carrying capacity of the tire on your vehicle. You will
not exceed the tire’s load carrying capacity if you adhere to
the loading conditions, tire size, and cold tire inflation
pressures specified on the Tire and Loading Information
placard in “Vehicle Loading” in the “Starting And Operat-
ing” section of this manual.
NOTE: Under a maximum loaded vehicle condition, gross
axle weight ratings (GAWRs) for the front and rear axles
must not be exceeded.
For further information on GAWRs, vehicle loading, and
trailer towing, refer to “Vehicle Loading” in the “Starting
And Operating” section of this manual.
To determine the maximum loading conditions of your
vehicle, locate the statement “The combined weight of
occupants and cargo should never exceed XXX kg or
XXX lbs” on the Tire and Loading Information placard. The
combined weight of occupants, cargo/luggage and trailer
tongue weight (if applicable) should never exceed the
weight referenced here.
Tire And Loading Information Placard
8
SERVICING AND MAINTENANCE 399
Page 402 of 527
Steps For Determining Correct Load Limit—
(1) Locate the statement “The combined weight of
occupants and cargo should never exceed XXX kg or
XXX lbs.” on your vehicle’s placard.
(2) Determine the combined weight of the driver and
passengers that will be riding in your vehicle.
(3) Subtract the combined weight of the driver and
passengers from XXX kg or XXX lbs.
(4) The resulting figure equals the available amount of
cargo and luggage load capacity. For example, if “XXX”
amount equals 1400 lbs. and there will be five 150 lb
passengers in your vehicle, the amount of available
cargo and luggage load capacity is 650 lbs. (1400-750
(5x150) = 650 lbs.)
(5) Determine the combined weight of luggage and
cargo being loaded on the vehicle. That weight may not
safely exceed the available cargo and luggage load
capacity calculated in Step 4.
(6) If your vehicle will be towing a trailer, load from
your trailer will be transferred to your vehicle. Consultthis manual to determine how this reduces the available
cargo and luggage load capacity of your vehicle.
Metric Example For Load Limit
For example, if “XXX” amount equals 635 kg and there will
be five 68 kg passengers in your vehicle, the amount of
available cargo and luggage load capacity is 295 kg (635-
340 (5x68) = 295 kg) as shown in step 4.
NOTE:
•
If your vehicle will be towing a trailer, load from your
trailer will be transferred to your vehicle. The following
table shows examples on how to calculate total load,
cargo/luggage, and towing capacities of your vehicle
with varying seating configurations and number and
size of occupants. This table is for illustration purposes
only and may not be accurate for the seating and load
carry capacity of your vehicle.
• For the following example, the combined weight of
occupants and cargo should never exceed 865 lbs
(392 kg).
400 SERVICING AND MAINTENANCE
Page 406 of 527
dealer for recommended safe operating speeds, loading
and cold tire inflation pressures.
WARNING!
High speed driving with your vehicle under maximum
load is dangerous. The added strain on your tires could
cause them to fail. You could have a serious collision.
Do not drive a vehicle loaded to the maximum capacity
at continuous speeds above 75 mph (120 km/h).
Radial Ply Tires
WARNING!
Combining radial ply tires with other types of tires on
your vehicle will cause your vehicle to handle poorly.
The instability could cause a collision. Always use
radial ply tires in sets of four. Never combine them
with other types of tires.
Tire Repair
If your tire becomes damaged, it may be repaired if it meets
the following criteria:
• The tire has not been driven on when flat. •
The damage is only on the tread section of your tire
(sidewall damage is not repairable).
• The puncture is no greater thana¼ofaninch (6 mm).
Consult an authorized tire dealer for tire repairs and
additional information.
Damaged Run Flat tires, or Run Flat tires that have
experienced a loss of pressure should be replaced immedi-
ately with another Run Flat tire of identical size and service
description (Load Index and Speed Symbol).
Run Flat Tires — If Equipped
Run Flat tires allow you the capability to drive 50 miles
(80 km) at 50 mph (80 km/h) after a rapid loss of inflation
pressure. This rapid loss of inflation is referred to as the
Run Flat mode. A Run Flat mode occurs when the tire
inflation pressure is of/or below 14 psi (96 kPa). Once a
Run Flat tire reaches the run flat mode it has limited
driving capabilities and needs to be replaced immediately.
A Run Flat tire is not repairable.
It is not recommended driving a vehicle loaded at full
capacity or to tow a trailer while a tire is in the run flat
mode.
See the tire pressure monitoring section for more information.
404 SERVICING AND MAINTENANCE