instrument cluster Ram 3500 Chassis Cab 2020 Owner's Manual
[x] Cancel search | Manufacturer: RAM, Model Year: 2020, Model line: 3500 Chassis Cab, Model: Ram 3500 Chassis Cab 2020Pages: 516, PDF Size: 29.24 MB
Page 5 of 516
3
EXTERIOR LIGHTS ...............................................44 Multifunction Lever ...................................... 44
Headlight Switch .......................................... 44
Daytime Running Lights (DRLs) ................. 45
High/Low Beam Switch ............................... 45
Automatic High Beam Headlamp
Control — If Equipped .................................. 45 Flash-To-Pass ............................................. 46
Automatic Headlights — If Equipped .......... 46
Parking Lights And Panel Lights ................. 46
Directional LED Headlamp System —
If Equipped ................................................... 46 Headlights On With Wipers (Available With
Automatic Headlights Only) ......................... 46 Headlight Delay ............................................ 47
Lights-On Reminder ..................................... 47
Front Fog Lights — If Equipped .................. 47
Turn Signals ............................................. 47
Lane Change Assist — If Equipped ............. 47
Cargo Lights/Trailer Spotter Lights —
If Equipped ................................................... 47 Battery Saver................................................ 48
INTERIOR LIGHTS ................................................48
Courtesy Lights ............................................ 48
Illuminated Entry ......................................... 49
WINDSHIELD WIPERS AND WASHERS ............50
Windshield Wipers ..................................... 50
Rain Sensing Wipers — If Equipped ........... 51 CLIMATE CONTROLS ........................................... 51
Manual Climate Control Overview ............ 52
Automatic Climate Control Overview .......... 55
Climate Control Functions........................... 62
Automatic Temperature Control (ATC) ...... 62
Operating Tips ............................................. 63
WINDOWS ............................................................ 64
Power Windows — If Equipped .................... 64
Wind Buffeting ............................................ 66
HOOD .................................................................... 66
To Open The Hood ...................................... 66
To Close The Hood ....................................... 67
GARAGE DOOR OPENER — IF EQUIPPED ........ 67
Before You Begin Programming
HomeLink® .................................................. 68 Canadian/Gate Operator Programming ..... 70
Using HomeLink®........................................ 71
Security......................................................... 71
Troubleshooting Tips ................................... 71
General Information .................................... 72
INTERNAL EQUIPMENT ........................................ 72
Storage ......................................................... 72
Cupholders .................................................. 77
Electrical Power Outlets ............................ 78
Power Inverter — If Equipped ..................... 80
Wireless Charging Pad — If Equipped ........ 81
Overhead Sunglass Storage ....................... 81
GETTING TO KNOW YOUR INSTRUMENT PANEL
BASE / MIDLINE INSTRUMENT CLUSTER..........82Base / Midline Instrument Cluster
Descriptions ................................................. 83
PREMIUM INSTRUMENT CLUSTER .....................85
Premium Instrument Cluster
Descriptions ................................................. 86
DIESEL INSTRUMENT CLUSTER .........................87
DIESEL INSTRUMENT CLUSTER ................ 88
INSTRUMENT CLUSTER .......................................90
Diesel INSTRUMENT CLUSTER .................. 91
INSTRUMENT CLUSTER DISPLAY .......................92
Instrument Cluster Display Controls .......... 92
Oil Life Reset ............................................... 93
Display Menu Items ..................................... 94
Diesel Messages And Warnings —
6.7L Cummins Diesel Engine ................... 103 Battery Saver On/Battery Saver Mode
Message — Electrical Load Reduction Actions
— If Equipped .......................................... 107
WARNING LIGHTS AND MESSAGES ............... 108
Red Warning Lights ................................... 108
Yellow Warning Lights ............................... 111Yellow Indicator Lights .............................. 115
Green Indicator Lights ............................... 116White Indicator Lights ............................... 117Blue Indicator Lights ................................. 118
2020_RAM_CHASSIS_CAB_OM_USA=GUID-6C67832B-7839-4CCF-BEFC-CDF988F949EA=1=en=.book Page 3
Page 15 of 516
GETTING TO KNOW YOUR VEHICLE13
TIP:
When viewing a topic, tap the star icon to add it
to your Favorites, for easy access in the future.
KEYS
Key Fob
Your vehicle uses a keyless ignition system. The
ignition system consists of a key fob with
Remote Keyless Entry (RKE) and a START/STOP
push button ignition system. The Remote
Keyless Entry (RKE) system (if equipped)
consists of a key fob and Keyless Enter-N-Go
feature.
NOTE:
The key fob may not be found if it is located next
to a mobile phone, laptop or other electronic
device; these devices may block the key fob’s
wireless signal.
If the vehicle is equipped with remote power
door locks, the key fob allows you to lock or
unlock all doors, as well as activate the Panic
Alarm, from distances up to approximately 66 ft
(20 m). The key fob does not need to be pointed
at the vehicle to activate the system. NOTE:
In the ON/RUN position, all key fob buttons
will work until the vehicle reaches 2 mph
(4 km/h).
The key fob should not be placed next to the
wireless charging pad (if equipped).
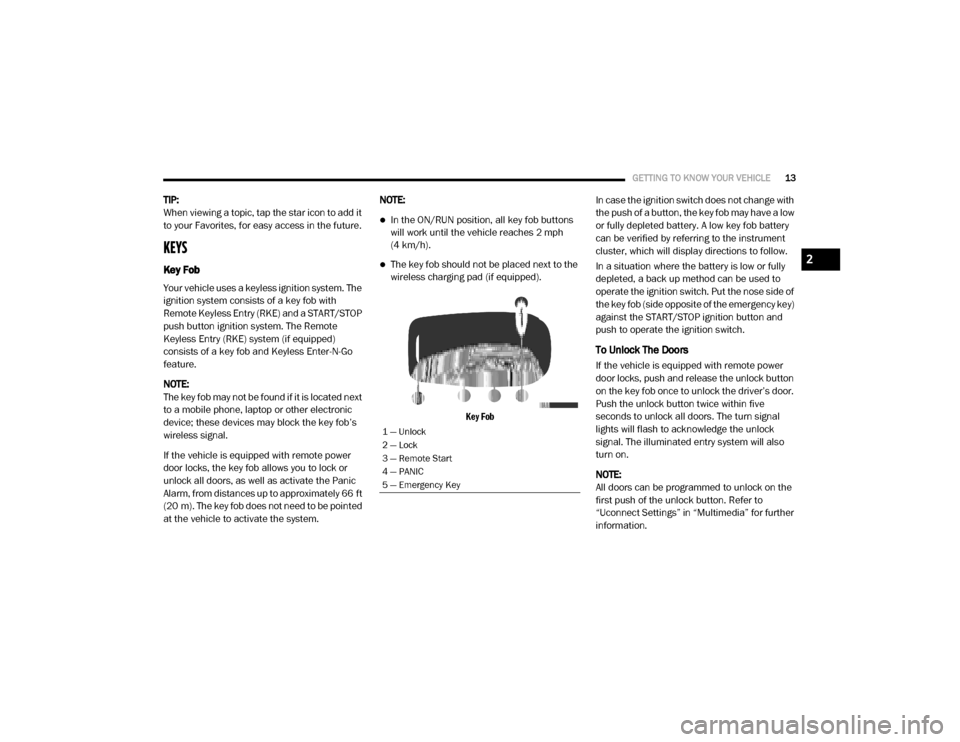
Key Fob
In case the ignition switch does not change with
the push of a button, the key fob may have a low
or fully depleted battery. A low key fob battery
can be verified by referring to the instrument
cluster, which will display directions to follow.
In a situation where the battery is low or fully
depleted, a back up method can be used to
operate the ignition switch. Put the nose side of
the key fob (side opposite of the emergency key)
against the START/STOP ignition button and
push to operate the ignition switch.
To Unlock The Doors
If the vehicle is equipped with remote power
door locks, push and release the unlock button
on the key fob once to unlock the driver’s door.
Push the unlock button twice within five
seconds to unlock all doors. The turn signal
lights will flash to acknowledge the unlock
signal. The illuminated entry system will also
turn on.
NOTE:
All doors can be programmed to unlock on the
first push of the unlock button. Refer to
“Uconnect Settings” in “Multimedia” for further
information.
1 — Unlock
2 — Lock
3 — Remote Start
4 — PANIC
5 — Emergency Key
2
2020_RAM_CHASSIS_CAB_OM_USA=GUID-6C67832B-7839-4CCF-BEFC-CDF988F949EA=1=en=.book Page 13
Page 16 of 516
14GETTING TO KNOW YOUR VEHICLE
To Lock The Doors
If the vehicle is equipped with remote power
door locks, push and release the lock button on
the key fob to lock all doors. The turn signal
lights will flash and the horn will chirp to
acknowledge the signal.
Sound Horn With Remote Key Lock
This feature will cause the horn to chirp when
the doors are locked with the key fob. This
feature can be turned on or turned off.
NOTE:
Pushing the lock button on the key fob while you
are in the vehicle will activate the vehicle secu -
rity alarm system. Opening a door with the
vehicle security alarm system activated will
cause the alarm to sound. Push the unlock
button to deactivate the vehicle security alarm
system.
Refer to “Instrument Cluster Display” in
“Getting To Know Your Instrument Panel” for
further information.
Using The Panic Alarm
To turn the Panic Alarm feature on or off, push
the Panic button on the key fob. When the Panic
Alarm is activated, the turn signals will flash, the
horn will pulse on and off, and the interior lights
will turn on.
The Panic Alarm will stay on for three minutes
unless you turn it off by either pushing the Panic
button a second time or driving the vehicle at a
speed of 15 mph (24 km/h) or greater.
NOTE:
The interior lights will turn off if you place the
ignition in the ACC or ON/RUN position while
the Panic Alarm is activated. However, the
exterior lights and horn will remain on.
You may need to be less than 35 ft (11 m)
from the vehicle when using the key fob to
turn off the Panic Alarm due to the radio
frequency noises emitted by the system.
Replacing The Battery In The Key Fob With
Remote Control
The replacement battery model is one CR2032
battery. NOTE:
Perchlorate Material — special handling may
apply. See
www.dtsc.ca.gov/hazard -
ouswaste/perchlorate for further informa -
tion.
Do not touch the battery terminals that are
on the back housing or the printed circuit
board.
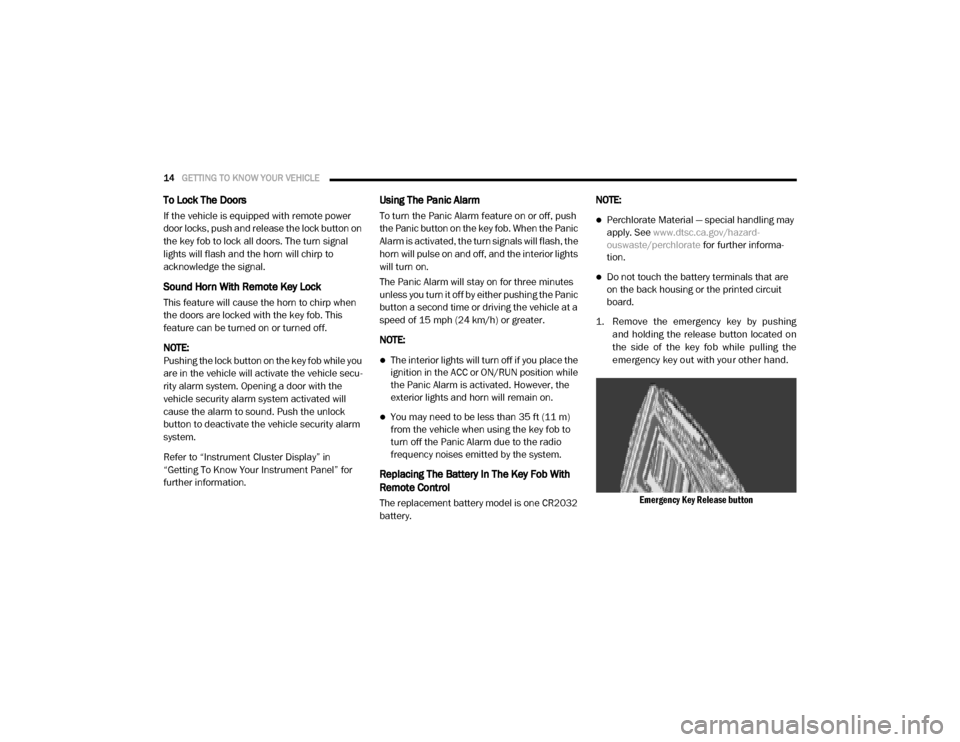
1. Remove the emergency key by pushing and holding the release button located on
the side of the key fob while pulling the
emergency key out with your other hand.
Emergency Key Release button
2020_RAM_CHASSIS_CAB_OM_USA=GUID-6C67832B-7839-4CCF-BEFC-CDF988F949EA=1=en=.book Page 14
Page 21 of 516
GETTING TO KNOW YOUR VEHICLE19
System not disabled from previous remote
start event
Vehicle security alarm not active
Malfunction Indicator Light is not illuminated
Remote Start Abort Message
The following messages will display in the
instrument cluster display if the vehicle fails to
remote start or exits remote start prematurely:
Remote Start Cancelled — Door Open
Remote Start Cancelled — Hood Open
Remote Start Cancelled — Fuel Low
Remote Start Cancelled — System Fault
Remote Start Disabled — Start Vehicle to
Reset
The instrument cluster display message stays
active until the ignition is placed in the ON/RUN
position.
To Enter Remote Start Mode
Push and release the Remote Start
button on the key fob twice within five
seconds. The parking lights will flash,
vehicle doors will lock, and the horn
will chirp twice (if programmed). Once the
vehicle has started, the engine will run for
15 minutes.
NOTE:
If your power door locks were unlocked,
Remote Start will automatically lock the
doors.
If an engine fault is present or fuel level is
low, the vehicle will start and then shut down
in 10 seconds.
The park lamps will turn on and remain on
during Remote Start mode.
For security, power window and power
sunroof operation (if equipped) are disabled
when the vehicle is in the Remote Start
mode.
The engine can be started two consecutive
times (two 15 minute cycles) with the key
fob. However, the ignition must be placed in
the ON/RUN position before you can repeat
the start sequence for a third cycle.
To Exit Remote Start Mode Without Driving
The Vehicle
Push and release the remote start button one
time or allow the engine to run for the entire
15 minute cycle.
NOTE:
To avoid unintentional shutdowns, the system
will disable for two seconds after receiving a
valid Remote Start request.
WARNING!
Do not start or run an engine in a closed
garage or confined area. Exhaust gas
contains Carbon Monoxide (CO) which is
odorless and colorless. Carbon Monoxide is
poisonous and can cause serious injury or
death when inhaled.
Keep key fobs away from children. Opera -
tion of the Remote Start System, windows,
door locks or other controls could cause
serious injury or death.
2
2020_RAM_CHASSIS_CAB_OM_USA=GUID-6C67832B-7839-4CCF-BEFC-CDF988F949EA=1=en=.book Page 19
Page 23 of 516
GETTING TO KNOW YOUR VEHICLE21
The Remote Start system will wait for the
“Wait To Start” Indicator Light to extinguish
before cranking the engine. This allows time
for the intake heater to preheat the incoming
air, and is normal operation in cold weather.
Refer to “Wait To Start Light,” located in
“Warning Lights And Messages” within
“Getting To Know Your Instrument Panel” for
more information.
How To Use Remote Start
All of the following conditions must be met
before the engine will remote start:
Transmission in PARK
Doors closed
Hood closed
Hazard switch off
Brake switch inactive (brake pedal not
pushed)
Battery at an acceptable charge level
PANIC button not pushed
Fuel meets minimum requirement
Water In Fuel Indicator Light is not illumi -
nated
Wait To Start Light Indicator Light is not illu -
minated
Malfunction Indicator Light is not illuminated
Remote Start Abort Message
The following messages will display in the
instrument cluster display if the vehicle fails to
remote start or exits remote start prematurely:
Remote Start Aborted — Door Open
Remote Start Aborted — Hood Open
Remote Start Aborted — Fuel Low
Remote Start Aborted — System Fault The instrument cluster display message is
stored until the ignition is placed in the ON/RUN
position.
To Enter Remote Start Mode
Push and release the Remote Start button on
the key fob twice, within five seconds. The
parking lights will flash and the horn will chirp
twice (if programmed). In cold ambient
temperature conditions, the diesel vehicle may
delay crank up to 30 seconds for the Intake Air
Heater. Once the vehicle has started, the
engine will run for 15 minutes.
NOTE:
Crank may be delayed up to 75 seconds for
intake air heater operation at high altitudes,
and/or extreme cold.
The park lamps will turn on and remain on
during Remote Start mode.
For security, power window and power
sunroof operation (if equipped) are disabled
when the vehicle is in the Remote Start
mode.
WARNING!
Do not start or run an engine in a closed
garage or confined area. Exhaust gas
contains Carbon Monoxide (CO) which is
odorless and colorless. Carbon Monoxide is
poisonous and can cause serious injury or
death when inhaled.
Keep key fobs away from children. Opera
-
tion of the Remote Start System, windows,
door locks or other controls could cause
serious injury or death.
2
2020_RAM_CHASSIS_CAB_OM_USA=GUID-6C67832B-7839-4CCF-BEFC-CDF988F949EA=1=en=.book Page 21
Page 30 of 516
28GETTING TO KNOW YOUR VEHICLE
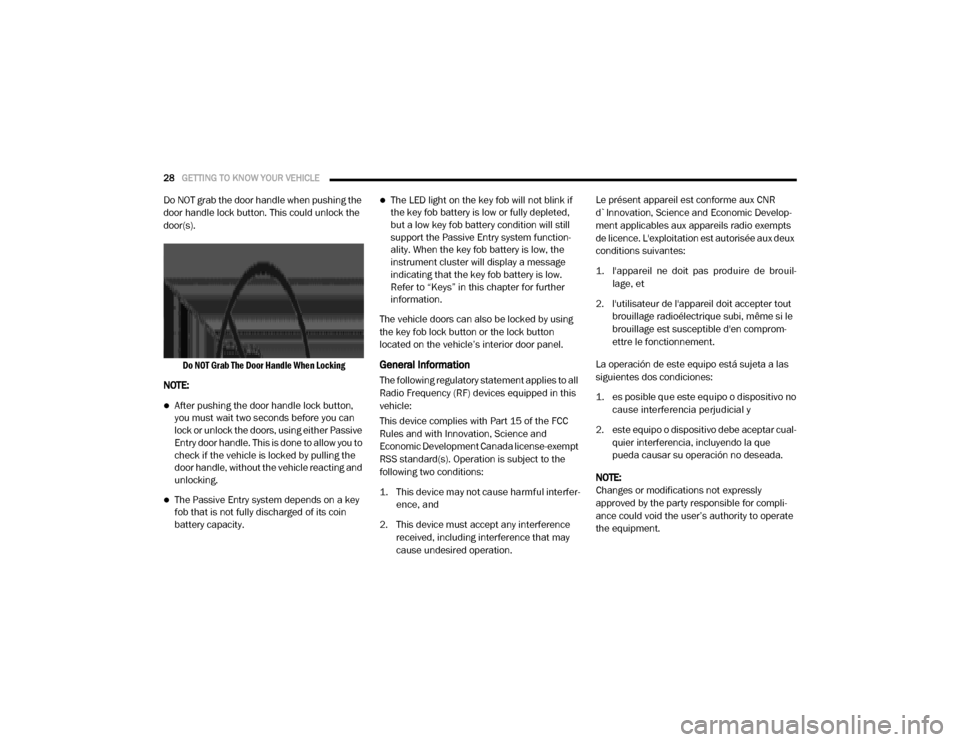
Do NOT grab the door handle when pushing the
door handle lock button. This could unlock the
door(s).
Do NOT Grab The Door Handle When Locking
NOTE:
After pushing the door handle lock button,
you must wait two seconds before you can
lock or unlock the doors, using either Passive
Entry door handle. This is done to allow you to
check if the vehicle is locked by pulling the
door handle, without the vehicle reacting and
unlocking.
The Passive Entry system depends on a key
fob that is not fully discharged of its coin
battery capacity.
The LED light on the key fob will not blink if
the key fob battery is low or fully depleted,
but a low key fob battery condition will still
support the Passive Entry system function -
ality. When the key fob battery is low, the
instrument cluster will display a message
indicating that the key fob battery is low.
Refer to “Keys” in this chapter for further
information.
The vehicle doors can also be locked by using
the key fob lock button or the lock button
located on the vehicle’s interior door panel.
General Information
The following regulatory statement applies to all
Radio Frequency (RF) devices equipped in this
vehicle:
This device complies with Part 15 of the FCC
Rules and with Innovation, Science and
Economic Development Canada license-exempt
RSS standard(s). Operation is subject to the
following two conditions:
1. This device may not cause harmful interfer -
ence, and
2. This device must accept any interference received, including interference that may
cause undesired operation. Le présent appareil est conforme aux CNR
d`Innovation, Science and Economic Develop
-
ment applicables aux appareils radio exempts
de licence. L'exploitation est autorisée aux deux
conditions suivantes:
1. l'appareil ne doit pas produire de brouil -
lage, et
2. l'utilisateur de l'appareil doit accepter tout brouillage radioélectrique subi, même si le
brouillage est susceptible d'en comprom -
ettre le fonctionnement.
La operación de este equipo está sujeta a las
siguientes dos condiciones:
1. es posible que este equipo o dispositivo no cause interferencia perjudicial y
2. este equipo o dispositivo debe aceptar cual -
quier interferencia, incluyendo la que
pueda causar su operación no deseada.
NOTE:
Changes or modifications not expressly
approved by the party responsible for compli -
ance could void the user’s authority to operate
the equipment.
2020_RAM_CHASSIS_CAB_OM_USA=GUID-6C67832B-7839-4CCF-BEFC-CDF988F949EA=1=en=.book Page 28
Page 31 of 516
GETTING TO KNOW YOUR VEHICLE29
Automatic Door Locks — If Equipped
The auto door lock feature default condition is
enabled. When enabled, the door locks will lock
automatically when the vehicle's speed exceeds
15 mph (24 km/h). The auto door lock feature
can be enabled or disabled by an authorized
dealer per written request of the customer.
Please see an authorized dealer for service.
Automatic Doors Unlock — If Equipped
This feature unlocks all of the doors of the
vehicle when either front door is opened. This
will occur only after the vehicle has been shifted
into the PARK position after the vehicle has
been driven (shifted out of PARK and all doors
closed).
Automatic Doors Unlock Programming — If
Equipped
The Automatic Doors Unlock feature can be
enabled or disabled as follows:
For vehicles not equipped with a touchscreen
radio, refer to “Instrument Cluster Display” in
“Getting To Know Your Instrument Panel” for
further information.
For vehicles equipped with a touchscreen
radio, refer to “Uconnect Settings” in “Multi -
media” for further information.
NOTE:
Use the Auto Unlock Doors feature in accor -
dance with local laws.
Child-Protection Door Lock
To provide a safer environment for children
riding in the rear seat, the rear doors (if
equipped) of your vehicle have the Child-Protec -
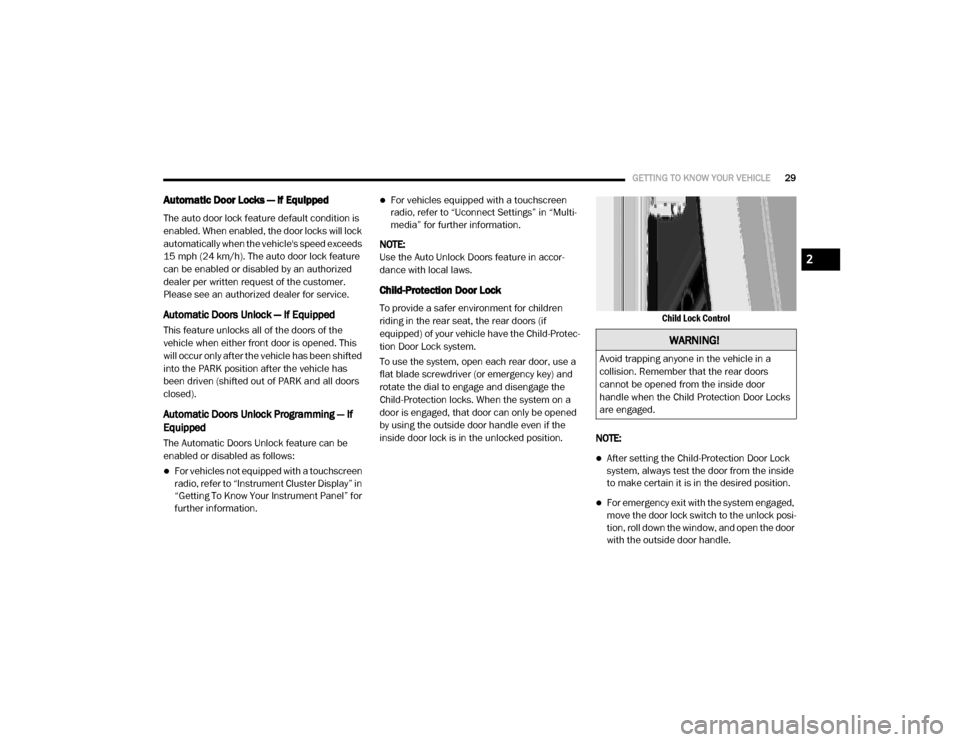
tion Door Lock system.
To use the system, open each rear door, use a
flat blade screwdriver (or emergency key) and
rotate the dial to engage and disengage the
Child-Protection locks. When the system on a
door is engaged, that door can only be opened
by using the outside door handle even if the
inside door lock is in the unlocked position.
Child Lock Control
NOTE:
After setting the Child-Protection Door Lock
system, always test the door from the inside
to make certain it is in the desired position.
For emergency exit with the system engaged,
move the door lock switch to the unlock posi -
tion, roll down the window, and open the door
with the outside door handle.
WARNING!
Avoid trapping anyone in the vehicle in a
collision. Remember that the rear doors
cannot be opened from the inside door
handle when the Child Protection Door Locks
are engaged.
2
2020_RAM_CHASSIS_CAB_OM_USA=GUID-6C67832B-7839-4CCF-BEFC-CDF988F949EA=1=en=.book Page 29
Page 34 of 516
32GETTING TO KNOW YOUR VEHICLE
Power Lumbar — If Equipped
Vehicles equipped with power driver or
passenger seats may be also be equipped with
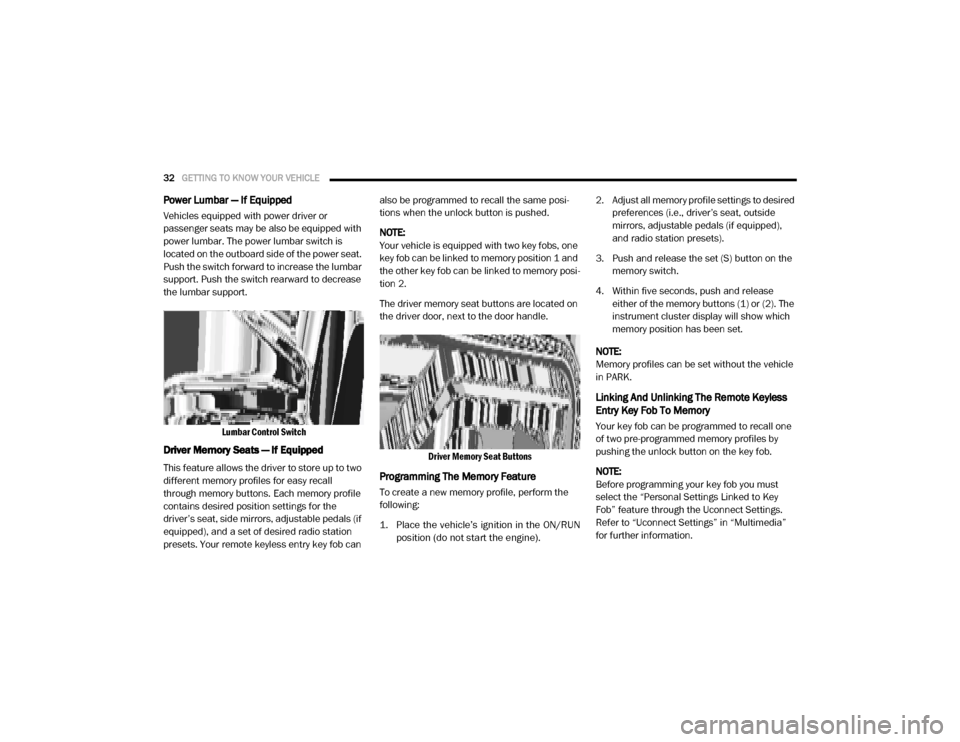
power lumbar. The power lumbar switch is
located on the outboard side of the power seat.
Push the switch forward to increase the lumbar
support. Push the switch rearward to decrease
the lumbar support.
Lumbar Control Switch
Driver Memory Seats — If Equipped
This feature allows the driver to store up to two
different memory profiles for easy recall
through memory buttons. Each memory profile
contains desired position settings for the
driver’s seat, side mirrors, adjustable pedals (if
equipped), and a set of desired radio station
presets. Your remote keyless entry key fob can also be programmed to recall the same posi
-
tions when the unlock button is pushed.
NOTE:
Your vehicle is equipped with two key fobs, one
key fob can be linked to memory position 1 and
the other key fob can be linked to memory posi -
tion 2.
The driver memory seat buttons are located on
the driver door, next to the door handle.
Driver Memory Seat Buttons
Programming The Memory Feature
To create a new memory profile, perform the
following:
1. Place the vehicle’s ignition in the ON/RUNposition (do not start the engine).
2. Adjust all memory profile settings to desired
preferences (i.e., driver’s seat, outside
mirrors, adjustable pedals (if equipped),
and radio station presets).
3. Push and release the set (S) button on the memory switch.
4. Within five seconds, push and release either of the memory buttons (1) or (2). The
instrument cluster display will show which
memory position has been set.
NOTE:
Memory profiles can be set without the vehicle
in PARK.
Linking And Unlinking The Remote Keyless
Entry Key Fob To Memory
Your key fob can be programmed to recall one
of two pre-programmed memory profiles by
pushing the unlock button on the key fob.
NOTE:
Before programming your key fob you must
select the “Personal Settings Linked to Key
Fob” feature through the Uconnect Settings.
Refer to “Uconnect Settings” in “Multimedia”
for further information.
2020_RAM_CHASSIS_CAB_OM_USA=GUID-6C67832B-7839-4CCF-BEFC-CDF988F949EA=1=en=.book Page 32
Page 35 of 516

GETTING TO KNOW YOUR VEHICLE33
To program your key fob, perform the following:
1. Place the vehicle’s ignition in the OFF posi -
tion.
2. Select a desired memory profile 1 or 2.
NOTE:
If a memory profile has not already been set,
refer to "Programming The Memory Feature" in
this section for instructions on how to set a
memory profile.
3. Once the profile has been recalled, push and release the set (S) button on the
memory switch.
4. Push and release button (1) or (2) accord -
ingly. “Memory Profile Set” (1 or 2) will
display in the instrument cluster.
5. Push and release the lock button on the key fob within 10 seconds.
NOTE:
Your key fob can be unlinked to your memory
settings by pushing the set (S) button, and
within 10 seconds, pushing the unlock button
on the key fob.Memory Position Recall
NOTE:
The vehicle speed must be lower than 5 mph
(8 km/h) to recall memory positions. If a recall
is attempted when the vehicle speed is greater
than 5 mph (8 km/h), a message will be
displayed in the instrument cluster display.
Driver One Memory Position Recall
To recall the memory settings for driver one
using the memory buttons on the door panel,
push memory button (1).
To recall the memory settings for driver one
using the key fob, push the unlock button on
the key fob linked to memory position 1.
Driver Two Memory Position Recall
To recall the memory setting for driver two
using the memory buttons on the door panel,
push memory button (2).
To recall the memory settings for driver two
using the key fob, push the unlock button on
the key fob linked to memory position 2. A recall can be cancelled by pushing any of the
memory buttons during a recall (S, 1, or 2).
When a recall is canceled, the driver's seat and
the power pedals (if equipped) stop moving. A
delay of one second will occur before another
recall can be selected.
Easy Entry/Exit Seat
This feature provides automatic driver’s seat
positioning to enhance driver mobility when
entering and exiting the vehicle.
The distance the driver’s seat moves depends
on where you have the driver’s seat positioned
when you remove the key fob from the ignition.
When you remove the key fob from the igni
-
tion, the driver’s seat will move about
2.4 inches (60 mm) rearward if the driver’s seat position is greater than or equal to
2.7 inches (67.7 mm) forward of the rear stop. The seat will return to its previously set
position when you place the ignition into the
ACC or RUN position.
2
2020_RAM_CHASSIS_CAB_OM_USA=GUID-6C67832B-7839-4CCF-BEFC-CDF988F949EA=1=en=.book Page 33
Page 41 of 516
GETTING TO KNOW YOUR VEHICLE39
DRIVER ADJUSTABLE PEDALS — IF
EQUIPPED
The adjustable pedals system is designed to
allow a greater range of driver comfort for
steering wheel tilt and seat position. This
feature allows the brake and accelerator pedals
to move toward or away from the driver to
provide improved position with the steering
wheel.
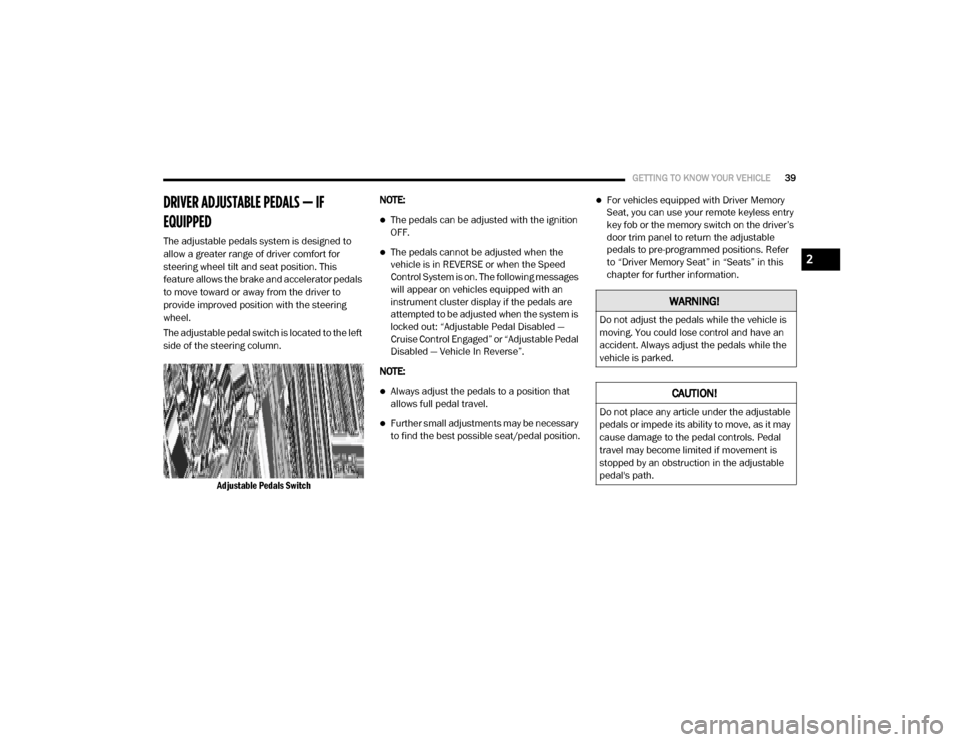
The adjustable pedal switch is located to the left
side of the steering column.
Adjustable Pedals Switch
NOTE:
The pedals can be adjusted with the ignition
OFF.
The pedals cannot be adjusted when the
vehicle is in REVERSE or when the Speed
Control System is on. The following messages
will appear on vehicles equipped with an
instrument cluster display if the pedals are
attempted to be adjusted when the system is
locked out: “Adjustable Pedal Disabled —
Cruise Control Engaged” or “Adjustable Pedal
Disabled — Vehicle In Reverse”.
NOTE:
Always adjust the pedals to a position that
allows full pedal travel.
Further small adjustments may be necessary
to find the best possible seat/pedal position.
For vehicles equipped with Driver Memory
Seat, you can use your remote keyless entry
key fob or the memory switch on the driver’s
door trim panel to return the adjustable
pedals to pre-programmed positions. Refer
to “Driver Memory Seat” in “Seats” in this
chapter for further information.
WARNING!
Do not adjust the pedals while the vehicle is
moving. You could lose control and have an
accident. Always adjust the pedals while the
vehicle is parked.
CAUTION!
Do not place any article under the adjustable
pedals or impede its ability to move, as it may
cause damage to the pedal controls. Pedal
travel may become limited if movement is
stopped by an obstruction in the adjustable
pedal's path.
2
2020_RAM_CHASSIS_CAB_OM_USA=GUID-6C67832B-7839-4CCF-BEFC-CDF988F949EA=1=en=.book Page 39