display Ram 4500 Chassis Cab 2019 Owner's Guide
[x] Cancel search | Manufacturer: RAM, Model Year: 2019, Model line: 4500 Chassis Cab, Model: Ram 4500 Chassis Cab 2019Pages: 607, PDF Size: 10.72 MB
Page 88 of 607
86 GETTING TO KNOW YOUR VEHICLE
Blower Control Knob
Blower Control Buttons Blower Control
Blower Control is used to regulate the amount of air forced through the climate system. There are
seven blower speeds available. Adjusting the blower will cause automatic mode to switch to manual
operation. The speeds can be selected using either the blower control knob on the faceplate or the
buttons on the touchscreen.
•
Faceplate: The blower speed increases as you turn the blower control knob clockwise from the
lowest blower setting. The blower speed decreases as you turn the blower control knob counter -
clockwise.
• Touchscreen: Use the small blower icon to reduce the blower setting and the large blower icon to
increase the blower setting. Blower can also be selected by pressing the blower bar area between the
icons.
NOTE:
On Uconnect 4C NAV With 12–inch display radios, pressing the blower control button below one
turns the Climate Control system OFF.
Mode Control Knob
Mode Controls Button Modes Control
Control Knob:
Push the Mode Control Knob to change the airflow distribution mode. The airflow
distribution mode can be adjusted so air comes from the instrument panel outlets, floor outlets,
defrost outlets and demist outlets.
Touchscreen: Select Mode by pressing one of the Mode buttons on the touchscreen to change the
airflow distribution mode. The airflow distribution mode can be adjusted so air comes from the
instrument panel outlets, floor outlets, defrost outlets and demist outlets.
Icon
Description
Page 91 of 607

GETTING TO KNOW YOUR VEHICLE 89
Automatic Temperature Control (ATC)
Automatic Operation
1. Push the AUTO button on the faceplate, or the AUTObutton on the touchscreen on the Automatic Temperature
Control (ATC) Panel.
2. Next, adjust the temperature you would like the system to maintain by adjusting the driver and passenger
temperature control buttons. Once the desired tempera -
ture is displayed, the system will achieve and automati -
cally maintain that comfort level.
3. When the system is set up for your comfort level, it is not necessary to change the settings. You will experience the
greatest efficiency by simply allowing the system to func -
tion automatically.
NOTE:
• It is not necessary to move the temperature settings for cold or hot vehicles. The system automatically adjusts the
temperature, mode, and blower speed to provide comfort
as quickly as possible. • The temperature can be displayed in U.S. or Metric units
by selecting the US/Metric customer-programmable
feature. Refer to the “Uconnect Settings” in “Multimedia”
for further information.
To provide you with maximum comfort in the Automatic
mode during cold start-ups, the blower fan will remain on
low until the engine warms up. The blower will increase in
speed and transition into Auto mode.
Manual Operation Override
This system offers a full complement of manual override
features. The AUTO symbol in the front ATC display will be
turned off when the system is being used in the manual
mode.
Operating Tips
NOTE:
Refer to the chart at the end of this section for suggested
control settings for various weather conditions.
2
Page 126 of 607

124 GETTING TO KNOW YOUR INSTRUMENT PANEL
Base / Midline Instrument Cluster Descriptions
1. Tachometer• Indicates the engine speed in revolutions per minute(RPM x 1000).
2. Voltmeter
• When the vehicle is in the RUN state, the gauge indi -
cates the electrical system voltage. The pointer should
stay within the normal range if the battery is charged.
If the pointer moves to either extreme left or right and
remains there during normal driving, the electrical
system should be serviced.
3. Instrument Cluster Display
• When the appropriate conditions exist, this displayshows the instrument cluster display messages. Refer
to “Instrument Cluster Display” in “Getting To Know
Your Instrument Panel” for further information. 4. Oil Pressure Gauge
• The pointer should always indicate the oil pressurewhen the engine is running. A continuous high or low
reading under normal driving conditions may indicate
a lubrication system malfunction. Immediate service
should be obtained from an authorized dealer.
NOTE:
In vehicles equipped with Stop/Start, an oil pressure indica -
tion of zero is normal during an Autostop.
5. Speedometer
• Indicates vehicle speed.
Page 129 of 607
GETTING TO KNOW YOUR INSTRUMENT PANEL 127
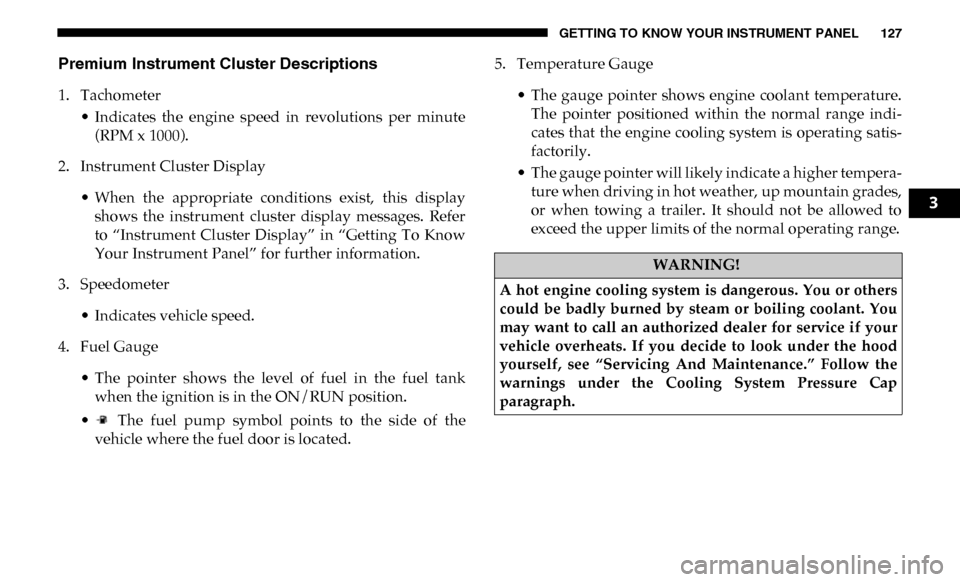
Premium Instrument Cluster Descriptions
1. Tachometer• Indicates the engine speed in revolutions per minute(RPM x 1000).
2. Instrument Cluster Display
• When the appropriate conditions exist, this displayshows the instrument cluster display messages. Refer
to “Instrument Cluster Display” in “Getting To Know
Your Instrument Panel” for further information.
3. Speedometer
• Indicates vehicle speed.
4. Fuel Gauge
• The pointer shows the level of fuel in the fuel tankwhen the ignition is in the ON/RUN position.
• The fuel pump symbol points to the side of the vehicle where the fuel door is located. 5. Temperature Gauge
• The gauge pointer shows engine coolant temperature.The pointer positioned within the normal range indi -
cates that the engine cooling system is operating satis -
factorily.
• The gauge pointer will likely indicate a higher tempera -
ture when driving in hot weather, up mountain grades,
or when towing a trailer. It should not be allowed to
exceed the upper limits of the normal operating range.
WARNING!
A hot engine cooling system is dangerous. You or others
could be badly burned by steam or boiling coolant. You
may want to call an authorized dealer for service if your
vehicle overheats. If you decide to look under the hood
yourself, see “Servicing And Maintenance.” Follow the
warnings under the Cooling System Pressure Cap
paragraph.
3
Page 130 of 607
128 GETTING TO KNOW YOUR INSTRUMENT PANEL
INSTRUMENT CLUSTER DISPLAY
Your vehicle will be equipped with an instrument cluster
display, which offers useful information to the driver. With
the ignition in the STOP/OFF mode, opening/closing of a
door will activate the display for viewing, and display the
total miles, or kilometers, in the odometer. Your instrument
cluster display is designed to display important information
about your vehicle’s systems and features. Using a driver
interactive display located on the instrument panel, your
instrument cluster display can show you how systems are
working and give you warnings when they are not. The
steering wheel mounted controls allow you to scroll through
the main menus and submenus. You can access the specific
information you want and make selections and adjustments.
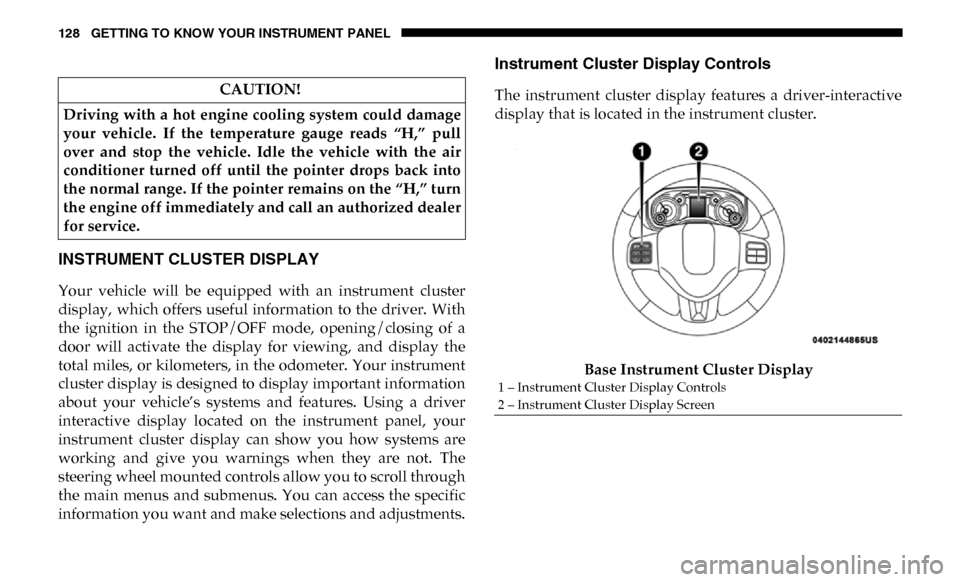
Instrument Cluster Display Controls
The instrument cluster display features a driver-interactive
display that is located in the instrument cluster.Base Instrument Cluster Display
CAUTION!
Driving with a hot engine cooling system could damage
your vehicle. If the temperature gauge reads “H,” pull
over and stop the vehicle. Idle the vehicle with the air
conditioner turned off until the pointer drops back into
the normal range. If the pointer remains on the “H,” turn
the engine off immediately and call an authorized dealer
for service.
1 – Instrument Cluster Display Controls
2 – Instrument Cluster Display Screen
Page 131 of 607
GETTING TO KNOW YOUR INSTRUMENT PANEL 129
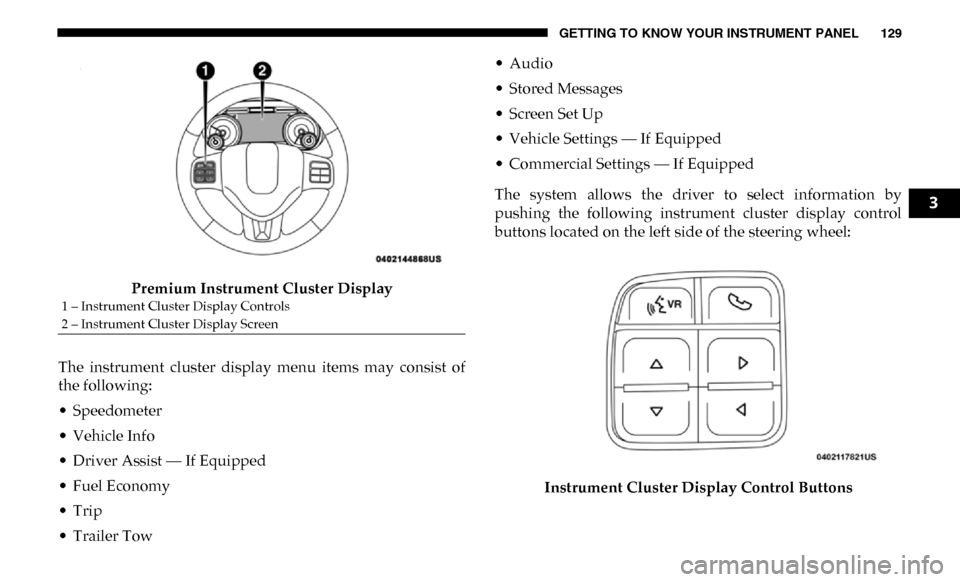
Premium Instrument Cluster Display
The instrument cluster display menu items may consist of
the following:
• Speedometer
• Vehicle Info
• Driver Assist — If Equipped
• Fuel Economy
• Trip
• Trailer Tow • Audio
• Stored Messages
• Screen Set Up
• Vehicle Settings — If Equipped
• Commercial Settings — If Equipped
The system allows the driver to select information by
pushing the following instrument cluster display control
buttons located on the left side of the steering wheel:
Instrument Cluster Display Control Buttons
1 – Instrument Cluster Display Controls
2 – Instrument Cluster Display Screen
3
Page 132 of 607
130 GETTING TO KNOW YOUR INSTRUMENT PANEL
•Up Arrow Button
Push and release the up arrow button to scroll
upward through the main menu items, submenu
screen, and vehicle settings.
•Down Arrow Button
Push and release the down arrow button to scroll
downward through the main menu items,
submenu screen, and vehicle settings.
•Right Arrow Button
Push and release the right arrow button to access/
select the information screens or submenu screens
of a main menu item. Push and hold the RIGHT arrow
button for two seconds to reset displayed/selected
features that can be reset.
•Left Arrow Button
Push and release the left arrow button to access/
select the information screens, submenu screens of
a main menu item, or to return to the main menu.Oil Life Reset
Your vehicle is equipped with an engine oil change indicator
system. The “Oil Change Required” message will display in
the instrument cluster display after a single chime has
sounded, to indicate the next scheduled oil change interval.
The engine oil change indicator system is duty cycle based,
which means the engine oil change interval may fluctuate,
dependent upon your personal driving style.
NOTE:
Use the steering wheel instrument cluster display controls
for the following procedure.
Page 133 of 607

GETTING TO KNOW YOUR INSTRUMENT PANEL 131
Oil Life Reset Procedure
1. Without pushing the brake pedal, push the ENGINESTART/STOP button and place the ignition to the ON/
RUN position (do not start the engine).
2. Push and release the down arrow button to scroll down -
ward through the main menu to “Vehicle Info.”
3. Push and release the right arrow button to access the
”Vehicle Info” screen, then scroll up or down to select
“Oil Life.”
4. Push and hold the right arrow button to select “Reset”.
5. Push and release the down arrow button to select “Yes,”
then push and release the right arrow button to reset the
Oil Life to 100%.
6. Push and release the up arrow button to exit the instru -
ment cluster display screen.
Secondary Method Of Resetting Engine Oil Life
1. Without pressing the brake pedal, push the ENGINE START/STOP button and place the ignition to the ON/
RUN position (do not start the engine). 2. Fully press the accelerator pedal, slowly, three times
within ten seconds.
3. Without pushing the brake pedal, push the ENGINE START/STOP button once to return the ignition to the
OFF/LOCK position.
NOTE:
If the indicator message illuminates when you start the
vehicle, the oil change indicator system did not reset. If
necessary, repeat this procedure.
Display Menu Items
Push and release the up or down arrow button until the
desired selectable menu icon is highlighted in the instrument
cluster display.
Speedometer
Push and release the up or down arrow button until the
speedometer menu item is highlighted in the instrument
cluster display. Push and release the right arrow button to
cycle the display between mph and km/h.
3
Page 134 of 607

132 GETTING TO KNOW YOUR INSTRUMENT PANEL
Vehicle Info
Push and release the up or down arrow button until the
Vehicle Info menu item is highlighted in the instrument
cluster display. Push and release the right arrow button to
enter the submenus items of Vehicle Info. Follow the direc -
tional prompts to access or reset any of the following Vehicle
Info submenu items:
• Tire Pressure
• Coolant Temperature — If Equipped
• Transmission Temperature — If Equipped
• Oil Temperature — If Equipped
• Oil Pressure
• Exhaust Brake — If Equipped
• Turbo Boost — If Equipped
• Diesel Particulate Filter — If Equipped
• Oil Life
• Fuel Filter Life — If Equipped
• Battery Voltage
• Gauge Summary — If Equipped
• Engine Hours Driver Assist — If Equipped
The Driver Assist menu displays the status of the ACC
system.
Push and release the
up or down arrow button until the
Driver Assist menu is displayed in the instrument cluster
display.
Adaptive Cruise Control (ACC) Feature
The instrument cluster display displays the current ACC
system settings. The information displayed depends on ACC
system status.
Push the Adaptive Cruise Control (ACC) on/off button
(located on the steering wheel) until one of the following
displays in the instrument cluster display:
Adaptive Cruise Control Off
When ACC is deactivated, the display will read “Adaptive
Cruise Control Off.”
Adaptive Cruise Control Ready
When ACC is activated but the vehicle speed setting has not
been selected, the display will read “Adaptive Cruise
Control Ready.”
Page 135 of 607

GETTING TO KNOW YOUR INSTRUMENT PANEL 133
Push the SET + or the SET- button (located on the steering
wheel) and the following will display in the instrument
cluster display:
ACC SET
When ACC is set, the set speed will display in the instrument
cluster.
The ACC screen may display once again if any ACC activity
occurs, which may include any of the following:
• Distance Setting Change
• System Cancel
• Driver Override
• System Off
• ACC Proximity Warning
• ACC Unavailable Warning
For further information, refer to “Adaptive Cruise Control
(ACC) — If Equipped” in “Starting And Operating.”Fuel Economy
Push and release the
up or down arrow button until the Fuel
Economy menu item is highlighted in the instrument cluster
display. Push and Hold the right arrow button to reset
Average Fuel Economy.
• Current Fuel Economy Gauge
• Average Fuel Economy Value
• Range To Empty
• Fuel Tank Levels — If Equipped
Trip A/Trip B
Push and release the up or down arrow button until the Trip
menu item is highlighted in the instrument cluster display.
Push and release the right arrow button to enter the
submenus of Trip A and Trip B. The Trip A or Trip B infor -
mation will display the following:
• Distance
• Average Fuel Economy
• Elapsed Time
Push and hold right arrow button to reset all information.
3