fuel pressure Ram 4500 Chassis Cab 2019 Owner's Manual
[x] Cancel search | Manufacturer: RAM, Model Year: 2019, Model line: 4500 Chassis Cab, Model: Ram 4500 Chassis Cab 2019Pages: 607, PDF Size: 10.72 MB
Page 9 of 607

7
PARKSENSE REAR PARK ASSIST —
IF EQUIPPED ................................................................... 309
ParkSense Sensors ....................................................... 310
ParkSense Warning Display ...................................... 310
ParkSense Display ....................................................... 310
Enabling And Disabling ParkSense .......................... 315
Service The ParkSense Rear Park Assist System..... 315
Cleaning The ParkSense System ............................... 316
ParkSense System Usage Precautions ...................... 316
PARKSENSE FRONT AND REAR PARK ASSIST ..... 317
ParkSense Sensors ....................................................... 318
ParkSense Warning Display ...................................... 318
ParkSense Display ....................................................... 318
Enabling And Disabling Front And/Or Rear
ParkSense ...................................................................... 323
Service The ParkSense Front/Rear Park Assist
System ........................................................................... 324
Cleaning The ParkSense System ............................... 324
ParkSense System Usage Precautions ...................... 324
PARKVIEW REAR BACK UP CAMERA ................. 326
SURROUND VIEW CAMERA SYSTEM —
IF EQUIPPED ................................................................... 330
REFUELING THE VEHICLE — GAS ........................... 336
Loose Fuel Filler Cap Message ................................. 337
VEHICLE LOADING .....................................................337
Gross Vehicle Weight Rating (GVWR) ....................337
Payload..........................................................................338
Gross Axle Weight Rating (GAWR)..........................338
Tire Size .........................................................................338
Rim Size.........................................................................338
Inflation Pressure .........................................................338
Curb Weight .................................................................338
Loading .........................................................................338
TRAILER TOWING ........................................................339
Common Towing Definitions ....................................339
Trailer Hitch Type and Maximum Trailer Weight ...... 344
Trailer Towing Weights (Maximum Trailer Weight
Ratings) ......................................................................345
Trailer And Tongue Weight ......................................345
Towing Requirements ................................................346
Towing Tips .................................................................353
SNOWPLOW .................................................................... 355
2500/3500 Models Only..............................................355
RECREATIONAL TOWING (BEHIND MOTORHOME,
ETC.) ...................................................................................358
Towing This Vehicle Behind Another Vehicle ........358
Recreational Towing — Two-Wheel Drive Models .... 359
Recreational Towing — Four-Wheel Drive
Models ...........................................................................359
Page 127 of 607

GETTING TO KNOW YOUR INSTRUMENT PANEL 125
6. Fuel Gauge• The pointer shows the level of fuel in the fuel tankwhen the ignition is in the ON/RUN position.
• The fuel pump symbol points to the side of the vehicle where the fuel door is located.
7. Temperature Gauge
• The gauge pointer shows engine coolant temperature.The pointer positioned within the normal range indi -
cates that the engine cooling system is operating satis -
factorily.
• The gauge pointer will likely indicate a higher tempera -
ture when driving in hot weather, up mountain grades,
or when towing a trailer. It should not be allowed to
exceed the upper limits of the normal operating range.WARNING!
A hot engine cooling system is dangerous. You or others
could be badly burned by steam or boiling coolant. You
may want to call an authorized dealer for service if your
vehicle overheats. If you decide to look under the hood
yourself, see “Servicing And Maintenance.” Follow the
warnings under the Cooling System Pressure Cap
paragraph.
CAUTION!
Driving with a hot engine cooling system could damage
your vehicle. If the temperature gauge reads “H,” pull
over and stop the vehicle. Idle the vehicle with the air
conditioner turned off until the pointer drops back into
the normal range. If the pointer remains on the “H,” turn
the engine off immediately and call an authorized dealer
for service.
3
Page 129 of 607

GETTING TO KNOW YOUR INSTRUMENT PANEL 127
Premium Instrument Cluster Descriptions
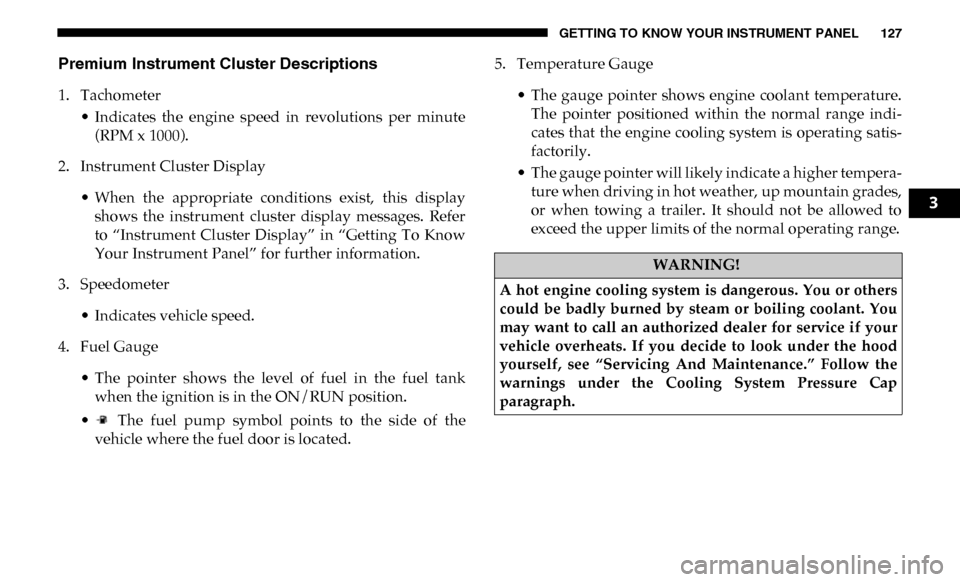
1. Tachometer• Indicates the engine speed in revolutions per minute(RPM x 1000).
2. Instrument Cluster Display
• When the appropriate conditions exist, this displayshows the instrument cluster display messages. Refer
to “Instrument Cluster Display” in “Getting To Know
Your Instrument Panel” for further information.
3. Speedometer
• Indicates vehicle speed.
4. Fuel Gauge
• The pointer shows the level of fuel in the fuel tankwhen the ignition is in the ON/RUN position.
• The fuel pump symbol points to the side of the vehicle where the fuel door is located. 5. Temperature Gauge
• The gauge pointer shows engine coolant temperature.The pointer positioned within the normal range indi -
cates that the engine cooling system is operating satis -
factorily.
• The gauge pointer will likely indicate a higher tempera -
ture when driving in hot weather, up mountain grades,
or when towing a trailer. It should not be allowed to
exceed the upper limits of the normal operating range.
WARNING!
A hot engine cooling system is dangerous. You or others
could be badly burned by steam or boiling coolant. You
may want to call an authorized dealer for service if your
vehicle overheats. If you decide to look under the hood
yourself, see “Servicing And Maintenance.” Follow the
warnings under the Cooling System Pressure Cap
paragraph.
3
Page 134 of 607

132 GETTING TO KNOW YOUR INSTRUMENT PANEL
Vehicle Info
Push and release the up or down arrow button until the
Vehicle Info menu item is highlighted in the instrument
cluster display. Push and release the right arrow button to
enter the submenus items of Vehicle Info. Follow the direc -
tional prompts to access or reset any of the following Vehicle
Info submenu items:
• Tire Pressure
• Coolant Temperature — If Equipped
• Transmission Temperature — If Equipped
• Oil Temperature — If Equipped
• Oil Pressure
• Exhaust Brake — If Equipped
• Turbo Boost — If Equipped
• Diesel Particulate Filter — If Equipped
• Oil Life
• Fuel Filter Life — If Equipped
• Battery Voltage
• Gauge Summary — If Equipped
• Engine Hours Driver Assist — If Equipped
The Driver Assist menu displays the status of the ACC
system.
Push and release the
up or down arrow button until the
Driver Assist menu is displayed in the instrument cluster
display.
Adaptive Cruise Control (ACC) Feature
The instrument cluster display displays the current ACC
system settings. The information displayed depends on ACC
system status.
Push the Adaptive Cruise Control (ACC) on/off button
(located on the steering wheel) until one of the following
displays in the instrument cluster display:
Adaptive Cruise Control Off
When ACC is deactivated, the display will read “Adaptive
Cruise Control Off.”
Adaptive Cruise Control Ready
When ACC is activated but the vehicle speed setting has not
been selected, the display will read “Adaptive Cruise
Control Ready.”
Page 137 of 607

GETTING TO KNOW YOUR INSTRUMENT PANEL 135
Current Gear
• Off (Default Setting)
• On
Odometer
• Unit Without Decimal (Default Setting)
• Unit With Decimal
Favorite Menu
• Speedometer
• Vehicle Info
• Driver Assist (Show/Hide) — If Equipped
• Fuel Economy (Show/Hide)
• Trip Info (Show/Hide)
• Trailer Tow (Show/Hide)
• Audio (Show/Hide)
• Messages
• Screen Setup
• Vehicle Settings — If Equipped
• Commercial Settings — If EquippedNOTE:
Menus with (Show/Hide) can push the
OK button to choose
whether to show or hide this menu in the instrument cluster
display.
Upper Left
• None
• Compass (Default Setting) — If Equipped
• Outside Temp — If Equipped
• Time
• Range To Empty
• Average MPG
• Current MPG
• Trip A Distance
• Trip B Distance
• Trailer Trip — If Equipped
• Trailer Brake — If Equipped
• Oil Pressure — If Equipped
• Coolant Temperature — If Equipped
• Oil Temperature — If Equipped
• Battery Voltage — If Equipped
3
Page 138 of 607

136 GETTING TO KNOW YOUR INSTRUMENT PANEL
• Transmission Temperature — If Equipped
• Oil Life — If Equipped
• Exhaust Brake — If Equipped
• Turbo Boost — If Equipped
• Fuel Filter Life — If Equipped
Upper Center
• None
• Compass
• Outside Temp
• Time
• Range To Empty
• Average MPG
• Current MPG
• Trip A Distance
• Trip B Distance
• Trailer Trip
• Audio
• Speedometer (Default Setting)
• Menu TitleUpper Right
• None
• Compass — If Equipped
• Outside Temp (Default Setting) — If Equipped
• Time
• Range To Empty
• Average MPG
• Current MPG
• Trip A Distance
• Trip B Distance
• Trailer Trip — If Equipped
• Trailer Brake — If Equipped
• Oil Pressure — If Equipped
• Coolant Temperature — If Equipped
• Oil Temperature — If Equipped
• Battery Voltage — If Equipped
• Transmission Temperature — If Equipped
Page 140 of 607

138 GETTING TO KNOW YOUR INSTRUMENT PANEL
• Trip A Distance
• Trip B Distance
• Trailer Trip
• Trailer Brake
• Oil Pressure
• Coolant Temperature
• Oil Temperature
• Battery Voltage (Default Setting)
• Transmission Temperature
• Oil Life
• Exhaust Brake — If Equipped
• Turbo Boost — If Equipped
• Fuel Filter Life — If Equipped
Lower Right — If Equipped
• None
• Compass
• Outside Temp
• Time
• Range To Empty• Average MPG
• Current MPG
• Trip A Distance
• Trip B Distance
• Trailer Trip
• Trailer Brake
• Oil Pressure (Default Setting)
• Coolant Temperature
• Oil Temperature
• Battery Voltage
• Transmission Temperature
• Oil Life
• Exhaust Brake — If Equipped
• Turbo Boost — If Equipped
• Fuel Filter Life — If Equipped
Restore Defaults
• Cancel (Default Setting)
• Ok
Page 154 of 607

152 GETTING TO KNOW YOUR INSTRUMENT PANEL
— Low Washer Fluid Warning Light — If Equipped
This warning light will illuminate when the windshield
washer fluid is low.
— Low Fuel Warning Light
When the fuel level reaches approximately 3.2 gal (12 L) this
light will turn on, and remain on until fuel is added.
A single warning chime will sound with Low Fuel Warning.
— Low Coolant Level Warning Light
This telltale will turn on to indicate the vehicle coolant level
is low.
— Loose Fuel Filler Cap Warning Light — If Equipped
This warning light will illuminate when the fuel filler cap is
loose. Properly close the filler cap to disengage the light. If
the light does not turn off, please see an authorized dealer. — Tire Pressure Monitoring System (TPMS) Warning
Light
The warning light switches on and a message is displayed to
indicate that the tire pressure is lower than the recom -
mended value and/or that slow pressure loss is occurring. In
these cases, optimal tire duration and fuel consumption may
not be guaranteed.
Should one or more tires be in the condition mentioned
above, the display will show the indications corresponding
to each tire.
Each tire, including the spare (if provided), should be checked
monthly when cold and inflated to the inflation pressure
recommended by the vehicle manufacturer on the vehicle
placard or tire inflation pressure label. (If your vehicle has tires
of a different size than the size indicated on the vehicle placard
or tire inflation pressure label, you should determine the
proper tire inflation pressure for those tires.)
CAUTION!
Do not continue driving with one or more flat tires as
handling may be compromised. Stop the vehicle, avoiding
sharp braking and steering. If a tire puncture occurs, repair
immediately using the dedicated tire repair kit and contact
an authorized dealer as soon as possible.
Page 155 of 607

GETTING TO KNOW YOUR INSTRUMENT PANEL 153
As an added safety feature, your vehicle has been equipped
with a Tire Pressure Monitoring System (TPMS) that illumi-
nates a low tire pressure telltale when one or more of your
tires is significantly under-inflated. Accordingly, when the
low tire pressure telltale illuminates, you should stop and
check your tires as soon as possible, and inflate them to the
proper pressure. Driving on a significantly under-inflated
tire causes the tire to overheat and can lead to tire failure.
Under-inflation also reduces fuel efficiency and tire tread
life, and may affect the vehicle’s handling and stopping
ability.
Please note that the TPMS is not a substitute for proper tire
maintenance, and it is the driver’s responsibility to maintain
correct tire pressure, even if under-inflation has not reached
the level to trigger illumination of the TPMS low tire pres -
sure telltale.
Your vehicle has also been equipped with a TPMS malfunc -
tion indicator to indicate when the system is not operating
properly. The TPMS malfunction indicator is combined with
the low tire pressure telltale. When the system detects a
malfunction, the telltale will flash for approximately one
minute and then remain continuously illuminated. This
sequence will continue upon subsequent vehicle start-ups as
long as the malfunction exists. When the malfunction indi -
cator is illuminated, the system may not be able to detect or signal low tire pressure as intended. TPMS malfunctions
may occur for a variety of reasons, including the installation
of replacement or alternate tires or wheels on the vehicle that
prevent the TPMS from functioning properly. Always check
the TPMS malfunction telltale after replacing one or more
tires or wheels on your vehicle to ensure that the replace
-
ment or alternate tires and wheels allow the TPMS to
continue to function properly.
CAUTION!
The TPMS has been optimized for the original
equipment tires and wheels. TPMS pressures and
warning have been established for the tire size equipped
on your vehicle. Undesirable system operation or sensor
damage may result when using replacement equipment
that is not of the same size, type, and/or style.
Aftermarket wheels can cause sensor damage. Using
aftermarket tire sealants may cause the Tire Pressure
Monitoring System (TPMS) sensor to become
inoperable. After using an aftermarket tire sealant it is
recommended that you take your vehicle to your
authorized dealer to have your sensor function checked.
3
Page 181 of 607

SAFETY 179
NOTE:
• The TPMS is not intended to replace normal tire care andmaintenance or to provide warning of a tire failure or
condition.
• If your vehicle is not equipped with the Tire Fill Alert feature the TPMS should not be used as a tire pressure
gauge while adjusting your tire pressure.
• Driving on a significantly under-inflated tire causes the tire to overheat and can lead to tire failure. Under-inflation
also reduces fuel efficiency and tire tread life, and may
affect the vehicle’s handling and stopping ability.
• The TPMS is not a substitute for proper tire maintenance, and it is the driver’s responsibility to maintain correct tire
pressure using an accurate tire pressure gauge, even if
under-inflation has not reached the level to trigger illumi -
nation of the TPMS Warning Light.
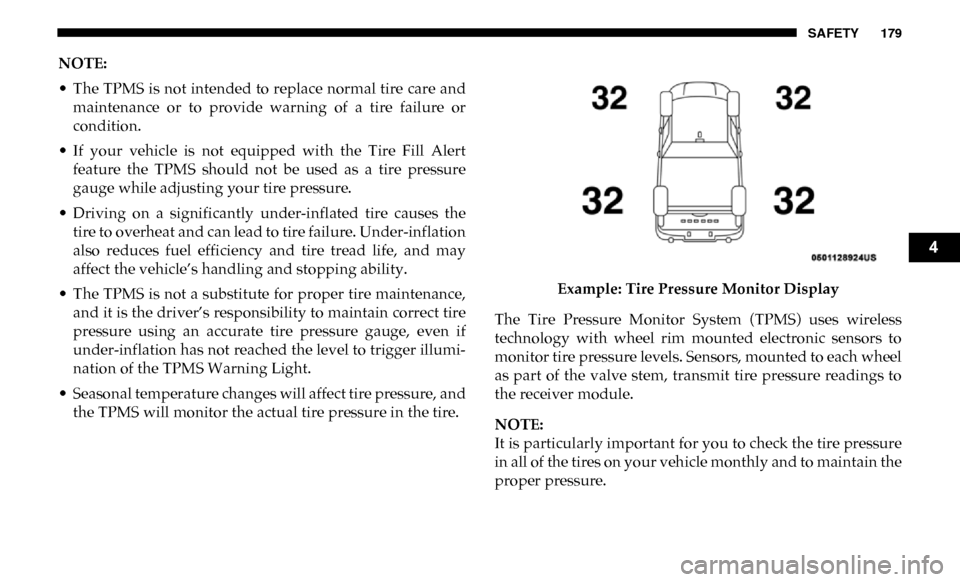
• Seasonal temperature changes will affect tire pressure, and the TPMS will monitor the actual tire pressure in the tire. Example: Tire Pressure Monitor Display
The Tire Pressure Monitor System (TPMS) uses wireless
technology with wheel rim mounted electronic sensors to
monitor tire pressure levels. Sensors, mounted to each wheel
as part of the valve stem, transmit tire pressure readings to
the receiver module.
NOTE:
It is particularly important for you to check the tire pressure
in all of the tires on your vehicle monthly and to maintain the
proper pressure.
4