Trailer Ram 4500 Chassis Cab 2020 Owner's Guide
[x] Cancel search | Manufacturer: RAM, Model Year: 2020, Model line: 4500 Chassis Cab, Model: Ram 4500 Chassis Cab 2020Pages: 516, PDF Size: 29.24 MB
Page 125 of 516
SAFETY123
Towing With HSA
HSA will also provide assistance to mitigate roll
back while towing a trailer.
Disabling And Enabling HSA
This feature can be turned on or turned off. To
change the current setting, proceed as follows:
If disabling HSA using your instrument cluster
display, refer to “Instrument Cluster Display”
in “Getting To Know Your Instrument Panel”
for further information.
If disabling HSA using Uconnect Settings,
refer to “Uconnect Settings” in “Multimedia”
for further information.
For vehicles not equipped with an instrument
cluster display, perform the following steps:
1. Center the steering wheel (front wheels pointing straight forward).
2. Shift the transmission into PARK.
3. Apply the parking brake.
4. Start the engine. 5. Rotate the steering wheel slightly more than
one-half turn to the left.
6. Push the “ESC OFF” button located in the lower switch bank below the climate control
four times within 20 seconds. The “ESC Off
Indicator Light” should turn on and turn off
two times.
7. Rotate the steering wheel back to center and then an additional slightly more than
one-half turn to the right.
8. Place the ignition to the OFF mode and then back to ON. If the sequence was completed
properly, the “ESC Off Indicator Light” will
blink several times to confirm HSA is
disabled.
9. Repeat these steps if you want to return this feature to its previous setting.
WARNING!
If you use a trailer brake controller with your
trailer, the trailer brakes may be activated
and deactivated with the brake switch. If
so, there may not be enough brake pres -
sure to hold both the vehicle and the trailer
on a hill when the brake pedal is released.
In order to avoid rolling down an incline
while resuming acceleration, manually acti -
vate the trailer brake or apply more vehicle
brake pressure prior to releasing the brake
pedal.
HSA is not a parking brake. Always apply
the parking brake fully when exiting your
vehicle. Also, be certain to place the trans -
mission in PARK.
Failure to follow these warnings can result
in a collision or serious personal injury.
4
2020_RAM_CHASSIS_CAB_OM_USA=GUID-6C67832B-7839-4CCF-BEFC-CDF988F949EA=1=en=.book Page 123
Page 127 of 516
SAFETY125
ESC Operating Modes
NOTE:
Depending upon model and mode of operation,
the ESC system may have multiple operating
modes.
ESC On
This is the normal operating mode for the ESC.
Whenever the vehicle is started, the ESC system
will be in this mode. This mode should be used
for most driving conditions. Alternate ESC
modes should only be used for specific reasons
as noted in the following paragraphs.
Partial Off
The “Partial Off” mode is intended for times
when a more spirited driving experience is
desired. This mode may modify TCS and ESC
thresholds for activation, which allows for more
wheel spin than normally allowed. This mode
may be useful if the vehicle becomes stuck.
To enter the “Partial Off” mode, momentarily
push the “ESC OFF” switch and the “ESC OFF
Indicator Light” will illuminate. To turn the ESC
on again, momentarily push the “ESC OFF”
switch and the “ESC OFF Indicator Light” will
turn off. NOTE:
For vehicles with multiple partial ESC modes a
momentary button push will toggle the ESC
mode. Multiple momentary button pushes may
be required to return to ESC On.Vehicle modifications, or failure to properly
maintain your vehicle, may change the
handling characteristics of your vehicle,
and may negatively affect the performance
of the ESC system. Changes to the steering
system, suspension, braking system, tire
type and size or wheel size may adversely
affect ESC performance. Improperly
inflated and unevenly worn tires may also
degrade ESC performance. Any vehicle
modification or poor vehicle maintenance
that reduces the effectiveness of the ESC
system can increase the risk of loss of
vehicle control, vehicle rollover, personal
injury and death.
WARNING!
(Continued)
WARNING!
When in “Partial Off” mode, the TCS func -
tionality of ESC, (except for the limited slip
feature described in the TCS section), has
been disabled and the “ESC Off Indicator
Light” will be illuminated. When in “Partial
Off” mode, the engine power reduction
feature of TCS is disabled, and the
enhanced vehicle stability offered by the
ESC system is reduced.
Trailer Sway control (TSC) is disabled when
the ESC system is in the “Partial Off” mode.
4
2020_RAM_CHASSIS_CAB_OM_USA=GUID-6C67832B-7839-4CCF-BEFC-CDF988F949EA=1=en=.book Page 125
Page 129 of 516
SAFETY127
NOTE:
The “ESC Activation/Malfunction Indicator
Light” and the “ESC OFF Indicator Light”
come on momentarily each time the ignition
is turned on.
Each time the ignition is turned on, the ESC
system will be on even if it was turned off
previously.
The ESC system will make buzzing or clicking
sounds when it is active. This is normal; the
sounds will stop when ESC becomes inactive
following the maneuver that caused the ESC
activation.
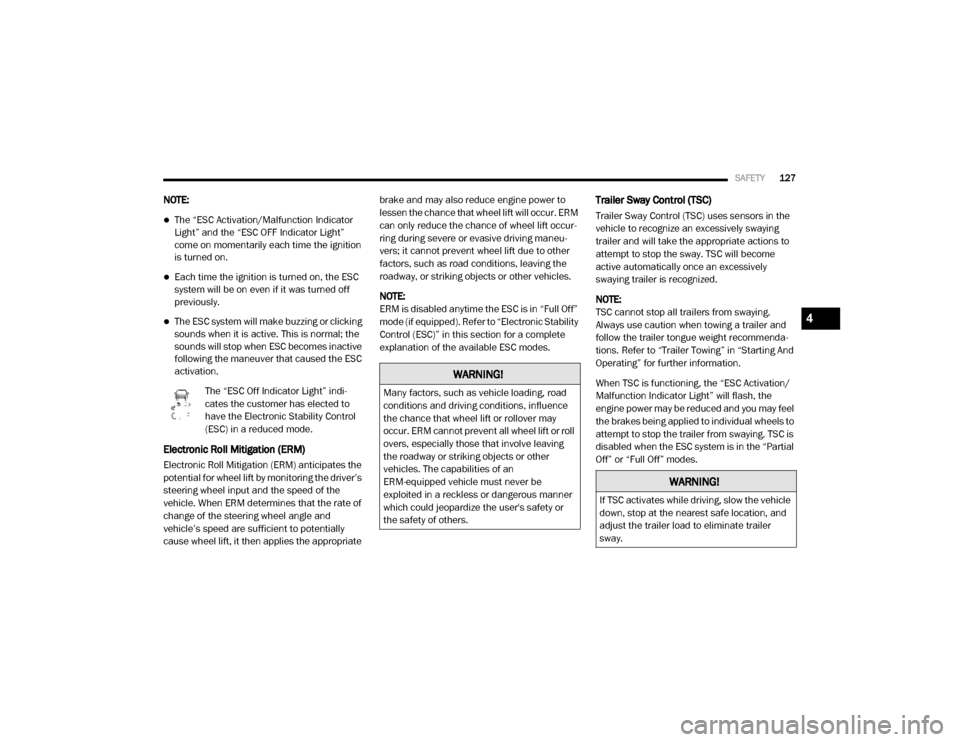
The “ESC Off Indicator Light” indi -
cates the customer has elected to
have the Electronic Stability Control
(ESC) in a reduced mode.
Electronic Roll Mitigation (ERM)
Electronic Roll Mitigation (ERM) anticipates the
potential for wheel lift by monitoring the driver’s
steering wheel input and the speed of the
vehicle. When ERM determines that the rate of
change of the steering wheel angle and
vehicle’s speed are sufficient to potentially
cause wheel lift, it then applies the appropriate brake and may also reduce engine power to
lessen the chance that wheel lift will occur. ERM
can only reduce the chance of wheel lift occur
-
ring during severe or evasive driving maneu -
vers; it cannot prevent wheel lift due to other
factors, such as road conditions, leaving the
roadway, or striking objects or other vehicles.
NOTE:
ERM is disabled anytime the ESC is in “Full Off”
mode (if equipped). Refer to “Electronic Stability
Control (ESC)” in this section for a complete
explanation of the available ESC modes.
Trailer Sway Control (TSC)
Trailer Sway Control (TSC) uses sensors in the
vehicle to recognize an excessively swaying
trailer and will take the appropriate actions to
attempt to stop the sway. TSC will become
active automatically once an excessively
swaying trailer is recognized.
NOTE:
TSC cannot stop all trailers from swaying.
Always use caution when towing a trailer and
follow the trailer tongue weight recommenda -
tions. Refer to “Trailer Towing” in “Starting And
Operating” for further information.
When TSC is functioning, the “ESC Activation/
Malfunction Indicator Light” will flash, the
engine power may be reduced and you may feel
the brakes being applied to individual wheels to
attempt to stop the trailer from swaying. TSC is
disabled when the ESC system is in the “Partial
Off” or “Full Off” modes.
WARNING!
Many factors, such as vehicle loading, road
conditions and driving conditions, influence
the chance that wheel lift or rollover may
occur. ERM cannot prevent all wheel lift or roll
overs, especially those that involve leaving
the roadway or striking objects or other
vehicles. The capabilities of an
ERM-equipped vehicle must never be
exploited in a reckless or dangerous manner
which could jeopardize the user's safety or
the safety of others.
WARNING!
If TSC activates while driving, slow the vehicle
down, stop at the nearest safe location, and
adjust the trailer load to eliminate trailer
sway.
4
2020_RAM_CHASSIS_CAB_OM_USA=GUID-6C67832B-7839-4CCF-BEFC-CDF988F949EA=1=en=.book Page 127
Page 138 of 516

136SAFETY
Vehicles With Non Matching Full Size Spare Or
Compact Spare
The non matching full size spare or compact
spare tire does not have a TPM sensor.
Therefore, the TPMS will not monitor the
pressure in the non matching full size spare
or compact spare tire.
If you install the non matching full size spare
or compact spare tire in place of a road tire
that has a pressure below the low-pressure
warning limit, upon the next ignition switch
cycle, the TPMS Warning Light and a “LOW
TIRE” message will remain on and a chime
will sound. In addition, the graphic in the
instrument cluster will still display a pressure
value in a different color and an “Inflate to
XX” message.
After driving the vehicle for up to 20 minutes
above 15 mph (24 km/h), the TPMS Warning
Light will flash on and off for 75 seconds and
then remain on solid. In addition, the instru -
ment cluster will display a "SERVICE TPM
SYSTEM" message for a minimum of five
seconds and then display dashes (- -) in place
of the pressure value.
For each subsequent ignition switch cycle, a
chime will sound, the TPMS Warning Light will
flash on and off for 75 seconds and then
remain on solid, and the instrument cluster
will display a "SERVICE TPM SYSTEM"
message for a minimum of five seconds and
then display dashes (- -) in place of the pres -
sure value.
Once you repair or replace the original road
tire and reinstall it on the vehicle in place of
the non matching full size spare or compact
spare, the TPMS will update automatically. In
addition, the TPMS Warning Light will turn off
and the graphic in the instrument cluster will
display a new pressure value instead of
dashes (- -), as long as no tire pressure is
below the low-pressure warning limit in any of
the four active road tires. The vehicle may
need to be driven for up to 20 minutes above
15 mph (24 km/h) in order for the TPMS to
receive this information.
Trailer Tire Pressure Monitoring System
(TTPMS)
The Trailer Tire Pressure Monitoring System
(TTPMS) is a feature that will display the trailer
tire pressure values and warn the driver of a low
trailer tire pressure, based on the drivers set target tire pressure value, through TTPMS
settings found in the radio.
The TTPMS monitors the pressure of each tire
and warns the driver, through the instrument
cluster, when either a low tire pressure condi
-
tion or system malfunction condition exists. The
instrument cluster will display the actual tire
pressure or dashes for each of the trailer tires in
the correct trailer position, based on trailer
configuration. The TTPMS system can support
up to 12 trailer tires per configured trailer on up
to four configurable trailers. Refer to “Uconnect
Settings” in “Multimedia” for further informa -
tion.
2020_RAM_CHASSIS_CAB_OM_USA=GUID-6C67832B-7839-4CCF-BEFC-CDF988F949EA=1=en=.book Page 136
Page 139 of 516

SAFETY137
Trailer Tire Pressure Sensor Pairing
In order use this feature, the provided tire pres -
sure sensors must be installed in the desired
trailer tires and the sensors must be paired to
the truck. If the target trailer requires more than
the provided four sensors, additional sensors
can be purchased at an authorized Ram dealer -
ship.
With the sensors installed and the trailer near
or connected to your Ram truck, initiate the
pairing process by entering the settings menu in
the radio and select trailer. Refer to “Uconnect
Settings” in “Multimedia” for further informa -
tion. Select the desired trailer profile to pair to,
open the “Tire Pressure” menu, and hit “Setup
All Tires.” Follow the on screen prompts to select the
number of axles (1 - 3), the number of trailer
tires (2, 4, 6, 8, or 12), and the set trailer tire
pressure. The range is selectable anywhere
between 25-125 PSI (172-862 kPa).
Once PSI (kPa) is programmed, the pairing
screen appears. Tire sensors must be paired in
order shown. Starting with Tire 1, deflate tire by
5 PSI (34 kPa) and wait for a horn chirp. It may
take up to three minutes for the chirp to occur,
indicating that the sensor has paired. Repeat
process on each tire, in order, until complete.
Do not exit the pairing screen until process is
complete. If pairing was unsuccessful, a double
horn chirp will sound, and a prompt on the touchscreen will allow you to retry the proce
-
dure; “Retry” will only appear when setup fails.
Each tire must be successfully paired during a
single pairing process to receive the success
screen.
NOTE:
If the pairing process times out after three
minutes of no communication with a sensor, a
double horn chirp will occur indicating the
pairing has failed and a message will display on
the radio indicating the process was unsuc -
cessful. Under certain circumstances, the
double horn chirp may continue to happen
every three minutes indicating the failed
pairing. If this happens, the horn chirping may
be canceled by cycling the ignition button OFF
and then back to ON/RUN position.
Tire Pres sure Monitoring Lo w Pre ssure
Warnings
When a tire pressure low in one or more of the
active road tires is detected, the instrument
cluster will display a message stating “Trailer
Tire Pressure Low”. The instrument cluster will
then display the TTPMS graphic showing the
pressure values of each tire with the low tire
pressure values in a different color.
4
2020_RAM_CHASSIS_CAB_OM_USA=GUID-6C67832B-7839-4CCF-BEFC-CDF988F949EA=1=en=.book Page 137
Page 140 of 516

138SAFETY
Should this occur, you should stop as soon as
possible and inflate the tires with a low pressure
condition (those in a different color in the instru -
ment cluster graphic) to the customer
programmed target tire pressure value as
shown at the top of the TTPMS instrument
cluster graphic. Once the tire(s) are inflated, the
system will automatically update the graphic
display in the instrument cluster, returning to
it’s original color. The vehicle may need to be
driven for up to 10 minutes above 15 mph
(24 km/h) in order for the TTPMS to receive the
updated information.
Service TTPMS Warning
If a system fault is detected, the instrument
cluster will display a “Trailer Tire Pressure
System Service Required” message for a
minimum of five seconds.
Once the system fault is corrected the "Trailer
Tire Pressure System Service Required"
message will no longer be displayed. The
vehicle may need to be driven for up to
10 minutes above 15 mph (24 km/h) in order
for the TTPMS to receive the trailer tire pressure
information. Trailer Tire Pressure System Not Configured
A “Trailer Tire Pressure System Not Configured”
message will be displayed in the Instrument
Cluster on the TTPM instrument cluster graphic
when a trailer number is selected that has not
had trailer tire pressure sensors paired. To
correct this condition, see “Trailer Tire Pressure
Sensor Pairing” in “Multimedia”.
Trailer Sensors Detected Do Not Match Active
Trailer
The “Trailer Sensors Detected Do Not Match
Active Trailer” message will be displayed in the
Instrument Cluster when the trailer sensors
being received by the TTPM module do not
match the trailer sensors paired to the current
trailer number selected. This message will be
displayed when the sensors being received
completely match the sensors paired to another
trailer number configured in the TTPM module.
To correct this condition, the correct trailer
number must be selected in the radio. Refer to
the “Uconnect Settings” in “Multimedia” for
further information.Tire Fill Alert — If Equipped
This feature notifies the user when the placard
tire pressure is attained while inflating or
deflating the tire.
The customer may choose to disable or enable
the Tire Fill Alert feature through use of the
customer settings in the radio.
NOTE:
Only one tire can be filled at a time when
using the Tire Fill Alert system.
The Tire Fill Alert feature cannot be entered if
an existing TPM system fault is set to “active”
or if the system is in deactivation mode (if
equipped).
The system will be activated when the TPM
receiver module detects a change in tire pres -
sure. The ignition must be in the RUN mode,
with the transmission in PARK (P).
NOTE:
It is not required to have the engine running to
enter Tire Fill Alert mode.
2020_RAM_CHASSIS_CAB_OM_USA=GUID-6C67832B-7839-4CCF-BEFC-CDF988F949EA=1=en=.book Page 138
Page 204 of 516
202STARTING AND OPERATING
ENGINE BREAK-IN RECOMMENDATIONS —
GAS ENGINE
A long break-in period is not required for the
engine and drivetrain (transmission and axle) in
your vehicle.
Drive moderately during the first 300 miles
(500 km). After the initial 60 miles (100 km),
speeds up to 50 or 55 mph (80 or 90 km/h) are
desirable.
While cruising, brief full-throttle acceleration
within the limits of local traffic laws contributes
to a good break-in. Wide-open throttle accelera-
tion in low gear can be detrimental and should
be avoided.
The engine oil installed in the engine at the
factory is a high-quality energy conserving type
lubricant. Oil changes should be consistent with
anticipated climate conditions under which
vehicle operations will occur. For the recom -
mended viscosity and quality grades, refer to
“Fluids And Lubricants” in “Technical Specifica-
tions”. NOTE:
A new engine may consume some oil during its
first few thousand miles (kilometers) of opera
-
tion. This should be considered a normal part of
the break-in and not interpreted as a problem.
Please check your oil level with the engine oil
indicator often during the break in period. Add
oil as required.
ENGINE BREAK-IN RECOMMENDATIONS —
DIESEL ENGINE
The Cummins® Turbo Diesel engine does not
require a break-in period due to its construction.
Normal operation is allowed, providing the
following recommendations are followed:
Warm up the engine before placing it under
load.
Do not operate the engine at idle for
prolonged periods.
Use the appropriate transmission gear to
prevent engine lugging.
Observe vehicle oil pressure and tempera -
ture indicators.
Check the coolant and oil levels frequently.
Vary throttle position at highway speeds
when carrying or towing significant weight.
NOTE:
Light duty operation such as light trailer towing
or no load operation will extend the time before
the engine is at full efficiency. Reduced fuel
economy and power may be seen at this time.
For additional vehicle break-in requirements,
refer to “Trailer Towing” in “Starting And Oper -
ating” of the Owner’s Manual.
Because of the construction of the Cummins®
Turbo Diesel engine, engine run-in is enhanced
by loaded operating conditions which allow the
engine parts to achieve final finish and fit during
the first 6,000 miles (10,000 km).
CAUTION!
Never use Non-Detergent Oil or Straight
Mineral Oil in the engine or damage may
result.
2020_RAM_CHASSIS_CAB_OM_USA=GUID-6C67832B-7839-4CCF-BEFC-CDF988F949EA=1=en=.book Page 202
Page 211 of 516
STARTING AND OPERATING209
The following indicators should be used to
ensure that you have properly engaged the
transmission into the PARK position:
When shifting into PARK, pull the gear
selector toward you and move it all the way
counterclockwise until it stops.
Release the gear selector and make sure it is
fully seated in the PARK gate.
Look at the transmission gear position
display and verify that it indicates the PARK
position (P).
With brake pedal released, verify that the
gear selector will not move out of PARK.
REVERSE (R)
This range is for moving the vehicle backward.
Shift into REVERSE only after the vehicle has
come to a complete stop. NEUTRAL (N)
Use this range when the vehicle is standing for
prolonged periods with the engine running. The
engine may be started in this range. Apply the
parking brake and shift the transmission into
PARK if you must exit the vehicle.
DRIVE (D)
This range should be used for most city and
highway driving. It provides the smoothest
upshifts and downshifts, and the best fuel
economy. The transmission automatically
upshifts through underdrive FIRST, SECOND,
and THIRD gears, direct FOURTH gear and over
-
drive FIFTH and SIXTH gears. The DRIVE posi -
tion provides optimum driving characteristics
under all normal operating conditions.
When frequent transmission shifting occurs
(such as when operating the vehicle under
heavy loading conditions, in hilly terrain, trav -
eling into strong head winds, or while towing a
heavy trailer), use the Electronic Range Select
(ERS) shift control (refer to “Electronic Range
Select (ERS) Operation” in this section for
further information) to select a lower gear
range. Under these conditions, using a lower
gear range will improve performance and
extend transmission life by reducing excessive
shifting and heat buildup.
DO NOT race the engine when shifting from
PARK or NEUTRAL into another gear range,
as this can damage the drivetrain.
CAUTION! (Continued)
WARNING!
Do not coast in NEUTRAL and never turn off
the ignition to coast down a hill. These are
unsafe practices that limit your response to
changing traffic or road conditions. You might
lose control of the vehicle and have a
collision.
CAUTION!
Towing the vehicle, coasting, or driving for any
other reason with the transmission in
NEUTRAL can cause severe transmission
damage. Refer to “Recreational Towing” in
“Starting And Operating” and “Towing A
Disabled Vehicle” in “In Case Of Emergency”
for further information.
5
2020_RAM_CHASSIS_CAB_OM_USA=GUID-6C67832B-7839-4CCF-BEFC-CDF988F949EA=1=en=.book Page 209
Page 212 of 516
210STARTING AND OPERATING
If the transmission temperature exceeds
normal operating limits, the powertrain
controller will modify the transmission shift
schedule and expand the range of torque
converter clutch engagement. This is done to
prevent transmission damage due to over -
heating.
If the transmission becomes extremely hot or is
in danger of overheating, the “Transmission
Temperature Warning Light” may illuminate and
the transmission may operate differently until
the transmission cools down.
NOTE:
Use caution when operating a heavily loaded
vehicle at low speeds (such as towing a trailer
up a steep grade, or in stop-and-go traffic)
during hot weather. In these conditions, torque
converter slip can impose a significant addi -
tional heat load on the cooling system. Down -
shifting the transmission to the lowest possible
gear (when climbing a grade), or shifting to
NEUTRAL (when stopped in heavy traffic) can
help to reduce this excess heat generation. During cold temperatures, transmission opera
-
tion may be modified depending on engine and
transmission temperature as well as vehicle
speed. This feature improves warm up time of
the engine and transmission to achieve
maximum efficiency. Engagement of the torque
converter clutch is inhibited until the transmis -
sion fluid is warm (refer to the “Note” under
“Torque Converter Clutch” in this section).
On trucks with AS66RC or AS69RC transmis -
sion, FIFTH and SIXTH gears may be inhibited
briefly on cold starts below 41°F (5°C), and
during very cold temperatures (-4°F [-20°C] or
below), operation may briefly be limited to third
gear only. During this condition, the ability of the
vehicle to accelerate under heavily loaded
conditions may be reduced. In all cases, normal
operation will resume once the transmission
temperature has risen to a suitable level.
Transmission Limp Home Mode
Transmission function is monitored electroni -
cally for abnormal conditions. If a condition is
detected that could result in transmission
damage, Transmission Limp Home Mode is acti -
vated. In this mode, the transmission remains
in third gear (for AS66RC/AS69RC transmis -
sion) regardless of which forward gear is
selected. If an AS66RC/AS69RC equipped truck enters Limp Home Mode at highway speeds, it
will initially engage fifth gear, until the vehicle
slows to a speed where third gear can be
engaged. PARK, REVERSE, and NEUTRAL will
continue to operate. The Malfunction Indicator
Light (MIL) may be illuminated. Limp Home
Mode allows the vehicle to be driven to an
authorized dealer for service without damaging
the transmission.
In the event of a momentary problem, the trans
-
mission can be reset to regain all forward gears
by performing the following steps:
1. Stop the vehicle.
2. Shift the transmission into PARK.
3. Turn the ignition to the OFF position.
4. Wait approximately 10 seconds.
5. Restart the engine.
6. Shift into the desired gear range. If the problem is no longer detected, the trans -
mission will return to normal operation.
2020_RAM_CHASSIS_CAB_OM_USA=GUID-6C67832B-7839-4CCF-BEFC-CDF988F949EA=1=en=.book Page 210
Page 214 of 516

212STARTING AND OPERATING
Overdrive Operation
The automatic transmission includes an elec -
tronically controlled Overdrive (FIFTH and SIXTH
gears). The transmission will automatically shift
into Overdrive if the following conditions are
present:
The gear selector is in the DRIVE position.
The transmission fluid has reached an
adequate temperature.
The engine coolant has reached an adequate
temperature.
Vehicle speed is sufficiently high.
The TOW/HAUL switch has not been
activated.
The driver is not heavily pressing the
accelerator.
Torque Converter Clutch
A feature designed to improve fuel economy
has been included in the automatic transmis -
sion on your vehicle. A clutch within the torque
converter engages automatically at calibrated
speeds. This may result in a slightly different feeling or response during normal operation in
the upper gears. When the vehicle speed drops
or during some accelerations, the clutch auto
-
matically disengages.
NOTE:
The torque converter clutch will not engage,
until the transmission fluid and engine
coolant are warm (usually after 1 to 3 miles
(2 to 5 km) of driving). Because engine speed
is higher when the torque converter clutch is
not engaged, it may seem as if the transmis -
sion is not shifting properly when cold. This is
normal. Using the Electronic Range Select
(ERS) shift control, when the transmission is
sufficiently warm, will demonstrate that the
transmission is able to shift into and out of
Overdrive.
If the vehicle has not been driven for several
days, the first few seconds of operation after
shifting the transmission into gear may seem
sluggish. This is due to the fluid partially
draining from the torque converter into the
transmission. This condition is normal and
will not cause damage to the transmission.
The torque converter will refill within five
seconds after starting the engine.
When To Use TOW/HAUL Mode
When driving in hilly areas, towing a trailer,
carrying a heavy load, etc., and frequent trans -
mission shifting occurs, push the TOW/HAUL
switch to activate TOW/HAUL mode. This will
improve performance and reduce the potential
for transmission overheating or failure due to
excessive shifting. When operating in TOW/
HAUL mode, transmission upshifts are delayed,
and the transmission will automatically down -
shift (for engine braking) when the throttle is
closed and/or during steady braking maneu -
vers.
TOW/HAUL Switch
2020_RAM_CHASSIS_CAB_OM_USA=GUID-6C67832B-7839-4CCF-BEFC-CDF988F949EA=1=en=.book Page 212