transmission oil Ram 5500 Chassis Cab 2011 Owner's Manual
[x] Cancel search | Manufacturer: RAM, Model Year: 2011, Model line: 5500 Chassis Cab, Model: Ram 5500 Chassis Cab 2011Pages: 476, PDF Size: 7.32 MB
Page 26 of 476
1. With the RKE transmitter buttons facing down, use a
flat blade to pry the two halves of the RKE transmitter
apart. Make sure not to damage the seal during removal.
2. Remove and replace the battery. Avoid touching the
new battery with your fingers. Skin oils may cause
battery deterioration. If you touch a battery, clean it with
rubbing alcohol.
3. To assemble the RKE transmitter case, snap the two
halves together.
General Information
This device complies with Part 15 of the FCC rules and
RSS 210 of Industry Canada. Operation is subject to the
following conditions:
•This device may not cause harmful interference.
•This device must accept any interference received,
including interference that may cause undesired
operation.NOTE:
Changes or modifications not expressly ap-
proved by the party responsible for compliance could
void the user’s authority to operate the equipment.
If your RKE transmitter fails to operate from a normal
distance, check for these two conditions:
1. A weak battery in the RKE transmitter. The expected
life of the battery is a minimum of three years.
2. Closeness to a radio transmitter such as a radio station
tower, airport transmitter, and some mobile or CB radios.
REMOTE STARTING SYSTEM — IF EQUIPPED
This system uses the Remote Keyless Entry
(RKE) transmitter to start the engine conve-
niently from outside the vehicle while still
maintaining security. The system has a range of
approximately 328 ft (100 m).
NOTE: The vehicle must be equipped with an auto-
matic transmission to be equipped with Remote Start.
2
THINGS TO KNOW BEFORE STARTING YOUR VEHICLE 25
Page 73 of 476
Children Too Large for Booster Seats
Children who are large enough to wear the shoulder belt
comfortably, and whose legs are long enough to bend
over the front of the seat when their back is against the
seat back should use the lap/shoulder belt in a rear seat.
•Make sure that the child is upright in the seat.
•The lap portion should be low on the hips and as snug
as possible.
•Check belt fit periodically. A child’s squirming or
slouching can move the belt out of position.
If the shoulder belt contacts the face or neck, move the
child closer to the center of the vehicle. Never allow a
child to put the shoulder belt under an arm or behind
their back.
Transporting Pets
Airbags deploying in the front seat could harm your pet.
An unrestrained pet will be thrown about and possibly injured, or injure a passenger during panic braking or in
a collision. Pets should be restrained in the rear seat in
pet harnesses or pet carriers that are secured by seat belts.
ENGINE BREAK-IN RECOMMENDATIONS
A long break-in period is not required for the engine and
drivetrain (transmission and axle) in your vehicle.
Drive moderately during the first 300 miles (500 km).
After the initial 60 miles (100 km), speeds up to 50 or
55 mph (80 or 90 km/h) are desirable.
While cruising, brief full-throttle acceleration within the
limits of local traffic laws, contributes to a good break-in.
Wide-open throttle acceleration in low gear can be detri-
mental and should be avoided.
The engine oil installed in the engine at the factory is a
high-quality energy conserving type lubricant. Oil
changes should be consistent with anticipated climate
conditions under which vehicle operations will occur. For
72 THINGS TO KNOW BEFORE STARTING YOUR VEHICLE
Page 187 of 476
2. Fully depress the accelerator pedal slowly three
times within 10 seconds.
3. Turn the ignition switch to the OFF/LOCK position.
NOTE: If the indicator message illuminates when you
start the vehicle, the oil change indicator system did not
reset. If necessary repeat this procedure.
15. Engine Temperature Warning Light This light warns of an overheated engine condi-
tion. As temperatures rise and the gauge ap-
proaches H,this indicator will illuminate and a
single chime will sound after reaching a set threshold.
Further overheating will cause the temperature gauge to
pass H,the indicator will continuously flash and a
continuous chime will occur until the engine is allowed
to cool.
If the light turns on while driving, safely pull over and
stop the vehicle. If the A/C system is on, turn it off. Also, shift the transmission into NEUTRAL and idle the ve-
hicle. If the temperature reading does not return to
normal, turn the engine off immediately and call for
service. Refer to “If Your Engine Overheats” in “What To
Do In Emergencies” for further information.
For vehicles equipped with a premium cluster this indi-
cator will display in the Electronic Vehicle Information
Center (EVIC). Refer to ”Electronic Vehicle Information
Center (EVIC) — If Equipped” for further information.
16. Shift Lever Indicator
The Shift Lever Indicator is self-contained within the
instrument cluster. It displays the gear position of the
automatic transmission.
NOTE:
In vehicles with a 4.7L or 5.7L engine, the
highest available transmission gear is displayed in the
lower right corner of the Electronic Vehicle Information
Center (EVIC) whenever the Electronic Range Select
(ERS) feature is active. Use the +/- selector on the shift
186 UNDERSTANDING YOUR INSTRUMENT PANEL
Page 193 of 476
27. Transmission Temperature Warning LightThis light indicates that there is excessive trans-
mission fluid temperature that might occur
with severe usage such as trailer towing. It may
also occur when operating the vehicle in a high
torque converter slip condition, such as 4-wheel-drive
operation (e.g., snow plowing, off- road operation). If this
light comes on, stop the vehicle and run the engine at idle
or faster, with the transmission in NEUTRAL until the
light goes off.
CAUTION!
Continuous driving with the Transmission Tempera-
ture Warning Light illuminated will eventually cause
severe transmission damage or transmission failure.
WARNING!
Continued operation with the Transmission Tem-
perature Warning Light illuminated could cause the
fluid to boil over, come in contact with hot engine or
exhaust components causing a fire that may result in
personal injury.
For vehicles equipped with a premium cluster this warn-
ing light will display in the Electronic Vehicle Informa-
tion Center (EVIC). Refer to ”Electronic Vehicle Informa-
tion Center (EVIC) — If Equipped” for further
information.
192 UNDERSTANDING YOUR INSTRUMENT PANEL
Page 200 of 476
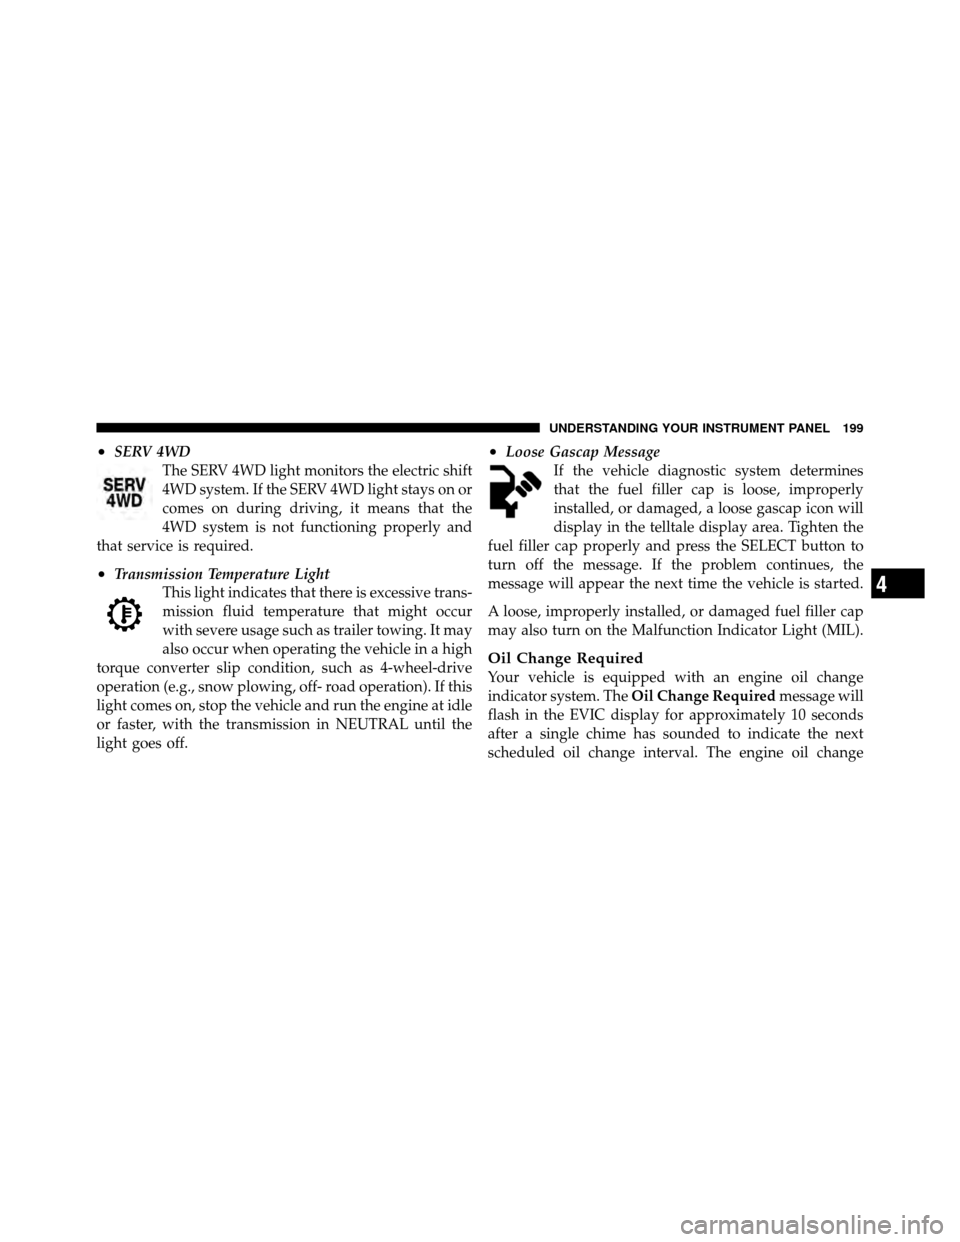
•SERV 4WDThe SERV 4WD light monitors the electric shift
4WD system. If the SERV 4WD light stays on or
comes on during driving, it means that the
4WD system is not functioning properly and
that service is required.
•Transmission Temperature Light This light indicates that there is excessive trans-
mission fluid temperature that might occur
with severe usage such as trailer towing. It may
also occur when operating the vehicle in a high
torque converter slip condition, such as 4-wheel-drive
operation (e.g., snow plowing, off- road operation). If this
light comes on, stop the vehicle and run the engine at idle
or faster, with the transmission in NEUTRAL until the
light goes off.
•Loose Gascap Message If the vehicle diagnostic system determines
that the fuel filler cap is loose, improperly
installed, or damaged, a loose gascap icon will
display in the telltale display area. Tighten the
fuel filler cap properly and press the SELECT button to
turn off the message. If the problem continues, the
message will appear the next time the vehicle is started.
A loose, improperly installed, or damaged fuel filler cap
may also turn on the Malfunction Indicator Light (MIL).
Oil Change Required
Your vehicle is equipped with an engine oil change
indicator system. The Oil Change Required message will
flash in the EVIC display for approximately 10 seconds
after a single chime has sounded to indicate the next
scheduled oil change interval. The engine oil change
4
UNDERSTANDING YOUR INSTRUMENT PANEL 199
Page 203 of 476
To Reset The Display
Reset will only occur while a resettable function is being
displayed. Press and release the ODOMETER/TRIP
ODOMETER button once to clear the resettable function
being displayed.
Vehicle Info (Customer Information Features)
Press and release the UP or DOWN button until “Vehicle
Info” displays in the EVIC and press the SELECT button.
Press the UP and DOWN button to scroll through the
available information displays, then press SELECT to
display anyone of the following choices.
•Coolant Temp
Displays the actual coolant temperature.
•Oil Temperature
Displays the actual oil temperature.
•Oil Pressure
Displays the actual oil pressure.
•Trans Temperature
Displays the actual transmission temperature.
•Engine Hours
Displays the hours of engine operation.
Units
Press and release the UP or DOWN button until “Units”
displays in the EVIC and press the SELECT button. The
EVIC, odometer, and navigation system (if equipped) can
be changed between English and Metric units of mea-
sure. To make your selection, scroll up or down until the
preferred setting is highlighted, then press and release
the SELECT button until a check-mark appears next to
the setting, showing that setting has been selected.
Compass / Temperature Display
The compass readings indicate the direction the vehicle is
facing. The EVIC will display one of eight compass
readings and the outside temperature.
202 UNDERSTANDING YOUR INSTRUMENT PANEL
Page 291 of 476
CAUTION! (Continued)
•Driving through standing water may cause dam-
age to your vehicle’s drivetrain components. Al-
ways inspect your vehicle’s fluids (i.e., engine oil,
transmission/transaxle, axle, etc.) for signs of con-
tamination (i.e., fluid that is milky or foamy in
appearance) after driving through standing water.
Do not continue to operate the vehicle if any fluid
appears contaminated, as this may result in further
damage. Such damage is not covered by the New
Vehicle Limited Warranty.
•Getting water inside your vehicle’s engine can
cause it to lock up and stall out, and cause serious
internal damage to the engine. Such damage is not
covered by the New Vehicle Limited Warranty.
WARNING!
•Driving through standing water limits your vehi-
cle’s traction capabilities. Do not exceed 5 mph
(8 km/h) when driving through standing water.
•Driving through standing water limits your vehi-
cle’s braking capabilities, which increases stop-
ping distances. Therefore, after driving through
standing water, drive slowly and lightly press on
the brake pedal several times to dry the brakes.
•Getting water inside your vehicle’s engine can
cause it to lock up and stall out, and leave you
stranded.
•Failure to follow these warnings may result in
injuries that are serious or fatal to you, your
passengers, and others around you.
290 STARTING AND OPERATING
Page 382 of 476
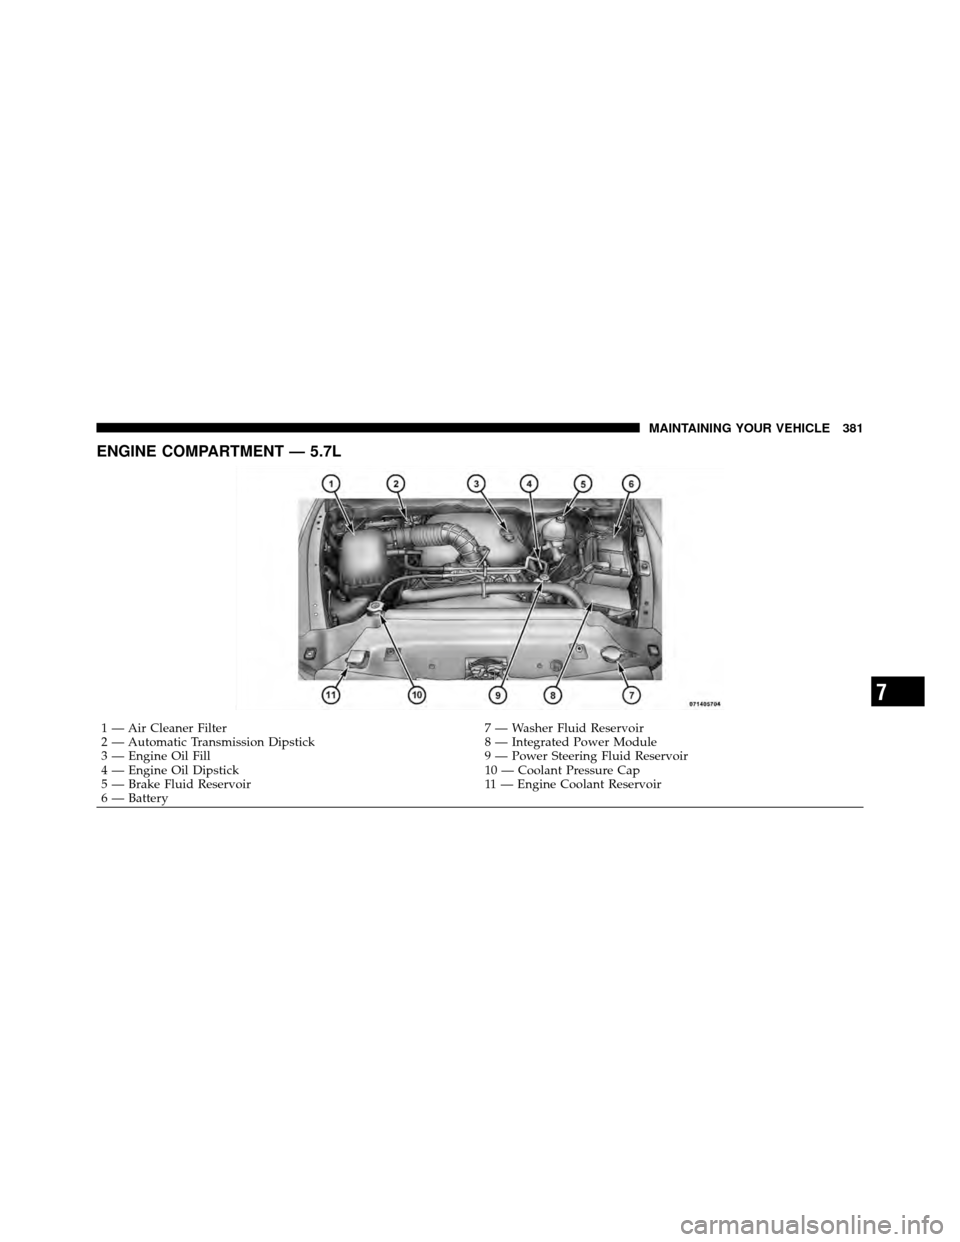
ENGINE COMPARTMENT — 5.7L
1 — Air Cleaner Filter7 — Washer Fluid Reservoir
2 — Automatic Transmission Dipstick 8 — Integrated Power Module
3 — Engine Oil Fill 9 — Power Steering Fluid Reservoir
4 — Engine Oil Dipstick 10 — Coolant Pressure Cap
5 — Brake Fluid Reservoir 11 — Engine Coolant Reservoir
6 — Battery
7
MAINTAINING YOUR VEHICLE 381
Page 387 of 476
CAUTION! (Continued)
•Your vehicle has been built with improved fluids
that protect the performance and durability of
your vehicle and also allow extended maintenance
intervals. Do not use chemical flushes in these
components as the chemicals can damage your
engine, transmission, power steering or air condi-
tioning. Such damage is not covered by the New
Vehicle Limited Warranty. If a flush is needed
because of component malfunction, use only the
specified fluid for the flushing procedure.
Engine Oil
Checking Oil Level
To assure proper lubrication of your vehicle’s engine, the
engine oil must be maintained at the correct level. Check
the oil level at regular intervals, such as every fuel stop.The best time to check the engine oil level is about five
minutes after a fully warmed up engine is shut off.
Checking the oil while the vehicle is on level ground will
improve the accuracy of the oil level readings. Always
maintain the oil level within the SAFE zone on the
dipstick. Adding one quart of oil when the reading is at
the bottom of the SAFE zone will result in a reading at the
top of the safe zone on these engines.
CAUTION!
Overfilling or underfilling the crankcase will cause
oil aeration or loss of oil pressure. This could damage
your engine.
Change Engine Oil
The oil change indicator system will remind you that it is
time to take your vehicle in for scheduled maintenance.
Refer to “Maintenance Schedule” for further information.
386 MAINTAINING YOUR VEHICLE
Page 406 of 476
Refer to “Maintenance Schedule” for the proper mainte-
nance intervals.
Lubricant Selection
Refer to “Fluids, Lubricants, and Genuine Parts” in
“Maintaining Your Vehicle” for further information.
NOTE:The presence of water in the gear lubricant will
result in corrosion and possible failure of differential
components. Operation of the vehicle in water, as may be
encountered in some off-highway types of service, will
require draining and refilling the axle to avoid damage.
Limited-Slip Differentials DO NOT REQUIRE any
limited slip oil additive (friction modifiers).
NOTE: Slight noise and mild shuddering may be evi-
dent while turning a vehicle with limited slip differential
on concrete or dry pavement. These conditions should be
considered normal operation of the limited slip
differential.
Transfer Case
Drain and Refill
Refer to “Maintenance Schedule” for proper maintenance
intervals.
Lubricant Selection
Refer to “Fluids, Lubricants, and Genuine Parts” in
“Maintaining Your Vehicle” for further information.
Fluid Level Check
This fluid level can be checked by removing the filler
plug. The fluid level should be to the bottom edge of the
filler plug hole with the vehicle in a level position.
Automatic Transmission
Selection Of Lubricant
It is important that the proper lubricant is used in the
transmission to assure optimum transmission perfor-
mance. Use only the manufacturer ’s recommended trans-
mission fluid. Refer to “Fluids, Lubricants, and Genuine
7
MAINTAINING YOUR VEHICLE 405