alarm RAM CHASSIS CAB 2017 User Guide
[x] Cancel search | Manufacturer: RAM, Model Year: 2017, Model line: CHASSIS CAB, Model: RAM CHASSIS CAB 2017Pages: 536, PDF Size: 5.67 MB
Page 37 of 536

• For emergency exit with the system engaged, move the
door lock switch to the unlock position, roll down the
window and open the door with the outside door
handle.
KEYLESS ENTER-N-GO — PASSIVE ENTRY
The Passive Entry system is an enhancement to the vehi-
cle’s Remote Keyless Entry system and a feature of Keyless
Enter-N-Go. Refer to “Keyless Enter-N-Go” in “Starting
And Operating” for further information. This feature al-
lows you to lock and unlock the vehicle’s door(s) without
having to push the key fob lock or unlock buttons.
NOTE:
• Passive Entry may be programmed ON/OFF. Refer to
“Uconnect Settings” in “Understanding Your Instrument
Panel” for further information.
• If wearing gloves on your hands, or if it has been
raining/snowing on the Passive Entry door handle, the
unlock sensitivity can be affected, resulting in a slower
response time.
• If the vehicle is unlocked by Passive Entry and no door
is opened within 60 seconds, the vehicle will re-lock and
if equipped will arm the security alarm. • The vehicles security alarm can be armed/disarmed by
pushing the passive entry key fob lock/unlock buttons
(if equipped).
• The key fob may not be found if it is located next to a
mobile phone, laptop or other electronic device; these
devices may block the key fob’s wireless signal.
To Unlock From The Driver’s Side:
With a valid Passive Entry key fob within 5 ft (1.5 m) of the
driver door handle, grab the front driver door handle to
unlock the driver’s door automatically. The interior door
panel lock knob will raise when the door is unlocked.
Grab The Door Handle To Unlock 2THINGS TO KNOW BEFORE STARTING YOUR VEHICLE 35
Page 61 of 536

The steering wheel hub trim cover and the upper right side
of the instrument panel separate and fold out of the way as
the air bags inflate to their full size. The front air bags fully
inflate in less time than it takes to blink your eyes. The
front air bags then quickly deflate while helping to restrain
the driver and front passenger.
Knee Impact Bolsters
The Knee Impact Bolsters help protect the knees of the
driver and front passenger, and position the front occu-
pants for improved interaction with the front air bags.
WARNING!• Do not drill, cut, or tamper with the knee impact
bolsters in any way.
• Do not mount any accessories to the knee impact
bolsters such as alarm lights, stereos, citizen band
radios, etc. Supplemental Side Air Bags — If Equipped
Your vehicle is equipped with two types of side air bags:
1. Supplemental Seat-Mounted Side Air Bags (SABs) (If
Equipped): Located in the outboard side of the front
seats. The SABs are marked with a “SRS AIRBAG” or
“AIRBAG” label sewn into the outboard side of the
seats.
Supplemental Seat-Mounted Side Air Bag Label 2THINGS TO KNOW BEFORE STARTING YOUR VEHICLE 59
Page 163 of 536

GARAGE DOOR OPENER — IF EQUIPPED
HomeLink replaces up to three hand-held transmitters that
operate devices such as garage door openers, motorized
gates, lighting or home security systems. The HomeLink
unit is powered by your vehicles 12 Volt battery.
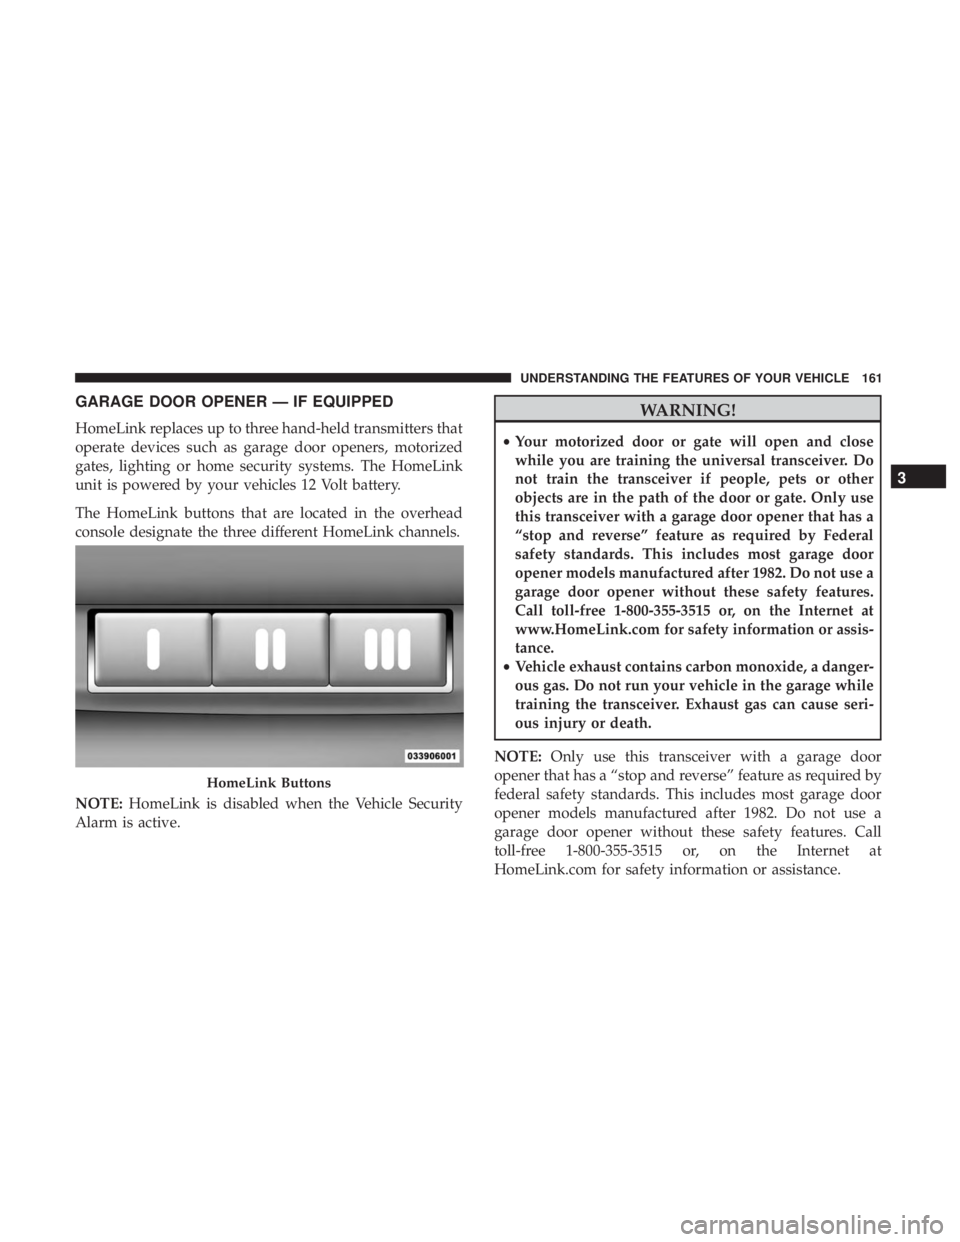
The HomeLink buttons that are located in the overhead
console designate the three different HomeLink channels.
NOTE: HomeLink is disabled when the Vehicle Security
Alarm is active. WARNING!• Your motorized door or gate will open and close
while you are training the universal transceiver. Do
not train the transceiver if people, pets or other
objects are in the path of the door or gate. Only use
this transceiver with a garage door opener that has a
“stop and reverse” feature as required by Federal
safety standards. This includes most garage door
opener models manufactured after 1982. Do not use a
garage door opener without these safety features.
Call toll-free 1-800-355-3515 or, on the Internet at
www.HomeLink.com for safety information or assis-
tance.
• Vehicle exhaust contains carbon monoxide, a danger-
ous gas. Do not run your vehicle in the garage while
training the transceiver. Exhaust gas can cause seri-
ous injury or death.
NOTE: Only use this transceiver with a garage door
opener that has a “stop and reverse” feature as required by
federal safety standards. This includes most garage door
opener models manufactured after 1982. Do not use a
garage door opener without these safety features. Call
toll-free 1-800-355-3515 or, on the Internet at
HomeLink.com for safety information or assistance.HomeLink Buttons 3UNDERSTANDING THE FEATURES OF YOUR VEHICLE 161
Page 168 of 536

5. Push and hold the programmed HomeLink button. The
instrument cluster display will display “CHANNEL #
TRANSMIT.” If the device is plugged in and activates,
programming is complete.
If you unplugged the garage door opener/device for
programming, plug it back in at this time.
Reprogramming A Single HomeLink Button
(Canadian/Gate Operator)
To reprogram a channel that has been previously trained,
follow these steps:
1. Turn the ignition switch to the ON/RUN position.
For vehicle’s equipped with Keyless Enter-N-Go, place the
ignition in the RUN position with the Engine ON.
2. Push and hold the desired HomeLink button until the
instrument cluster display shows “CHANNEL #
TRAINING” Do not release the button.
3. Without releasing the button proceed with “Canadian/
Gate Operator Programming” Step 2 and follow all
remaining steps. Using HomeLink
To operate, push and release the programmed HomeLink
button. Activation will now occur for the programmed
device (i.e. garage door opener, gate operator, security
system, entry door lock, home/office lighting, etc.) The
hand-held transmitter of the device may also be used at
any time.
Security
It is advised to erase all channels before you sell or turn in
your vehicle.
To erase the channels press and hold the two outside
HomeLink buttons (I and III) for up 20 seconds. The
instrument cluster display will display “CLEARING
CHANNELS.” Release the buttons when the instrument
cluster display shows “CHANNELS CLEARED.”
The HomeLink Universal Transceiver is disabled when the
Vehicle Security Alarm is active.
Troubleshooting Tips
If you are having trouble programming HomeLink, here
are some of the most common solutions:
• Replace the battery in the Garage Door Opener hand-
held transmitter.166 UNDERSTANDING THE FEATURES OF YOUR VEHICLE
Page 201 of 536

WARNING!Driving a vehicle with the red brake light on is
dangerous. Part of the brake system may have failed. It
will take longer to stop the vehicle. You could have a
collision. Have the vehicle checked immediately.
Vehicles equipped with the Anti-Lock Brake System (ABS)
are also equipped with Electronic Brake Force Distribution
(EBD).
CAUTION!In the event of an EBD failure, the Brake Warning
Light will turn on along with the ABS Light. Immedi-
ate repair to the ABS system is required. Operation of the Brake Warning Light can be checked by
placing the ignition in the ON/RUN position. The light
should illuminate for approximately two seconds. The light
should then turn off unless the parking brake is applied or
a brake fault is detected. If the light does not illuminate,
have the light inspected by an authorized dealer.
The light also will turn on when the parking brake is
applied with the ignition placed in the ON/RUN position.
NOTE: This light shows only that the parking brake is
applied. It does not show the degree of brake application.
Vehicle Security Warning Light — If Equipped
Red Telltale
Light What It Means
Vehicle Security Warning Light — If Equipped
This light will flash at a fast rate for approximately 15 seconds when the vehicle security alarm is
arming, and then will flash slowly until the vehicle is disarmed. 4UNDERSTANDING YOUR INSTRUMENT PANEL 199
Page 235 of 536

The electrical loads that may be switched off (if equipped),
and vehicle functions which can be affected by load
reduction:
• Heated Seat/Vented Seats/Heated Wheel
• Heated/Cooled Cup Holders — If Equipped
• Rear Defroster And Heated Mirrors
• HVAC System
• 115V AC Power Inverter System
• Audio and Telematics System
Loss of the battery charge may indicate one or more of the
following conditions:
• The charging system cannot deliver enough electrical
power to the vehicle system because the electrical loads
are larger than the capability of charging system. The
charging system is still functioning properly.
• Turning on all possible vehicle electrical loads (e.g.
HVAC to max settings, exterior and interior lights,
overloaded power outlets +12V, 115V AC, USB ports)
during certain driving conditions (city driving, towing,
frequent stopping). • Installing options like additional lights, upfitter electri-
cal accessories, audio systems, alarms and similar de-
vices.
• Unusual driving cycles (short trips separated by long
parking periods).
• The vehicle was parked for an extended period of time
(weeks, months).
• The battery was recently replaced and was not charged
completely.
• The battery was discharged by an electrical load left on
when the vehicle was parked.
• The battery was used for an extended period with the
engine not running to supply radio, lights, chargers,
+12V portable appliances like vacuum cleaners, game
consoles and similar devices. 4UNDERSTANDING YOUR INSTRUMENT PANEL 233
Page 236 of 536

What to do when an electrical load reduction action
message is present (“Battery Saver On” or “Battery Saver
Mode”)
During a trip:
• Reduce power to unnecessary loads if possible:
– Turn off redundant lights (interior or exterior)
– Check what may be plugged in to power outlets +12V,
115V AC, USB ports
– Check HVAC settings (blower, temperature)
– Check the audio settings (volume)
After a trip:
• Check if any aftermarket equipment was installed (ad-
ditional lights, upfitter electrical accessories, audio sys-
tems, alarms) and review specifications if any (load and
Ignition Off Draw currents).
• Evaluate the latest driving cycles (distance, driving time
and parking time).
• The vehicle should have service performed if the mes-
sage is still present during consecutive trips and the
evaluation of the vehicle and driving pattern did not
help to identify the cause. CYBERSECURITY
Your vehicle may be a connected vehicle and may be
equipped with both wired and wireless networks. These
networks allow your vehicle to send and receive informa-
tion. This information allows systems and features in your
vehicle to function properly.
Your vehicle may be equipped with certain security fea-
tures to reduce the risk of unauthorized and unlawful
access to vehicle systems and wireless communications.
Vehicle software technology continues to evolve over time
and FCA US LLC, working with its suppliers, evaluates
and takes appropriate steps as needed. Similar to a com-
puter or other devices, your vehicle may require software
updates to improve the usability and performance of your
systems or to reduce the potential risk of unauthorized and
unlawful access to your vehicle systems.
The risk of unauthorized and unlawful access to your
vehicle systems may still exist, even if the most recent
version of vehicle software (such as Uconnect software) is
installed.234 UNDERSTANDING YOUR INSTRUMENT PANEL
Page 308 of 536

• For the 8.4 NAV Uconnect System, say: “Find address
800 Chrysler Drive Auburn Hills, Michigan.”
2. Then follow the system prompts.
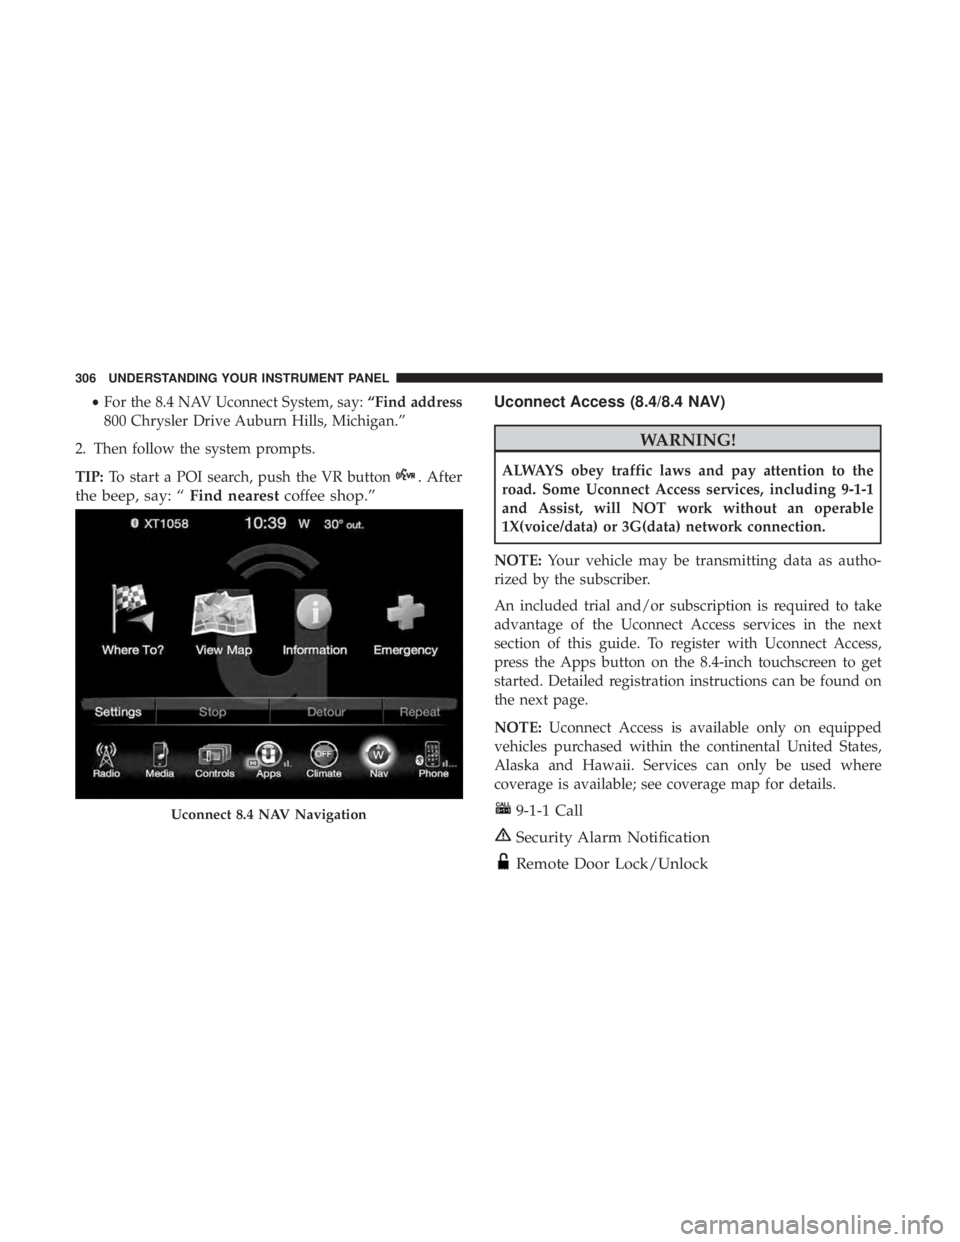
TIP: To start a POI search, push the VR button . After
the beep, say: “ Find nearest coffee shop.” Uconnect Access (8.4/8.4 NAV)
WARNING!ALWAYS obey traffic laws and pay attention to the
road. Some Uconnect Access services, including 9-1-1
and Assist, will NOT work without an operable
1X(voice/data) or 3G(data) network connection.
NOTE: Your vehicle may be transmitting data as autho-
rized by the subscriber.
An included trial and/or subscription is required to take
advantage of the Uconnect Access services in the next
section of this guide. To register with Uconnect Access,
press the Apps button on the 8.4-inch touchscreen to get
started. Detailed registration instructions can be found on
the next page.
NOTE: Uconnect Access is available only on equipped
vehicles purchased within the continental United States,
Alaska and Hawaii. Services can only be used where
coverage is available; see coverage map for details.
9-1-1 Call
Security Alarm Notification
Remote Door Lock/UnlockUconnect 8.4 NAV Navigation306 UNDERSTANDING YOUR INSTRUMENT PANEL
Page 520 of 536

Adding Engine Coolant (Antifreeze) ............ .472
Adding Fuel ............................. .400
Additives, Fuel ........................... .399
Adjust
Down ..............................111,112
Forward ............................110,111
Rearward ...........................110,111
Up................................111,112
Adjustable Pedals ......................... .137
Air Bag
Air Bag Operation .........................58
Air Bag Warning Light .....................55
Enhanced Accident Response ............. .64, 444
Event Data Recorder (EDR) ................ .444
If A Deployment Occurs ....................63
Knee Impact Bolsters .......................59
Maintaining Your Air Bag System ..............65
Side Air Bags ............................59
Transporting Pets .........................89
Air Bag Light ....................... .55, 92, 197
Air Bag Maintenance .........................65
Air Cleaner, Engine (Engine Air Cleaner Filter) ..... .454
Air Conditioner Maintenance ................. .459
Air Conditioning .......................... .277
Air Conditioning Controls ................... .277 Air Conditioning Filter .................. .291, 460
Air Conditioning, Operating Tips .............. .291
Air Conditioning Refrigerant .............. .459, 460
Air Conditioning System .............. .277, 290, 459
Air Pressure, Tires ......................... .377
Alarm, Panic ...............................25
Alarm (Security Alarm) ................... .20, 199
Alarm System (Security Alarm) .................20
Alterations/Modifications, Vehicle ................7
Antifreeze (Engine Coolant) .................. .472
Capacities ............................. .500
Disposal .............................. .474
Anti-Lock Brake System (ABS) ................ .353
Appearance Care .......................... .480
Ashtray ................................ .173
Assist, Hill Start .......................... .355
Auto Down Power Windows ...................39
Automatic Door Locks ........................33
Automatic Headlights ...................... .125
Automatic High Beams ..................... .126
Automatic Temperature Control (ATC) .......... .290
Automatic Transmission ..................... .478
Adding Fluid .......................... .479
Fluid And Filter Changes .................. .480
Fluid Level Check ....................... .479518 INDEX
Page 527 of 536

Low Fuel ............................. .210
Malfunction Indicator (Check Engine) ......... .204
Park ................................. .215
Passing ............................... .132
Seat Belt Reminder ...................... .197
Security Alarm ......................... .199
Service ............................ .494, 495
Tire Pressure Monitoring (TPMS) ......... .208, 390
Traction Control ........................ .361
Transfer Case .......................... .341
Turn Signal ................... .94, 132, 216, 495
Warning (Instrument Cluster Description) . . . .200, 216
Limited-Slip Differential ................. .346, 477
Loading Vehicle ........................... .401
Tires................................. .371
Load Shed
Battery Saver Mode ...................... .232
Battery Saver On ........................ .232
Electrical Load Reduction .................. .232
Intelligent Battery Sensor .................. .232
Locks ....................................31
Automatic Door ..........................33
Child Protection ..........................34
Door ..................................31
Power Door .............................32 Low Tire Pressure System .................... .390
Lubrication, Body ......................... .466
Lug Nuts ......................... .427, 433, 434
Maintenance Free Battery .................... .458
Maintenance Procedures ..................... .451
Maintenance Schedule ...................... .506
Malfunction Indicator Light (Check Engine) . . . .204, 449
Manual, Service ........................... .516
Manual Transmission
Fluid Level Check ....................... .478
Memory Seat ..............................119
Methanol ............................... .397
Mirrors ..................................99
Electric Powered ........................ .106
Heated ............................... .107
Memory ............................... 1 19
Outside .............................. .105
Rearview ........................... .99, 104
Trailer Towing .......................... .109
Modifications/Alterations, Vehicle ................7
Monitor, Tire Pressure System ................. .390
MOPAR Parts ......................... .450, 515
MTBE/ETBE ............................. .39710 INDEX 525