lights RAM CHASSIS CAB 2020 Owners Manual
[x] Cancel search | Manufacturer: RAM, Model Year: 2020, Model line: CHASSIS CAB, Model: RAM CHASSIS CAB 2020Pages: 516, PDF Size: 16.57 MB
Page 5 of 516
3
EXTERIOR LIGHTS ...............................................44 Multifunction Lever ...................................... 44
Headlight Switch .......................................... 44
Daytime Running Lights (DRLs) ................. 45
High/Low Beam Switch ............................... 45
Automatic High Beam Headlamp
Control — If Equipped .................................. 45 Flash-To-Pass ............................................. 46
Automatic Headlights — If Equipped .......... 46
Parking Lights And Panel Lights ................. 46
Directional LED Headlamp System —
If Equipped ................................................... 46 Headlights On With Wipers (Available With
Automatic Headlights Only) ......................... 46 Headlight Delay ............................................ 47
Lights-On Reminder ..................................... 47
Front Fog Lights — If Equipped .................. 47
Turn Signals ............................................. 47
Lane Change Assist — If Equipped ............. 47
Cargo Lights/Trailer Spotter Lights —
If Equipped ................................................... 47 Battery Saver................................................ 48
INTERIOR LIGHTS ................................................48
Courtesy Lights ............................................ 48
Illuminated Entry ......................................... 49
WINDSHIELD WIPERS AND WASHERS ............50
Windshield Wipers ..................................... 50
Rain Sensing Wipers — If Equipped ........... 51 CLIMATE CONTROLS ........................................... 51
Manual Climate Control Overview ............ 52
Automatic Climate Control Overview .......... 55
Climate Control Functions........................... 62
Automatic Temperature Control (ATC) ...... 62
Operating Tips ............................................. 63
WINDOWS ............................................................ 64
Power Windows — If Equipped .................... 64
Wind Buffeting ............................................ 66
HOOD .................................................................... 66
To Open The Hood ...................................... 66
To Close The Hood ....................................... 67
GARAGE DOOR OPENER — IF EQUIPPED ........ 67
Before You Begin Programming
HomeLink® .................................................. 68 Canadian/Gate Operator Programming ..... 70
Using HomeLink®........................................ 71
Security......................................................... 71
Troubleshooting Tips ................................... 71
General Information .................................... 72
INTERNAL EQUIPMENT ........................................ 72
Storage ......................................................... 72
Cupholders .................................................. 77
Electrical Power Outlets ............................ 78
Power Inverter — If Equipped ..................... 80
Wireless Charging Pad — If Equipped ........ 81
Overhead Sunglass Storage ....................... 81
GETTING TO KNOW YOUR INSTRUMENT PANEL
BASE / MIDLINE INSTRUMENT CLUSTER..........82Base / Midline Instrument Cluster
Descriptions ................................................. 83
PREMIUM INSTRUMENT CLUSTER .....................85
Premium Instrument Cluster
Descriptions ................................................. 86
DIESEL INSTRUMENT CLUSTER .........................87
DIESEL INSTRUMENT CLUSTER ................ 88
INSTRUMENT CLUSTER .......................................90
Diesel INSTRUMENT CLUSTER .................. 91
INSTRUMENT CLUSTER DISPLAY .......................92
Instrument Cluster Display Controls .......... 92
Oil Life Reset ............................................... 93
Display Menu Items ..................................... 94
Diesel Messages And Warnings —
6.7L Cummins Diesel Engine ................... 103 Battery Saver On/Battery Saver Mode
Message — Electrical Load Reduction Actions
— If Equipped .......................................... 107
WARNING LIGHTS AND MESSAGES ............... 108
Red Warning Lights ................................... 108
Yellow Warning Lights ............................... 111Yellow Indicator Lights .............................. 115
Green Indicator Lights ............................... 116White Indicator Lights ............................... 117Blue Indicator Lights ................................. 118
2020_RAM_CHASSIS_CAB_OM_USA=GUID-6C67832B-7839-4CCF-BEFC-CDF988F949EA=1=en=.book Page 3
Page 13 of 516

INTRODUCTION11
HOW TO USE THIS MANUAL
Essential Information
Consult the Table of Contents to determine
which section contains the information you
desire.
Since the specification of your vehicle depends
on the items of equipment ordered, certain
descriptions and illustrations may differ from
your vehicle's equipment.
The detailed Index at the back of this Owner's
Manual contains a complete listing of all
subjects.
Symbols
Some vehicle components have colored labels
whose symbols indicate precautions to be
observed when using this component. Refer to
“Warning Lights and Messages” in “Getting To
Know Your Instrument Panel” for further infor -
mation on the symbols used in your vehicle.
WARNINGS AND CAUTIONS
This Owner’s Manual contains WARNINGS
against operating procedures that could result
in a collision, bodily injury and/or death. It also
contains CAUTIONS against procedures that
could result in damage to your vehicle. If you do
not read this entire Owner’s Manual, you may
miss important information. Observe all Warn -
ings and Cautions.
VAN CONVERSIONS/CAMPERS
The New Vehicle Limited Warranty does not
apply to body modifications or special equip -
ment installed by van conversion/camper
manufacturers/body builders. US residents
refer to the Warranty Information, Section
2.1.C. Canadian residents refer to the “What Is
Not Covered” section of the Warranty Informa -
tion. Such equipment includes video monitors,
VCRs, heaters, stoves, refrigerators, etc. For
warranty coverage and service on these items,
contact the applicable manufacturer. Operating instructions for the special equip
-
ment installed by the conversion/camper
manufacturer should also be supplied with your
vehicle. If these instructions are missing, please
contact an authorized dealer for assistance in
obtaining replacement documents from the
applicable manufacturer.
For information on the Body Builder’s Guide
refer to www.ramtrucks.com . This website
contains dimensional and technical specifica -
tions for your vehicle. It is intended for Second
Stage Manufacturer's technical support. For
service issues, contact an authorized dealer.
VEHICLE MODIFICATIONS/ALTERATIONS
WARNING!
Any modifications or alterations to this vehicle
could seriously affect its roadworthiness and
safety and may lead to a collision resulting in
serious injury or death.
1
2020_RAM_CHASSIS_CAB_OM_USA=GUID-6C67832B-7839-4CCF-BEFC-CDF988F949EA=1=en=.book Page 11
Page 15 of 516
GETTING TO KNOW YOUR VEHICLE13
TIP:
When viewing a topic, tap the star icon to add it
to your Favorites, for easy access in the future.
KEYS
Key Fob
Your vehicle uses a keyless ignition system. The
ignition system consists of a key fob with
Remote Keyless Entry (RKE) and a START/STOP
push button ignition system. The Remote
Keyless Entry (RKE) system (if equipped)
consists of a key fob and Keyless Enter-N-Go
feature.
NOTE:
The key fob may not be found if it is located next
to a mobile phone, laptop or other electronic
device; these devices may block the key fob’s
wireless signal.
If the vehicle is equipped with remote power
door locks, the key fob allows you to lock or
unlock all doors, as well as activate the Panic
Alarm, from distances up to approximately 66 ft
(20 m). The key fob does not need to be pointed
at the vehicle to activate the system. NOTE:
In the ON/RUN position, all key fob buttons
will work until the vehicle reaches 2 mph
(4 km/h).
The key fob should not be placed next to the
wireless charging pad (if equipped).
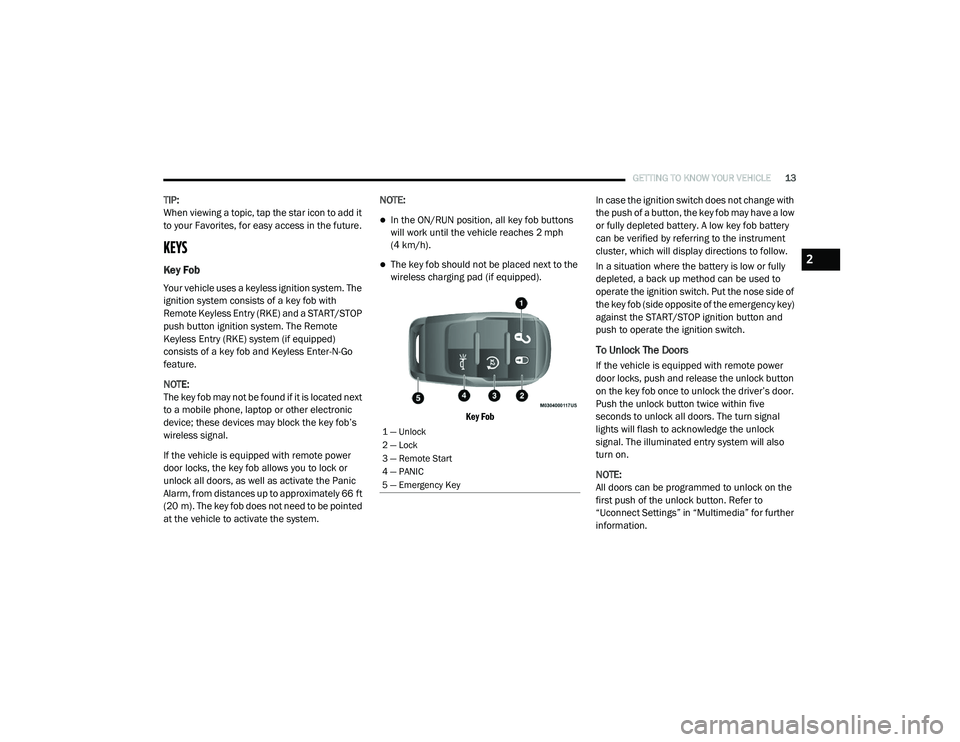
Key Fob
In case the ignition switch does not change with
the push of a button, the key fob may have a low
or fully depleted battery. A low key fob battery
can be verified by referring to the instrument
cluster, which will display directions to follow.
In a situation where the battery is low or fully
depleted, a back up method can be used to
operate the ignition switch. Put the nose side of
the key fob (side opposite of the emergency key)
against the START/STOP ignition button and
push to operate the ignition switch.
To Unlock The Doors
If the vehicle is equipped with remote power
door locks, push and release the unlock button
on the key fob once to unlock the driver’s door.
Push the unlock button twice within five
seconds to unlock all doors. The turn signal
lights will flash to acknowledge the unlock
signal. The illuminated entry system will also
turn on.
NOTE:
All doors can be programmed to unlock on the
first push of the unlock button. Refer to
“Uconnect Settings” in “Multimedia” for further
information.
1 — Unlock
2 — Lock
3 — Remote Start
4 — PANIC
5 — Emergency Key
2
2020_RAM_CHASSIS_CAB_OM_USA=GUID-6C67832B-7839-4CCF-BEFC-CDF988F949EA=1=en=.book Page 13
Page 16 of 516
14GETTING TO KNOW YOUR VEHICLE
To Lock The Doors
If the vehicle is equipped with remote power
door locks, push and release the lock button on
the key fob to lock all doors. The turn signal
lights will flash and the horn will chirp to
acknowledge the signal.
Sound Horn With Remote Key Lock
This feature will cause the horn to chirp when
the doors are locked with the key fob. This
feature can be turned on or turned off.
NOTE:
Pushing the lock button on the key fob while you
are in the vehicle will activate the vehicle secu -
rity alarm system. Opening a door with the
vehicle security alarm system activated will
cause the alarm to sound. Push the unlock
button to deactivate the vehicle security alarm
system.
Refer to “Instrument Cluster Display” in
“Getting To Know Your Instrument Panel” for
further information.
Using The Panic Alarm
To turn the Panic Alarm feature on or off, push
the Panic button on the key fob. When the Panic
Alarm is activated, the turn signals will flash, the
horn will pulse on and off, and the interior lights
will turn on.
The Panic Alarm will stay on for three minutes
unless you turn it off by either pushing the Panic
button a second time or driving the vehicle at a
speed of 15 mph (24 km/h) or greater.
NOTE:
The interior lights will turn off if you place the
ignition in the ACC or ON/RUN position while
the Panic Alarm is activated. However, the
exterior lights and horn will remain on.
You may need to be less than 35 ft (11 m)
from the vehicle when using the key fob to
turn off the Panic Alarm due to the radio
frequency noises emitted by the system.
Replacing The Battery In The Key Fob With
Remote Control
The replacement battery model is one CR2032
battery. NOTE:
Perchlorate Material — special handling may
apply. See
www.dtsc.ca.gov/hazard -
ouswaste/perchlorate for further informa -
tion.
Do not touch the battery terminals that are
on the back housing or the printed circuit
board.
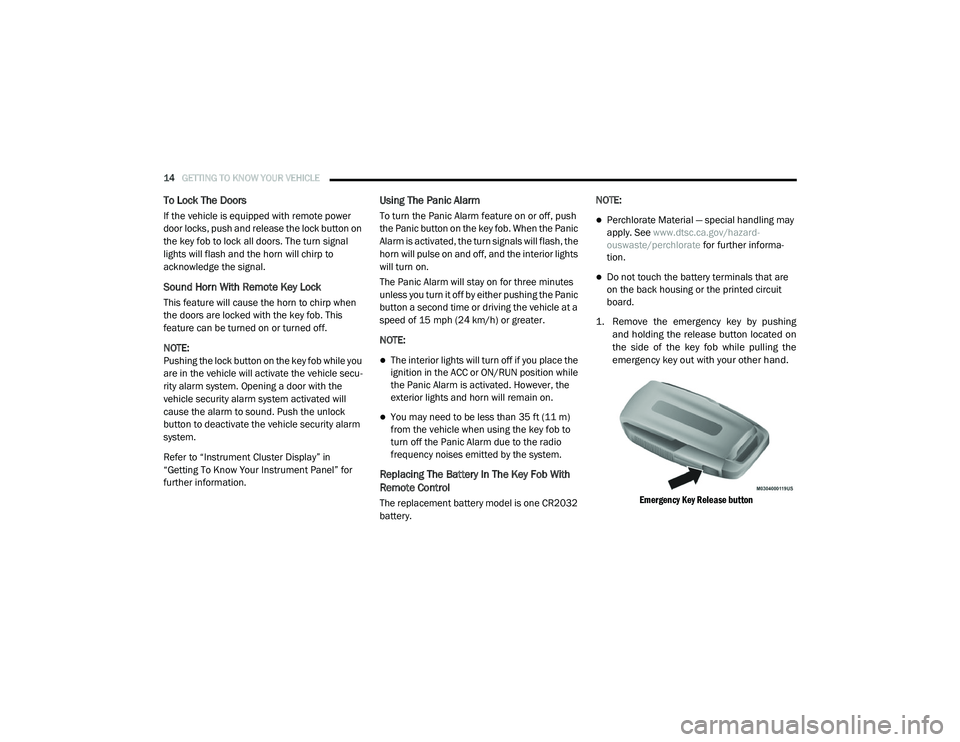
1. Remove the emergency key by pushing and holding the release button located on
the side of the key fob while pulling the
emergency key out with your other hand.
Emergency Key Release button
2020_RAM_CHASSIS_CAB_OM_USA=GUID-6C67832B-7839-4CCF-BEFC-CDF988F949EA=1=en=.book Page 14
Page 21 of 516
GETTING TO KNOW YOUR VEHICLE19
System not disabled from previous remote
start event
Vehicle security alarm not active
Malfunction Indicator Light is not illuminated
Remote Start Abort Message
The following messages will display in the
instrument cluster display if the vehicle fails to
remote start or exits remote start prematurely:
Remote Start Cancelled — Door Open
Remote Start Cancelled — Hood Open
Remote Start Cancelled — Fuel Low
Remote Start Cancelled — System Fault
Remote Start Disabled — Start Vehicle to
Reset
The instrument cluster display message stays
active until the ignition is placed in the ON/RUN
position.
To Enter Remote Start Mode
Push and release the Remote Start
button on the key fob twice within five
seconds. The parking lights will flash,
vehicle doors will lock, and the horn
will chirp twice (if programmed). Once the
vehicle has started, the engine will run for
15 minutes.
NOTE:
If your power door locks were unlocked,
Remote Start will automatically lock the
doors.
If an engine fault is present or fuel level is
low, the vehicle will start and then shut down
in 10 seconds.
The park lamps will turn on and remain on
during Remote Start mode.
For security, power window and power
sunroof operation (if equipped) are disabled
when the vehicle is in the Remote Start
mode.
The engine can be started two consecutive
times (two 15 minute cycles) with the key
fob. However, the ignition must be placed in
the ON/RUN position before you can repeat
the start sequence for a third cycle.
To Exit Remote Start Mode Without Driving
The Vehicle
Push and release the remote start button one
time or allow the engine to run for the entire
15 minute cycle.
NOTE:
To avoid unintentional shutdowns, the system
will disable for two seconds after receiving a
valid Remote Start request.
WARNING!
Do not start or run an engine in a closed
garage or confined area. Exhaust gas
contains Carbon Monoxide (CO) which is
odorless and colorless. Carbon Monoxide is
poisonous and can cause serious injury or
death when inhaled.
Keep key fobs away from children. Opera -
tion of the Remote Start System, windows,
door locks or other controls could cause
serious injury or death.
2
2020_RAM_CHASSIS_CAB_OM_USA=GUID-6C67832B-7839-4CCF-BEFC-CDF988F949EA=1=en=.book Page 19
Page 23 of 516
GETTING TO KNOW YOUR VEHICLE21
The Remote Start system will wait for the
“Wait To Start” Indicator Light to extinguish
before cranking the engine. This allows time
for the intake heater to preheat the incoming
air, and is normal operation in cold weather.
Refer to “Wait To Start Light,” located in
“Warning Lights And Messages” within
“Getting To Know Your Instrument Panel” for
more information.
How To Use Remote Start
All of the following conditions must be met
before the engine will remote start:
Transmission in PARK
Doors closed
Hood closed
Hazard switch off
Brake switch inactive (brake pedal not
pushed)
Battery at an acceptable charge level
PANIC button not pushed
Fuel meets minimum requirement
Water In Fuel Indicator Light is not illumi -
nated
Wait To Start Light Indicator Light is not illu -
minated
Malfunction Indicator Light is not illuminated
Remote Start Abort Message
The following messages will display in the
instrument cluster display if the vehicle fails to
remote start or exits remote start prematurely:
Remote Start Aborted — Door Open
Remote Start Aborted — Hood Open
Remote Start Aborted — Fuel Low
Remote Start Aborted — System Fault The instrument cluster display message is
stored until the ignition is placed in the ON/RUN
position.
To Enter Remote Start Mode
Push and release the Remote Start button on
the key fob twice, within five seconds. The
parking lights will flash and the horn will chirp
twice (if programmed). In cold ambient
temperature conditions, the diesel vehicle may
delay crank up to 30 seconds for the Intake Air
Heater. Once the vehicle has started, the
engine will run for 15 minutes.
NOTE:
Crank may be delayed up to 75 seconds for
intake air heater operation at high altitudes,
and/or extreme cold.
The park lamps will turn on and remain on
during Remote Start mode.
For security, power window and power
sunroof operation (if equipped) are disabled
when the vehicle is in the Remote Start
mode.
WARNING!
Do not start or run an engine in a closed
garage or confined area. Exhaust gas
contains Carbon Monoxide (CO) which is
odorless and colorless. Carbon Monoxide is
poisonous and can cause serious injury or
death when inhaled.
Keep key fobs away from children. Opera
-
tion of the Remote Start System, windows,
door locks or other controls could cause
serious injury or death.
2
2020_RAM_CHASSIS_CAB_OM_USA=GUID-6C67832B-7839-4CCF-BEFC-CDF988F949EA=1=en=.book Page 21
Page 27 of 516
GETTING TO KNOW YOUR VEHICLE25
(Continued)
(Continued)
If the vehicle security alarm is armed and the
battery becomes disconnected, the vehicle
security alarm will remain armed when the
battery is reconnected; the exterior lights will
flash, and the horn will sound. If this occurs,
disarm the vehicle security alarm.
Rearming Of The System
If something triggers the alarm, and no action is
taken to disarm it, the vehicle security alarm will
turn the horn off after 29 seconds, 5 seconds
between cycles, up to 8 cycles if the trigger
remains active and then the vehicle security
alarm will rearm itself.
Security System Manual Override
The vehicle security alarm will not arm/disarm if
you lock/unlock the doors using the manual
door lock.
DOORS
Manual Door Locks
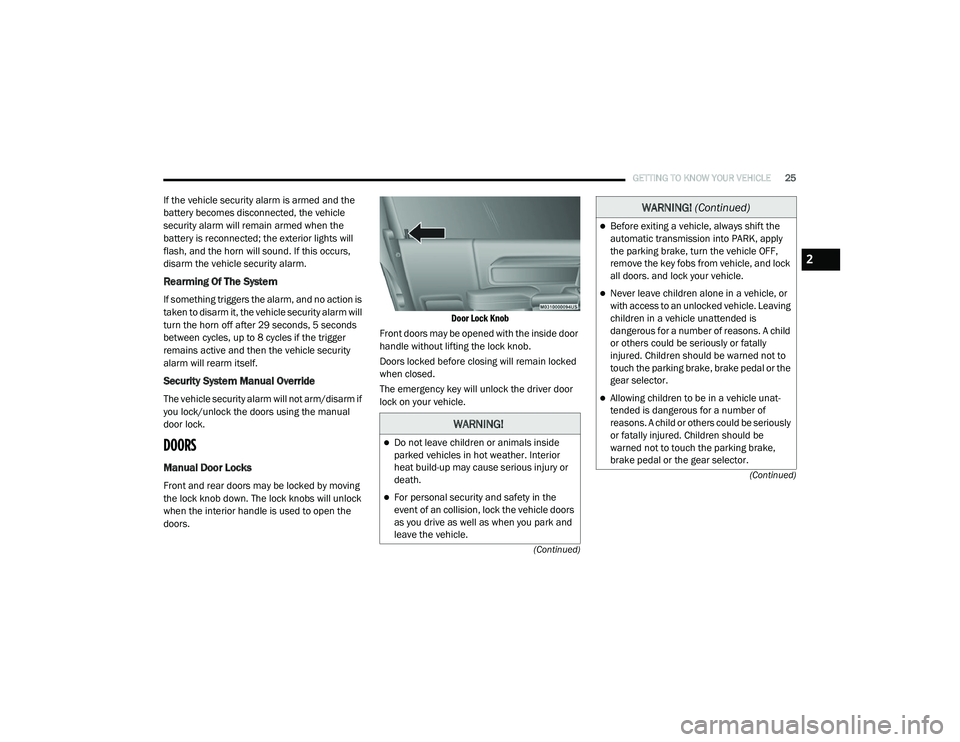
Front and rear doors may be locked by moving
the lock knob down. The lock knobs will unlock
when the interior handle is used to open the
doors.
Door Lock Knob
Front doors may be opened with the inside door
handle without lifting the lock knob.
Doors locked before closing will remain locked
when closed.
The emergency key will unlock the driver door
lock on your vehicle.
WARNING!
Do not leave children or animals inside
parked vehicles in hot weather. Interior
heat build-up may cause serious injury or
death.
For personal security and safety in the
event of an collision, lock the vehicle doors
as you drive as well as when you park and
leave the vehicle.
Before exiting a vehicle, always shift the
automatic transmission into PARK, apply
the parking brake, turn the vehicle OFF,
remove the key fobs from vehicle, and lock
all doors. and lock your vehicle.
Never leave children alone in a vehicle, or
with access to an unlocked vehicle. Leaving
children in a vehicle unattended is
dangerous for a number of reasons. A child
or others could be seriously or fatally
injured. Children should be warned not to
touch the parking brake, brake pedal or the
gear selector.
Allowing children to be in a vehicle unat -
tended is dangerous for a number of
reasons. A child or others could be seriously
or fatally injured. Children should be
warned not to touch the parking brake,
brake pedal or the gear selector.
WARNING! (Continued)
2
2020_RAM_CHASSIS_CAB_OM_USA=GUID-6C67832B-7839-4CCF-BEFC-CDF988F949EA=1=en=.book Page 25
Page 37 of 516
GETTING TO KNOW YOUR VEHICLE35
Rear Heated Seats
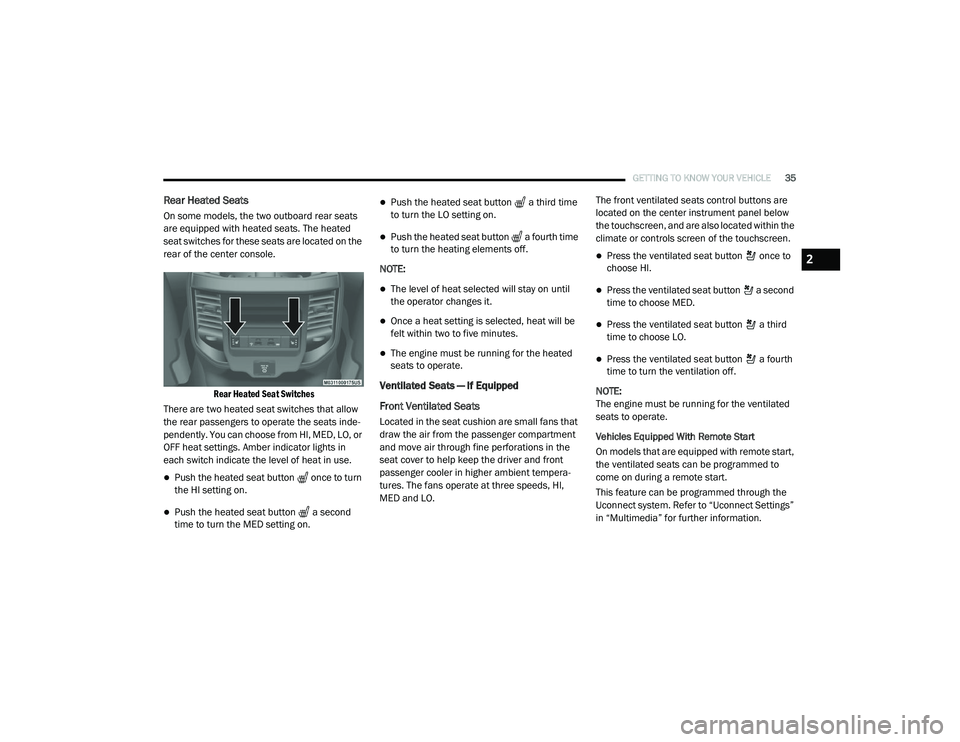
On some models, the two outboard rear seats
are equipped with heated seats. The heated
seat switches for these seats are located on the
rear of the center console.
Rear Heated Seat Switches
There are two heated seat switches that allow
the rear passengers to operate the seats inde -
pendently. You can choose from HI, MED, LO, or
OFF heat settings. Amber indicator lights in
each switch indicate the level of heat in use.
Push the heated seat button once to turn
the HI setting on.
Push the heated seat button a second
time to turn the MED setting on.
Push the heated seat button a third time
to turn the LO setting on.
Push the heated seat button a fourth time
to turn the heating elements off.
NOTE:
The level of heat selected will stay on until
the operator changes it.
Once a heat setting is selected, heat will be
felt within two to five minutes.
The engine must be running for the heated
seats to operate.
Ventilated Seats — If Equipped
Front Ventilated Seats
Located in the seat cushion are small fans that
draw the air from the passenger compartment
and move air through fine perforations in the
seat cover to help keep the driver and front
passenger cooler in higher ambient tempera -
tures. The fans operate at three speeds, HI,
MED and LO. The front ventilated seats control buttons are
located on the center instrument panel below
the touchscreen, and are also located within the
climate or controls screen of the touchscreen.
Press the ventilated seat button once to
choose HI.
Press the ventilated seat button a second
time to choose MED.
Press the ventilated seat button a third
time to choose LO.
Press the ventilated seat button a fourth
time to turn the ventilation off.
NOTE:
The engine must be running for the ventilated
seats to operate.
Vehicles Equipped With Remote Start
On models that are equipped with remote start,
the ventilated seats can be programmed to
come on during a remote start.
This feature can be programmed through the
Uconnect system. Refer to “Uconnect Settings”
in “Multimedia” for further information.
2
2020_RAM_CHASSIS_CAB_OM_USA=GUID-6C67832B-7839-4CCF-BEFC-CDF988F949EA=1=en=.book Page 35
Page 46 of 516
44GETTING TO KNOW YOUR VEHICLE
Illuminated Vanity Mirror — If Equipped
Illuminated vanity mirrors are located on each
sun visor. To use the mirror, rotate the sun visor
down and swing the mirror cover upward. The
lights will turn on automatically. Closing the
mirror cover turns off the light.
Illuminated Vanity Mirror
“Slide-On-Rod” Features Of Sun Visor — If
Equipped
The sun visor “Slide-On-Rod” feature allows for
additional flexibility in positioning the visor to
block out the sun.
To use the “Slide-On-Rod” feature, rotate the
sun visor downward and unclip it. Pull the sun
visor along the “Slide-On-Rod” until the sun
visor is in the desired position.
“Slide-On-Rod” Extender
EXTERIOR LIGHTS
Multifunction Lever
The multifunction lever is located on the left
side of the steering column.
Multifunction Lever
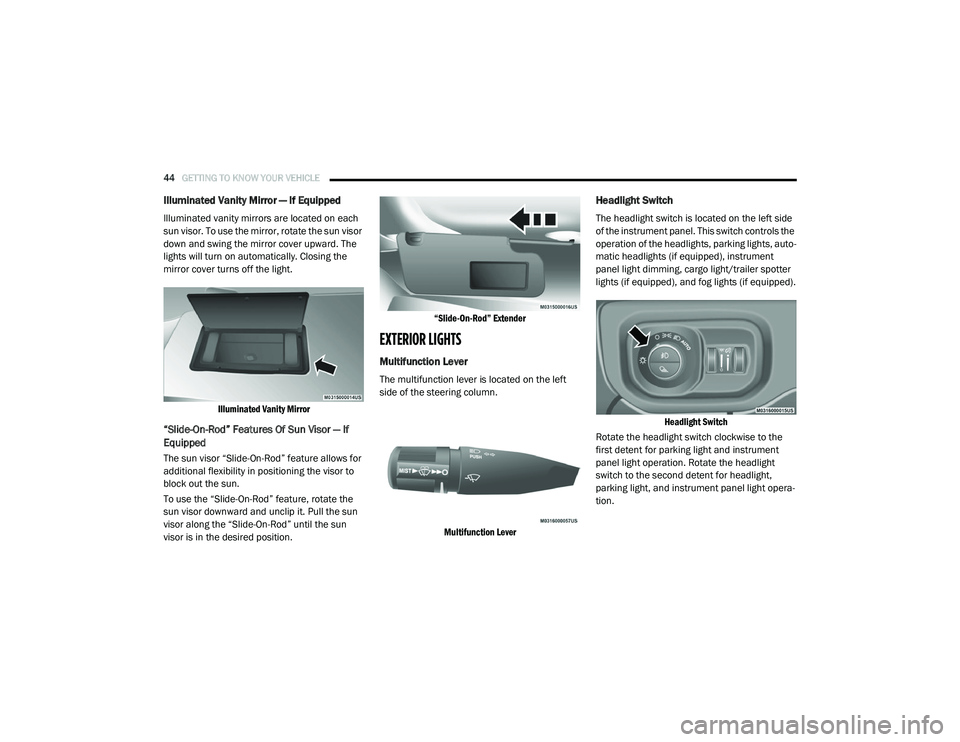
Headlight Switch
The headlight switch is located on the left side
of the instrument panel. This switch controls the
operation of the headlights, parking lights, auto -
matic headlights (if equipped), instrument
panel light dimming, cargo light/trailer spotter
lights (if equipped), and fog lights (if equipped).
Headlight Switch
Rotate the headlight switch clockwise to the
first detent for parking light and instrument
panel light operation. Rotate the headlight
switch to the second detent for headlight,
parking light, and instrument panel light opera -
tion.
2020_RAM_CHASSIS_CAB_OM_USA=GUID-6C67832B-7839-4CCF-BEFC-CDF988F949EA=1=en=.book Page 44
Page 47 of 516
GETTING TO KNOW YOUR VEHICLE45
Daytime Running Lights (DRLs)
The headlights on your vehicle will illuminate
when the engine is started and the transmis -
sion is in any gear except PARK. This provides a
constant "lights on" condition until the ignition is
placed in the OFF position. The lights illuminate
at less than half of normal intensity. If the
parking brake is applied, the Daytime Running
Lights (DRLs) will turn off. Also, if a turn signal is
activated, the DRL lamp on the same side of the
vehicle may turn off for the duration of the turn
signal activation. Once the turn signal is no
longer active, the DRL lamp will illuminate.
NOTE:
If allowed by law in the country in which the
vehicle was purchased, the Daytime Running
Lights can be turned on and off using the
Uconnect System, refer to “Uconnect Settings”
in “Multimedia” for further information.
High/Low Beam Switch
Push the multifunction lever toward the instru-
ment panel to switch the headlights to high
beam. Pulling the multifunction lever back
toward the steering wheel will turn the low
beams back on, or shut the high beams off.
Automatic High Beam Headlamp Control —
If Equipped
The Automatic High Beam Headlamp Control
system provides increased forward lighting at
night by automating high beam control through
the use of a digital camera mounted on the
inside rearview mirror or forward facing camera.
This camera detects vehicle specific light and
automatically switches from high beams to low
beams until the approaching vehicle is out of
view.
NOTE:
The Automatic High Beam Headlamp Control
can be turned on or off by selecting “ON”
under “Auto Dim High Beams” within your
Uconnect settings, as well as turning the
headlight switch to the AUTO position. Refer
to “Uconnect Settings” in “Multimedia” for
further information.
Broken, muddy, or obstructed headlights and
taillights of vehicles in the field of view will
cause headlights to remain on longer (closer
to the vehicle). Also, dirt, film, and other
obstructions on the windshield or camera
lens will cause the system to function improp -
erly.
To opt out of the Advanced Auto High Beam
Sensitivity Control (default) and enter
Reduced High Beam Sensitivity Control (not
recommended), on vehicles equipped with
mirror controlled automatic high beams and
without the forward facing camera, toggle the
high beam lever six full on/off cycles within
10 seconds of placing the ignition in the ON
position. The system will return to the default
setting when the ignition is OFF.
If the windshield or Automatic High Beam Head -
lamp Control mirror is replaced, the mirror must
be re-aimed to ensure proper performance. See
a local authorized dealer.
To Activate
1. The Automatic High Beams are enabled through the Uconnect system. Refer to
“Uconnect Settings” in “Multimedia” for
further information.
2. Turn the headlight switch to the AUTO head -
light position.
3. Push the multifunction lever away from you (toward front of vehicle) to engage the high
beam mode.
2
2020_RAM_CHASSIS_CAB_OM_USA=GUID-6C67832B-7839-4CCF-BEFC-CDF988F949EA=1=en=.book Page 45