buttons RAM CHASSIS CAB 2022 Owner's Manual
[x] Cancel search | Manufacturer: RAM, Model Year: 2022, Model line: CHASSIS CAB, Model: RAM CHASSIS CAB 2022Pages: 428, PDF Size: 20.18 MB
Page 146 of 428

144STARTING AND OPERATING
Adaptive Cruise Control (ACC) Operation
The buttons on the right side of the steering wheel
operate the ACC system.
Adaptive Cruise Control Buttons
Adaptive Cruise Control (ACC) Menu
The instrument cluster display will show the
current ACC system settings. The information it
displays depends on ACC system status. Push the ACC on/off button until one of the
following appears in the instrument cluster display:
Adaptive Cruise Control Off
When ACC is deactivated, the display will read
“Adaptive Cruise Control Off.”
Adaptive Cruise Control Ready
When ACC is activated, but the vehicle speed
setting has not been selected, the display will read
“Adaptive Cruise Control Ready.”
Adaptive Cruise Control Set
When the RES (+) or the SET(-) button is pushed,
the display will read “ACC SET.”
When ACC is set, the set speed will show in the
instrument cluster display.
The ACC screen may display once again if any of
the following ACC activity occurs:
System Cancel
Driver Override
System Off
ACC Proximity Warning
ACC Unavailable Warning
The instrument cluster display will return to the last
display selected after five seconds of no ACC
display activity.
Activating Adaptive Cruise Control (ACC)
The minimum set speed for the ACC system is
20 mph (32 km/h).
When the system is turned on and in the ready
state, the instrument cluster display will read “ACC
Ready.”
When the system is off, the instrument cluster
display will read “Adaptive Cruise Control (ACC)
Off.”
NOTE:You cannot engage ACC under the following condi -
tions:
When in 4WD Low
When brakes are applied
When the parking brake is applied
When the automatic transmission is in PARK,
REVERSE or NEUTRAL
When the vehicle speed is below the minimum
speed range
When the brakes are overheated
When the driver’s door is open at low speeds
When the driver’s seat belt is unbuckled at low
speed
When Electronic Stability Control (ESC) Full Off
mode is active
1 — Adaptive Cruise Control On/Off Button
2 — Fixed Speed Cruise Control On/Off Button
3 — CANCEL
4 — Distance Button
5 — RES (+)
6 — SET (-)
22_DPF_OM_EN_USC_t.book Page 144
Page 170 of 428
168STARTING AND OPERATING
(Continued)
AUX CAMERA — IF EQUIPPED
Your vehicle may be equipped with one or two AUX
Cameras, which display a rearview image from the
trailer on the touchscreen.
NOTE:Two Aux Cameras are only available on vehicles
with NAV equipped radios if the vehicle is not
equipped with a Center High Mounted Stop Lamp
(CHMSL) and Surround View Camera system.
Activation
The AUX Camera is activated by first pressing the
Backup Camera or Cargo Camera (if equipped)
button on the touchscreen, followed by the AUX
button located in the upper left corner of the rearview display. On vehicles with Surround View
Camera (if equipped), the AUX Camera can be
activated when the vehicle is in REVERSE by first
pressing the More Cams button in the Surround
view screen, followed by the AUX tab. The AUX
camera can also be activated when the vehicle is
in REVERSE by pressing the AUX button.
If equipped with two AUX Cameras, you can switch
between each camera by pressing the AUX 1 or
AUX 2 buttons on the Trailer Camera display.
Deactivation
The AUX Camera is deactivated by pressing the “X”
in the upper right corner of the touchscreen. This
will return the display back to the previously
displayed screen.
NOTE:
If the AUX button is pressed and no AUX Camera
is connected, the touchscreen will display a blue
screen along with the message “Camera
System Unavailable.” The screen can be exited
out by pressing the “X” in the upper right hand
corner. This will return the display back to the
previously displayed screen.
Zoom View is not available with the AUX Camera
feature.
The display will always default to the Trailer
Camera display AUX 1.
ENGINE RUNAWAY
Diesel engine runaway is a rare condition affecting
diesel engines, where the engine consumes its
own lubrication oil and runs at higher and higher
RPM until it overspeeds to a point where it destroys
itself due to either mechanical failure or engine
seizure through lack of lubrication.
CAUTION!
To avoid vehicle damage, Trailer Surround
View should only be used as a parking aid. The
Trailer Surround View Camera is unable to
view every obstacle or object in your drive
path.
To avoid vehicle damage, the vehicle must be
driven slowly when using Trailer Surround
View to be able to stop in time when an
obstacle is seen. It is recommended that the
driver look frequently over his/her shoulder
when using Trailer Surround View.
AUX 1 Camera Button
AUX 2 Camera Button
WARNING!
In case of engine runaway due to flammable
fumes from fuel spills or turbocharger oil leaks
being sucked into the engine, do the following to
help avoid personal injury and/or vehicle
damage:
Turn the ignition switch to the OFF position.
Using a CO2 or dry chemical type fire extin
-
guisher, direct the spray from the fire extin -
guisher into the grille on the passenger side so
that the spray enters the engine air intake.
22_DPF_OM_EN_USC_t.book Page 168
Page 181 of 428
STARTING AND OPERATING179
Integrated Trailer Brake Module (ITBM) —
If Equipped
Your vehicle may have an ITBM for Electric and
Electric Over Hydraulic (EOH) trailer brakes.
NOTE:This module has been designed and verified with
electric trailer brakes and new electric over
hydraulic systems. Some previous EOH systems
may not be compatible with ITBM.
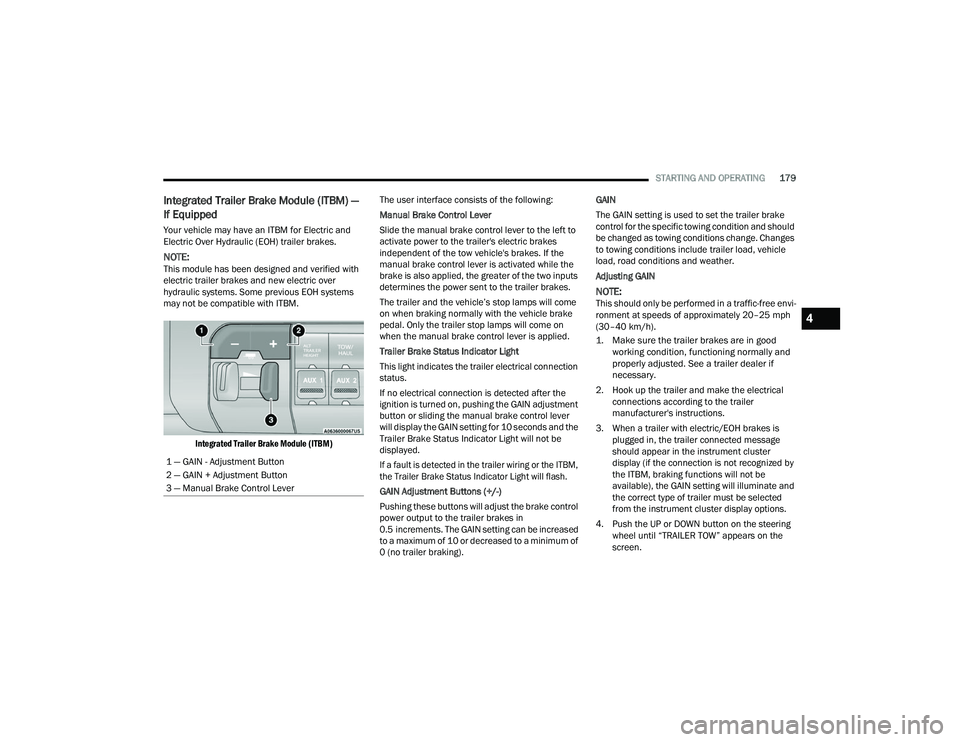
Integrated Trailer Brake Module (ITBM)
The user interface consists of the following:
Manual Brake Control Lever
Slide the manual brake control lever to the left to
activate power to the trailer's electric brakes
independent of the tow vehicle's brakes. If the
manual brake control lever is activated while the
brake is also applied, the greater of the two inputs
determines the power sent to the trailer brakes.
The trailer and the vehicle’s stop lamps will come
on when braking normally with the vehicle brake
pedal. Only the trailer stop lamps will come on
when the manual brake control lever is applied.
Trailer Brake Status Indicator Light
This light indicates the trailer electrical connection
status.
If no electrical connection is detected after the
ignition is turned on, pushing the GAIN adjustment
button or sliding the manual brake control lever
will display the GAIN setting for 10 seconds and the
Trailer Brake Status Indicator Light will not be
displayed.
If a fault is detected in the trailer wiring or the ITBM,
the Trailer Brake Status Indicator Light will flash.
GAIN Adjustment Buttons (+/-)
Pushing these buttons will adjust the brake control
power output to the trailer brakes in
0.5 increments. The GAIN setting can be increased
to a maximum of 10 or decreased to a minimum of
0 (no trailer braking). GAIN
The GAIN setting is used to set the trailer brake
control for the specific towing condition and should
be changed as towing conditions change. Changes
to towing conditions include trailer load, vehicle
load, road conditions and weather.
Adjusting GAIN
NOTE:This should only be performed in a traffic-free envi
-
ronment at speeds of approximately 20–25 mph
(30–40 km/h).
1. Make sure the trailer brakes are in good working condition, functioning normally and
properly adjusted. See a trailer dealer if
necessary.
2. Hook up the trailer and make the electrical connections according to the trailer
manufacturer's instructions.
3. When a trailer with electric/EOH brakes is plugged in, the trailer connected message
should appear in the instrument cluster
display (if the connection is not recognized by
the ITBM, braking functions will not be
available), the GAIN setting will illuminate and
the correct type of trailer must be selected
from the instrument cluster display options.
4. Push the UP or DOWN button on the steering wheel until “TRAILER TOW” appears on the
screen.
1 — GAIN - Adjustment Button
2 — GAIN + Adjustment Button
3 — Manual Brake Control Lever
4
22_DPF_OM_EN_USC_t.book Page 179
Page 182 of 428
180STARTING AND OPERATING
5. Push the RIGHT arrow on the steering wheel to enter “TRAILER TOW”.
6. Push the UP or DOWN buttons until the Trailer Brake Type appears on the screen.
7. Push the RIGHT arrow and then push the UP or DOWN buttons until the proper Trailer Brake
Type appears on the screen. 8. In a traffic-free environment, tow the trailer on
a dry, level surface at a speed of 20–25 mph
(30–40 km/h) and squeeze the manual brake
control lever completely.
9. If the trailer wheels lockup (indicated by squealing tires), reduce the GAIN setting; if the
trailer wheels turn freely, increase the GAIN
setting. Repeat steps 8 and 9 until the GAIN setting is at a
point just below trailer wheel lockup. If towing a
heavier trailer, trailer wheel lockup may not be
attainable even with the maximum GAIN setting of
10.
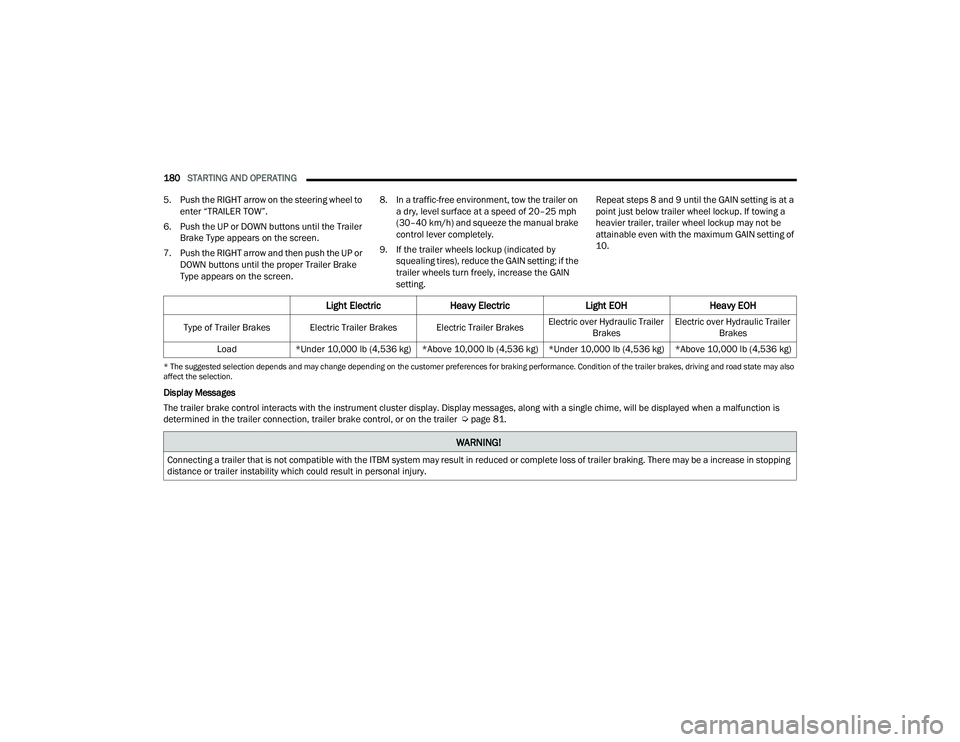
* The suggested selection depends and may change depending on the customer preferences for braking performance. Condition of the trailer brakes, driving and road state may also
affect the selection.
Display Messages
The trailer brake control interacts with the instrument cluster display. Display messages, along with a single chime, will be displayed when a malfunction is
determined in the trailer connection, trailer brake control, or on the trailer Ú
page 81.
Light ElectricHeavy Electric Light EOHHeavy EOH
Type of Trailer Brakes Electric Trailer Brakes Electric Trailer Brakes Electric over Hydraulic Trailer
Brakes Electric over Hydraulic Trailer
Brakes
Load *Under 10,000 lb (4,536 kg) *Above 10,000 lb (4,536 kg) *Under 10,000 lb (4,536 kg) *Above 10,000 lb (4,536 kg)
WARNING!
Connecting a trailer that is not compatible with the ITBM system may result in reduced or complete loss of trailer braking. There may be a increase in stopping
distance or trailer instability which could result in personal injury.
22_DPF_OM_EN_USC_t.book Page 180
Page 193 of 428
MULTIMEDIA191
UCONNECT SETTINGS
The Uconnect system uses a combination of
buttons on the touchscreen and buttons on the
faceplate located on the center of the instrument
panel. These buttons allow you to access and
change the Customer Programmable Features.
Many features can vary by vehicle.
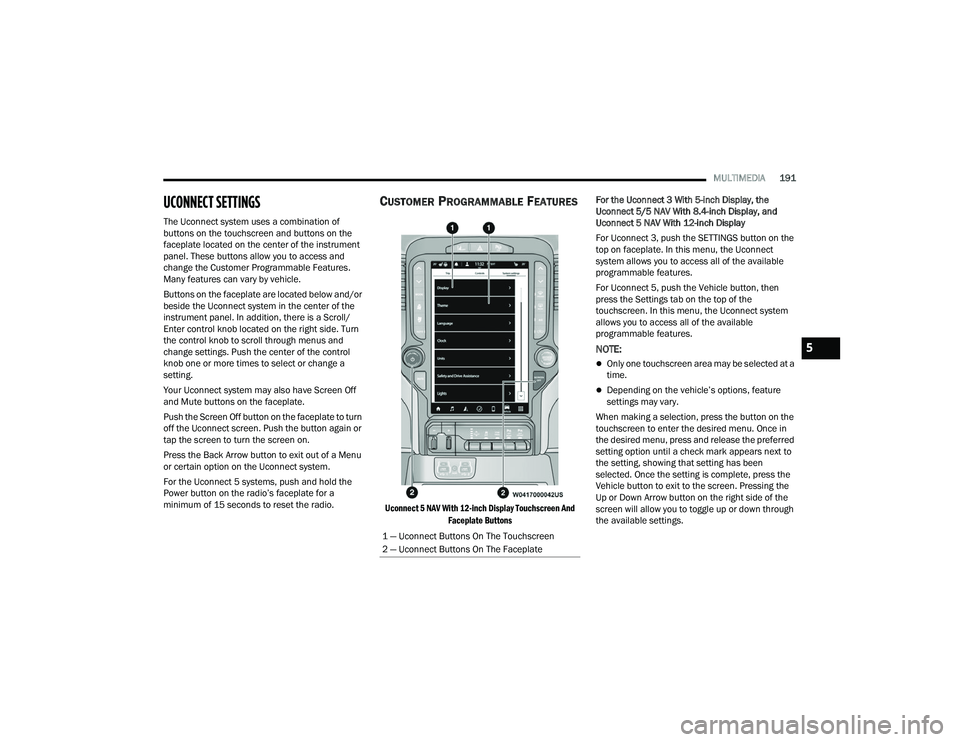
Buttons on the faceplate are located below and/or
beside the Uconnect system in the center of the
instrument panel. In addition, there is a Scroll/
Enter control knob located on the right side. Turn
the control knob to scroll through menus and
change settings. Push the center of the control
knob one or more times to select or change a
setting.
Your Uconnect system may also have Screen Off
and Mute buttons on the faceplate.
Push the Screen Off button on the faceplate to turn
off the Uconnect screen. Push the button again or
tap the screen to turn the screen on.
Press the Back Arrow button to exit out of a Menu
or certain option on the Uconnect system.
For the Uconnect 5 systems, push and hold the
Power button on the radio’s faceplate for a
minimum of 15 seconds to reset the radio.
CUSTOMER PROGRAMMABLE FEATURES
Uconnect 5 NAV With 12-inch Display Touchscreen And
Faceplate Buttons
For the Uconnect 3 With 5-inch Display, the
Uconnect 5/5 NAV With 8.4-inch Display, and
Uconnect 5 NAV With 12-inch Display
For Uconnect 3, push the SETTINGS button on the
top on faceplate. In this menu, the Uconnect
system allows you to access all of the available
programmable features.
For Uconnect 5, push the Vehicle button, then
press the Settings tab on the top of the
touchscreen. In this menu, the Uconnect system
allows you to access all of the available
programmable features.
NOTE:
Only one touchscreen area may be selected at a
time.
Depending on the vehicle’s options, feature
settings may vary.
When making a selection, press the button on the
touchscreen to enter the desired menu. Once in
the desired menu, press and release the preferred
setting option until a check mark appears next to
the setting, showing that setting has been
selected. Once the setting is complete, press the
Vehicle button to exit to the screen. Pressing the
Up or Down Arrow button on the right side of the
screen will allow you to toggle up or down through
the available settings.
1 — Uconnect Buttons On The Touchscreen
2 — Uconnect Buttons On The Faceplate
5
22_DPF_OM_EN_USC_t.book Page 191
Page 217 of 428
MULTIMEDIA215
Tune/Scroll Control
Turn the rotary TUNE/SCROLL control knob
clockwise to increase or counterclockwise to
decrease the radio station frequency. Push the
ENTER/BROWSE button to choose a selection.
Seek
The Seek Up and Down functions are activated by
pressing the double arrow buttons on the
touchscreen to the right and left of the radio
station display or by pushing the left steering wheel
audio control button up or down.
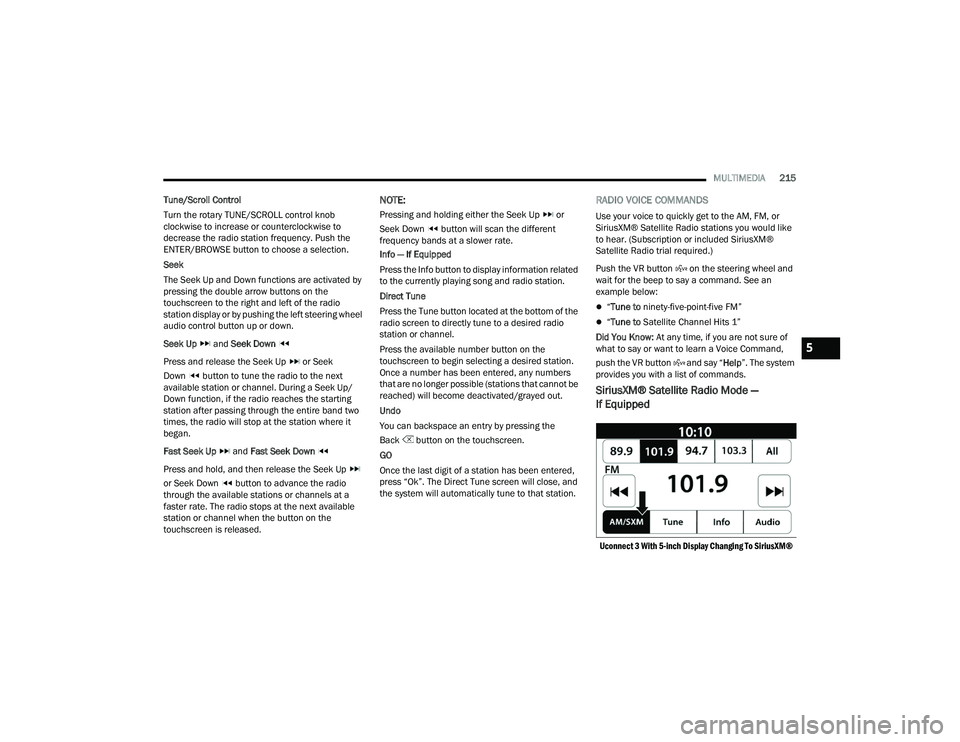
Seek Up and Seek Down
Press and release the Seek Up or Seek
Down button to tune the radio to the next
available station or channel. During a Seek Up/
Down function, if the radio reaches the starting
station after passing through the entire band two
times, the radio will stop at the station where it
began.
Fast Seek Up and Fast Seek Down
Press and hold, and then release the Seek Up
or Seek Down button to advance the radio
through the available stations or channels at a
faster rate. The radio stops at the next available
station or channel when the button on the
touchscreen is released.
NOTE:
Pressing and holding either the Seek Up or
Seek Down button will scan the different
frequency bands at a slower rate.
Info — If Equipped
Press the Info button to display information related
to the currently playing song and radio station.
Direct Tune
Press the Tune button located at the bottom of the
radio screen to directly tune to a desired radio
station or channel.
Press the available number button on the
touchscreen to begin selecting a desired station.
Once a number has been entered, any numbers
that are no longer possible (stations that cannot be
reached) will become deactivated/grayed out.
Undo
You can backspace an entry by pressing the
Back button on the touchscreen.
GO
Once the last digit of a station has been entered,
press “Ok”. The Direct Tune screen will close, and
the system will automatically tune to that station.
RADIO VOICE COMMANDS
Use your voice to quickly get to the AM, FM, or
SiriusXM® Satellite Radio stations you would like
to hear. (Subscription or included SiriusXM®
Satellite Radio trial required.)
Push the VR button on the steering wheel and
wait for the beep to say a command. See an
example below:
“ Tune to ninety-five-point-five FM”
“Tune to Satellite Channel Hits 1”
Did You Know: At any time, if you are not sure of
what to say or want to learn a Voice Command,
push the VR button and say “ Help”. The system
provides you with a list of commands.
SiriusXM® Satellite Radio Mode —
If Equipped
Uconnect 3 With 5-inch Display Changing To SiriusXM®
5
22_DPF_OM_EN_USC_t.book Page 215
Page 218 of 428
216MULTIMEDIA
SiriusXM® Satellite Radio uses direct
satellite-to-receiver broadcasting technology to
provide clear, coast-to-coast radio content.
SiriusXM® is a subscription-based service.
Visit siriusxm.com/getallaccess or review your
SiriusXM® Radio pamphlet in your Owner’s
Manual kit for more information.
SiriusXM® services require subscriptions, sold
separately after the trial included with the new
vehicle purchase. If you decide to continue your
service at the end of your trial subscription, the
plan you choose will automatically renew and bill at
then-current rates until you call SiriusXM® at
866-635-2349 to cancel. See SiriusXM®
Customer Agreement for complete terms at
www.siriusxm.com (US) or www.siriusxm.ca
(Canada).
All fees and programming subject to change.
SiriusXM® satellite service is available only to
those at least 18 and older in the 48 contiguous
US and D.C. Our SiriusXM® satellite service is also
available in Canada and Puerto Rico (with
coverage limitations). SiriusXM® Internet radio
service is available throughout their satellite
service area and in AK. © 2021 SiriusXM® Radio
Inc. SiriusXM® and all related marks and logos are
trademarks of SiriusXM® Radio Inc. This functionality is only available for radios
equipped with a Satellite receiver. In order to
receive satellite radio, the vehicle needs to be
outside with a clear view to the sky.
If the screen shows “Acquiring Signal”, you might
have to change the vehicle’s position in order to
receive a signal. In most cases, the satellite radio
does not receive a signal in underground parking
garages or tunnels.
No Subscription
Radios equipped with a Satellite receiver require a
subscription to the SiriusXM® Service. When the
radio does not have the necessary subscription,
the radio is able to receive the Preview channel
only.
Acquiring SiriusXM® Subscription
To activate the SiriusXM® Satellite Radio
subscription, US residents visit http://
www.siriusxm.com/getallaccess or call:
1-800-643-2112
Canadian residents visit https://www.siriusxm.ca/
or call: 1-888-539-7474.
NOTE:You will need to provide the SiriusXM® ID (RID)
located at the bottom of the Channel 0 screen.
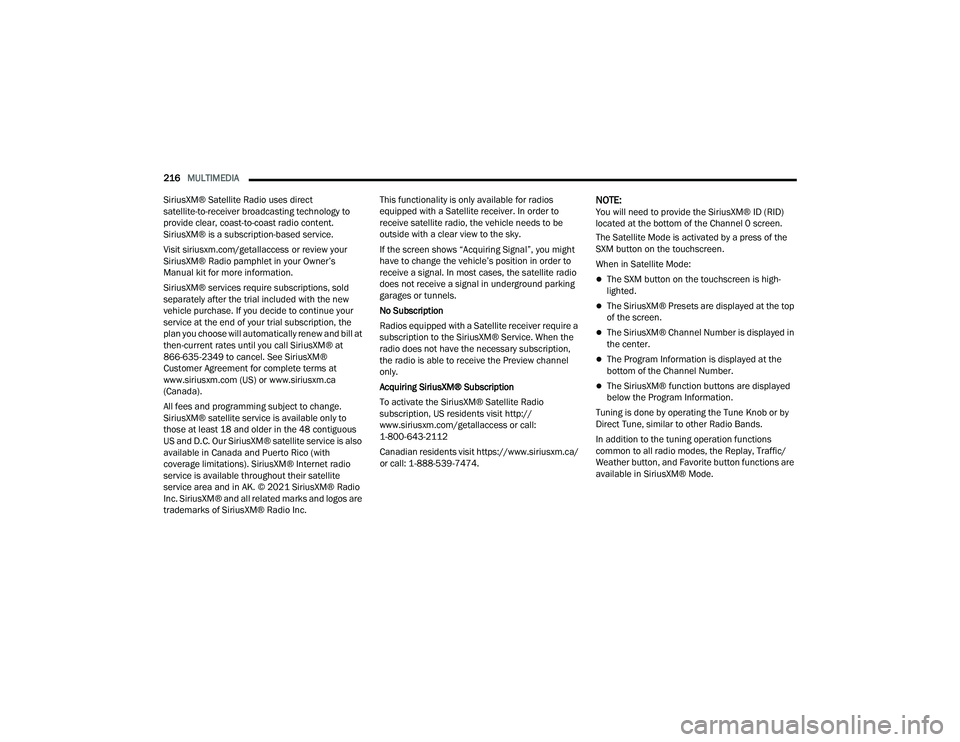
The Satellite Mode is activated by a press of the
SXM button on the touchscreen.
When in Satellite Mode:
The SXM button on the touchscreen is high -
lighted.
The SiriusXM® Presets are displayed at the top
of the screen.
The SiriusXM® Channel Number is displayed in
the center.
The Program Information is displayed at the
bottom of the Channel Number.
The SiriusXM® function buttons are displayed
below the Program Information.
Tuning is done by operating the Tune Knob or by
Direct Tune, similar to other Radio Bands.
In addition to the tuning operation functions
common to all radio modes, the Replay, Traffic/
Weather button, and Favorite button functions are
available in SiriusXM® Mode.
22_DPF_OM_EN_USC_t.book Page 216
Page 219 of 428

MULTIMEDIA217
Uconnect 3 With 5-inch Display SiriusXM® Satellite Radio
REPLAY
Replay provides a means to store and replay up to
22 minutes of music audio and 48 minutes of talk
radio. Once the channel is switched, content in
replay memory is lost.
Press the Replay button on the touchscreen. The
Play/Pause, Rewind/Forward and Live buttons will
display at the top of the screen, along with the
replay time.
You can exit by pressing the Replay button on the
touchscreen any time during the Replay Mode.1 — Browse
2 — Radio Bands
3 — Direct Tune
4 — Info Button
5 — Next Button
Play/Pause Press the Pause/Play button on the touchscreen to pause the playing of live or rewound content
at any time. Play can be resumed by pressing the Pause/Play button again on the touchscreen.
Rewind Press the Rewind button on the touchscreen to rewind the content in steps of five seconds.
Pressing the Rewind button on the touchscreen for more than two seconds rewinds the content.
The radio begins playing the content at the point at which the press is released.
Forward Each press of the Forward button on the touchscreen forwards the content in steps of five
seconds. Forwarding of the content can only be done when the content is previously rewound,
and therefore, cannot be done for live content. A continuous press of the Forward button on the
touchscreen also forwards the content. The radio begins playing the content at the point at which
the press is released.
Live Press the Live button on the touchscreen to resume the playing of live content.
5
22_DPF_OM_EN_USC_t.book Page 217
Page 221 of 428
MULTIMEDIA219
Add/Delete — If Equipped
Press the Add/Delete button on the touchscreen to
activate the League Scroll list. Press the chosen
league and a scroll list of all teams within the
league will appear, then you can select a team by
pressing the corresponding box. A check mark
appears for all teams that are chosen.
Remove Selection/Trash Can Icon
Press the Remove Selection tab at the top of the
screen. Press the Delete All button on the
touchscreen to delete all of the selections or press
the Trash Can icon next to the selection to be
deleted.
Alert Settings
Press the Alert Setting tab at the top of the screen.
The Alert Settings menu allows you to choose from
“Alert me to on-air games upon start” or “Alert
upon score update” or both when one or more of
your selections is airing on any of the SiriusXM®
channels.
Tune Start
Tune Start begins playing the current song from
the beginning when you tune to a music channel
using one of the 12 presets. This feature occurs
the first time the preset is selected during that
current song.
Setting Presets
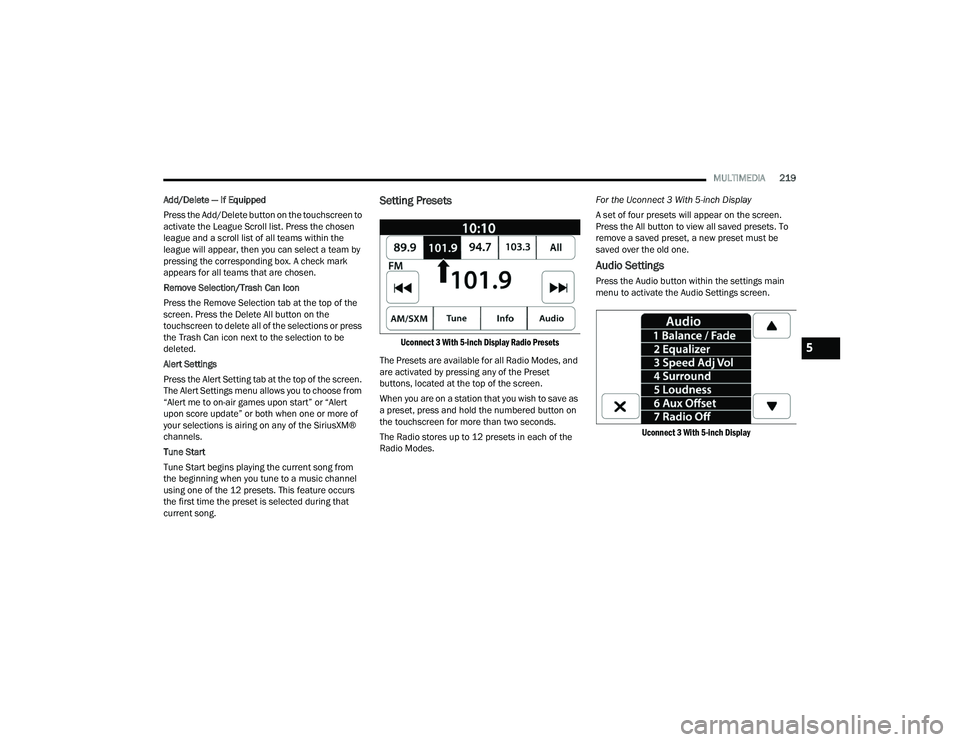
Uconnect 3 With 5-inch Display Radio Presets
The Presets are available for all Radio Modes, and
are activated by pressing any of the Preset
buttons, located at the top of the screen.
When you are on a station that you wish to save as
a preset, press and hold the numbered button on
the touchscreen for more than two seconds.
The Radio stores up to 12 presets in each of the
Radio Modes. For the Uconnect 3 With 5-inch Display
A set of four presets will appear on the screen.
Press the All button to view all saved presets. To
remove a saved preset, a new preset must be
saved over the old one.
Audio Settings
Press the Audio button within the settings main
menu to activate the Audio Settings screen.
Uconnect 3 With 5-inch Display
5
22_DPF_OM_EN_USC_t.book Page 219
Page 222 of 428

220MULTIMEDIA
Audio Setting Description
Balance/FadePress the Balance/Fade button on the touchscreen to balance audio between
the front speakers or fade the audio between the rear and front speakers.
Press the Front, Rear, Left or Right button or press and drag the red Speaker
icon to adjust the Balance/Fade.
Equalizer Press the + or – button or press and drag the level bar to increase or decrease
each of the equalizer bands. The level value, which spans between plus or
minus nine, is displayed at the top of each of the bands.
Speed Adjusted Volume The Speed Adjusted Volume is adjusted by selecting from “Off”, “1”, “2”, and
“3”. This alters the automatic adjustment of the audio volume with variation
to vehicle speed. Volume increases automatically as speed increases to
compensate for normal road noise.
Surround Sound — If Equipped When Surround Sound is on, you can hear audio coming from every direction
as in a movie theatre or home theatre system.
Loudness — If Equipped When Loudness is on, the sound quality at lower volumes improves.
AUX Volume Offset The AUX Volume Offset is adjusted by pressing + and – buttons. This alters the
AUX input audio volume. The level value, which spans between plus or minus
three, is displayed above the adjustment bar.
Auto Play — If Equipped The Auto Play feature begins playing music as soon as a USB Media device is
connected to one of the vehicle’s Media USB ports, when it is turned on. Press
“Off” to turn the setting off.
Radio Off With Door — If Equipped The Radio Off With Door feature, when activated, keeps the radio on until the
driver or passenger door is opened or until the Radio Off Delay selected time
has expired.
22_DPF_OM_EN_USC_t.book Page 220