low beam RAM CHASSIS CAB 2022 Owners Manual
[x] Cancel search | Manufacturer: RAM, Model Year: 2022, Model line: CHASSIS CAB, Model: RAM CHASSIS CAB 2022Pages: 428, PDF Size: 20.18 MB
Page 5 of 428
3
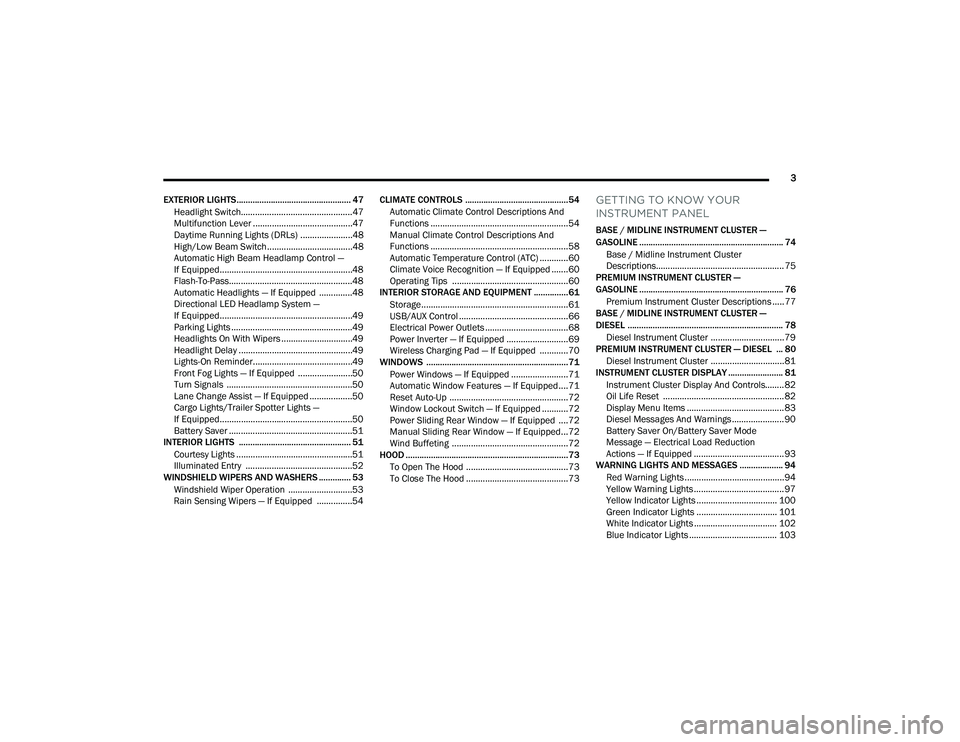
EXTERIOR LIGHTS.................................................. 47 Headlight Switch...............................................47
Multifunction Lever ..........................................47
Daytime Running Lights (DRLs) ......................48
High/Low Beam Switch....................................48
Automatic High Beam Headlamp Control —
If Equipped........................................................48
Flash-To-Pass....................................................48
Automatic Headlights — If Equipped ..............48
Directional LED Headlamp System —
If Equipped........................................................49
Parking Lights ...................................................49
Headlights On With Wipers ..............................49
Headlight Delay ................................................49
Lights-On Reminder..........................................49
Front Fog Lights — If Equipped .......................50
Turn Signals .....................................................50
Lane Change Assist — If Equipped ..................50
Cargo Lights/Trailer Spotter Lights —
If Equipped........................................................50
Battery Saver ....................................................51
INTERIOR LIGHTS ................................................. 51
Courtesy Lights .................................................51
Illuminated Entry .............................................52
WINDSHIELD WIPERS AND WASHERS .............. 53
Windshield Wiper Operation ...........................53
Rain Sensing Wipers — If Equipped ...............54 CLIMATE CONTROLS .............................................54
Automatic Climate Control Descriptions And
Functions ..........................................................54
Manual Climate Control Descriptions And
Functions ..........................................................58
Automatic Temperature Control (ATC) ............60
Climate Voice Recognition — If Equipped .......60
Operating Tips .................................................60
INTERIOR STORAGE AND EQUIPMENT ............... 61
Storage..............................................................61
USB/AUX Control ..............................................66
Electrical Power Outlets ...................................68
Power Inverter — If Equipped ..........................69
Wireless Charging Pad — If Equipped ............70
WINDOWS ..............................................................71
Power Windows — If Equipped ........................71
Automatic Window Features — If Equipped....71
Reset Auto-Up ..................................................72
Window Lockout Switch — If Equipped ...........72
Power Sliding Rear Window — If Equipped ....72
Manual Sliding Rear Window — If Equipped...72
Wind Buffeting .................................................72
HOOD .......................................................................73
To Open The Hood ...........................................73
To Close The Hood ...........................................73
GETTING TO KNOW YOUR
INSTRUMENT PANEL
BASE / MIDLINE INSTRUMENT CLUSTER —
GASOLINE ............................................................... 74Base / Midline Instrument Cluster
Descriptions...................................................... 75
PREMIUM INSTRUMENT CLUSTER —
GASOLINE ............................................................... 76
Premium Instrument Cluster Descriptions ..... 77
BASE / MIDLINE INSTRUMENT CLUSTER —
DIESEL .................................................................... 78
Diesel Instrument Cluster ............................... 79
PREMIUM INSTRUMENT CLUSTER — DIESEL ... 80
Diesel Instrument Cluster ............................... 81
INSTRUMENT CLUSTER DISPLAY ........................ 81
Instrument Cluster Display And Controls........ 82
Oil Life Reset ................................................... 82
Display Menu Items ......................................... 83
Diesel Messages And Warnings ...................... 90
Battery Saver On/Battery Saver Mode
Message — Electrical Load Reduction
Actions — If Equipped ...................................... 93
WARNING LIGHTS AND MESSAGES ................... 94
Red Warning Lights ..........................................94
Yellow Warning Lights ...................................... 97
Yellow Indicator Lights .................................. 100 Green Indicator Lights .................................. 101White Indicator Lights ................................... 102
Blue Indicator Lights ..................................... 103
22_DPF_OM_EN_USC_t.book Page 3
Page 50 of 428
48GETTING TO KNOW YOUR VEHICLE
DAYTIME RUNNING LIGHTS (DRLS)
The Daytime Running Lights (DRLs) come on
whenever the engine is running, and the low
beams are not on. The lights will remain on until
the ignition is placed in the OFF or ACC position, or
the parking brake is engaged.
NOTE:
For vehicles sold in Canada, the Daytime
Running Lights will automatically deactivate
when the front fog lights are turned on.
If allowed by law in the country in which the
vehicle was purchased, the Daytime Running
Lights can be turned on and off using the
Uconnect system Úpage 191.
On some vehicles, the Daytime Running Lights
may deactivate, or reduce intensity, on one side
of the vehicle (when a turn signal is activated on
that side), or on both sides of the vehicle (when
the hazard warning lights are activated).
HIGH/LOW BEAM SWITCH
Push the multifunction lever toward the instrument
panel to switch the headlights to high beam.
Pulling the multifunction lever back toward the
steering wheel will turn the low beams back on.
AUTOMATIC HIGH BEAM HEADLAMP
C
ONTROL — IF EQUIPPED
The Automatic High Beam Headlamp Control
system provides increased forward lighting at night
by automating high beam control through the use
of a camera mounted on the inside rearview mirror
or a windshield mounted camera. These cameras
detect vehicle specific light and automatically
switch from high beams to low beams until the
approaching vehicle is out of view.
NOTE:
The Automatic High Beam Headlamp Control
can be turned on or off by selecting “ON” under
“Auto Dim High Beams” within your Uconnect
Settings Ú page 191, as well as turning the
headlight switch to the AUTO position.
Broken, muddy, or obstructed headlights and
taillights of vehicles in the field of view will
cause headlights to remain on longer (closer to
the vehicle). Also, dirt, film, and other obstruc -
tions on the windshield or camera lens will
cause the system to function improperly.
If the windshield or Automatic High Beam Head -
lamp Control mirror is replaced, the mirror must
be re-aimed to ensure proper performance. See
a local authorized dealer.
To opt out of the Automatic High-Beam Sensi -
tivity Control (default) and enter Reduced
High-Beam Sensitivity Control (not recom -
mended), toggle the multifunction lever six full
on/off cycles within 10 seconds of ignition ON.
The system will return to the default setting
when the ignition is placed in the OFF position.
FLASH-TO-PASS
You can signal another vehicle with your headlights
by lightly pulling the multifunction lever toward you.
This will cause the high beam headlights to turn on,
and remain on, until the lever is released.
AUTOMATIC HEADLIGHTS — IF EQUIPPED
This system automatically turns your headlights on
or off based on ambient light levels. To turn the
system on, rotate the headlight switch to the AUTO
position.
When the system is on, the Headlight Delay feature
is also on. This means the headlights will stay on
for up to 90 seconds after you place the ignition
into the OFF position. To turn the automatic
headlights off, turn the headlight switch out of the
AUTO position.
NOTE:The engine must be running before the headlights
will come on in the Automatic mode.
22_DPF_OM_EN_USC_t.book Page 48
Page 51 of 428
GETTING TO KNOW YOUR VEHICLE49
DIRECTIONAL LED HEADLAMP
S
YSTEM — IF EQUIPPED
This is a system consisting of LED (low/high beam)
headlights that incorporate dynamic cornering with
5-degree inboard/15-degree outboard swivel. The
headlights continuously and automatically adapt
to the driving conditions around bends or when
cornering based on steering wheel angle.
The system directs the headlights to light up the
road in the best way, taking into account the speed
of the vehicle and the bend or corner angle, as well
as the speed of the vehicle while the steering
wheel is being turned.
The adaptive lights are automatically activated
when the vehicle is traveling above approximately
5 mph (8 km/h).
This system can be turned on/off through the
Uconnect Settings under “Steering Directed
Lights” Ú page 191.
PARKING LIGHTS
To turn on the parking lights and instrument panel
lights, rotate the headlight switch clockwise. To
turn off the parking lights, rotate the headlight
switch back to the O (off) position.
NOTE:For vehicles sold in Canada, the first headlight
switch position is the parking lights and instrument
panel lights position (instead of the OFF position).
To turn off the parking lights, rotate the headlight
switch to the AUTO position.
HEADLIGHTS ON WITH WIPERS
If your vehicle is equipped with Automatic
Headlights, it also has this
customer-programmable feature. When your
headlights are in the automatic mode and the
engine is running, they will automatically turn on
when the wiper system is on. This feature is
programmable through the Uconnect system
Úpage 191.
If your vehicle is equipped with the Rain Sensing
Wiper system Ú page 54, and it is activated, the
headlights will automatically turn on after the
wipers complete five wipe cycles within
approximately one minute, and they will turn off
approximately four minutes after the wipers
completely stop.
NOTE:When your headlights come on during the daytime,
the instrument panel lights will automatically dim
to the lower nighttime intensity.
HEADLIGHT DELAY
To assist when exiting the vehicle, the headlight
delay feature will leave the headlights on for up to
90 seconds. This delay is initiated when the
ignition is placed in the OFF position while the
headlight switch is on, and then the headlight
switch is cycled off. Headlight delay can be
canceled by either turning the headlight switch on
then off, or by placing the ignition in the ON
position.
NOTE:
This feature can be programmed through the
Uconnect system Ú page 191.
The headlight delay feature is automatically
activated if the headlight switch is left in the
AUTO position when the ignition is placed in the
OFF position.
LIGHTS-ON REMINDER
If the headlights, parking lights, or cargo lights are
left on after the ignition is placed in the OFF
position, a chime will sound and a message will
appear in the instrument cluster display when the
driver’s door is opened.
2
22_DPF_OM_EN_USC_t.book Page 49
Page 52 of 428

50GETTING TO KNOW YOUR VEHICLE
FRONT FOG LIGHTS — IF EQUIPPED
To activate the front fog lights, turn on the parking
lights or low beam headlights and push the fog
light switch located within the headlight switch.
Pushing the fog light switch a second time will turn
the front fog lights off.
Fog Light Switch
Fog Light Switch (Vehicles Sold In Canada Only)
TURN SIGNALS
Move the multifunction lever up or down to
activate the turn signals. The arrows on each side
of the instrument cluster flash to show proper
operation.
NOTE:If either light remains on and does not flash, or
there is a very fast flash rate, check for a defective
outside light bulb.
LANE CHANGE ASSIST — IF EQUIPPED
Lightly push the multifunction lever up or down,
without moving beyond the detent, and the turn
signal will flash three times then automatically turn
off.
CARGO LIGHTS/TRAILER SPOTTER
L
IGHTS — IF EQUIPPED
The cargo lights (if equipped) and trailer spotter
lights (if equipped) are turned on by pushing the
cargo lights button located on the lower half of the
headlight switch.
Cargo Lights Button On Headlight Switch
Cargo Lights Button (Vehicles Sold In Canada Only)
The cargo lights will turn on for approximately
60 seconds when a key fob unlock button is
pushed, as part of the Illuminated Entry feature.
When these lights are activated using the button
on the headlight switch, the trailer spotter lights
will remain illuminated when the vehicle
22_DPF_OM_EN_USC_t.book Page 50
Page 89 of 428

GETTING TO KNOW YOUR INSTRUMENT PANEL87
Restore Defaults
Cancel
Restore
Settings — If Equipped
Personal Settings allows the driver to set and recall
features when the transmission is in PARK.
Push and release the up or down arrow
button until Settings displays in the instrument
cluster display. Follow the prompts to display and set any of the
following Vehicle Settings.
NOTE:Your vehicle may be equipped with the following
settings.
If equipped with a base radio (Non-Touch
-
screen) Vehicle Settings will be included in the
instrument cluster display.
If equipped with a Touchscreen radio, the
Vehicle Settings will be included in the radio
head unit.
Oil Pressure
Oil
Temperature Battery
Voltage
Transmission Temperature Oil LifeTurbo Boost —
If Equipped
Exhaust Brake — If Equipped Fuel Filter Life
— If Equipped
Lower Left and Lower Right — If Equipped
Setting Names Setting Names Abbreviated
(Left Submenu Layer) Submenus (Right Submenu Layer)
Language Select
LanguageEnglish, Spanish, French, Arabic
Units UnitsU.S.; Metric
ParkSense ParkSense
Front Volume — Low; Medium; High
Rear Volume — Low; Medium; High
Tilt Mirror in Reverse Tilt Mirror in ROn; Off
Rain Sensing Wipers Auto WipersOn; Off
Hill Start Assist Hill Start AssistOn; Off
Headlights Off Delay Lights Off Delay0 seconds; 30 seconds; 60 seconds; 90 seconds
Illuminated Approach Lights w/ Unlock0 seconds; 30 seconds; 60 seconds; 90 seconds
Headlights On with Wipers Lights w/ WipersOn; Off
Automatic High beams Auto High beamsOn; Off
Daytime Running Lights Daytime LightsOn; Off
3
22_DPF_OM_EN_USC_t.book Page 87
Page 105 of 428
GETTING TO KNOW YOUR INSTRUMENT PANEL103
BLUE INDICATOR LIGHTS
High Beam Indicator Light
This indicator light will illuminate to
indicate that the high beam headlights
are on. With the low beams activated,
push the multifunction lever forward
(toward the front of the vehicle) to turn on the high
beams. Pull the multifunction lever rearward
(toward the rear of the vehicle) to turn off the high
beams. If the high beams are off, pull the lever
toward you for a temporary high beam on, "flash to
pass" scenario.
ONBOARD DIAGNOSTIC SYSTEM — OBD II
Your vehicle is equipped with a sophisticated
Onboard Diagnostic system called OBD II. This
system monitors the performance of the
emissions, engine, and transmission control
systems. When these systems are operating
properly, your vehicle will provide excellent
performance and fuel economy, as well as engine
emissions well within current government
regulations.
If any of these systems require service, the OBD II
system will turn on the Malfunction Indicator Light
(MIL). It will also store diagnostic codes and other
information to assist your service technician in making repairs. Although your vehicle will usually
be drivable and not need towing, see an authorized
dealer for service as soon as possible.ONBOARD DIAGNOSTIC SYSTEM
(OBD II) CYBERSECURITY
Your vehicle is required to have an OBD II and a
connection port to allow access to information
related to the performance of your emissions
controls. Authorized service technicians may need
to access this information to assist with the
diagnosis and service of your vehicle and
emissions system Ú
page 190.
CAUTION!
Prolonged driving with the MIL on could cause
further damage to the emission control
system. It could also affect fuel economy and
driveability. The vehicle must be serviced
before any emissions tests can be performed.
If the MIL is flashing while the vehicle is
running, severe catalytic converter damage
and power loss will soon occur. Immediate
service is required.
WARNING!
ONLY an authorized service technician should
connect equipment to the OBD II connection
port in order to read the VIN, diagnose, or
service your vehicle.
If unauthorized equipment is connected to the
OBD II connection port, such as a
driver-behavior tracking device, it may:
Be possible that vehicle systems,
including safety related systems, could be
impaired or a loss of vehicle control could
occur that may result in an accident
involving serious injury or death.
Access, or allow others to access, infor -
mation stored in your vehicle systems,
including personal information.
3
22_DPF_OM_EN_USC_t.book Page 103
Page 184 of 428
182STARTING AND OPERATING
When activated the feature will enable all of the
exterior lights sequentially for up to five minutes
allowing time to walk around and verify
functionality. The following exterior lights will
remain on for the entirety of the sequence:
Park/Running Lamps
Side Marker Lamps (if equipped)
License Lamp
Signature Lamp (if equipped)
Low Beams
Fog Lamps (if equipped)
Daytime Running Lamps
During this time the following lights will sequence,
each activating for three seconds:
1. Brake and CHMSL (third brake light)
2. Left turn signal
3. Right turn signal
4. Reverse Lamps
5. High Beam
This light check sequence will continue for a total
of five minutes. The sequence will only activate if the following
conditions are met:
Vehicle is equipped with the Trailer Tow
Package
Vehicle is in PARK
Vehicle is not in motion
Ignition in ACC or RUN
Remote start is inactive
Brakes are not applied
Left turn signal is not applied
Right turn signal not applied
Hazard switch is not applied
The sequence will cancel if any of the following
conditions occur:
Brakes are applied
Vehicle is shifted from PARK
Vehicle is no longer stationary
Left turn signal activated from stalk
Right turn signal is activated from stalk
Hazard switch is activated
Any button on the key fob is pushed
Ignition button is pushed
High Beam stalk position is changed
Sequence is canceled in the instrument cluster
TOWING TIPS
Before setting out on a trip, practice turning,
stopping, and backing up the trailer in an area
located away from heavy traffic.
Automatic Transmission
The DRIVE range can be selected when towing. The
transmission controls include a drive strategy to
avoid frequent shifting when towing. However, if
frequent shifting does occur while in DRIVE, select
TOW/HAUL mode or select a lower gear range
(using the Electronic Range Select (ERS) shift
control).
NOTE:Using TOW/HAUL mode or selecting a lower gear
range (using the ERS shift control) while operating
the vehicle under heavy loading conditions will
improve performance and extend transmission life
by reducing excessive shifting and heat build-up.
This action will also provide better engine braking.
6-Speed Automatic Transmission Only
When towing a loaded trailer up steep grades at
low speeds (20 mph [32 km/h] or below), holding
your vehicle in FIRST gear (using the ERS shift
control) can help to avoid transmission
overheating.
22_DPF_OM_EN_USC_t.book Page 182
Page 205 of 428
MULTIMEDIA203
Lights
When the Lights button is pressed on the touchscreen, the system displays the options related to the vehicle’s exterior and interior lights.
NOTE:
When the “Daytime Running Lights” feature is selected, the daytime running lights can be turned on or off. This feature is only allowed by law in the country
of the vehicle purchased.
Depending on the vehicle’s options, feature settings may vary.
Setting Name Description
Headlight Off Delay This setting will allow you to set the amount of time it takes for the headlights
to shut off after the vehicle is turned off. The available settings are “0 sec”,
“30 sec”, “60 sec”, and “90 sec”.
Headlight Illumination On Approach This setting will allow you to set the amount of time it takes for the headlights
to shut off after the vehicle is unlocked. The available settings are “0 sec”,
“30 sec”, “60 sec”, and “90 sec”.
Headlights with Wipers This setting will turn the headlights on when the wipers are activated.
Daytime Running Lights This setting will allow you to turn the Daytime Running Lights on or off.
Flash Lights With Lock This setting will allow you to turn the flashing of the lights when the Lock
button is pushed on the key fob on or off.
Auto Dim High Beams This setting will allow you to turn the Auto Dim High Beams on or off.
Steering Directed Lights This setting will turn the headlights with the steering wheel. The available
options are “On” and “Off”.
5
22_DPF_OM_EN_USC_t.book Page 203
Page 311 of 428

SAFETY309
PERIODIC SAFETY CHECKS YOU SHOULD
M
AKE OUTSIDE THE VEHICLE
Tires
Examine tires for excessive tread wear and uneven
wear patterns. Check for stones, nails, glass, or
other objects lodged in the tread or sidewall.
Inspect the tread for cuts and cracks. Inspect
sidewalls for cuts, cracks, and bulges. Check the
lug nuts/bolt torque for tightness. Check the tires
(including spare) for proper cold inflation pressure.
Lights
Have someone observe the operation of brake
lights and exterior lights while you work the
controls. Check turn signal and high beam
indicator lights on the instrument panel.
Door Latches
Check for proper closing, latching, and locking.
Fluid Leaks
Check area under the vehicle after overnight
parking for fuel, coolant, oil, or other fluid leaks.
Also, if gasoline fumes are detected or if fuel or
brake fluid leaks are suspected, the cause should
be located and corrected immediately.
EXHAUST GAS The best protection against carbon monoxide entry
into the vehicle body is a properly maintained
engine exhaust system.
Whenever a change is noticed in the sound of the
exhaust system, when exhaust fumes can be
detected inside the vehicle, or when the underside
or rear of the vehicle is damaged, have an
authorized dealer inspect the complete exhaust
system and adjacent body areas for broken,
damaged, deteriorated, or mispositioned parts.
Open seams or loose connections could permit
exhaust fumes to seep into the passenger
compartment. In addition, inspect the exhaust
system each time the vehicle is raised for
lubrication or oil change. Replace as required.
WARNING!
Exhaust gases can injure or kill. They contain
carbon monoxide (CO), which is colorless and
odorless. Breathing it can make you
unconscious and can eventually poison you. To
avoid breathing (CO), follow these safety tips:
Do not run the engine in a closed garage or in
confined areas any longer than needed to
move your vehicle in or out of the area.
If you are required to drive with the trunk/lift -
gate/rear doors open, make sure that all
windows are closed and the climate control
BLOWER switch is set at high speed. DO NOT
use the recirculation mode.
If it is necessary to sit in a parked vehicle with
the engine running, adjust your heating or
cooling controls to force outside air into the
vehicle. Set the blower at high speed.
6
22_DPF_OM_EN_USC_t.book Page 309
Page 374 of 428

372SERVICING AND MAINTENANCE
Exterior Bulbs
Bulb Name Bulb Number
Low Beam (Halogen Reflector Headlamp) H11LL
High Beam (Halogen Reflector Headlamp) 9005LL
Low & High Beam (LED Reflector Headlamp) LED (Serviced at an authorized dealer)
Low & High Beam (LED Projector Headlamp) LED (Serviced at an authorized dealer)
Turn Signal / Front Position (Halogen Reflector Headlamp) 7444NA
Turn Signal (LED Projector Headlamp) LED (Serviced at an authorized dealer)
Front Position (LED Headlamps) LED (Serviced at an authorized dealer)
Turn Signal (LED Reflector Headlamp) 7444NA
Front Side Marker (Headlamps) LED (Serviced at an authorized dealer)
Front Fog Lamps (Halogen Reflector Headlamp) H11LL
Front Fog Lamps (LED Headlamp) LED (Serviced at an authorized dealer)
Side Indicators (Front And Side View Mirror) LED (Serviced at an authorized dealer)
Center High Mounted Stop Lamp (CHMSL) 921
Cab Roof Marker Lamps 194NA
Box Off Tail Lamps – Stop/Turn/Tail/License Plate 1157
Box Off Tail Lamps – Back Up 1156
22_DPF_OM_EN_USC_t.book Page 372