navigation RAM CHASSIS CAB 2023 Owners Manual
[x] Cancel search | Manufacturer: RAM, Model Year: 2023, Model line: CHASSIS CAB, Model: RAM CHASSIS CAB 2023Pages: 444, PDF Size: 20.51 MB
Page 2 of 444

The driver’s primary responsibility is the safe operation of the vehicle. Driving while distracted can result in loss of vehicle control, resulting in an accident and personal injury. FCA US LLC strongly recommends that the driver use extreme caution when using any device or feature that may take their attention off the road. Use of any electrical devices, such as cellular telephones, computers, portable radios, vehicle navigation or other devices, by the driver while the vehicle is moving is dangerous and could lead to a serious accident. Texting while driving is also dangerous and should never be done while the vehicle is moving. If you find yourself unable to devote your full attention to vehicle operation, pull off the road to a safe location and stop your vehicle. Some states or provinces prohibit the use of cellular telephones or texting while driving. It is always the driver’s responsibility to comply with all local laws.
This Owner’s Manual has been prepared to help you get acquainted with your new Ram brand vehicle and to provide a convenient reference for common questions.
Not all features shown in this manual may apply to your vehicle. For additional information on accessories to help personalize your vehicle, visit mopar.com/om (USA), owners.mopar.ca (Canada) or your local Ram brand dealer.
This Owner’s Manual is intended to familiarize you with the important features of your vehicle. Your most up-to-date Owner’s Manual, Navigation/Uconnect manuals and Warranty Booklet can be found by visiting the website on the back cover.
U.S. Residents: If you are the first registered retail owner of your vehicle, you may obtain a complimentary printed copy of the Warranty Booklet by calling 1-866-726-4636 or by contacting your dealer. Replacement kits can be purchased by visiting www.techauthority.com.
Canadian Residents: If you are the first registered retail owner of your vehicle, you may obtain a complimentary printed copy of the Warranty Booklet or purchase a replacement kit by calling 1-800-387-1143 or by contacting your dealer.
DRIVING AND ALCOHOL
Drunk driving is one of the most frequent causes of accidents. Your driving ability can be seriously impaired with blood alcohol levels far below the legal minimum. If you are drinking, don’t drive. Ride with a designated non-drinking driver, call a cab, a friend or use public transportation.
WARNING
Driving after drinking can lead to an accident. Your perceptions are less sharp, your reflexes are slower and your judgment is impaired when you have been drinking. Never drink and then drive.
WARNING: Operating, servicing and maintaining a passenger vehicle or off-highway
motor vehicle can expose you to chemicals including engine exhaust, carbon monoxide, phthalates,
and lead, which are known to the State of California to cause cancer and birth defects or other
reproductive harm. To minimize exposure, avoid breathing exhaust, do not idle the engine except
as necessary, service your vehicle in a well-ventilated area and wear gloves or wash your hands frequently
when servicing your vehicle. For more information go to www.P65Warnings.ca.gov/passenger-vehicle.
This Owner’s Manual illustrates and describes the operation of features and equipment that are either standard or optional on this vehicle. This manual may also include a description of features and equipment that are no longer available or were not ordered on this vehicle. Please disregard any features and equipment described in this manual that are not on this vehicle. FCA US LLC reserves the right to make changes in design and specifications, and/or make additions to or improvements to its products without imposing any obligation upon itself to install them on products previously manufactured.
With respect to any vehicles sold in Canada, the name FCA US LLC shall be deemed to be deleted and the name FCA Canada Inc. used in substitution therefore.
FCA US LLC reserves the right to modify the terms or discontinue the Roadside Assistance Program at any time. The Roadside Assistance Program is subject to restrictions and conditions of use, that are determined solely by FCA US LLC.
ROADSIDE ASSISTANCE 24 HOURS, 7 DAYS A WEEK AT YOUR SERVICE. CALL 1-800-521-2779 OR VISIT CHRYSLER.RSAHELP.COM (USA) CALL 1-800-363-4869 OR VISIT FCA.ROADSIDEAID.COM (CANADA) SERVICES: Flat Tire Service, Out Of Gas/Fuel Delivery, Battery Jump Assistance, Lockout Service and Towing Service
Please see the Customer Assistance chapter in this Owner’s Manual for further information.
Page 31 of 444
GETTING TO KNOW YOUR VEHICLE29
BASIC VOICE COMMANDS
The following basic Voice Commands can be given
at any point while using your Uconnect system.
Push the VR button or for the Uconnect 5/
5 NAV, say the vehicle’s Wake Up word, “Hey
Uconnect”. After the beep, say:
“Cancel ” to stop a current voice session
“Help ” to hear a list of suggested Voice
Commands
“ Repeat ” to listen to the system prompts again
Notice the visual cues that inform you of your voice
recognition system’s status. Cues appear on the
touchscreen.
NOTE:On Uconnect 5 systems, the factory default Wake
Up word is set to “Hey Uconnect” and can be repro -
grammed through the Uconnect Settings.
GET STARTED
All you need to control your Uconnect system with
your voice are the buttons on your steering wheel.
Helpful hints for using Voice Recognition:
Reduce background noise. Wind and passenger
conversations are examples of noise that may
impact recognition.
Speak clearly at a normal pace and volume
while facing straight ahead.
Each time you give a Voice Command, first push
the VR button, wait until after the beep, then say
your Voice Command. You can also say the
vehicle “Wake Up” word and state your
command. Some examples of “Wake up” words
include “Hey Uconnect” or “Hey Ram”.
A passenger can press the VR button shortcut
on the radio status bar to also issue a
command.
You can interrupt the help message or system
prompts by pushing the VR button and saying a
Voice Command from the current category.
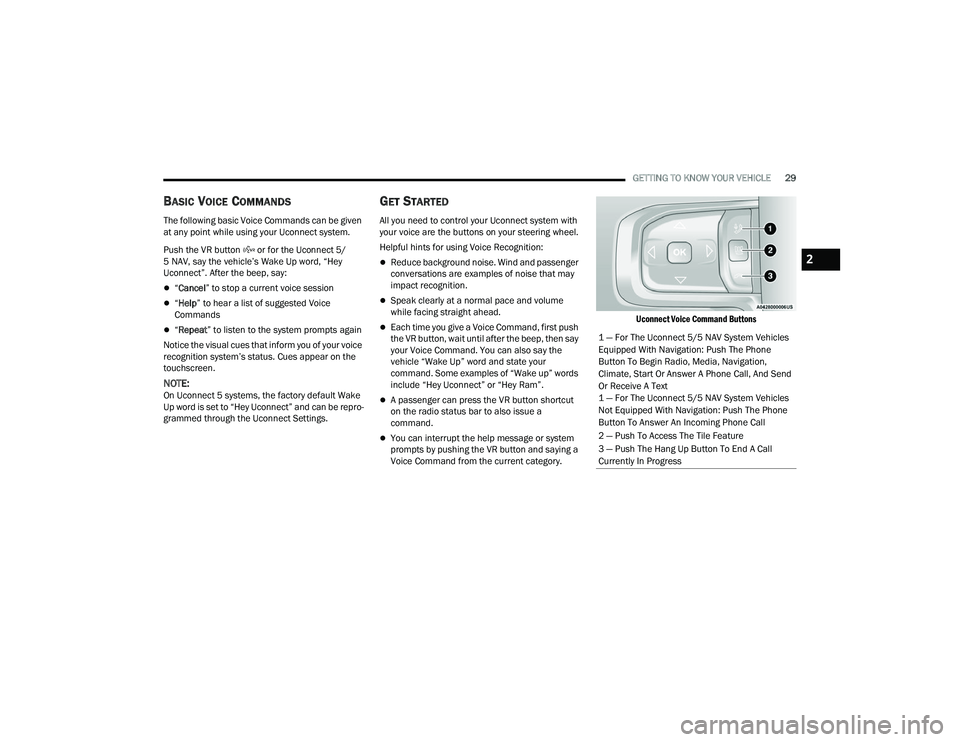
Uconnect Voice Command Buttons
1 — For The Uconnect 5/5 NAV System Vehicles
Equipped With Navigation: Push The Phone
Button To Begin Radio, Media, Navigation,
Climate, Start Or Answer A Phone Call, And Send
Or Receive A Text
1 — For The Uconnect 5/5 NAV System Vehicles
Not Equipped With Navigation: Push The Phone
Button To Answer An Incoming Phone Call
2 — Push To Access The Tile Feature
3 — Push The Hang Up Button To End A Call
Currently In Progress
2
23_DPF_OM_EN_USC_t.book Page 29
Page 93 of 444
GETTING TO KNOW YOUR INSTRUMENT PANEL91
NOTE:
Holding the up / down or left / right
arrow button will loop the user through the
currently selected menu or options presented
on the screen.
Main menu and submenus wrap for continuous
scrolling.
Upon returning to a main menu, the last
submenu screen viewed within that main menu
will be displayed.
OK Button:
For Digital Speedometer:
Pushing the OK button changes units (mph or
km/h).
Menu Button
Press Menu button for Home Screen display.
Navigate left or right to highlight desired
tile. Press OK to select desired. Once OK is
pressed, cluster will navigate to selected
submenu (e.g. “Audio”).
NOTE:Exiting Home Screen Speed Limit tile and Navi -
gation tile with no Ethernet navigates to Speed -
ometer submenu.
Press up or down to select different
screen within selected category.
If Menu button is pressed while in this view,
cluster will return to previously displayed
screen.
Press and hold OK button to enter edit mode.
Instruction text may overlay lower tachom -
eter
For Screen Setup:
OK button allows user to enter menu and
submenus.
Within each submenu layer, the up and
down arrow buttons will allow the user to
select the item of interest.
Pushing the OK button makes the selection and
a confirmation screen will appear (returning the
user to the first page of the submenu).
Pushing the left arrow button will exit each
submenu layer and return to the main menu.
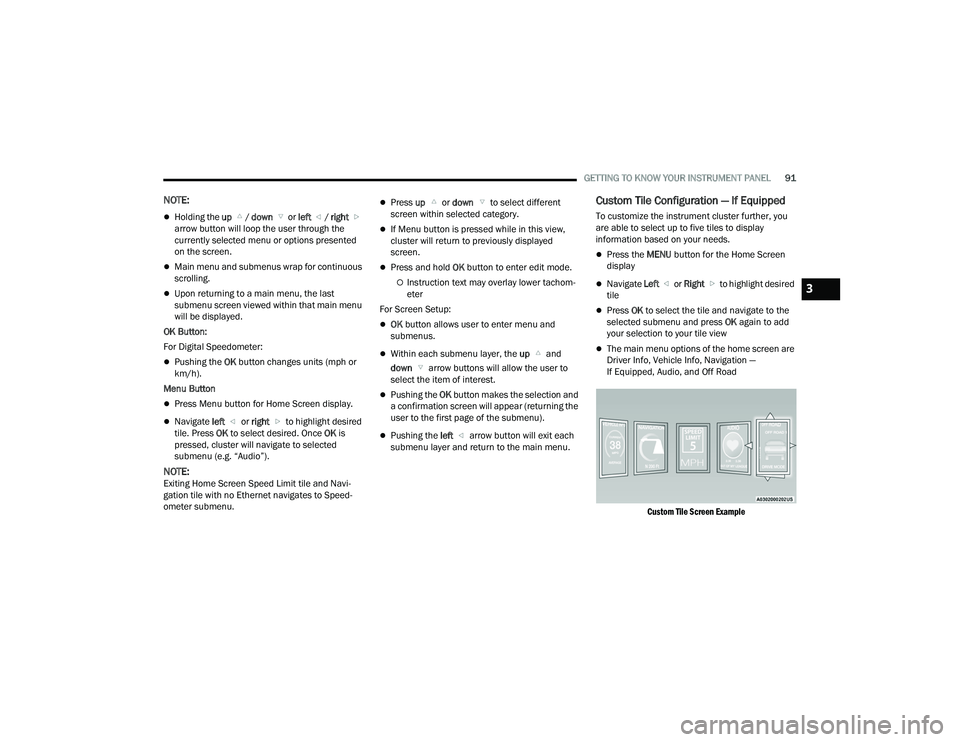
Custom Tile Configuration — If Equipped
To customize the instrument cluster further, you
are able to select up to five tiles to display
information based on your needs.
Press the MENU button for the Home Screen
display
Navigate Left or Right to highlight desired
tile
Press OK to select the tile and navigate to the
selected submenu and press OK again to add
your selection to your tile view
The main menu options of the home screen are
Driver Info, Vehicle Info, Navigation —
If Equipped, Audio, and Off Road
Custom Tile Screen Example
3
23_DPF_OM_EN_USC_t.book Page 91
Page 94 of 444
92GETTING TO KNOW YOUR INSTRUMENT PANEL
You can customize your Instrument Cluster Display
with up to five tiles that may consist of the
following:
NOTE:These options may vary based on your vehicle trim
level.
Navigation
Route Set / Route Not Set
Trip A / Trip B
Vehicle Info
Coolant Temp
Trans Temp
Oil Temp
Oil Pressure
Battery Voltage
Oil Life
Tire Pressure
Fuel Economy
Air Suspension
Driver Info
Driver Assist
Audio
Audio Info
Off Road
Selec-Terrain / Air Suspension Status
Steering Angle
Pitch
Roll
Trailer Tow
Trailer Trip
Trailer Brake
Trailer Tire Pressure Monitor
OIL LIFE RESET
Use this QR code to access your
digital experience.
Your vehicle is equipped with an
engine oil change indicator
system. The “Oil Change
Required” message will display in
the instrument cluster display
after a single chime has sounded, to indicate the
next scheduled oil change interval. The engine oil
change indicator system is duty cycle based, which
means the engine oil change interval may
fluctuate, dependent upon your personal driving
style.
NOTE:Use the steering wheel instrument cluster display
controls for the following procedure. Oil Life Reset Procedure
1. Without pushing the brake pedal, push the
ENGINE START/STOP button and place the
ignition to the ON/RUN position (do not start
the engine).
2. Push and release the down arrow button to
scroll downward through the main menu to
“Vehicle Info.”
3. Push and release the right arrow button to
access the ”Vehicle Info” screen, then scroll up
or down to select “Oil Life.”
4. Push and hold the right arrow button to
select “Reset”.
5. Push and release the down arrow button to
select “Yes,” then push and release the
right arrow button to reset the Oil Life to
100%.
6. Push and release the up arrow button to
exit the instrument cluster display screen.
Secondary Method Of Resetting Engine Oil Life
1. Without pressing the brake pedal, push the ENGINE START/STOP button and place the
ignition to the ON/RUN position (do not start
the engine).
2. Fully press the accelerator pedal, slowly, three times within ten seconds.
23_DPF_OM_EN_USC_t.book Page 92
Page 97 of 444
GETTING TO KNOW YOUR INSTRUMENT PANEL95
Pitch And Roll
Displays the pitch and roll of the vehicle in
the graphic with the angle number on the
screen.
NOTE:When vehicle speed becomes too high to display
the pitch and roll, “- -” will display in place of the
numbers, and the graphic will be greyed out. A
message indicating the necessary speed for the
feature to become available will also display.
Fuel Economy — If Equipped
Push and release the up or down arrow
button until the Fuel Economy menu item is
highlighted in the instrument cluster display. Push
and Hold the right arrow button to reset
Average Fuel Economy.
Current Fuel Economy Gauge
Average Fuel Economy Value
Range To Empty
Fuel Tank Levels — If Equipped
Trip A/Trip B
Push and release the up or down arrow
button until the Trip menu item is highlighted in the
instrument cluster display. Push and release the
right arrow button to enter the submenus of Trip A and Trip B. The Trip A or Trip B information
will display the following:
Distance
Average Fuel Economy
Elapsed Time
Push and hold right arrow button to reset all
information.
Navigation — If Equipped
Push and release the up or down arrow
button until the Navigation display title is
highlighted in the instrument cluster display, “Hold
OK to Start Route” will display when no active route
is set. “Hold OK to Cancel Route” will display when
active route is set. Use the left or right arrow
button to zoom in or out on the display
Ú page 199.
Trailer Tow
Push and release the up or down arrow
button until the Trailer Tow menu item is
highlighted in the instrument cluster display. Push
and release the right or left arrow button to
cycle through the following trailer tow information:
Trip (trailer specific) Distance: Push and hold
the OK button to reset the distance.
Integrated Trailer Brake Module (ITBM):
Braking Output
Trailer Type
ITBM Gain
Trailer Tire Pressure Monitoring: The Instrument
Cluster Display will display the Trailer Tire Pres -
sure for a connected trailer with sensors that
match the active trailer profile. When a low tire
is present, the low tire value will be displayed in
red, and the affected low tire will have a red
glow. “Trailer Tire Low“ will be displayed on the
center bottom of the Instrument Cluster Display
screen.
Trailer Light Check – If Equipped: Push and hold
the OK button to begin the Trailer Light Test
sequence Ú page 190.
For vehicles equipped with Blind Spot Monitoring
(BSM):
When a Trailer Brake signal is detected, a
pop-up message will appear in the cluster
requiring user to select trailer type.
If a conventional trailer is selected, the BSM
operation will function as normal.
If Gooseneck/5th Wheel trailer is selected
BSM will be disabled due to unsupported
trailer type.
If no selection is made, the BSM system will
remain on until a selection is chosen.
3
23_DPF_OM_EN_USC_t.book Page 95
Page 100 of 444
98GETTING TO KNOW YOUR INSTRUMENT PANEL
Fuel Gauge
Hide Range
Show Range
Defaults (Restores All Settings To Default Settings)
Restore
Cancel
Commercial Settings — If Equipped
Commercial Settings allows the driver to set and
recall additional features when the transmission is
in PARK.
Push and release the up or down arrow
button until Commercial Settings displays in the
instrument cluster display.
Follow the prompts to enter the required PIN and
enter the Commercial Settings submenu.
NOTE:If your vehicle is equipped with a touchscreen
radio, “Commercial Settings” will replace “Vehicle
Settings” in the instrument cluster display. The
Commercial Settings menu will only include the
settings below Ú page 199. Commercial Settings allows you to access the
following features (if equipped):
Power Take Off (PTO)
Remote Ignition
Idle Control
Backup Alarm
ParkSense
Aux Switches
PIN Setup
NOTE:If the vehicle’s PIN is forgotten or not known, see
an authorized dealer to have the PIN reset.
DIESEL MESSAGES AND WARNINGS
Diesel Particulate Filter (DPF) Messages
The Cummins® diesel engine meets all diesel
emissions standards, resulting in one of the lowest
emitting diesel engines ever produced. To achieve
these emissions standards, your vehicle is
equipped with a state-of-the-art engine and
exhaust system. These systems are seamlessly
integrated into your vehicle and managed by the
Powertrain Control Module (PCM). The PCM
manages engine combustion to allow the exhaust
system’s catalyst to trap and burn Particulate
Matter (PM) pollutants, with no input or interaction
on your part.
Your vehicle has the ability to alert you to
additional maintenance required on your vehicle or
engine. The following messages may display in
your instrument cluster display:
Perform Service
— Your vehicle will require emis -
sions maintenance at a set interval. To help
remind you when this maintenance is due, the
instrument cluster display will display “Perform
Service”. When the “Perform Service” message
is displayed in the instrument cluster display it is
necessary to have the emissions maintenance
performed. Emissions maintenance may
include replacing the Closed Crankcase Ventila -
tion (CCV) filter element. The procedure for
clearing and resetting the "Perform Service"
indicator message is located in the appropriate
Service Information.
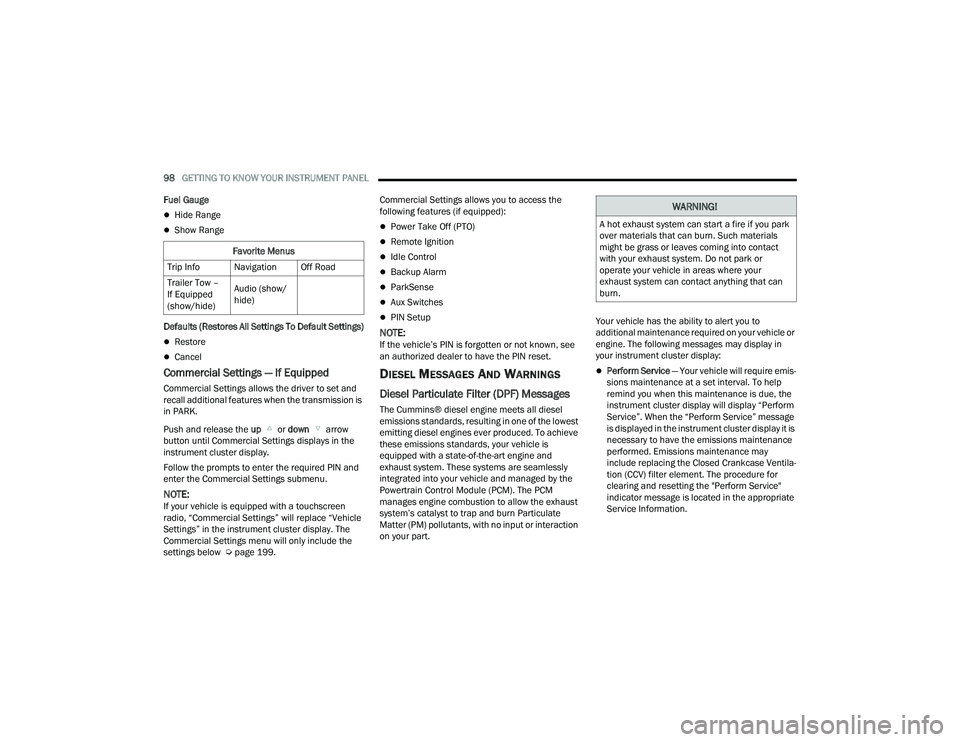
Favorite Menus
Trip Info Navigation Off Road
Trailer Tow –
If Equipped
(show/hide) Audio (show/
hide)
WARNING!
A hot exhaust system can start a fire if you park
over materials that can burn. Such materials
might be grass or leaves coming into contact
with your exhaust system. Do not park or
operate your vehicle in areas where your
exhaust system can contact anything that can
burn.
23_DPF_OM_EN_USC_t.book Page 98
Page 204 of 444
202MULTIMEDIA
My Profile
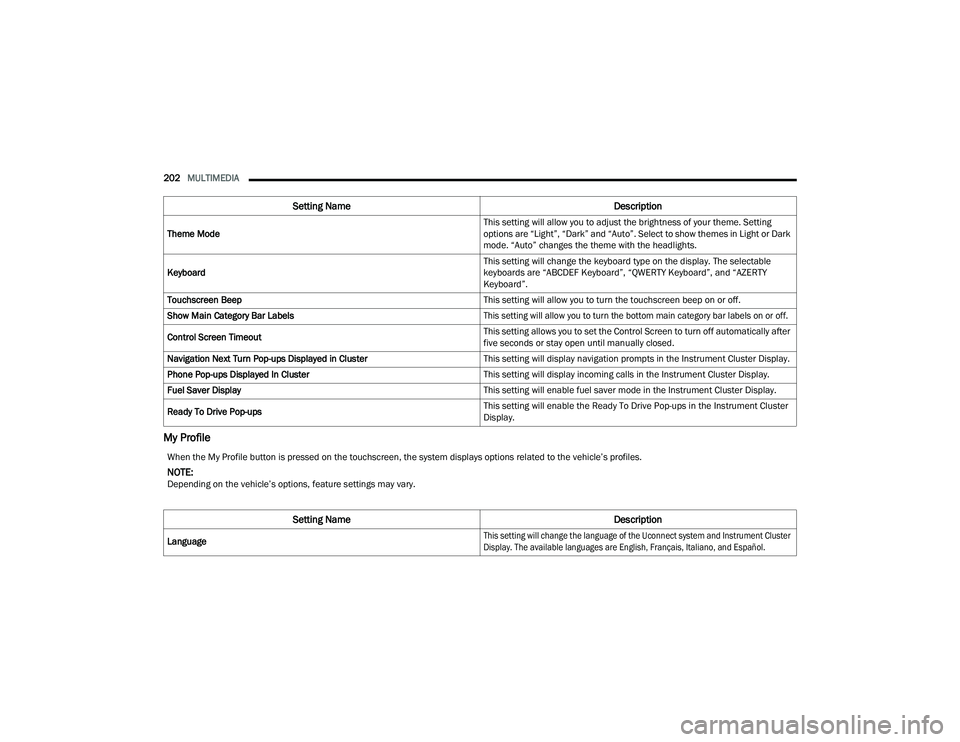
Theme Mode This setting will allow you to adjust the brightness of your theme. Setting
options are “Light”, “Dark” and “Auto”. Select to show themes in Light or Dark
mode. “Auto” changes the theme with the headlights.
Keyboard This setting will change the keyboard type on the display. The selectable
keyboards are “ABCDEF Keyboard”, “QWERTY Keyboard”, and “AZERTY
Keyboard”.
Touchscreen Beep This setting will allow you to turn the touchscreen beep on or off.
Show Main Category Bar Labels
This setting will allow you to turn the bottom main category bar labels on or off.
Control Screen Timeout This setting allows you to set the Control Screen to turn off automatically after
five seconds or stay open until manually closed.
Navigation Next Turn Pop-ups Displayed in Cluster This setting will display navigation prompts in the Instrument Cluster Display.
Phone Pop-ups Displayed In Cluster This setting will display incoming calls in the Instrument Cluster Display.
Fuel Saver Display This setting will enable fuel saver mode in the Instrument Cluster Display.
Ready To Drive Pop-ups This setting will enable the Ready To Drive Pop-ups in the Instrument Cluster
Display.
Setting Name
Description
When the My Profile button is pressed on the touchscreen, the system displays options related to the vehicle’s profiles.
NOTE:Depending on the vehicle’s options, feature settings may vary.
Setting NameDescription
Language
This setting will change the language of the Uconnect system and Instrument Cluster
Display. The available languages are English, Français, Italiano, and Español.
23_DPF_OM_EN_USC_t.book Page 202
Page 205 of 444
MULTIMEDIA203
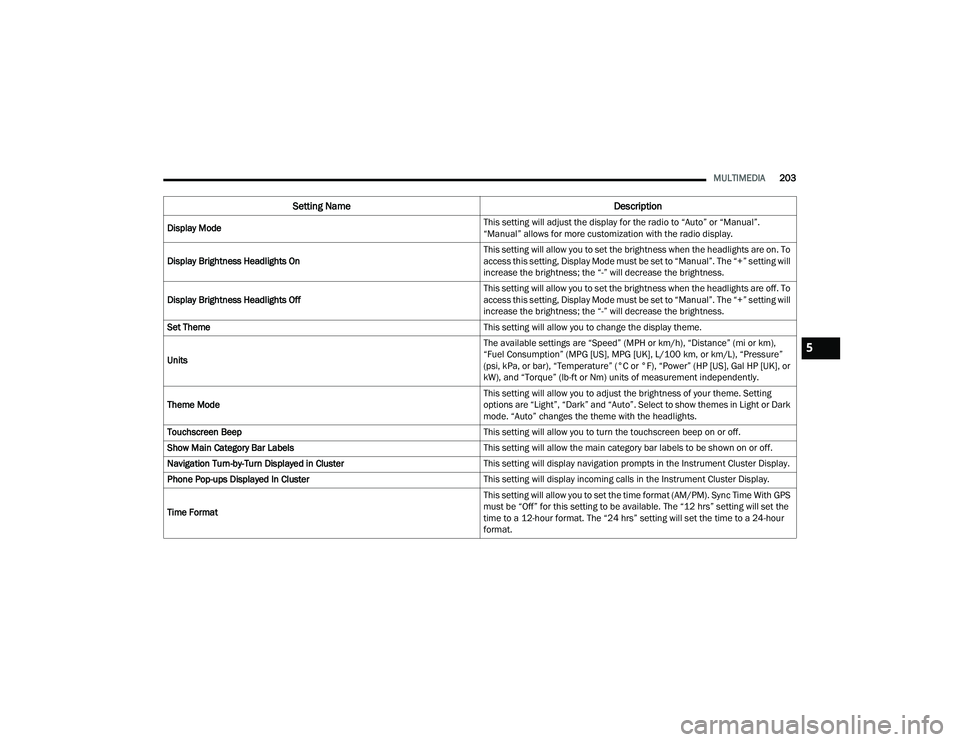
Display Mode This setting will adjust the display for the radio to “Auto” or “Manual”.
“Manual” allows for more customization with the radio display.
Display Brightness Headlights On This setting will allow you to set the brightness when the headlights are on. To
access this setting, Display Mode must be set to “Manual”. The “+” setting will
increase the brightness; the “-” will decrease the brightness.
Display Brightness Headlights Off This setting will allow you to set the brightness when the headlights are off. To
access this setting, Display Mode must be set to “Manual”. The “+” setting will
increase the brightness; the “-” will decrease the brightness.
Set Theme This setting will allow you to change the display theme.
Units The available settings are “Speed” (MPH or km/h), “Distance” (mi or km),
“Fuel Consumption” (MPG [US], MPG [UK], L/100 km, or km/L), “Pressure”
(psi, kPa, or bar), “Temperature” (°C or °F), “Power” (HP [US], Gal HP [UK], or
kW), and “Torque” (lb-ft or Nm) units of measurement independently.
Theme Mode This setting will allow you to adjust the brightness of your theme. Setting
options are “Light”, “Dark” and “Auto”. Select to show themes in Light or Dark
mode. “Auto” changes the theme with the headlights.
Touchscreen Beep This setting will allow you to turn the touchscreen beep on or off.
Show Main Category Bar Labels This setting will allow the main category bar labels to be shown on or off.
Navigation Turn-by-Turn Displayed in Cluster This setting will display navigation prompts in the Instrument Cluster Display.
Phone Pop-ups Displayed In Cluster This setting will display incoming calls in the Instrument Cluster Display.
Time Format This setting will allow you to set the time format (AM/PM). Sync Time With GPS
must be “Off” for this setting to be available. The “12 hrs” setting will set the
time to a 12-hour format. The “24 hrs” setting will set the time to a 24-hour
format.
Setting Name
Description
5
23_DPF_OM_EN_USC_t.book Page 203
Page 206 of 444
204MULTIMEDIA
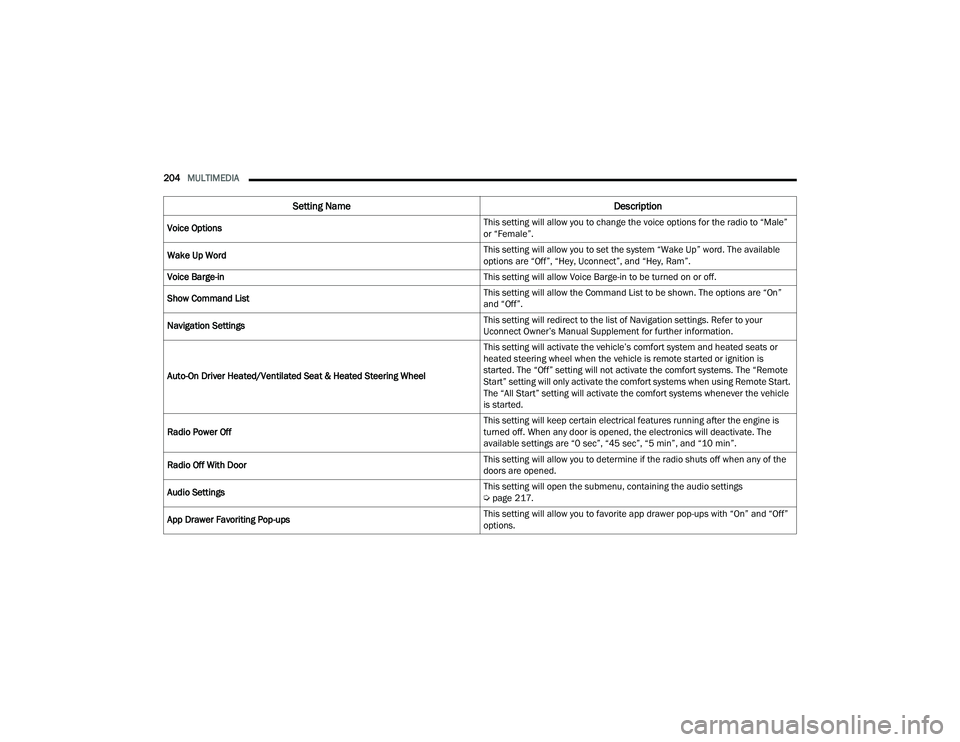
Voice Options This setting will allow you to change the voice options for the radio to “Male”
or “Female”.
Wake Up Word This setting will allow you to set the system “Wake Up” word. The available
options are “Off”, “Hey, Uconnect”, and “Hey, Ram”.
Voice Barge-in This setting will allow Voice Barge-in to be turned on or off.
Show Command List This setting will allow the Command List to be shown. The options are “On”
and “Off”.
Navigation Settings This setting will redirect to the list of Navigation settings. Refer to your
Uconnect Owner’s Manual Supplement for further information.
Auto-On Driver Heated/Ventilated Seat & Heated Steering Wheel This setting will activate the vehicle’s comfort system and heated seats or
heated steering wheel when the vehicle is remote started or ignition is
started. The “Off” setting will not activate the comfort systems. The “Remote
Start” setting will only activate the comfort systems when using Remote Start.
The “All Start” setting will activate the comfort systems whenever the vehicle
is started.
Radio Power Off This setting will keep certain electrical features running after the engine is
turned off. When any door is opened, the electronics will deactivate. The
available settings are “0 sec”, “45 sec”, “5 min”, and “10 min”.
Radio Off With Door This setting will allow you to determine if the radio shuts off when any of the
doors are opened.
Audio Settings This setting will open the submenu, containing the audio settings
Ú
page 217.
App Drawer Favoriting Pop-ups This setting will allow you to favorite app drawer pop-ups with “On” and “Off”
options.
Setting Name
Description
23_DPF_OM_EN_USC_t.book Page 204
Page 207 of 444
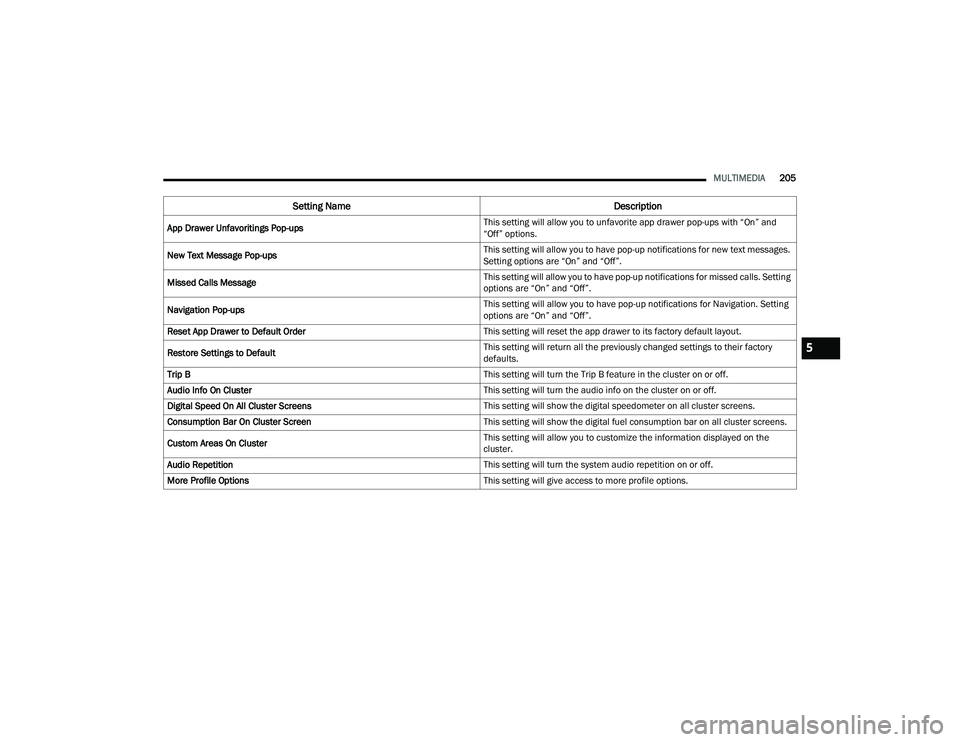
MULTIMEDIA205
App Drawer Unfavoritings Pop-ups This setting will allow you to unfavorite app drawer pop-ups with “On” and
“Off” options.
New Text Message Pop-ups This setting will allow you to have pop-up notifications for new text messages.
Setting options are “On” and “Off”.
Missed Calls Message This setting will allow you to have pop-up notifications for missed calls. Setting
options are “On” and “Off”.
Navigation Pop-ups This setting will allow you to have pop-up notifications for Navigation. Setting
options are “On” and “Off”.
Reset App Drawer to Default Order This setting will reset the app drawer to its factory default layout.
Restore Settings to Default This setting will return all the previously changed settings to their factory
defaults.
Trip B This setting will turn the Trip B feature in the cluster on or off.
Audio Info On Cluster This setting will turn the audio info on the cluster on or off.
Digital Speed On All Cluster Screens This setting will show the digital speedometer on all cluster screens.
Consumption Bar On Cluster Screen This setting will show the digital fuel consumption bar on all cluster screens.
Custom Areas On Cluster This setting will allow you to customize the information displayed on the
cluster.
Audio Repetition This setting will turn the system audio repetition on or off.
More Profile Options This setting will give access to more profile options.
Setting NameDescription
5
23_DPF_OM_EN_USC_t.book Page 205