wipers Ram ProMaster 2018 User Guide
[x] Cancel search | Manufacturer: RAM, Model Year: 2018, Model line: ProMaster, Model: Ram ProMaster 2018Pages: 204, PDF Size: 4 MB
Page 13 of 204

GETTING TO KNOW YOUR VEHICLE
KEYS......................12
KeyFob.....................12
SEATS .....................13
Heated Seats — If Equipped ........13
Adjustable Armrests — If Equipped ....14
HEAD RESTRAINTS..............14
Front Head Restraint Adjustment .....15
Front Head Restraint Removal .......15
STEERING WHEEL..............16
Telescoping Steering Column .......16
EXTERIOR LIGHTS..............16
Multifunction Lever ..............16
Headlights ...................17
High Beam/Low Beam Select Switch . . .17
Parking Lights .................17
Turn Signals ..................17
Lane Change Assist .............17
INTERIOR LIGHTS...............17
WIPERS AND WASHERS ..........17
Front Wiper Operation............17
CLIMATE CONTROLS.............19
Manual Climate Control Overview .....19
Climate Control Functions ..........22
Operating Tips .................23
HOOD......................24
Opening .....................24
Closing .....................24
INTERNAL EQUIPMENT ...........25
Power Outlets.................25
GETTING TO KNOW YOUR VEHICLE
11
Page 19 of 204
Headlights
To turn on the headlights, turn the end of the
multifunction lever to the headlight position.
When the headlight switch is on, the parking
lights, taillights, license plate light, the clear-
ance lights and instrument panel lights are
also turned on. To turn off the headlights,
turn the end of the multifunction lever back
to the O (Off) position.
High Beam/Low Beam Select
Switch
Pull the multifunction lever toward you to
switch the headlights to high beam. Pull the
lever a second time to switch the headlights
back to low beam.
Parking Lights
These lights can only be turned on with igni-
tion key in the STOP position or removed, by
moving the end of the multifunction lever to
O (off) position and then to the headlight
position.The warning light telltale in the instrument
panel comes on. The lights stay on until the
next ignition cycle is performed.
Turn Signals
Move the multifunction lever up or down and
the arrows on each side of the instrument
cluster flash to show proper operation of the
front and rear turn signal lights.
NOTE:
If either light remains on and does not flash,
or there is a very fast flash rate, check for a
defective outside light bulb. If an indicator
fails to light when the lever is moved, it would
suggest that the indicator bulb is defective.
Lane Change Assist
Tap the lever up or down once, without mov-
ing beyond the detent, and the turn signal
(right or left) will flash five times then auto-
matically turn off.
INTERIOR LIGHTS
The courtesy lights, dome lights, and map
lights are mounted between the sun visors on
the overhead shelf. Each light is turned on by
pushing the corresponding switch.
The courtesy lights will turn on when you use
the key fob or manually from the driver door
cylinder to unlock the doors or open any door.
The lights will fade to off after approximately
30 seconds, or they will immediately fade to
off once the ignition switch is turned to ON/
RUN from the OFF position.
WIPERS AND WASHERS
Front Wiper Operation
The windshield wiper/washer lever is located
on the right side of the steering column.
There are five different modes of operation
for the front windshield wipers. The wind-
shield wiper lever can be raised or lowered to
access the modes.
17
Page 20 of 204
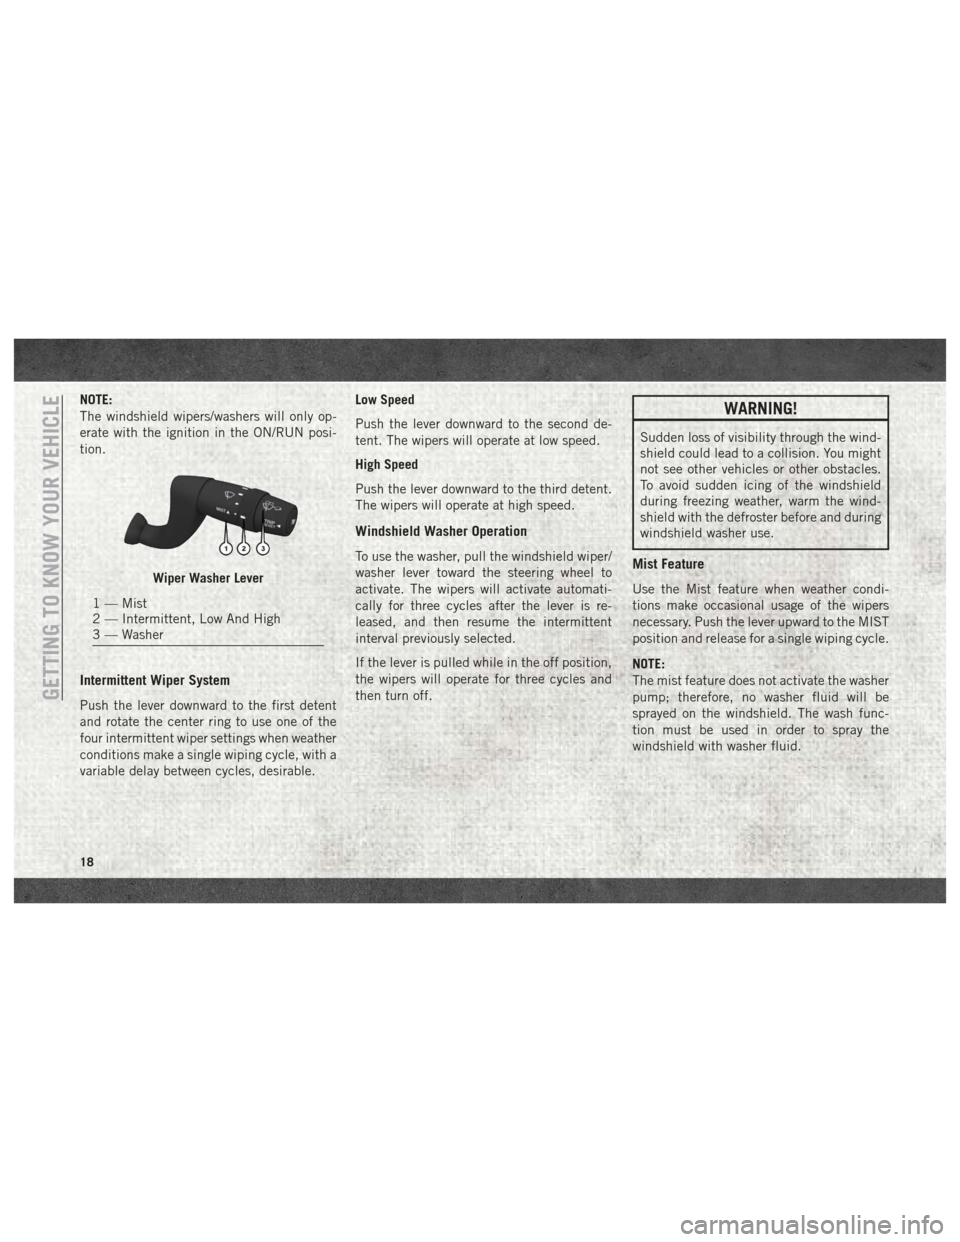
NOTE:
The windshield wipers/washers will only op-
erate with the ignition in the ON/RUN posi-
tion.
Intermittent Wiper System
Push the lever downward to the first detent
and rotate the center ring to use one of the
four intermittent wiper settings when weather
conditions make a single wiping cycle, with a
variable delay between cycles, desirable.Low Speed
Push the lever downward to the second de-
tent. The wipers will operate at low speed.
High Speed
Push the lever downward to the third detent.
The wipers will operate at high speed.
Windshield Washer Operation
To use the washer, pull the windshield wiper/
washer lever toward the steering wheel to
activate. The wipers will activate automati-
cally for three cycles after the lever is re-
leased, and then resume the intermittent
interval previously selected.
If the lever is pulled while in the off position,
the wipers will operate for three cycles and
then turn off.
WARNING!
Sudden loss of visibility through the wind-
shield could lead to a collision. You might
not see other vehicles or other obstacles.
To avoid sudden icing of the windshield
during freezing weather, warm the wind-
shield with the defroster before and during
windshield washer use.
Mist Feature
Use the Mist feature when weather condi-
tions make occasional usage of the wipers
necessary. Push the lever upward to the MIST
position and release for a single wiping cycle.
NOTE:
The mist feature does not activate the washer
pump; therefore, no washer fluid will be
sprayed on the windshield. The wash func-
tion must be used in order to spray the
windshield with washer fluid.Wiper Washer Lever
1 — Mist
2 — Intermittent, Low And High
3 — Washer
GETTING TO KNOW YOUR VEHICLE
18
Page 90 of 204

Towing The Vehicle
NOTE:
• The information in this section is for Auto-mated Manual Transmission (Diesel En-
gine) models ONLY. DO NOT flat tow any
model with a gasoline engine. Gasoline
engine models MUST be towed with front
wheels OFF the ground. See "Recreational
Towing" for additional information.
• For vehicles equipped with Electric Park Brake, you must ensure that the Auto Park
Brake feature is disabled before being
towed, to avoid inadvertent Electric Park
Brake engagement. The Auto Park Brake
feature can be temporarily disabled by
holding the park brake switch in the off
position while turning the ignition key from
ON/RUN to “OFF”.
• Vehicles with a discharged battery or total electrical failure when the Electric Park
Brake (EPB) is engaged, will need a wheel
dolly or jack to raise the rear wheels off the
ground when moving the vehicle onto a
flatbed. • The manufacturer recommends towing your
vehicle with all four wheels OFFthe ground
using a flatbed.
• Automated Manual transmission vehicles can also be flat towed (all four wheels on
the ground) with the transmission in NEU-
TRAL. Ensure the transmission is in NEU-
TRAL (N) (by checking that the vehicle
moves when pushed) and tow in the same
way as a normal vehicle with a manual
transmission.
If it is not possible to shift the transmission to
NEUTRAL (N), do not flat tow the vehicle and
contact your authorized dealer.
If you must use the accessories (wipers, de-
frosters, etc.) while being towed, the ignition
must be in the ON/RUN mode. NOTE:
For vehicles equipped with Electric Park
Brake the SafeHold feature will engage the
Electric Park Brake whenever the driver's
door is opened (if the ignition is ON and the
brake pedal is released). If you are towing
this vehicle with the ignition in the ON/RUN
position, you must manually disable the Elec-
tric Park Brake each time the driver's door is
opened, by pressing the brake pedal and then
releasing the EPB.
CAUTION!
• DO NOT flat tow any disabled vehicle if
condition is related to the clutch,
transmission or driveline. Additional
damage to the drivetrain could result.
• Towing this vehicle in violation of the
above requirements can cause severe
engine, transmission, or drivetrain
damage. Damage from improper tow-
ing is not covered under the New Ve-
hicle Limited Warranty.
• Ensure that the electric park brake (if
equipped) is released, and remains re-
leased, while being towed.STARTING AND OPERATING
88
Page 123 of 204
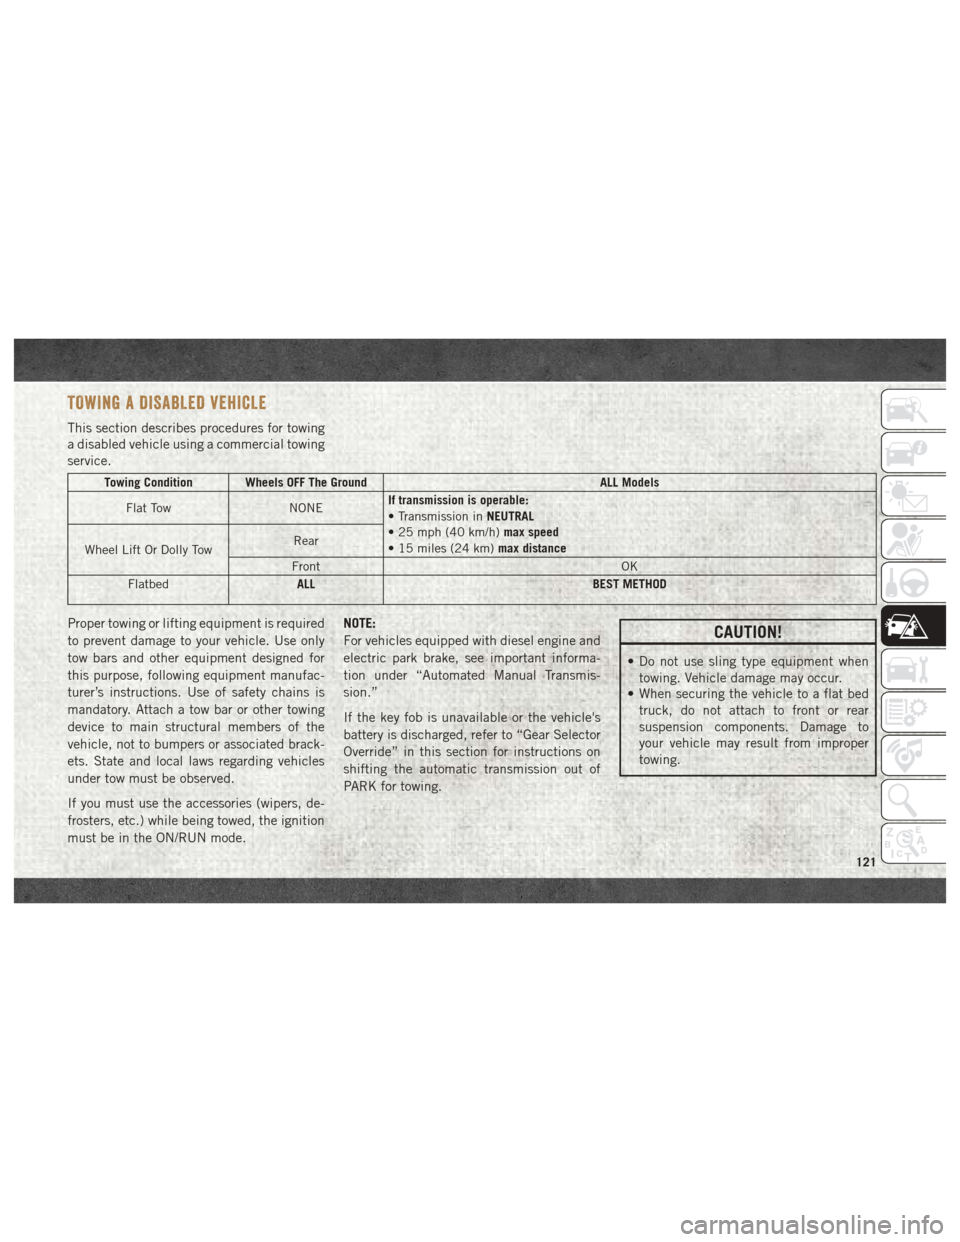
TOWING A DISABLED VEHICLE
This section describes procedures for towing
a disabled vehicle using a commercial towing
service.
Towing Condition Wheels OFF The GroundALL Models
Flat Tow NONEIf transmission is operable:
• Transmission in
NEUTRAL
• 25 mph (40 km/h) max speed
• 15 miles (24 km) max distance
Wheel Lift Or Dolly Tow Rear
Front OK
Flatbed ALL
BEST METHOD
Proper towing or lifting equipment is required
to prevent damage to your vehicle. Use only
tow bars and other equipment designed for
this purpose, following equipment manufac-
turer’s instructions. Use of safety chains is
mandatory. Attach a tow bar or other towing
device to main structural members of the
vehicle, not to bumpers or associated brack-
ets. State and local laws regarding vehicles
under tow must be observed.
If you must use the accessories (wipers, de-
frosters, etc.) while being towed, the ignition
must be in the ON/RUN mode.NOTE:
For vehicles equipped with diesel engine and
electric park brake, see important informa-
tion under “Automated Manual Transmis-
sion.”
If the key fob is unavailable or the vehicle's
battery is discharged, refer to “Gear Selector
Override” in this section for instructions on
shifting the automatic transmission out of
PARK for towing.CAUTION!
• Do not use sling type equipment when
towing. Vehicle damage may occur.
• When securing the vehicle to a flat bed
truck, do not attach to front or rear
suspension components. Damage to
your vehicle may result from improper
towing.
121
Page 192 of 204
Disturb....................176
Door Ajar ....................35
Door Ajar Light ................35
Driver's Seat Back Tilt ............13
Electric Parking Brake ............78
Electronic Speed Control (Cruise Control) ..............89
Electronic Throttle Control Warning Light ...............35
Emergency, In Case Of Freeing Vehicle When Stuck .....119
Jacking ..............108, 134
Jump Starting ..............115
Engine .................132, 133
Break-In Recommendations ......77
Compartment ...........132, 133
Compartment Identification ......132
Coolant (Antifreeze) .......156, 157
Exhaust Gas Caution ...........69
Fuel Requirements ...........155
Identification ..............133
Jump Starting ..............115
Oil ..............155, 156, 157
Oil Filler Cap ..............132
Oil Selection ..............155
Overheating ...............118 Starting
..................74
Enhanced Accident Response Feature. .122
Exhaust Gas Caution .............69
Exhaust System ................69
Exterior Lighting ...............17
Exterior Lights ..............16, 72
Filters Air Conditioning .............24
Engine Oil ............156, 157
Flashers Turn Signal ..............41, 72
Fluid Capacities ...............155
Fluid Leaks ...................72
Fluids And Lubricants ........156, 157
Folding Rear Seat ...............13
Freeing A Stuck Vehicle ..........119
Fuel .......................92
Adding ...................92
Additives .................92
Diesel ................92, 157
Filler Cap (Gas Cap) ...........91
Filter ...................157
Materials Added .............92
Octane Rating ..............156
Requirements ..............155
Tank Capacity ..............155 Fuses
.....................102
Gas Cap (Fuel Filler Cap) ..........91
Gear Ranges ..................82
Gear Select Lever Override ........119
General Information .............47
Hands-Free Phone (Uconnect) ......171
Headlights High Beam ................17
High Beam/Low Beam Select Switch. .17
Switch ...................17
Head Restraints ................14
Heated Seats .................13
High Beam/Low Beam Select (Dimmer) Switch ....................17
Hood Prop ...................24
Hood Release .................24
Ignition Key .....................12
Instrument Cluster ..............41
Intermittent Wipers (Delay Wipers) ....18
Introduction ...................1
iPod/USB/MP3 Control Bluetooth Streaming Audio ......171
INDEX
190
Page 195 of 204
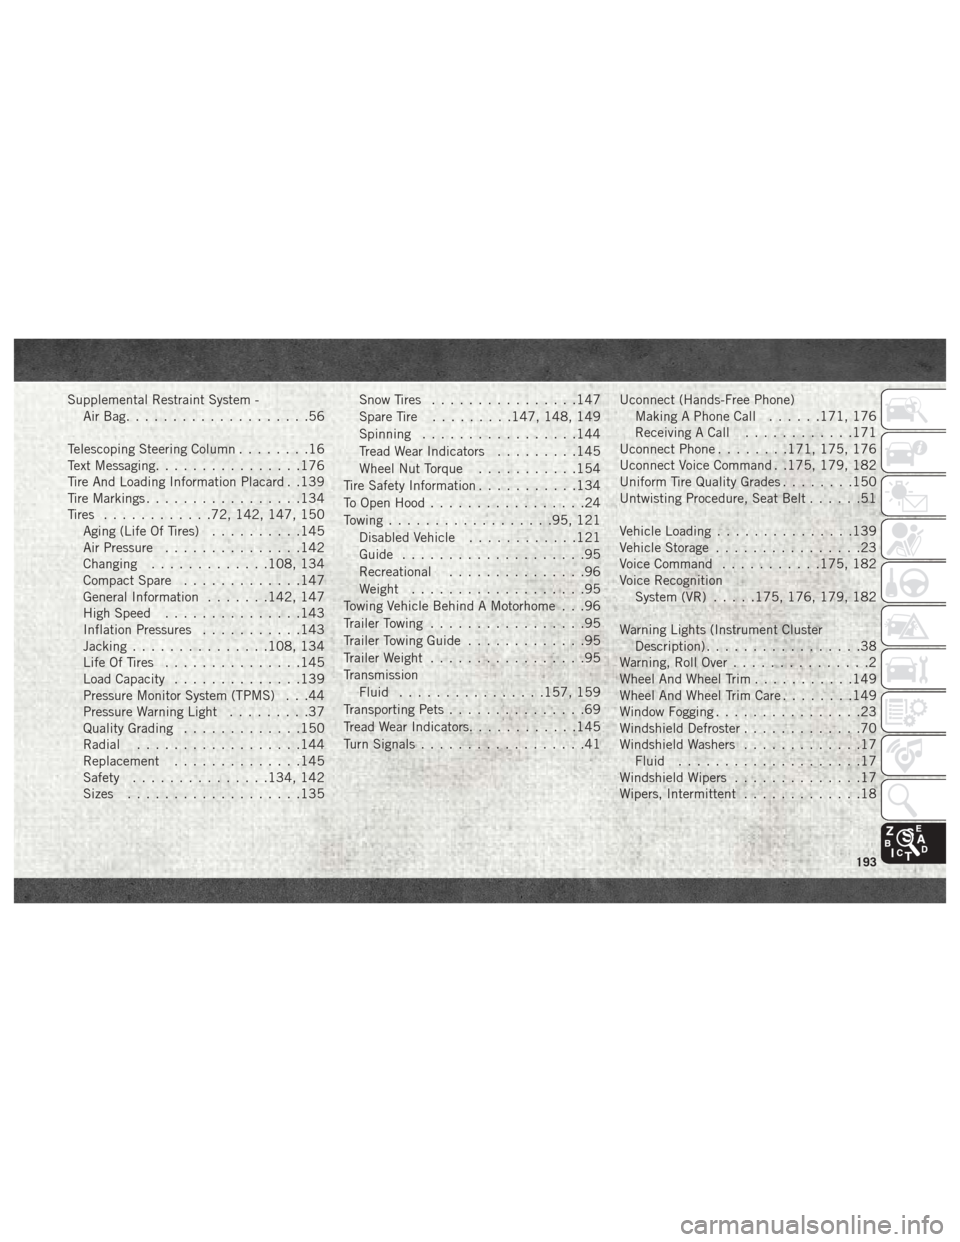
Supplemental Restraint System -AirBag....................56
Telescoping Steering Column ........16
Text Messaging ................176
Tire And Loading Information Placard . .139
Tire Markings .................134
Tires ............72, 142, 147, 150
Aging (Life Of Tires) ..........145
Air Pressure ...............142
Changing .............108, 134
Compact Spare .............147
General Information .......142, 147
High Speed ...............143
Inflation Pressures ...........143
Jacking ...............108, 134
Life Of Tires ...............145
Load Capacity ..............139
Pressure Monitor System (TPMS) . . .44
Pressure Warning Light .........37
Quality Grading .............150
Radial ..................144
Replacement ..............145
Safety ...............134, 142
Sizes ...................135 Snow Tires
................147
Spare Tire .........147, 148, 149
Spinning .................144
Tread Wear Indicators .........145
Wheel Nut Torque ...........154
Tire Safety Information ...........134
To Open Hood .................24
Towing ..................95, 121
Disabled Vehicle ............121
Guide ....................95
Recreational ...............96
Weight ...................95
Towing Vehicle Behind A Motorhome . . .96
Trailer Towing .................95
Trailer Towing Guide .............95
Trailer Weight .................95
Transmission Fluid ............... .157, 159
T
ransporting Pets ...............69
Tread Wear Indicators ............145
Turn Signals ..................41 Uconnect (Hands-Free Phone)
Making A Phone Call ......171, 176
Receiving A Call ............171
Uconnect Phone ........171, 175, 176
Uconnect Voice Command . .175, 179, 182
Uniform Tire Quality Grades ........150
Untwisting Procedure, Seat Belt ......51
Vehicle Loading ...............139
Vehicle Storage ................23
Voice Command ...........175, 182
Voice Recognition System (VR) .....175, 176, 179, 182
Warning Lights (Instrument Cluster Description) .................38
Warning, Roll Over ...............2
Wheel And Wheel Trim ...........149
Wheel And Wheel Trim Care ........149
Window Fogging ................23
Windshield Defroster .............70
Windshield Washers .............17
Fluid ....................17
Windshield Wipers ..............17
Wipers, Intermittent .............18
193