ignition Ram ProMaster 2019 User Guide
[x] Cancel search | Manufacturer: RAM, Model Year: 2019, Model line: ProMaster, Model: Ram ProMaster 2019Pages: 332, PDF Size: 3.66 MB
Page 43 of 332
Turn Signals
Move the multifunction lever up or down and the arrows
on each side of the instrument cluster flash to show proper
operation of the front and rear turn signal lights.
NOTE:If either light remains on and does not flash, or
there is a very fast flash rate, check for a defective outside
light bulb. If an indicator fails to light when the lever is
moved, it would suggest that the indicator bulb is defec-
tive.
Lane Change Assist
Tap the lever up or down once, without moving beyond
the detent, and the turn signal (right or left) will flash five
times then automatically turn off.
Battery Saver
To protect the life of your vehicle’s battery when the
ignition is OFF and any door is left ajar for 15 minutes the
interior lights will automatically turn off.
NOTE: Battery saver mode is cancelled if the ignition is
ON.
INTERIOR LIGHTS
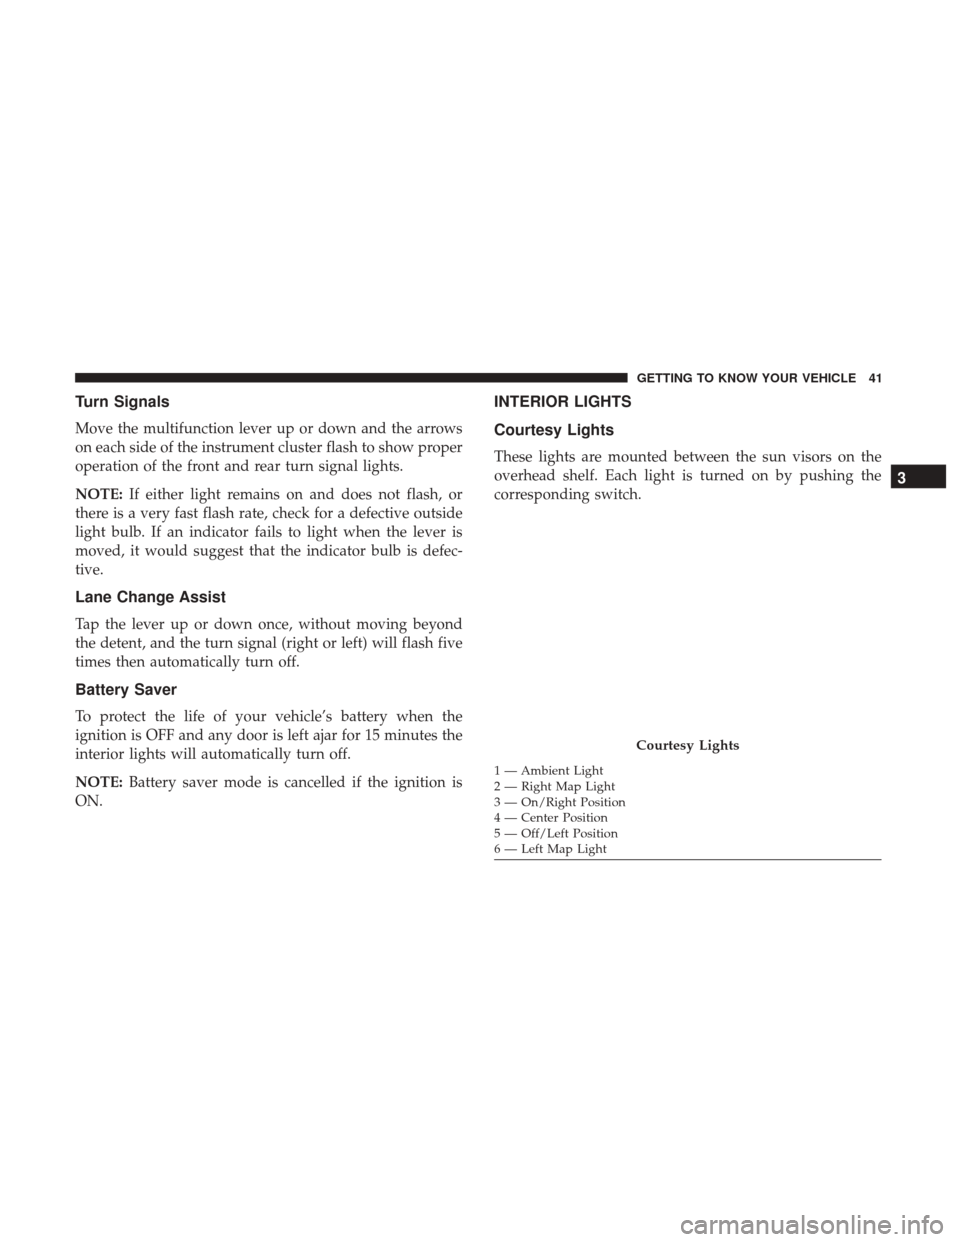
Courtesy Lights
These lights are mounted between the sun visors on the
overhead shelf. Each light is turned on by pushing the
corresponding switch.
Courtesy Lights
1 — Ambient Light
2 — Right Map Light
3 — On/Right Position
4 — Center Position
5 — Off/Left Position
6 — Left Map Light
3
GETTING TO KNOW YOUR VEHICLE 41
Page 46 of 332
Illuminated Entry
The courtesy lights will turn on when you use the key fob
or manually from the driver door cylinder to unlock the
doors or open any door.
The lights will fade to off after approximately 30 seconds,
or they will immediately fade to off once the ignition
switch is turned to ON/RUN from the OFF position.
NOTE:
•The front courtesy overhead console and door courtesy
lights will not turn off if the dimmer control is in the
“Dome ON” position.
• The illuminated entry system will not operate if the
dimmer control is in the “Dome OFF” position.
WIPERS AND WASHERS
Front Wiper Operation
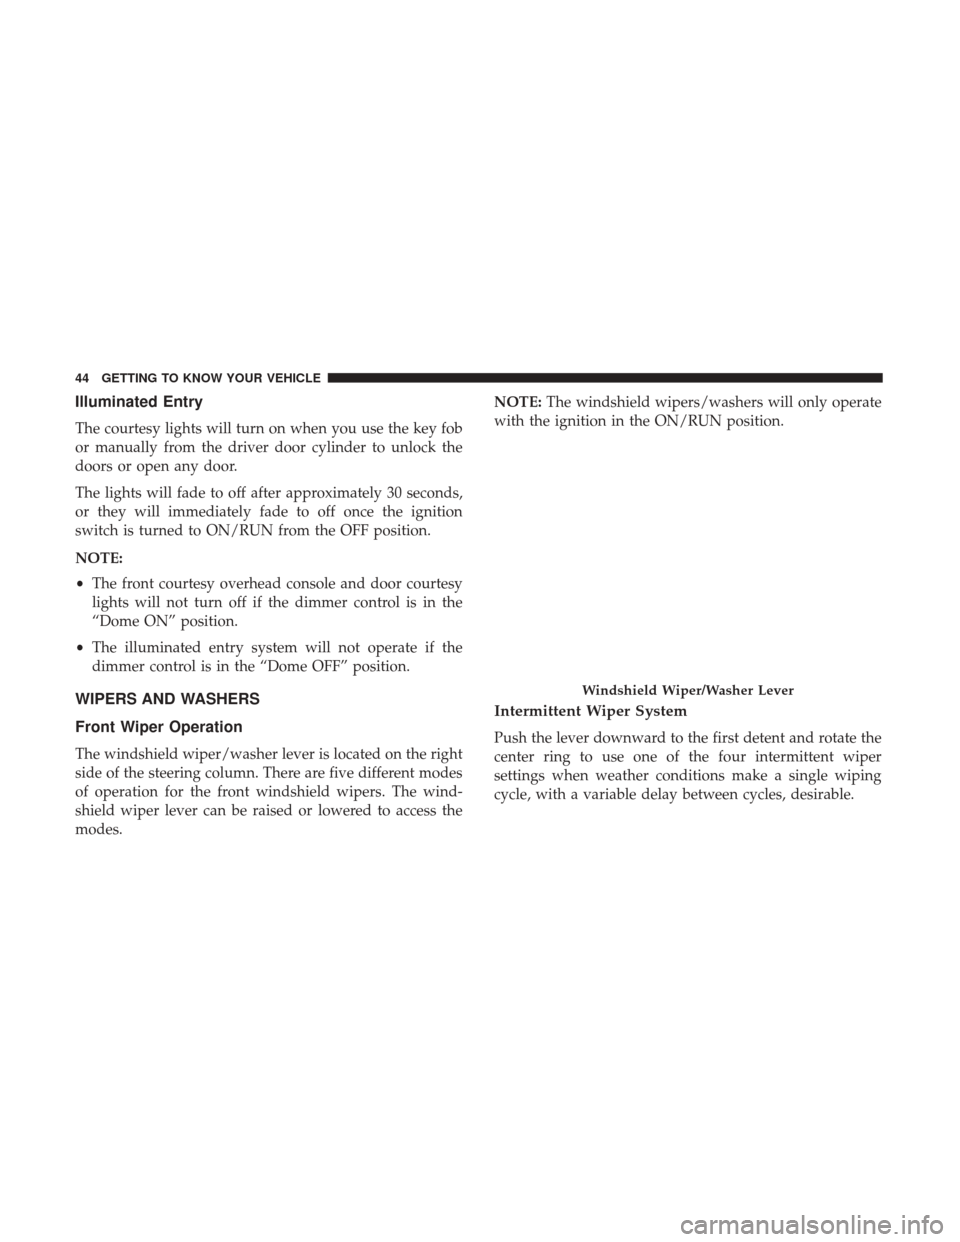
The windshield wiper/washer lever is located on the right
side of the steering column. There are five different modes
of operation for the front windshield wipers. The wind-
shield wiper lever can be raised or lowered to access the
modes. NOTE:
The windshield wipers/washers will only operate
with the ignition in the ON/RUN position.
Intermittent Wiper System
Push the lever downward to the first detent and rotate the
center ring to use one of the four intermittent wiper
settings when weather conditions make a single wiping
cycle, with a variable delay between cycles, desirable.
Windshield Wiper/Washer Lever
44 GETTING TO KNOW YOUR VEHICLE
Page 55 of 332

Control Setting Suggestions For Various Weather
ConditionsWINDOWS
Power Windows
The control on the left front door panel has up-down
switches that give you fingertip control of all power
windows. There is a single opening and closing switch on
the front passenger door for passenger window control.
NOTE:
The Key Off Power Delay feature will allow the
power windows to operate for up to three minutes after the
ignition is turned OFF. This feature is cancelled when
either front door is opened.
Control Settings Suggestions For Various Weather
Conditions Chart
Power Window Switches
3
GETTING TO KNOW YOUR VEHICLE 53
Page 56 of 332

WARNING!
•Never leave children alone in a vehicle, or with
access to an unlocked vehicle. Allowing children to
be in a vehicle unattended is dangerous for a number
of reasons. A child or others could be seriously or
fatally injured. Children should be warned not to
touch the parking brake, brake pedal or the gear
selector.
• Do not leave the key fob in or near the vehicle or in
a location accessible to children. A child could oper-
ate power windows, other controls, or move the
vehicle.
Auto-Down Feature — If Equipped
The window switches may be equipped with an Auto-
Down feature. Push the window switch for half a second,
release, and the window will go down automatically.
To stop the window from going all the way down during
the auto-down operation, pull up or push down on the
switch briefly.
To open the window part way, lift the window switch to
the detent for less than half a second and release it to stop
the window. NOTE:
The power window switches remain active for up
to three minutes after the ignition switch has been turned
OFF. Opening either of the vehicle’s front doors will cancel
this feature.
Window Bar Grates — If Equipped
This vehicle may be equipped with metal grates over the
side door windows. This feature is a part of the vehicle’s
safety system, and is designed to protect you and your
passengers in the event of an accident.
Window Bar Grates
54 GETTING TO KNOW YOUR VEHICLE
Page 62 of 332

Cupholders
The cupholders for the driver ’s and passenger ’s area are
located near the floor just under the center stack storage
compartment. There are cupholders located in each door
panel as well as one single cupholder located to the right of
the manual climate controls.
Power Outlets
Passenger Compartment Power Outlet
The power outlet is located on the Instrument Panel
Passenger Compartment near the cup holder. It only oper-
ates with the ignition key at MAR/ON.
CupholdersPassenger Compartment Power Outlet
60 GETTING TO KNOW YOUR VEHICLE
Page 65 of 332
Auxiliary Switches — If Equipped
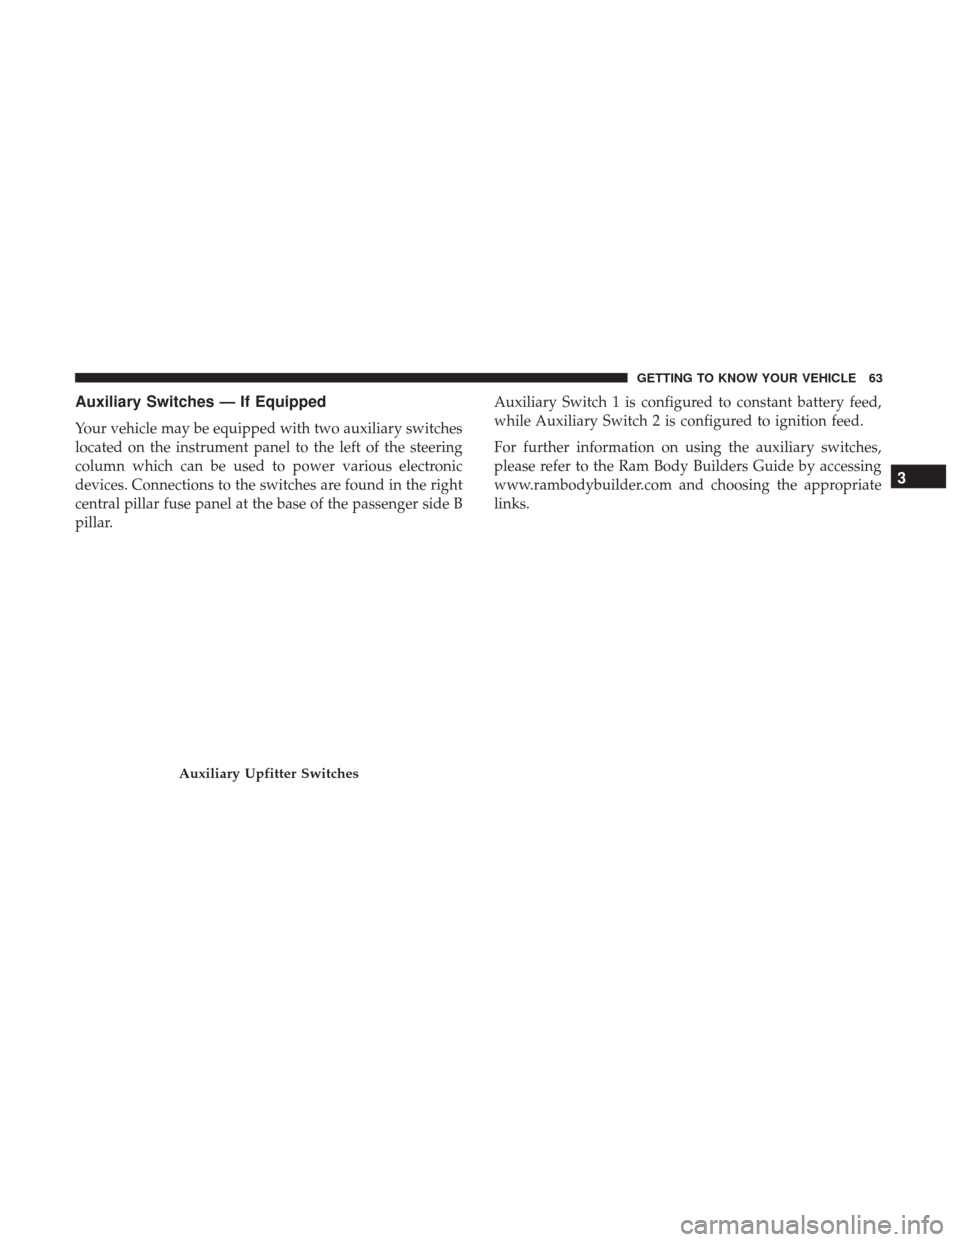
Your vehicle may be equipped with two auxiliary switches
located on the instrument panel to the left of the steering
column which can be used to power various electronic
devices. Connections to the switches are found in the right
central pillar fuse panel at the base of the passenger side B
pillar.Auxiliary Switch 1 is configured to constant battery feed,
while Auxiliary Switch 2 is configured to ignition feed.
For further information on using the auxiliary switches,
please refer to the Ram Body Builders Guide by accessing
www.rambodybuilder.com and choosing the appropriate
links.
Auxiliary Upfitter Switches
3
GETTING TO KNOW YOUR VEHICLE 63
Page 70 of 332
CAUTION!
Driving with a hot engine cooling system could dam-
age your vehicle. If the temperature gauge reads “H,”
pull over and stop the vehicle. Idle the vehicle with the
air conditioner turned off until the pointer drops back
into the normal range. If the pointer remains on the
“H,” turn the engine off immediately and call an
authorized dealer for service.
5. Fuel Gauge •The pointer shows the level of fuel in the fuel tank
when the ignition switch is in the ON/RUN position.
•
The fuel pump symbol points to the side of the
vehicle where the fuel door is located.
INSTRUMENT CLUSTER DISPLAY
Your vehicle will be equipped with an instrument cluster
display, which offers useful information to the driver. With
the ignition in the STOP/OFF mode, opening/closing of a
door will activate the display for viewing, and display the
total miles, or kilometers, in the odometer. Your instrument
cluster display is designed to display important informa-
tion about your vehicle’s systems and features. Using a driver interactive display located on the instrument panel,
your instrument cluster display can show you how sys-
tems are working and give you warnings when they are
not. The steering wheel mounted controls allow you to
scroll through the main menus and submenus. You can
access the specific information you want and make selec-
tions and adjustments.
Location And Controls
The instrument cluster display features a driver-interactive
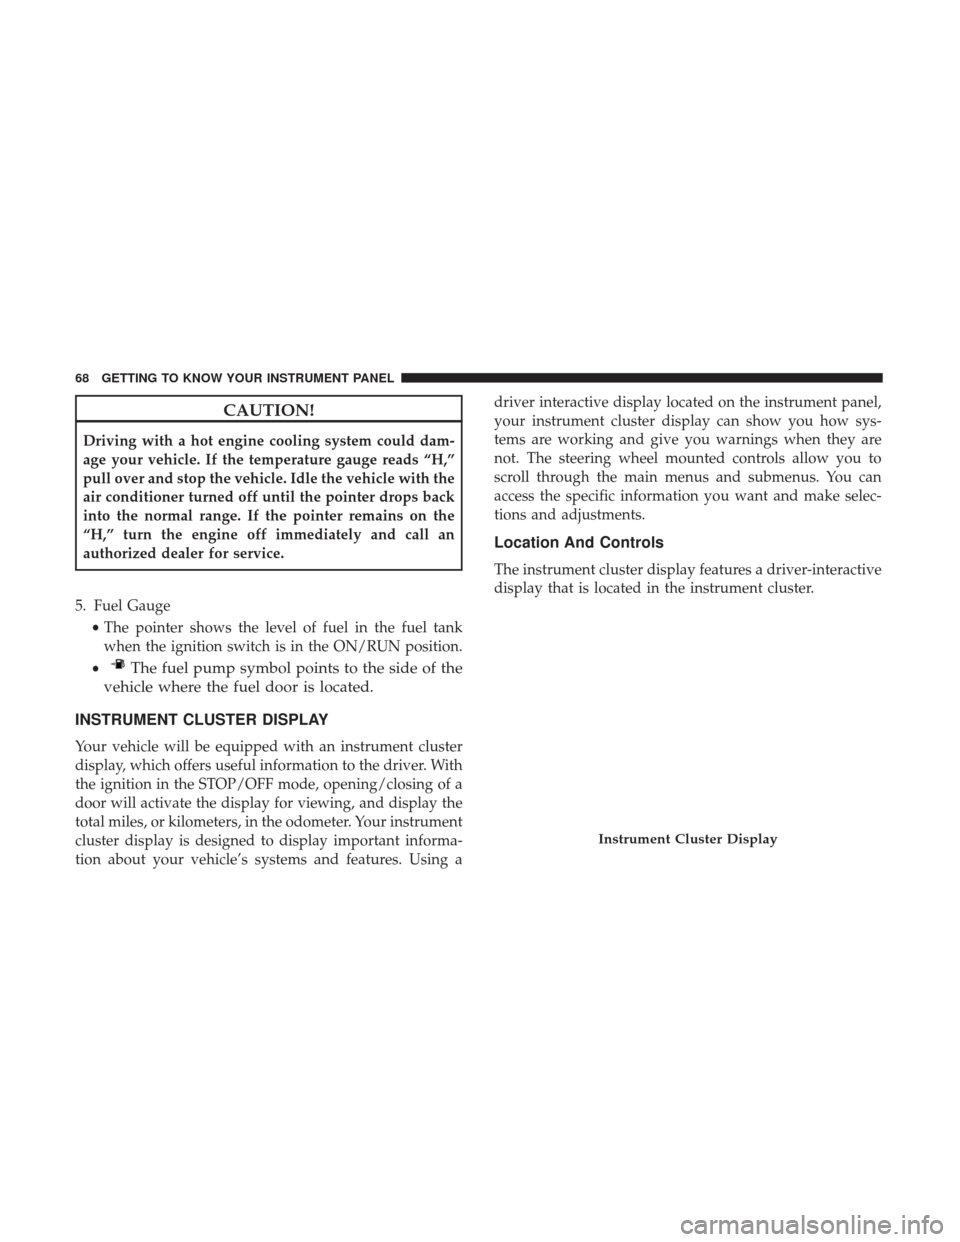
display that is located in the instrument cluster.
Instrument Cluster Display
68 GETTING TO KNOW YOUR INSTRUMENT PANEL
Page 72 of 332
•Up Arrow Button
Push and release the uparrow button to scroll
upward through the main menu and submenus
or adjust the illumination on the instrument
panel when the headlights are on.
• Down Arrow Button
Push and release the downarrow button to scroll
downward through the main menu and sub-
menus or adjust the illumination on the instru-
ment panel when the headlights are on.
Change Engine Oil
Your vehicle is equipped with an engine oil change indi-
cator system. The “Change Engine Oil” message will
display in the instrument cluster display. The engine oil
change indicator system is duty cycle based, which means
the engine oil change interval may fluctuate, dependent
upon your personal driving style.
Unless reset, this message will continue to display each
time you turn the ignition switch to the ON/RUN position.
To turn off the message temporarily, push and release the
MODE button. To reset the oil change indicator system
(after performing the scheduled maintenance), refer to the
following procedure. 1. Turn the ignition switch to the ON position (do not start
the engine).
2. Fully push the accelerator pedal slowly, three times, within 10 seconds.
3. Turn the ignition switch to the OFF/LOCK position.
NOTE: If the indicator message illuminates when you
start the vehicle, the oil change indicator system did not
reset. If necessary, repeat this procedure.
Display Setup Menu
The menu comprises a series of functions arranged in a
cycle. Push and release the upordown arrow button to
access the different options and settings (setup).
The setup menu can be activated by pushing the MODE
button. Single pushes on the upordown arrow button will
scroll through the setup menu options. The menu items
include the following functions:
• Speed Beep
• Buzzer Volume
• Seat Belt Buzzer (Just Available After SBR Disable Made
By CHR Service)
• Exit menu
70 GETTING TO KNOW YOUR INSTRUMENT PANEL
Page 75 of 332
Trip Button
TheTRIP button, located on the right steering column
stalk, can be used to display and to reset the previously
described values.
• A short button push displays the different values.
• A long button push resets the system and then starts a
new trip.
New Trip
To reset:
• Push and hold the TRIP button to reset the system
manually.
• When the “Trip distance” reaches 99999.9 miles or
kilometers or when the “Travel time” reaches 999.59 (999
hours and 59 minutes), the system is reset automatically.
• Disconnecting/Reconnecting the battery resets the sys-
tem.
NOTE: If the reset operation occurs in the presence of the
screens concerning Trip A or Trip B, only the information
associated with Trip A or Trip B functions will be reset. Start Of Trip Procedure
With the ignition on, push and hold the TRIP button for
over two seconds to reset trip information.
Exit Trip
To exit the Trip function, push the TRIP button until all the
trip menu items have been displayed and the display
returns to the main menu.
Trip Functions
Both trip functions are resettable (reset — start of new trip).
“Trip A” can be used to display the figures relating to:
•
Trip Distance A
• Average Fuel Consumption
• Average Speed A
• Travel Time A (Driving Time)
“Trip B” can be used to display the figures relating to:
• Trip Distance B
• Average Fuel Consumption
• Average Speed B
• Travel Time B (Driving Time)
4
GETTING TO KNOW YOUR INSTRUMENT PANEL 73
Page 76 of 332
NOTE: “Trip B” functions may be excluded (see “Trip B
Data”). “Range” and “Instantaneous Fuel Consumption”
cannot be reset.
WARNING LIGHTS AND MESSAGES
The warning/indicator lights will illuminate in the instru-
ment panel together with a dedicated message and/or
acoustic signal when applicable. These indications are
indicative and precautionary and as such must not be
considered as exhaustive and/or alternative to the infor-
mation contained in the Owner ’s Manual, which you are
advised to read carefully in all cases. Always refer to the
information in this chapter in the event of a failure indica-
tion. All active telltales will display first if applicable. The
system check menu may appear different based upon
equipment options and current vehicle status. Some tell-
tales are optional and may not appear.
Red Warning Lights
— Seat Belt Reminder Warning Light
When the ignition is first placed in the ON/RUN or
MAR/ON/RUN position, if the driver ’s seat belt is un-
buckled, a chime will sound and the light will turn on.
When driving, if the driver or front passenger seat belt
remains unbuckled, the Seat Belt Reminder Light will flashor remain on continuously and a chime will sound. Refer to
“Occupant Restraints Systems” in “Safety” for further
information.
— Air Bag Warning Light
This light will turn on for four to eight seconds as a bulb
check when the ignition is placed in the ON/RUN or
MAR/ON/RUN position. If the light is either not on
during startup, stays on, or turns on while driving, have
the system inspected at an authorized dealer as soon as
possible. This light will illuminate with a single chime
when a fault with the Air Bag Warning Light has been
detected, it will stay on until the fault is cleared. If the light
comes on intermittently or remains on while driving, have
an authorized dealer service the vehicle immediately.
— Battery Charge Warning Light
This warning light will illuminate when the battery is not
charging properly. If it stays on while the engine is run-
ning, there may be a malfunction with the charging system.
Contact an authorized dealer as soon as possible.
This indicates a possible problem with the electrical system
or a related component.
74 GETTING TO KNOW YOUR INSTRUMENT PANEL