engine Ram ProMaster 2019 Workshop Manual
[x] Cancel search | Manufacturer: RAM, Model Year: 2019, Model line: ProMaster, Model: Ram ProMaster 2019Pages: 332, PDF Size: 3.66 MB
Page 188 of 332
FUSES
WARNING!
•When replacing a blown fuse, always use an appro-
priate replacement fuse with the same amp rating as
the original fuse. Never replace a fuse with another
fuse of higher amp rating. Never replace a blown
fuse with metal wires or any other material. Do not
place a fuse inside a circuit breaker cavity or vice
versa. Failure to use proper fuses may result in
serious personal injury, fire and/or property damage.
• Before replacing a fuse, make sure that the ignition is
off and that all the other services are switched off
and/or disengaged.
• If the replaced fuse blows again, contact an autho-
rized dealer.
• If a general protection fuse for safety systems (air
bag system, braking system), power unit systems
(engine system, transmission system) or steering
system blows, contact an authorized dealer.
Underhood Fuses
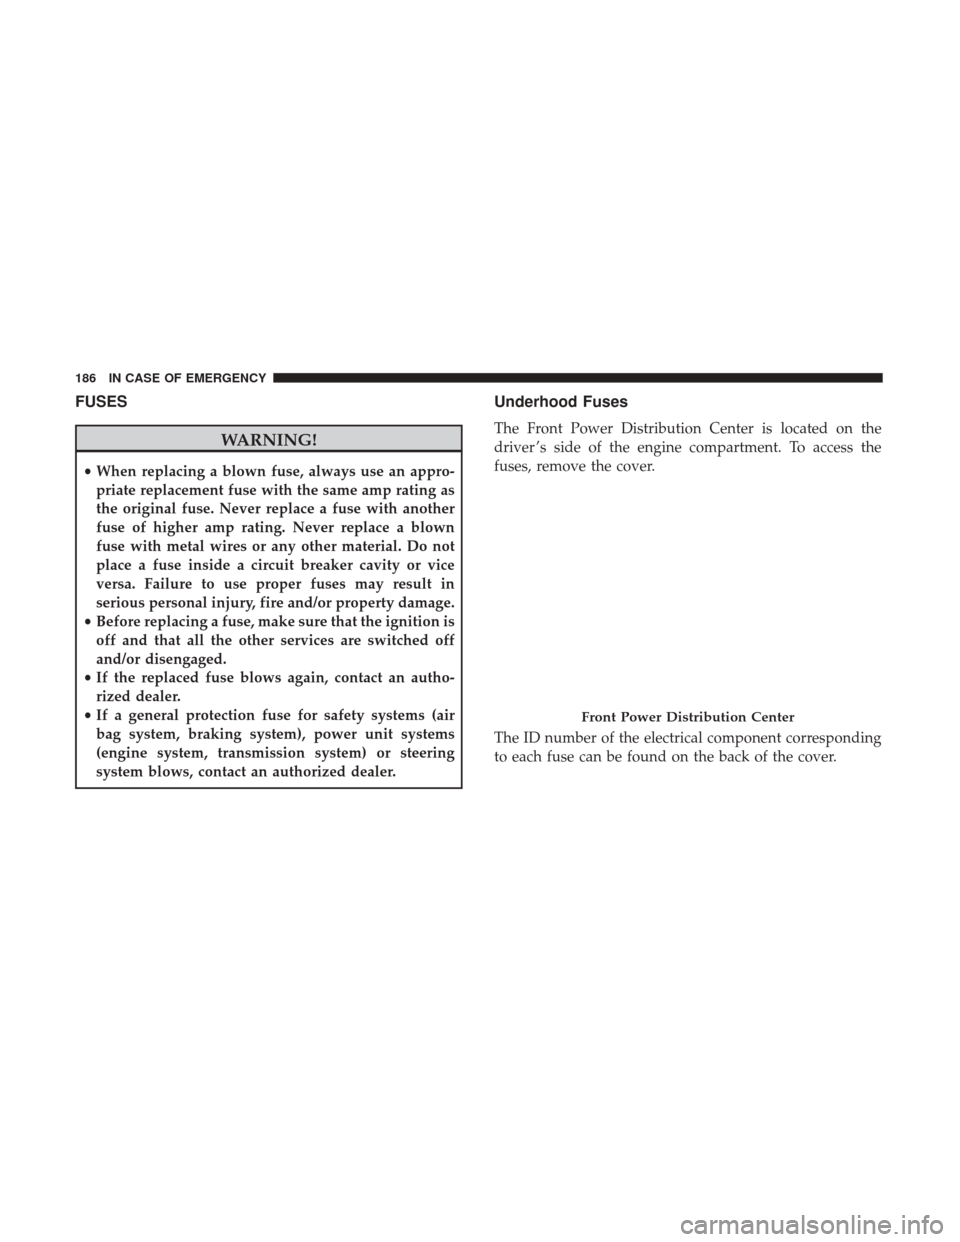
The Front Power Distribution Center is located on the
driver ’s side of the engine compartment. To access the
fuses, remove the cover.
The ID number of the electrical component corresponding
to each fuse can be found on the back of the cover.
Front Power Distribution Center
186 IN CASE OF EMERGENCY
Page 189 of 332
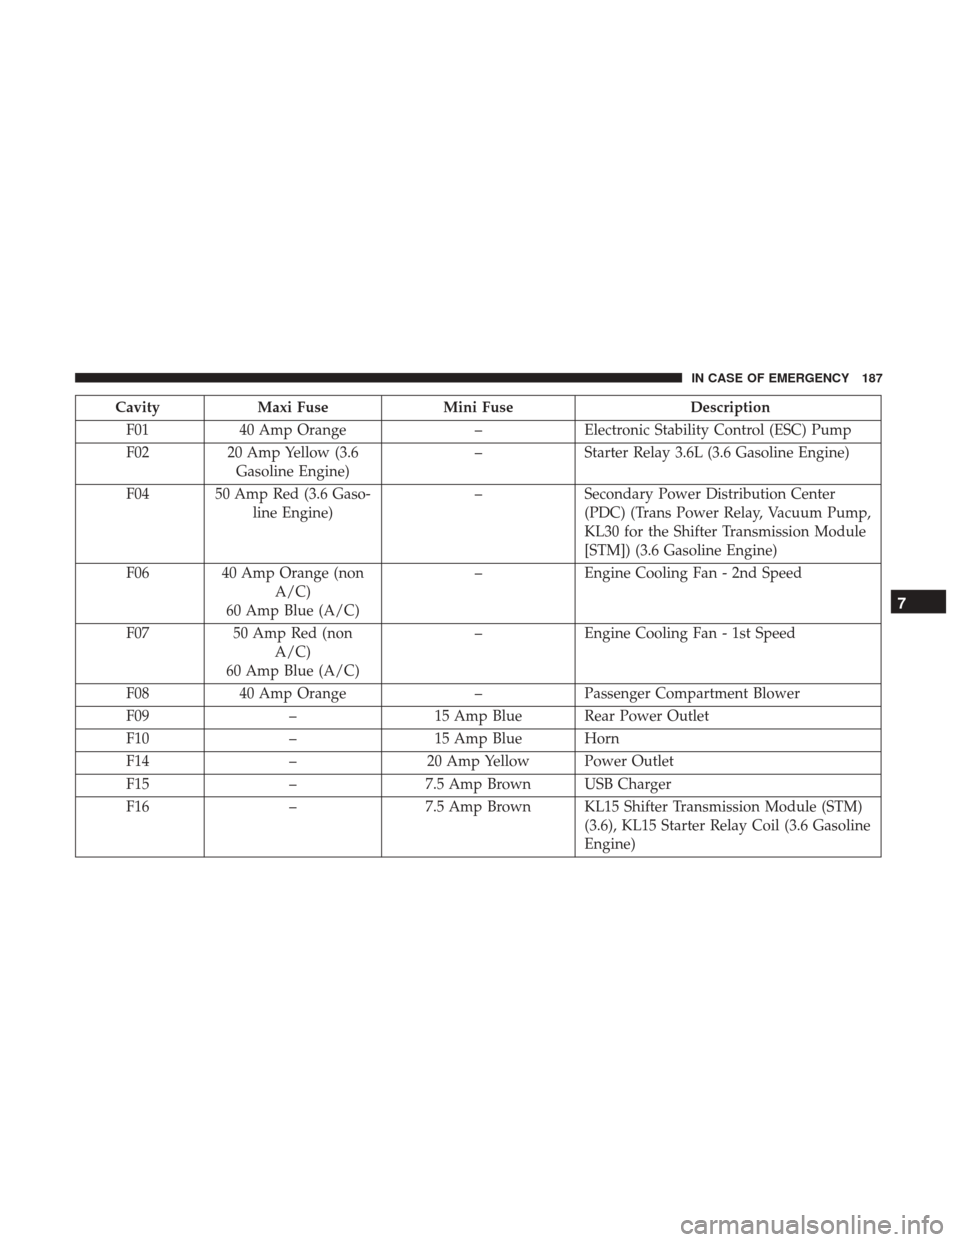
CavityMaxi Fuse Mini Fuse Description
F01 40 Amp Orange –Electronic Stability Control (ESC) Pump
F02 20 Amp Yellow (3.6
Gasoline Engine) –
Starter Relay 3.6L (3.6 Gasoline Engine)
F04 50 Amp Red (3.6 Gaso- line Engine) –
Secondary Power Distribution Center
(PDC) (Trans Power Relay, Vacuum Pump,
KL30 for the Shifter Transmission Module
[STM]) (3.6 Gasoline Engine)
F06 40 Amp Orange (non A/C)
60 Amp Blue (A/C) –
Engine Cooling Fan - 2nd Speed
F07 50 Amp Red (non
A/C)
60 Amp Blue (A/C) –
Engine Cooling Fan - 1st Speed
F08 40 Amp Orange –Passenger Compartment Blower
F09 –15 Amp Blue Rear Power Outlet
F10 –15 Amp Blue Horn
F14 –20 Amp Yellow Power Outlet
F15 –7.5 Amp Brown USB Charger
F16 –7.5 Amp Brown KL15 Shifter Transmission Module (STM)
(3.6), KL15 Starter Relay Coil (3.6 Gasoline
Engine)
7
IN CASE OF EMERGENCY 187
Page 190 of 332
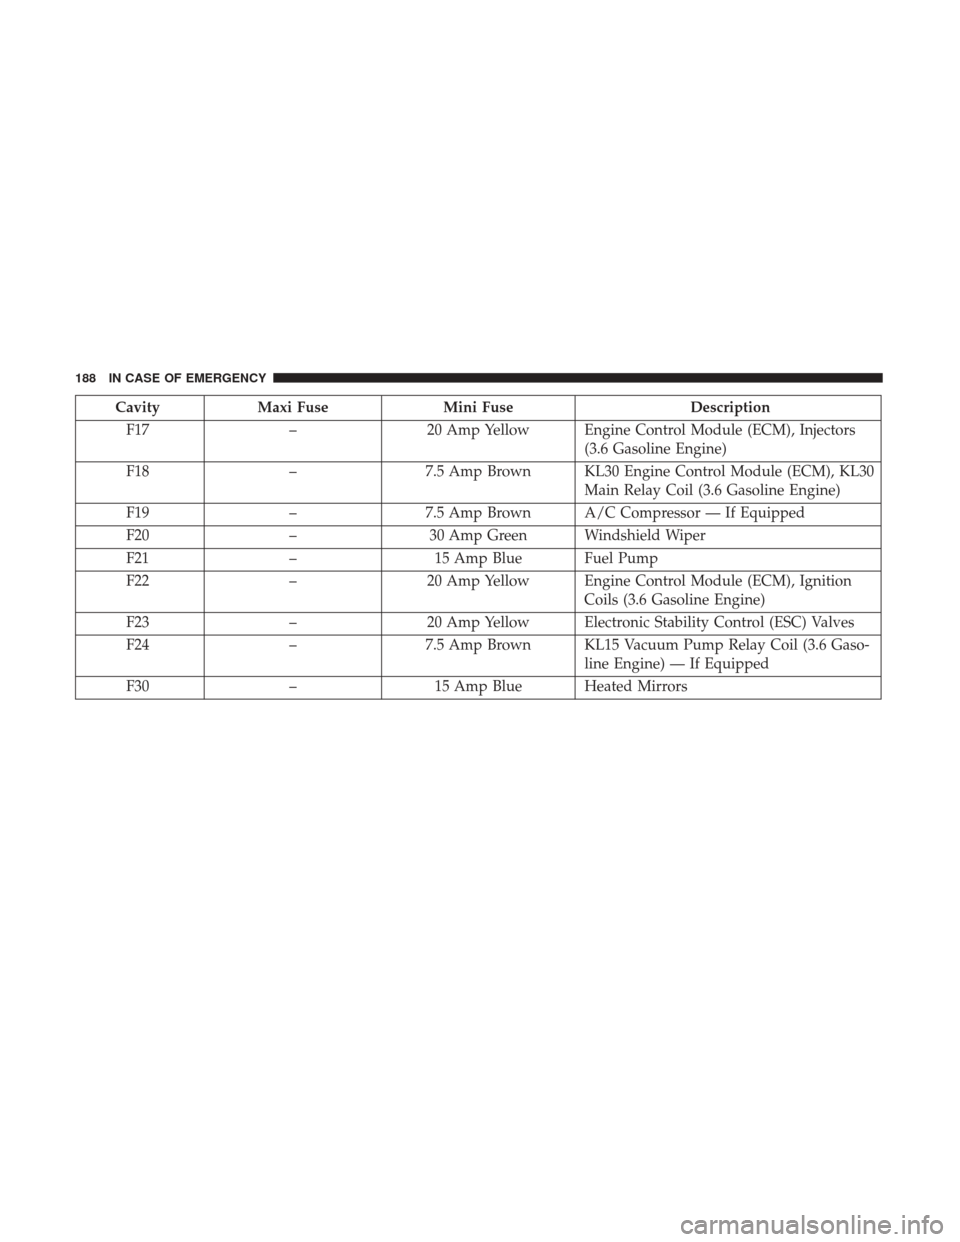
CavityMaxi Fuse Mini Fuse Description
F17 –20 Amp Yellow Engine Control Module (ECM), Injectors
(3.6 Gasoline Engine)
F18 –7.5 Amp Brown KL30 Engine Control Module (ECM), KL30
Main Relay Coil (3.6 Gasoline Engine)
F19 –7.5 Amp Brown A/C Compressor — If Equipped
F20 –30 Amp Green Windshield Wiper
F21 –15 Amp Blue Fuel Pump
F22 –20 Amp Yellow Engine Control Module (ECM), Ignition
Coils (3.6 Gasoline Engine)
F23 –20 Amp Yellow Electronic Stability Control (ESC) Valves
F24 –7.5 Amp Brown KL15 Vacuum Pump Relay Coil (3.6 Gaso-
line Engine) — If Equipped
F30 –15 Amp Blue Heated Mirrors
188 IN CASE OF EMERGENCY
Page 191 of 332
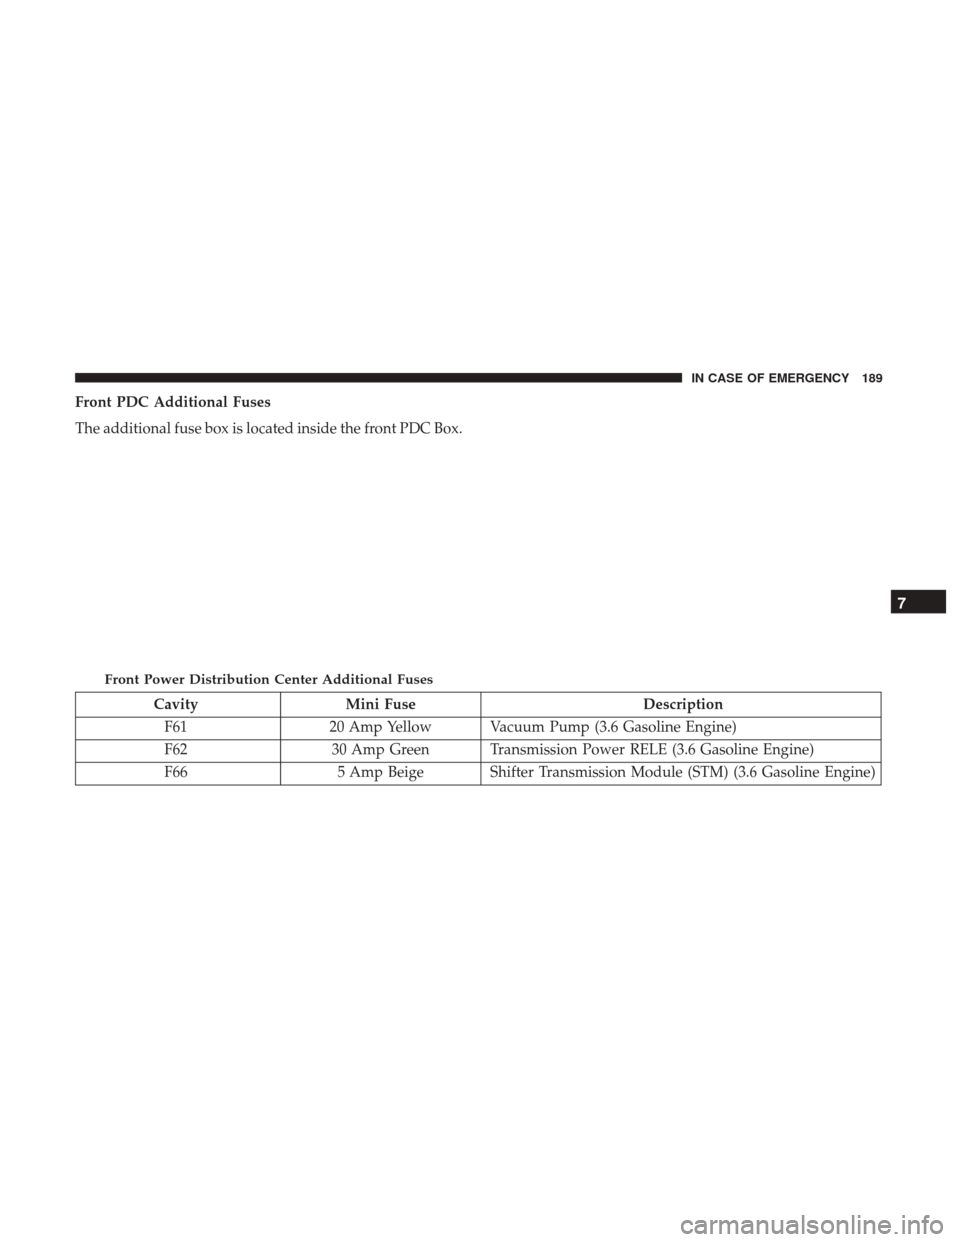
Front PDC Additional Fuses
The additional fuse box is located inside the front PDC Box.
CavityMini Fuse Description
F61 20 Amp Yellow Vacuum Pump (3.6 Gasoline Engine)
F62 30 Amp Green Transmission Power RELE (3.6 Gasoline Engine)
F66 5 Amp Beige Shifter Transmission Module (STM) (3.6 Gasoline Engine)
Front Power Distribution Center Additional Fuses
7
IN CASE OF EMERGENCY 189
Page 196 of 332
JACKING AND TIRE CHANGING
WARNING!
•Do not attempt to change a tire on the side of the
vehicle close to moving traffic. Pull far enough off
the road to avoid the danger of being hit when
operating the jack or changing the wheel.
• Being under a jacked-up vehicle is dangerous. The
vehicle could slip off the jack and fall on you. You
could be crushed. Never put any part of your body
under a vehicle that is on a jack. If you need to get
under a raised vehicle, take it to a service center
where it can be raised on a lift.
• Never start or run the engine while the vehicle is on
a jack.
• The jack is designed to be used as a tool for changing
tires only. The jack should not be used to lift the
vehicle for service purposes. The vehicle should be
jacked on a firm level surface only. Avoid ice or
slippery areas.
Jack Location
The jack and jack tools are stored under the front passenger
seat.
To release the jack kit for it’s storage location, turn the lock
knob 1/4 turn counter clockwise to the unlock position.
Jack Kit Location
194 IN CASE OF EMERGENCY
Page 203 of 332
WARNING!(Continued)
•Never start or run the engine with the vehicle on a
jack.
• Do not let anyone sit in the vehicle when it is on a
jack.
• Do not get under the vehicle when it is on a jack. If
you need to get under a raised vehicle, take it to a
service center where it can be raised on a lift.
• Only use the jack in the positions indicated and for
lifting this vehicle during a tire change.
• If working on or near a roadway, be extremely
careful of motor traffic.
• To assure that spare tires, flat or inflated, are securely
stowed, spares must be stowed with the valve stem
facing the ground.
CAUTION!
Do not attempt to raise the vehicle by jacking on
locations other than those indicated in the Jacking
Instructions for this vehicle.
Jack Warning Label
7
IN CASE OF EMERGENCY 201
Page 212 of 332
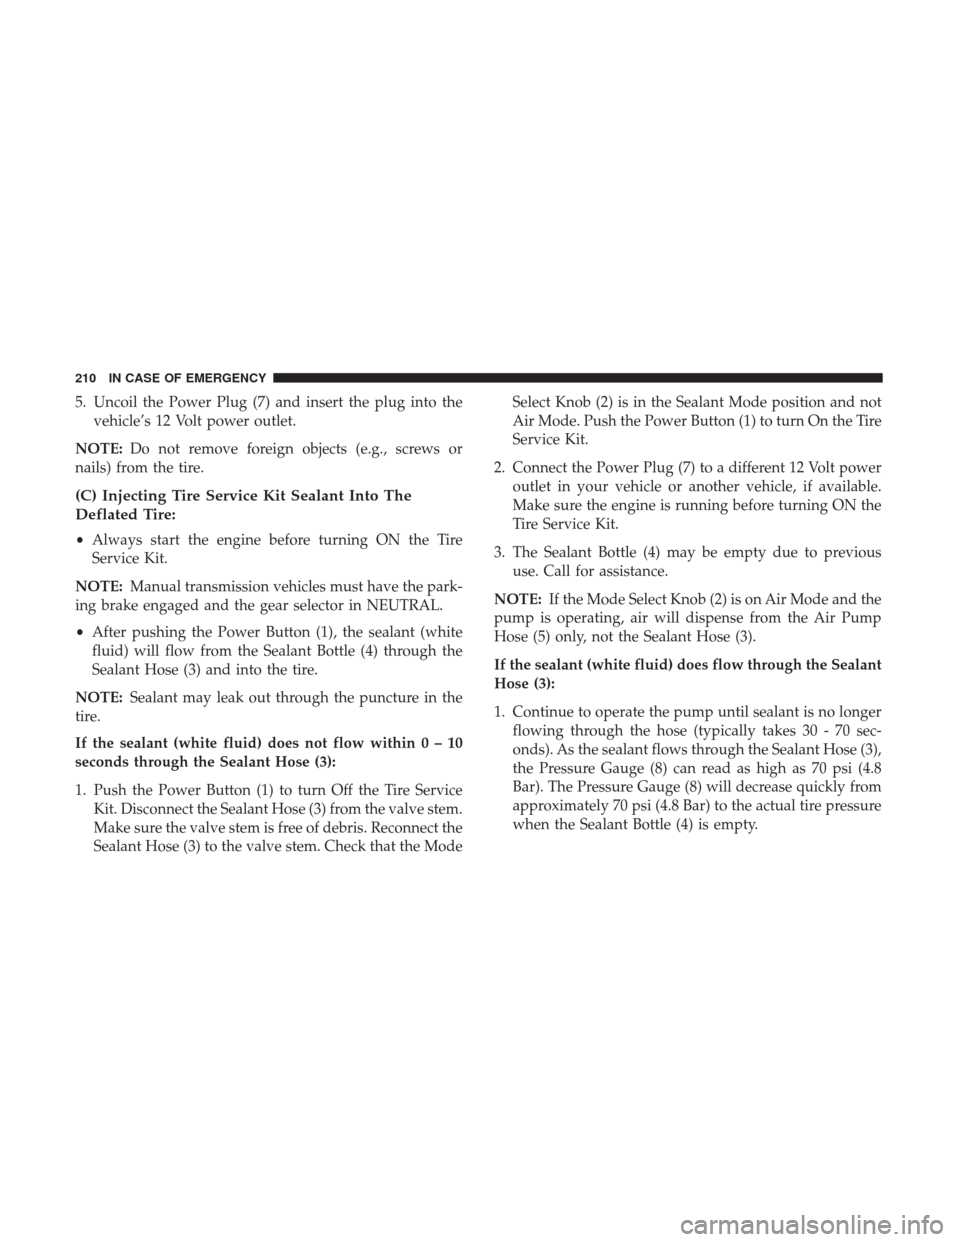
5. Uncoil the Power Plug (7) and insert the plug into thevehicle’s 12 Volt power outlet.
NOTE: Do not remove foreign objects (e.g., screws or
nails) from the tire.
(C) Injecting Tire Service Kit Sealant Into The
Deflated Tire:
• Always start the engine before turning ON the Tire
Service Kit.
NOTE: Manual transmission vehicles must have the park-
ing brake engaged and the gear selector in NEUTRAL.
• After pushing the Power Button (1), the sealant (white
fluid) will flow from the Sealant Bottle (4) through the
Sealant Hose (3) and into the tire.
NOTE: Sealant may leak out through the puncture in the
tire.
If the sealant (white fluid) does not flow within0–10
seconds through the Sealant Hose (3):
1. Push the Power Button (1) to turn Off the Tire Service Kit. Disconnect the Sealant Hose (3) from the valve stem.
Make sure the valve stem is free of debris. Reconnect the
Sealant Hose (3) to the valve stem. Check that the Mode Select Knob (2) is in the Sealant Mode position and not
Air Mode. Push the Power Button (1) to turn On the Tire
Service Kit.
2. Connect the Power Plug (7) to a different 12 Volt power outlet in your vehicle or another vehicle, if available.
Make sure the engine is running before turning ON the
Tire Service Kit.
3. The Sealant Bottle (4) may be empty due to previous use. Call for assistance.
NOTE: If the Mode Select Knob (2) is on Air Mode and the
pump is operating, air will dispense from the Air Pump
Hose (5) only, not the Sealant Hose (3).
If the sealant (white fluid) does flow through the Sealant
Hose (3):
1. Continue to operate the pump until sealant is no longer flowing through the hose (typically takes 30 - 70 sec-
onds). As the sealant flows through the Sealant Hose (3),
the Pressure Gauge (8) can read as high as 70 psi (4.8
Bar). The Pressure Gauge (8) will decrease quickly from
approximately 70 psi (4.8 Bar) to the actual tire pressure
when the Sealant Bottle (4) is empty.
210 IN CASE OF EMERGENCY
Page 216 of 332
CAUTION!
Do not use a portable battery booster pack or any other
booster source with a system voltage greater than 12
Volts or damage to the battery, starter motor, alternator
or electrical system may occur.
Preparations For Jump Start
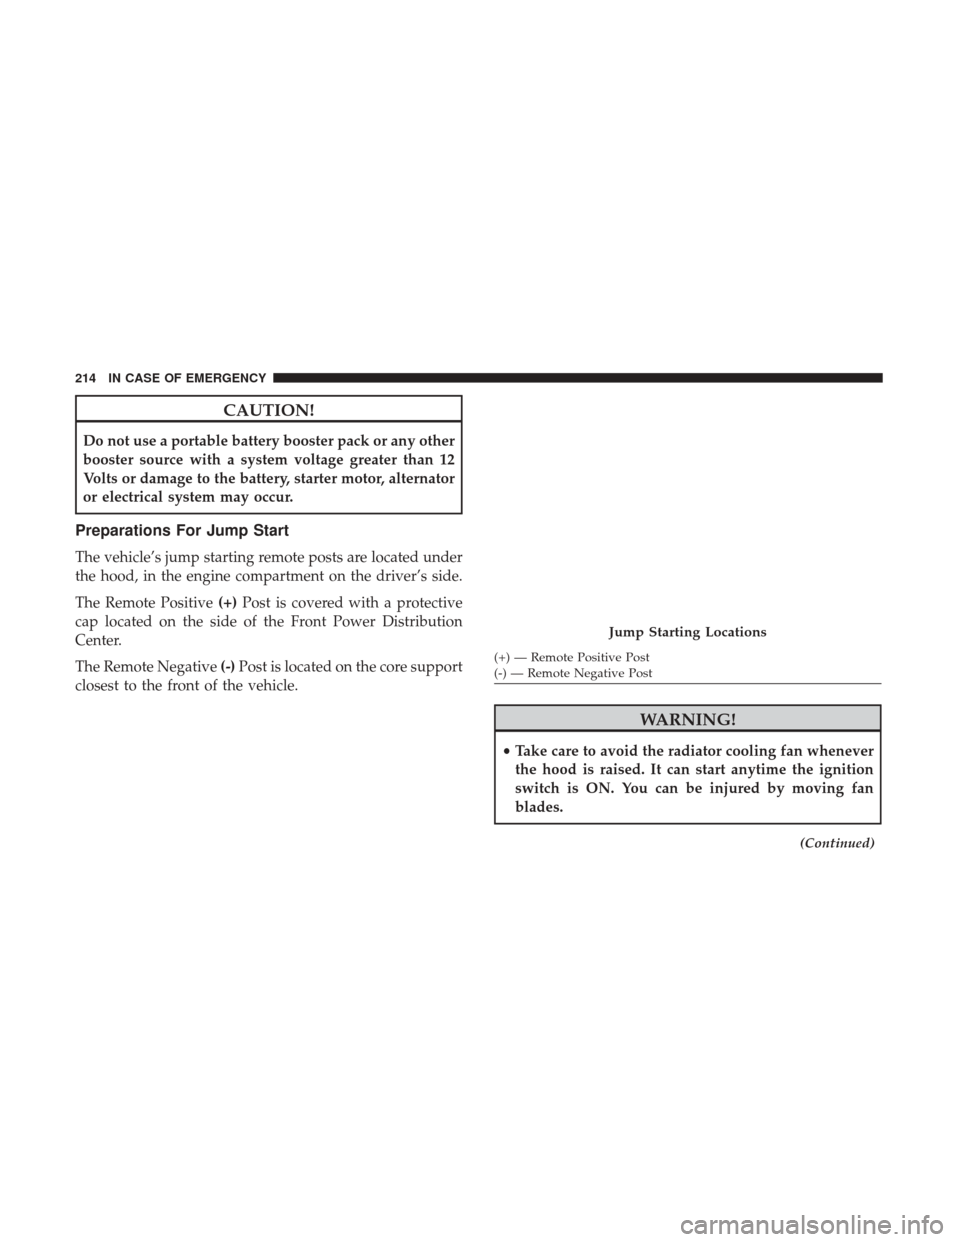
The vehicle’s jump starting remote posts are located under
the hood, in the engine compartment on the driver’s side.
The Remote Positive(+)Post is covered with a protective
cap located on the side of the Front Power Distribution
Center.
The Remote Negative (-)Post is located on the core support
closest to the front of the vehicle.
WARNING!
• Take care to avoid the radiator cooling fan whenever
the hood is raised. It can start anytime the ignition
switch is ON. You can be injured by moving fan
blades.
(Continued)
Jump Starting Locations
(+) — Remote Positive Post
(-) — Remote Negative Post
214 IN CASE OF EMERGENCY
Page 217 of 332

WARNING!(Continued)
•Remove any metal jewelry such as rings, watch
bands and bracelets that could make an inadvertent
electrical contact. You could be seriously injured.
• Batteries contain sulfuric acid that can burn your
skin or eyes and generate hydrogen gas which is
flammable and explosive. Keep open flames or
sparks away from the battery.
1. Apply the parking brake, shift the automatic transmis- sion into PARK and turn the ignition to the OFF
position.
2. Turn off the heater, radio, and all unnecessary electrical accessories.
3. If using another vehicle to jump start the battery, park the vehicle within the jumper cables reach, apply the
parking brake and make sure the ignition is OFF.
WARNING!
Do not allow vehicles to touch each other as this could
establish a ground connection and personal injury
could result.
Jump Starting Procedure
WARNING!
Failure to follow this jump starting procedure could
result in personal injury or property damage due to
battery explosion.
CAUTION!
Failure to follow these procedures could result in
damage to the charging system of the booster vehicle
or the discharged vehicle.
Connecting The Jumper Cables
1. Connect the positive (+)end of the jumper cable to the
remote positive (+)post of the discharged vehicle.
NOTE: The remote positive (+)post is located in the
engine compartment on the driver’s side under the cover of
the Front Power Distribution Center.
2. Connect the opposite end of the positive (+)jumper
cable to the positive (+)post of the booster battery.
3. Connect the negative end (-)of the jumper cable to the
negative (-)post of the booster battery.
7
IN CASE OF EMERGENCY 215
Page 218 of 332

4. Connect the opposite end of the negative(-)jumper
cable to the remote negative (-)post of the discharged
vehicle.
NOTE: The remote negative (-)post is located in the front
of the engine compartment on the driver’s side.
WARNING!
Do not connect the jumper cable to the negative (-) post
of the discharged battery. The resulting electrical spark
could cause the battery to explode and could result in
personal injury. Only use the specific ground point, do
not use any other exposed metal parts.
5. Start the engine in the vehicle that has the booster battery. Let the engine idle a few minutes and then start
the engine in the vehicle with the discharged battery.
6. Once the engine is started, disconnect the jumper cables in the reverse sequence:
Disconnecting The Jumper Cables
1. Disconnect the negative end (-)of the jumper cable from
the remote negative (-)post of the vehicle with the
discharged battery. 2. Disconnect the opposite end of the negative
(-)jumper
cable from the negative (-)post of the booster battery.
3. Disconnect the positive end (+)of the jumper cable from
the positive (+)post of the booster battery.
4. Disconnect the opposite end of the positive (+)jumper
cable from the remote positive (+)post of the discharged
vehicle.
5. Close the cover of the Front Power Distribution Center.
If frequent jump starting is required to start your vehicle
you should have the battery and charging system in-
spected at your authorized dealer.
CAUTION!
Accessories plugged into the vehicle power outlets
draw power from the vehicle’s battery, even when not
in use (i.e., cellular devices, etc.). Eventually, if plugged
in long enough without engine operation, the vehicle’s
battery will discharge sufficiently to degrade battery
life and/or prevent the engine from starting.
216 IN CASE OF EMERGENCY