start stop button RAM PROMASTER 2021 Owners Manual
[x] Cancel search | Manufacturer: RAM, Model Year: 2021, Model line: PROMASTER, Model: RAM PROMASTER 2021Pages: 288, PDF Size: 15.22 MB
Page 24 of 288
22GETTING TO KNOW YOUR VEHICLE
UCONNECT VOICE RECOGNITION
INTRODUCING VOICE RECOGNITION
Start using Uconnect Voice Recognition with
these helpful quick tips. It provides the key Voice
Commands and tips you need to know to control
your vehicle’s Voice Recognition (VR) system.
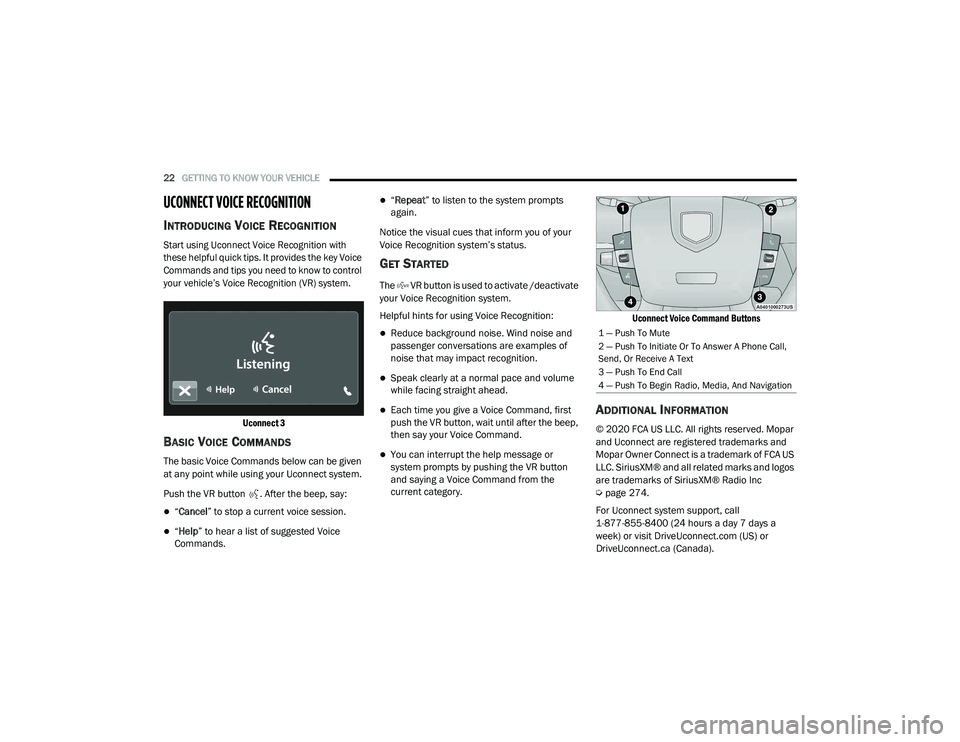
Uconnect 3
BASIC VOICE COMMANDS
The basic Voice Commands below can be given
at any point while using your Uconnect system.
Push the VR button . After the beep, say:
“Cancel ” to stop a current voice session.
“Help ” to hear a list of suggested Voice
Commands.
“ Repeat ” to listen to the system prompts
again.
Notice the visual cues that inform you of your
Voice Recognition system’s status.
GET STARTED
The VR button is used to activate /deactivate
your Voice Recognition system.
Helpful hints for using Voice Recognition:
Reduce background noise. Wind noise and
passenger conversations are examples of
noise that may impact recognition.
Speak clearly at a normal pace and volume
while facing straight ahead.
Each time you give a Voice Command, first
push the VR button, wait until after the beep,
then say your Voice Command.
You can interrupt the help message or
system prompts by pushing the VR button
and saying a Voice Command from the
current category.
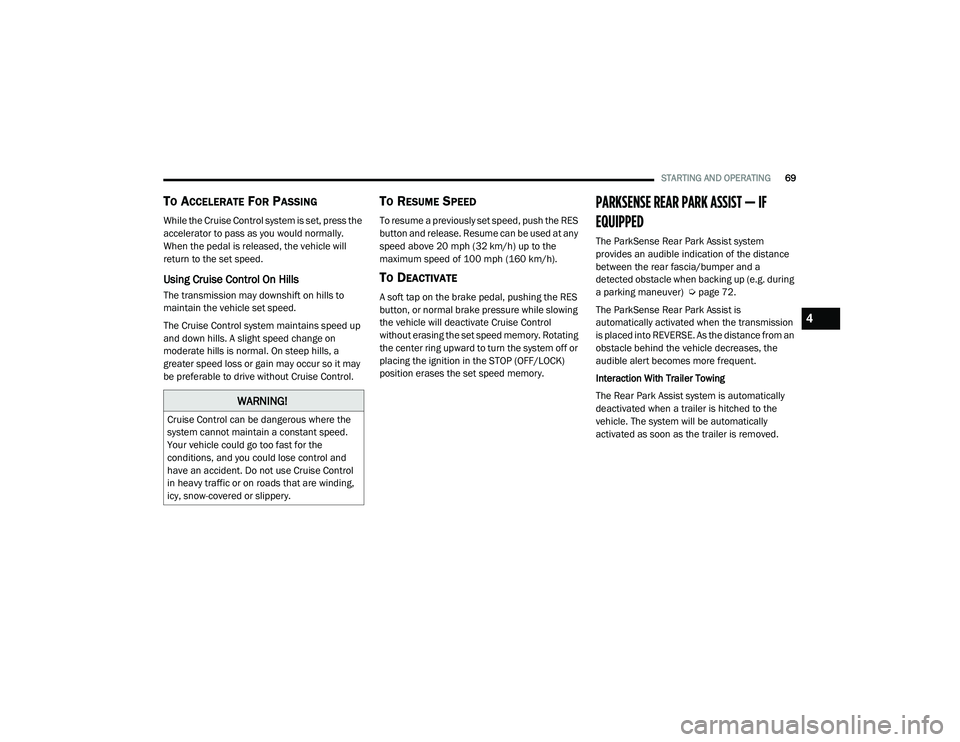
Uconnect Voice Command Buttons
ADDITIONAL INFORMATION
© 2020 FCA US LLC. All rights reserved. Mopar
and Uconnect are registered trademarks and
Mopar Owner Connect is a trademark of FCA US
LLC. SiriusXM® and all related marks and logos
are trademarks of SiriusXM® Radio Inc
Ú
page 274.
For Uconnect system support, call
1-877-855-8400 (24 hours a day 7 days a
week) or visit DriveUconnect.com (US) or DriveUconnect.ca (Canada).
1 — Push To Mute
2 — Push To Initiate Or To Answer A Phone Call,
Send, Or Receive A Text
3 — Push To End Call
4 — Push To Begin Radio, Media, And Navigation
21_VF_OM_EN_USC_t.book Page 22
Page 71 of 288
STARTING AND OPERATING69
TO ACCELERATE FOR PASSING
While the Cruise Control system is set, press the
accelerator to pass as you would normally.
When the pedal is released, the vehicle will
return to the set speed.
Using Cruise Control On Hills
The transmission may downshift on hills to
maintain the vehicle set speed.
The Cruise Control system maintains speed up
and down hills. A slight speed change on
moderate hills is normal. On steep hills, a
greater speed loss or gain may occur so it may
be preferable to drive without Cruise Control.
TO RESUME SPEED
To resume a previously set speed, push the RES
button and release. Resume can be used at any
speed above 20 mph (32 km/h) up to the
maximum speed of 100 mph (160 km/h).
TO DEACTIVATE
A soft tap on the brake pedal, pushing the RES
button, or normal brake pressure while slowing
the vehicle will deactivate Cruise Control
without erasing the set speed memory. Rotating
the center ring upward to turn the system off or
placing the ignition in the STOP (OFF/LOCK)
position erases the set speed memory.
PARKSENSE REAR PARK ASSIST — IF
EQUIPPED
The ParkSense Rear Park Assist system
provides an audible indication of the distance
between the rear fascia/bumper and a
detected obstacle when backing up (e.g. during
a parking maneuver) Úpage 72.
The ParkSense Rear Park Assist is
automatically activated when the transmission
is placed into REVERSE. As the distance from an
obstacle behind the vehicle decreases, the
audible alert becomes more frequent.
Interaction With Trailer Towing
The Rear Park Assist system is automatically
deactivated when a trailer is hitched to the
vehicle. The system will be automatically
activated as soon as the trailer is removed.
WARNING!
Cruise Control can be dangerous where the
system cannot maintain a constant speed.
Your vehicle could go too fast for the
conditions, and you could lose control and
have an accident. Do not use Cruise Control
in heavy traffic or on roads that are winding,
icy, snow-covered or slippery.
4
21_VF_OM_EN_USC_t.book Page 69
Page 103 of 288
MULTIMEDIA101
UCONNECT MODES
RADIO MODE
Operating Radio Mode
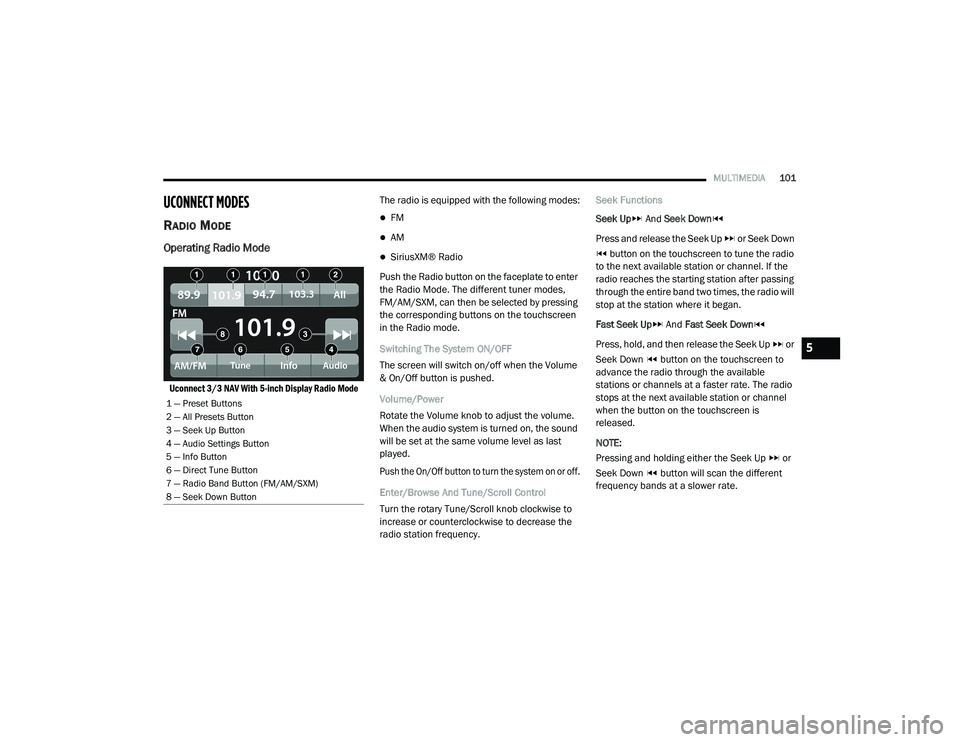
Uconnect 3/3 NAV With 5-inch Display Radio Mode
The radio is equipped with the following modes:
FM
AM
SiriusXM® Radio
Push the Radio button on the faceplate to enter
the Radio Mode. The different tuner modes,
FM/AM/SXM, can then be selected by pressing
the corresponding buttons on the touchscreen
in the Radio mode.
Switching The System ON/OFF
The screen will switch on/off when the Volume
& On/Off button is pushed.
Volume/Power
Rotate the Volume knob to adjust the volume.
When the audio system is turned on, the sound
will be set at the same volume level as last
played.
Push the On/Off button to turn the system on or off.
Enter/Browse And Tune/Scroll Control
Turn the rotary Tune/Scroll knob clockwise to
increase or counterclockwise to decrease the
radio station frequency. Seek Functions
Seek Up
And Seek Down
Press and release the Seek Up or Seek Down button on the touchscreen to tune the radio
to the next available station or channel. If the
radio reaches the starting station after passing
through the entire band two times, the radio will
stop at the station where it began.
Fast Seek Up And Fast Seek Down
Press, hold, and then release the Seek Up or
Seek Down button on the touchscreen to
advance the radio through the available
stations or channels at a faster rate. The radio
stops at the next available station or channel
when the button on the touchscreen is
released.
NOTE:
Pressing and holding either the Seek Up or
Seek Down button will scan the different
frequency bands at a slower rate.
1 — Preset Buttons
2 — All Presets Button
3 — Seek Up Button
4 — Audio Settings Button
5 — Info Button
6 — Direct Tune Button
7 — Radio Band Button (FM/AM/SXM)
8 — Seek Down Button
5
21_VF_OM_EN_USC_t.book Page 101
Page 131 of 288
MULTIMEDIA129
Planning A Route Using My Places
1. Select the Main Menu button.
2. Select “My Places”.
3. Select the place you want to navigate to. For
example: Home.
My Places
4. To plan a route to this place, select the Drive button. Finding A Parking Lot
1. Press the Parking button from the
Main Menu.
NOTE:
If a route is planned, the map shows parking
lots near your destination. If a route isn’t
planned, the map shows parking lots near your
current location. You also have an option to
view the parking lots in a list by pressing the
Menu button.
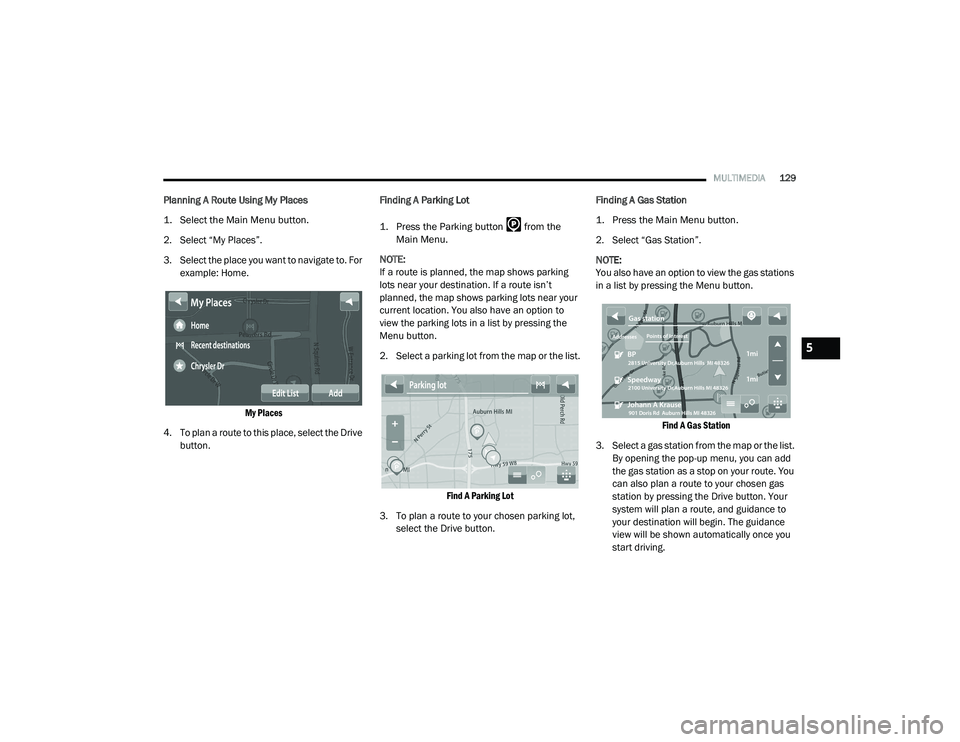
2. Select a parking lot from the map or the list.
Find A Parking Lot
3. To plan a route to your chosen parking lot, select the Drive button. Finding A Gas Station
1. Press the Main Menu button.
2. Select “Gas Station”.
NOTE:
You also have an option to view the gas stations
in a list by pressing the Menu button.
Find A Gas Station
3. Select a gas station from the map or the list. By opening the pop-up menu, you can add
the gas station as a stop on your route. You
can also plan a route to your chosen gas
station by pressing the Drive button. Your
system will plan a route, and guidance to
your destination will begin. The guidance
view will be shown automatically once you
start driving.
5
21_VF_OM_EN_USC_t.book Page 129
Page 144 of 288
142MULTIMEDIA
Points Of Interest
About Points Of Interest
Points Of Interest (POI) are useful places on the
map.
Here are some examples:
Restaurants
Hotels
Museums
Parking lots
Gas stations
Emergency Services
Using POIs To Plan A Route
When you plan a route, you can use a POI for the
destination or as a stop along the route. Using Search
1. Select “Search” on the Main Menu to begin
a search. The search screen will open,
displaying the keyboard. Enter the name of
your desired destination. Your search
results will be displayed in two lists.
Addresses and city matches are shown in
the list called “Addresses.” POIs, types of
POIs, and Places are shown in the list
called “Points of Interest.” You can also
select a POI category to only see POI
search results from that category.
2. Select the desired POI. The location will appear on the map. From here, you can
save the POI to “My Places,” use this POI as
a starting point, begin navigation to this
destination, or view more details about this
POI. By pressing “More Information,” you
can view the phone number and full
address of the POI.
3. If a route is already planned, you can add the location to your current route. To plan a
route to this destination, press the Drive
button on the touchscreen. NOTE:
Your navigation system will calculate a route,
and guidance to your destination will begin.
Guidance view will begin as soon as you start
driving.
My Places
About My Places
My Places provides an easy way to
select a location without the need to
enter the address or search for the
location. You can use My Places to
create a collection of useful or favorite
addresses.
The following items are always in My Places:
Home : Your home location can be your home
address or somewhere you often visit. This
feature provides an easy way to navigate
there.
Recent Destinations: Select this button to
select your destination from a list of locations
you have recently navigated to.
21_VF_OM_EN_USC_t.book Page 142
Page 181 of 288
SAFETY179
(Continued)
Fuel Cut Off Switch
Your vehicle is equipped with a Fuel Cut Off
switch. In the event of an accident, if the
communication network remains intact, and
the power remains intact, depending on the
nature of the event, the Fuel Cut Off Switch may
perform the following functions:
Cut off fuel to the engine and turn off the
engine.
Flash hazard lights as long as the battery has
power or until the hazard light button is
pressed. The hazard lights can be deacti -
vated by pressing the hazard light button.
Turn on the interior lights, which remain on
as long as the battery has power.
Unlock the power door locks.
NOTE:
After an accident, remember to cycle the igni -
tion to the STOP (OFF/LOCK) position and
remove the key from the ignition switch to avoid
draining the battery. Carefully check the vehicle
for fuel leaks in the engine compartment and on
the ground near the engine compartment and
fuel tank before resetting the system and
starting the engine. If there are no fuel leaks or damage to the vehicle electrical devices (e.g.
headlights) after an accident, reset the Fuel Cut
Off Switch by following the procedure described
below. If you have any doubt, contact an autho
-
rized dealer.
Fuel Cut Off Switch Reset Procedure
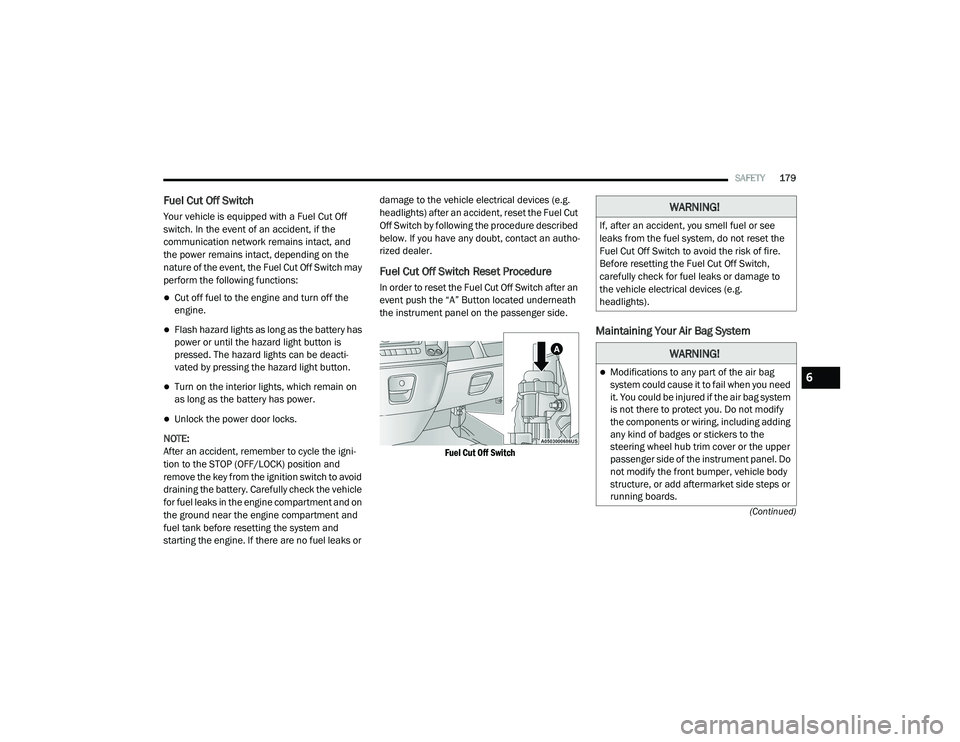
In order to reset the Fuel Cut Off Switch after an
event push the “A” Button located underneath
the instrument panel on the passenger side.
Fuel Cut Off Switch
Maintaining Your Air Bag System
WARNING!
If, after an accident, you smell fuel or see
leaks from the fuel system, do not reset the
Fuel Cut Off Switch to avoid the risk of fire.
Before resetting the Fuel Cut Off Switch,
carefully check for fuel leaks or damage to
the vehicle electrical devices (e.g.
headlights).
WARNING!
Modifications to any part of the air bag
system could cause it to fail when you need
it. You could be injured if the air bag system
is not there to protect you. Do not modify
the components or wiring, including adding
any kind of badges or stickers to the
steering wheel hub trim cover or the upper
passenger side of the instrument panel. Do
not modify the front bumper, vehicle body
structure, or add aftermarket side steps or
running boards.6
21_VF_OM_EN_USC_t.book Page 179
Page 202 of 288
200IN CASE OF EMERGENCY
SEALING A TIRE WITH TIRE SERVICE KIT
(A) Whenever You Stop To Use Tire Service
Kit:
1. Pull over to a safe location and turn on the
vehicle’s Hazard Warning Flashers.
2. Verify that the valve stem (on the wheel with the deflated tire) is in a position that is near
to the ground. This will allow the Tire Service
Kit Hoses (3) and (5) to reach the valve
stem and keep the Tire Service Kit flat on
the ground. This will provide the best
positioning of the kit when injecting the
sealant into the deflated tire and running
the air pump. Move the vehicle as
necessary to place the valve stem in this
position before proceeding.
3. Place the transmission in PARK (P) (auto transmission) or in Gear (manual
transmission) and place the ignition in the
OFF position.
4. Apply the parking brake.
(B) Setting Up To Use Tire Service Kit:
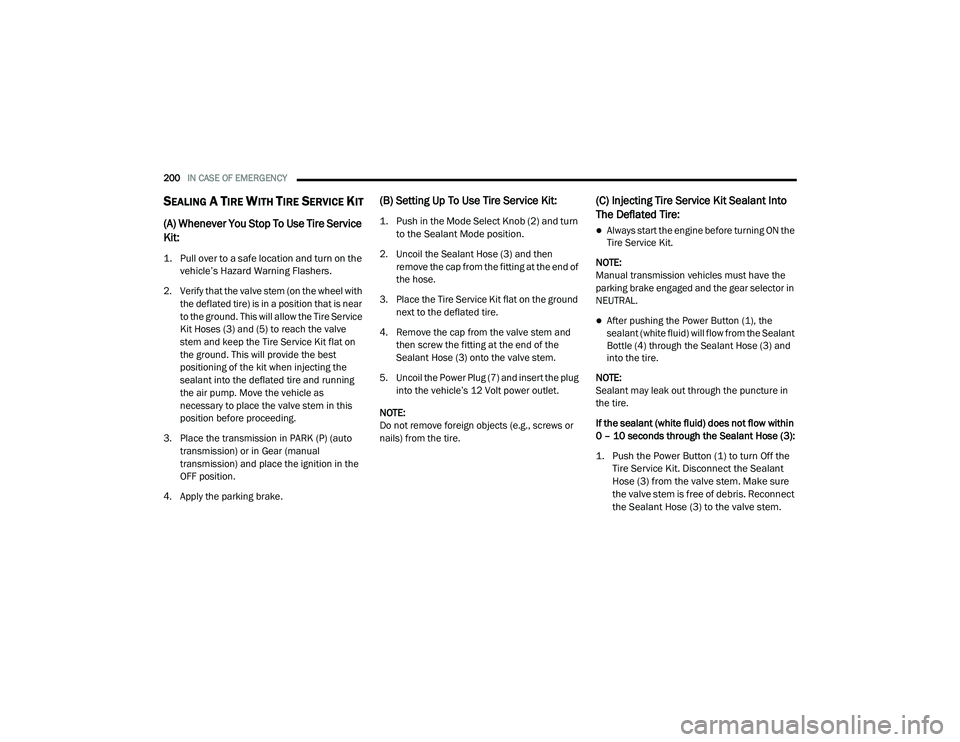
1. Push in the Mode Select Knob (2) and turn to the Sealant Mode position.
2. Uncoil the Sealant Hose (3) and then remove the cap from the fitting at the end of
the hose.
3. Place the Tire Service Kit flat on the ground next to the deflated tire.
4. Remove the cap from the valve stem and then screw the fitting at the end of the
Sealant Hose (3) onto the valve stem.
5. Uncoil the Power Plug (7) and insert the plug into the vehicle’s 12 Volt power outlet.
NOTE:
Do not remove foreign objects (e.g., screws or
nails) from the tire.
(C) Injecting Tire Service Kit Sealant Into
The Deflated Tire:
Always start the engine before turning ON the
Tire Service Kit.
NOTE:
Manual transmission vehicles must have the
parking brake engaged and the gear selector in
NEUTRAL.
After pushing the Power Button (1), the
sealant (white fluid) will flow from the Sealant
Bottle (4) through the Sealant Hose (3) and
into the tire.
NOTE:
Sealant may leak out through the puncture in
the tire.
If the sealant (white fluid) does not flow within
0 – 10 seconds through the Sealant Hose (3):
1. Push the Power Button (1) to turn Off the Tire Service Kit. Disconnect the Sealant
Hose (3) from the valve stem. Make sure
the valve stem is free of debris. Reconnect
the Sealant Hose (3) to the valve stem.
21_VF_OM_EN_USC_t.book Page 200