ECU RAM PROMASTER 2022 User Guide
[x] Cancel search | Manufacturer: RAM, Model Year: 2022, Model line: PROMASTER, Model: RAM PROMASTER 2022Pages: 268, PDF Size: 13.26 MB
Page 24 of 268
22GETTING TO KNOW YOUR VEHICLE
NOTE:
Passive Entry may be programmed on or off
within Uconnect Settings Úpage 120.
The key fob may not be detected by the vehicle
Passive Entry system if it is located next to a
mobile phone, laptop, or other electronic device;
these devices may block the key fob’s wireless
signal and prevent the Passive Entry system
from locking/unlocking the vehicle.
Passive Entry Unlock initiates illuminated
approach (low beams, license plate lamp, posi -
tion lamps) for whichever time duration is set
between 0, 30, 60 or 90 seconds. Passive Entry
Unlock also initiates two flashes of the turn
signal lamps.
If the vehicle is unlocked by Passive Entry and
no door is opened within 60 seconds, the
vehicle will relock and (if equipped) will arm the
Vehicle Security system.
To Unlock From The Driver, Passenger or Rear
Door
With a valid Passive Entry key fob within 5 ft
(1.5 m) of the door handle, push the Passive Entry
button next to the handle to unlock the vehicle.
Unlock the front doors only if the Uconnect
setting is set to "Approach" and you press the
button located next to the front handle.
Unlock the load compartment doors only if the
Uconnect setting is set to "Approach" and you
press the button located next to the rear handle.
The Passive Entry feature will be disabled if the
Uconnect setting is set to "Off".
NOTE:
Either the load compartment and cabin
compartment or all doors will unlock when you
press Passive Entry button, depending on the
selected setting in the Uconnect system
Ú page 120.
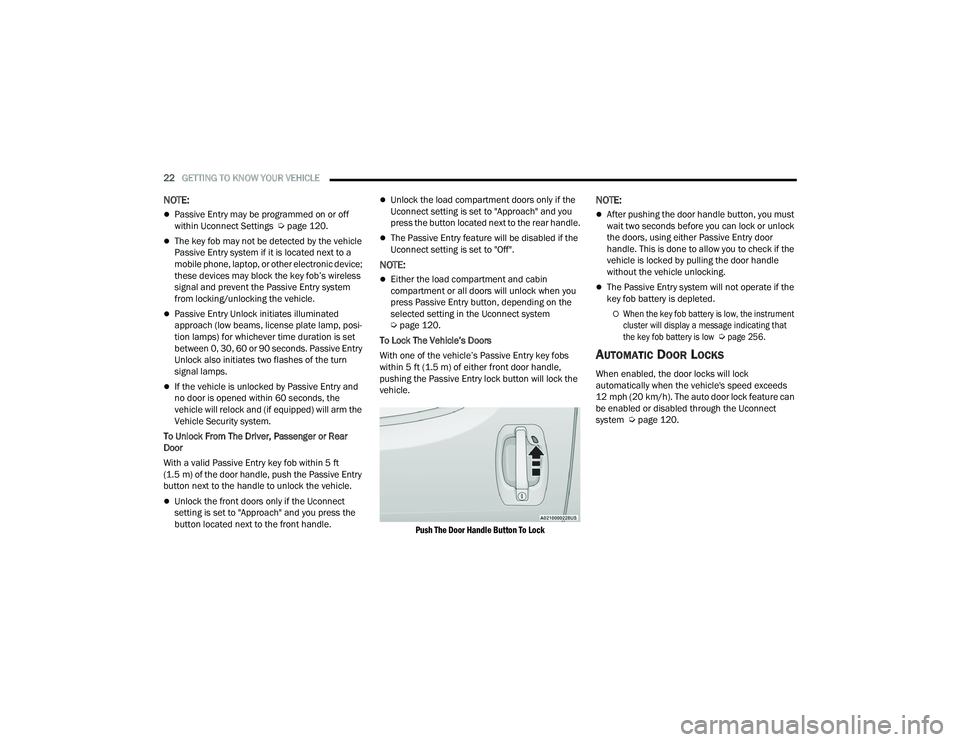
To Lock The Vehicle’s Doors
With one of the vehicle’s Passive Entry key fobs
within 5 ft (1.5 m) of either front door handle,
pushing the Passive Entry lock button will lock the
vehicle.
Push The Door Handle Button To Lock
NOTE:
After pushing the door handle button, you must
wait two seconds before you can lock or unlock
the doors, using either Passive Entry door
handle. This is done to allow you to check if the
vehicle is locked by pulling the door handle
without the vehicle unlocking.
The Passive Entry system will not operate if the
key fob battery is depleted.
When the key fob battery is low, the instrument
cluster will display a message indicating that
the key fob battery is low
Ú
page 256.
AUTOMATIC DOOR LOCKS
When enabled, the door locks will lock
automatically when the vehicle's speed exceeds
12 mph (20 km/h). The auto door lock feature can
be enabled or disabled through the Uconnect
system Ú page 120.
22_VF_OM_EN_USC_t.book Page 22
Page 30 of 268
28GETTING TO KNOW YOUR VEHICLE
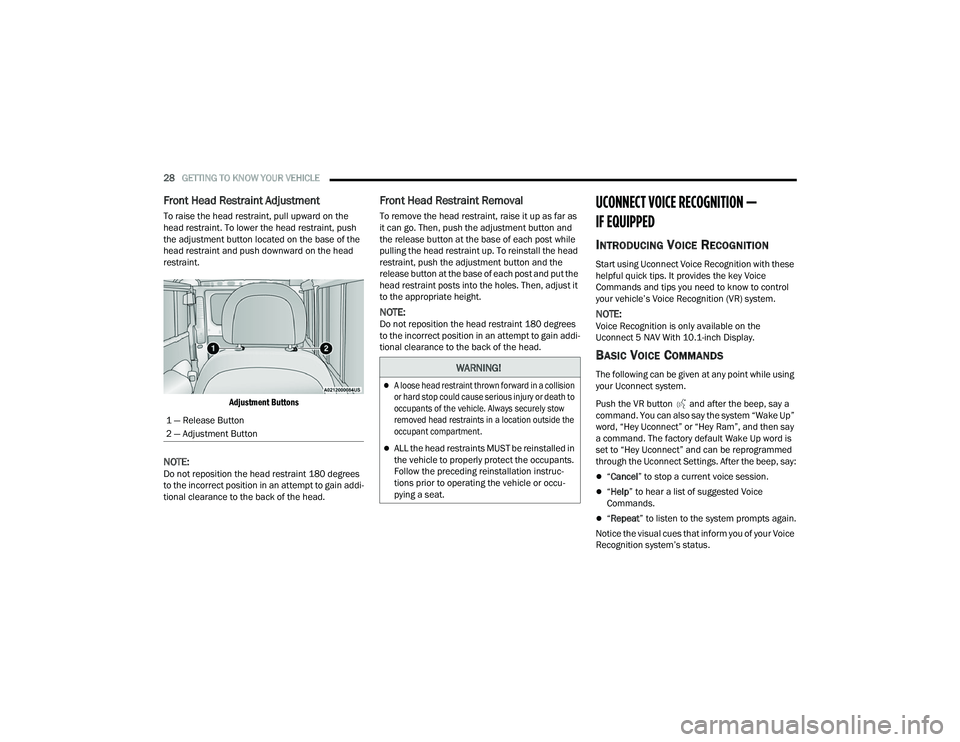
Front Head Restraint Adjustment
To raise the head restraint, pull upward on the
head restraint. To lower the head restraint, push
the adjustment button located on the base of the
head restraint and push downward on the head
restraint.
Adjustment Buttons
NOTE:Do not reposition the head restraint 180 degrees
to the incorrect position in an attempt to gain addi -
tional clearance to the back of the head.
Front Head Restraint Removal
To remove the head restraint, raise it up as far as
it can go. Then, push the adjustment button and
the release button at the base of each post while
pulling the head restraint up. To reinstall the head
restraint, push the adjustment button and the
release button at the base of each post and put the
head restraint posts into the holes. Then, adjust it
to the appropriate height.
NOTE:Do not reposition the head restraint 180 degrees
to the incorrect position in an attempt to gain addi -
tional clearance to the back of the head.
UCONNECT VOICE RECOGNITION —
IF EQUIPPED
INTRODUCING VOICE RECOGNITION
Start using Uconnect Voice Recognition with these
helpful quick tips. It provides the key Voice
Commands and tips you need to know to control
your vehicle’s Voice Recognition (VR) system.
NOTE:Voice Recognition is only available on the
Uconnect 5 NAV With 10.1-inch Display.
BASIC VOICE COMMANDS
The following can be given at any point while using
your Uconnect system.
Push the VR button and after the beep, say a
command. You can also say the system “Wake Up”
word, “Hey Uconnect” or “Hey Ram”, and then say
a command. The factory default Wake Up word is
set to “Hey Uconnect” and can be reprogrammed
through the Uconnect Settings. After the beep, say:
“ Cancel ” to stop a current voice session.
“Help ” to hear a list of suggested Voice
Commands.
“ Repeat ” to listen to the system prompts again.
Notice the visual cues that inform you of your Voice
Recognition system’s status.
1 — Release Button
2 — Adjustment Button
WARNING!
A loose head restraint thrown forward in a collision
or hard stop could cause serious injury or death to
occupants of the vehicle. Always securely stow
removed head restraints in a location outside the
occupant compartment.
ALL the head restraints MUST be reinstalled in
the vehicle to properly protect the occupants.
Follow the preceding reinstallation instruc
-
tions prior to operating the vehicle or occu -
pying a seat.
22_VF_OM_EN_USC_t.book Page 28
Page 52 of 268
50GETTING TO KNOW YOUR VEHICLE
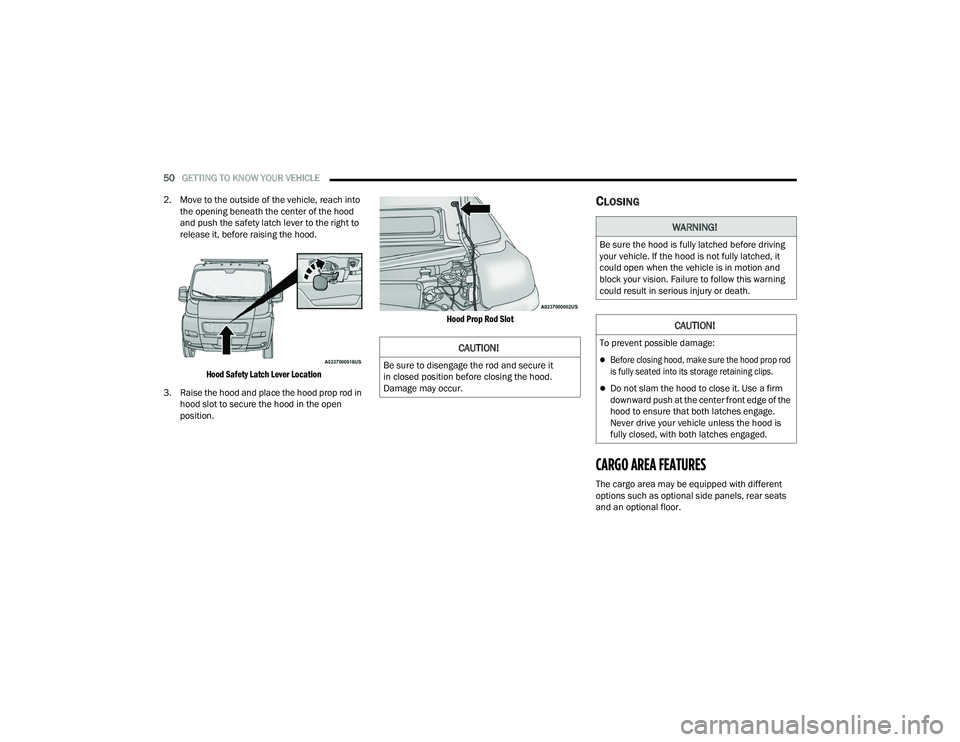
2. Move to the outside of the vehicle, reach into the opening beneath the center of the hood
and push the safety latch lever to the right to
release it, before raising the hood.
Hood Safety Latch Lever Location
3. Raise the hood and place the hood prop rod in hood slot to secure the hood in the open
position.
Hood Prop Rod Slot
CLOSING
CARGO AREA FEATURES
The cargo area may be equipped with different
options such as optional side panels, rear seats
and an optional floor.
CAUTION!
Be sure to disengage the rod and secure it
in closed position before closing the hood.
Damage may occur.
WARNING!
Be sure the hood is fully latched before driving
your vehicle. If the hood is not fully latched, it
could open when the vehicle is in motion and
block your vision. Failure to follow this warning
could result in serious injury or death.
CAUTION!
To prevent possible damage:
Before closing hood, make sure the hood prop rod
is fully seated into its storage retaining clips.
Do not slam the hood to close it. Use a firm
downward push at the center front edge of the
hood to ensure that both latches engage.
Never drive your vehicle unless the hood is
fully closed, with both latches engaged.
22_VF_OM_EN_USC_t.book Page 50
Page 60 of 268
58GETTING TO KNOW YOUR INSTRUMENT PANEL
VEHICLE SETTINGS
NOTE:Some items may be displayed and managed
through the Uconnect system. This may vary
according to your vehicle equipment. If equipped,
the following menu/submenu items are available
in the cluster display.
NOTE:If equipped, some customer programmable
features will display in the Uconnect system
Úpage 120.
This menu allows you to change the settings for the
following:
Display
Security
Safety And Assistance
Vehicle Shut Off Display – If Equipped
By selecting the item “Display,” you can access the
following settings using the arrows on the steering
wheel:
Screen Setup
Center
• Audio Info
• Phone Info
• Time
• Outside Temp
• Date
Bottom Right
• Time
• Odometer
• Outside Temp
• Date
Reset Trip B
Phone repetition
Navigation repetition
Off
Map
PictogramSecurity – If Equipped
By selecting the item “Security” you can make the
following adjustments (if equipped):
Passenger Airbag: Front passenger air bag may
be enabled or disabled
Speed Warning: Set the vehicle speed limit,
which the driver is notified through a visual and
acoustic signaling (display of a message and a
symbol on the display)
Seat Belt Reminder: This function is only view
-
able when the Seat Belt Reminder (SBR) system
is active
Hill Start Assist: Activation/Deactivation of the
Hill Start Assist system
Safety And Assistance – If Equipped
By selecting the item “Safety & Assistance” you
can make the following adjustments
Warning Buzzer Volume: Off/Low/Medium/High
Vehicle Shut Off – If Equipped
By selecting the item “Vehicle Shut Off”, you can
turn off the engine from the instrument cluster.
This feature is available in the event of a Keyless
Ignition system failure, and will display instructions
for turning off the engine via the instrument cluster
display controls.
22_VF_OM_EN_USC_t.book Page 58
Page 63 of 268
GETTING TO KNOW YOUR INSTRUMENT PANEL61
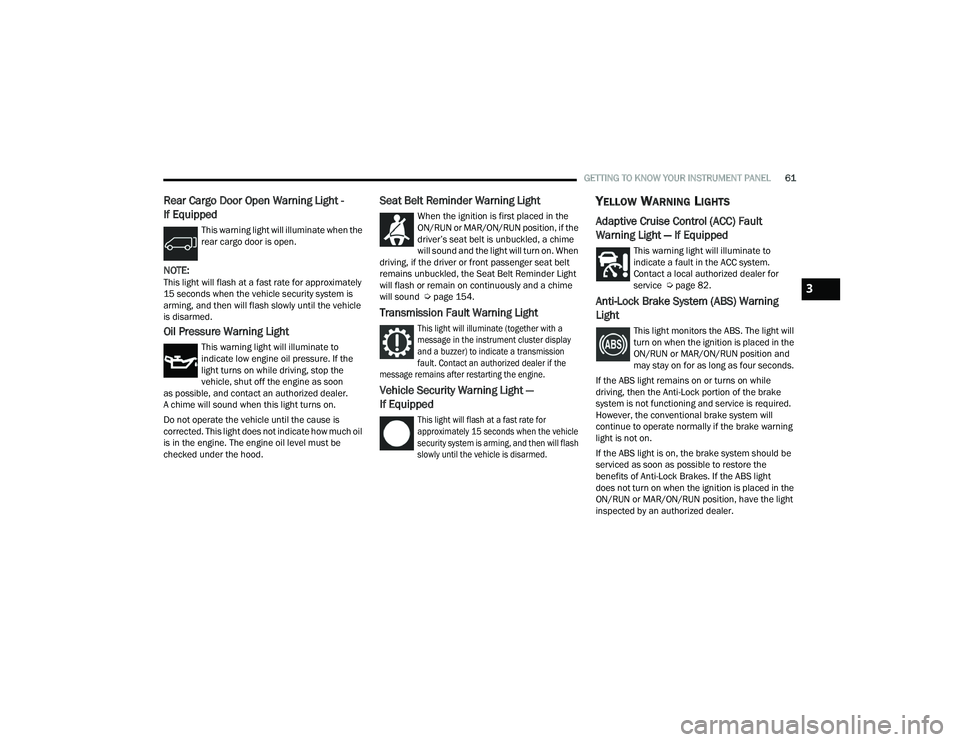
Rear Cargo Door Open Warning Light -
If Equipped
This warning light will illuminate when the
rear cargo door is open.
NOTE:This light will flash at a fast rate for approximately
15 seconds when the vehicle security system is
arming, and then will flash slowly until the vehicle
is disarmed.
Oil Pressure Warning Light
This warning light will illuminate to
indicate low engine oil pressure. If the
light turns on while driving, stop the
vehicle, shut off the engine as soon
as possible, and contact an authorized dealer.
A chime will sound when this light turns on.
Do not operate the vehicle until the cause is
corrected. This light does not indicate how much oil
is in the engine. The engine oil level must be
checked under the hood.
Seat Belt Reminder Warning Light
When the ignition is first placed in the
ON/RUN or MAR/ON/RUN position, if the
driver’s seat belt is unbuckled, a chime
will sound and the light will turn on. When
driving, if the driver or front passenger seat belt
remains unbuckled, the Seat Belt Reminder Light
will flash or remain on continuously and a chime
will sound Ú page 154.
Transmission Fault Warning Light
This light will illuminate (together with a
message in the instrument cluster display
and a buzzer) to indicate a transmission
fault. Contact an authorized dealer if the
message remains after restarting the engine.
Vehicle Security Warning Light —
If Equipped
This light will flash at a fast rate for
approximately 15 seconds when the vehicle
security system is arming, and then will flash
slowly until the vehicle is disarmed.
YELLOW WARNING LIGHTS
Adaptive Cruise Control (ACC) Fault
Warning Light — If Equipped
This warning light will illuminate to
indicate a fault in the ACC system.
Contact a local authorized dealer for
service Ú page 82.
Anti-Lock Brake System (ABS) Warning
Light
This light monitors the ABS. The light will
turn on when the ignition is placed in the
ON/RUN or MAR/ON/RUN position and
may stay on for as long as four seconds.
If the ABS light remains on or turns on while
driving, then the Anti-Lock portion of the brake
system is not functioning and service is required.
However, the conventional brake system will
continue to operate normally if the brake warning
light is not on.
If the ABS light is on, the brake system should be
serviced as soon as possible to restore the
benefits of Anti-Lock Brakes. If the ABS light
does not turn on when the ignition is placed in the
ON/RUN or MAR/ON/RUN position, have the light
inspected by an authorized dealer.
3
22_VF_OM_EN_USC_t.book Page 61
Page 64 of 268
62GETTING TO KNOW YOUR INSTRUMENT PANEL
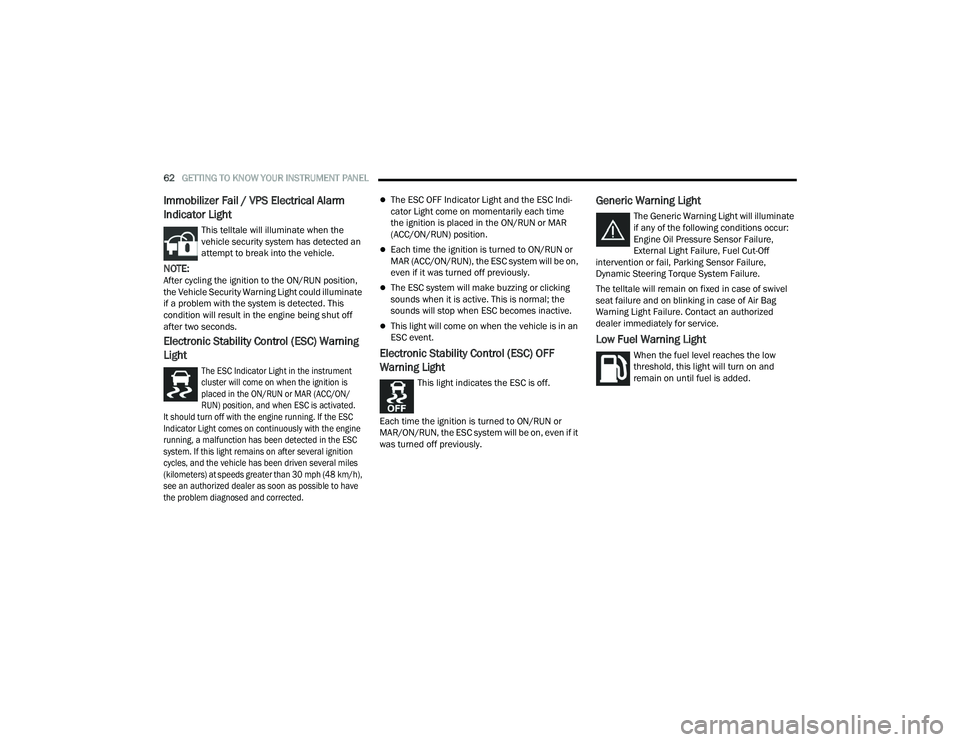
Immobilizer Fail / VPS Electrical Alarm
Indicator Light
This telltale will illuminate when the
vehicle security system has detected an
attempt to break into the vehicle.
NOTE:After cycling the ignition to the ON/RUN position,
the Vehicle Security Warning Light could illuminate
if a problem with the system is detected. This
condition will result in the engine being shut off
after two seconds.
Electronic Stability Control (ESC) Warning
Light
The ESC Indicator Light in the instrument
cluster will come on when the ignition is
placed in the ON/RUN or MAR (ACC/ON/
RUN) position, and when ESC is activated.
It should turn off with the engine running. If the ESC
Indicator Light comes on continuously with the engine
running, a malfunction has been detected in the ESC
system. If this light remains on after several ignition
cycles, and the vehicle has been driven several miles
(kilometers) at speeds greater than 30 mph (48 km/h),
see an authorized dealer as soon as possible to have
the problem diagnosed and corrected.
The ESC OFF Indicator Light and the ESC Indi -
cator Light come on momentarily each time
the ignition is placed in the ON/RUN or MAR
(ACC/ON/RUN) position.
Each time the ignition is turned to ON/RUN or
MAR (ACC/ON/RUN), the ESC system will be on,
even if it was turned off previously.
The ESC system will make buzzing or clicking
sounds when it is active. This is normal; the
sounds will stop when ESC becomes inactive.
This light will come on when the vehicle is in an
ESC event.
Electronic Stability Control (ESC) OFF
Warning Light
This light indicates the ESC is off.
Each time the ignition is turned to ON/RUN or
MAR/ON/RUN, the ESC system will be on, even if it
was turned off previously.
Generic Warning Light
The Generic Warning Light will illuminate
if any of the following conditions occur:
Engine Oil Pressure Sensor Failure,
External Light Failure, Fuel Cut-Off
intervention or fail, Parking Sensor Failure,
Dynamic Steering Torque System Failure.
The telltale will remain on fixed in case of swivel
seat failure and on blinking in case of Air Bag
Warning Light Failure. Contact an authorized
dealer immediately for service.
Low Fuel Warning Light
When the fuel level reaches the low
threshold, this light will turn on and
remain on until fuel is added.
22_VF_OM_EN_USC_t.book Page 62
Page 70 of 268

68GETTING TO KNOW YOUR INSTRUMENT PANEL
ONBOARD DIAGNOSTIC SYSTEM
(OBD II) C
YBERSECURITY
Your vehicle is required to have an OBD II and a
connection port to allow access to information
related to the performance of your emissions
controls. Authorized service technicians may need
to access this information to assist with the
diagnosis and service of your vehicle and
emissions system Ú page 119.
EMISSIONS INSPECTION AND
MAINTENANCE PROGRAMS
In some localities, it may be a legal requirement to
pass an inspection of your vehicle's emissions
control system. Failure to pass could prevent
vehicle registration.
For states that require an Inspection and
Maintenance (I/M), this check verifies
the Malfunction Indicator Light (MIL) is
functioning and is not on when the
engine is running, and that the OBD II system is
ready for testing.
The OBD II system may not be ready if your vehicle
was recently serviced, recently had a depleted
battery or a battery replacement. If the OBD II
system should be determined not ready for the I/M
test, your vehicle may fail the test.
Your vehicle has a simple ignition actuated test,
which you can use prior to going to the test station.
To check if your vehicle's OBD II system is ready,
you must do the following:
1. Switch the ignition to the ON position, but do not crank or start the engine.
NOTE:If you crank or start the engine, you will have to
start this test over. 2. As soon as you cycle the ignition switch to the
ON position, you will see the Malfunction
Indicator Light (MIL) symbol come on as part of
a normal bulb check.
3. Approximately 15 seconds later, one of two things will happen:
The MIL will flash for about 10 seconds and
then return to being fully illuminated until you
turn OFF the ignition or start the engine. This
means that your vehicle's OBD II system is not
ready and you should not proceed to the I/M
station.
The MIL will not flash at all and will remain fully
illuminated until you place the ignition in the off
position or start the engine. This means that
your vehicle's OBD II system is ready and you
can proceed to the I/M station.
If your OBD II system is not ready, you should see
an authorized dealer or repair facility. If your
vehicle was recently serviced or had a battery
failure or replacement, you may need to do nothing
more than drive your vehicle as you normally would
in order for your OBD II system to update. A
recheck with the above test routine may then
indicate that the system is now ready.
WARNING!
ONLY an authorized service technician should
connect equipment to the OBD II connection
port in order to read the VIN, diagnose, or
service your vehicle.
If unauthorized equipment is connected to the
OBD II connection port, such as a
driver-behavior tracking device, it may:
Be possible that vehicle systems,
including safety related systems, could be
impaired or a loss of vehicle control could
occur that may result in an accident
involving serious injury or death.
Access, or allow others to access, infor -
mation stored in your vehicle systems,
including personal information.
22_VF_OM_EN_USC_t.book Page 68
Page 75 of 268
STARTING AND OPERATING73
(Continued)
SafeHold
SafeHold is a safety feature of the Electric Park
Brake (EPB) system that will engage the parking
brake automatically if the vehicle is left unsecured
while the ignition is in ON/RUN.
The parking brake will automatically engage if all of
the following conditions are met:
The vehicle is at a standstill.
There is no attempt to press the brake pedal
and accelerator pedal.
The seat belt is unbuckled.
The driver door is open.
SafeHold can be temporarily bypassed by pushing
the EPB switch while the driver door is open. Once
manually bypassed, SafeHold will be enabled
again once the vehicle reaches 12 mph (20 km/h)
or the ignition is turned to the OFF position and
back to ON again.
Brake Service Mode
We recommend having your brakes serviced by an
authorized dealer. You should only make repairs
for which you have the knowledge and the right
equipment. You should only enter Brake Service
Mode during brake service.
When servicing your rear brakes, it may be necessary
for you or your technician to push the rear piston into
the rear caliper bore. With the Electric Park Brake (EPB)
system, this can only be done after retracting the EPB actuator. Fortunately, actuator retraction can be done
easily by entering the Brake Service Mode through the
Uconnect Settings in your vehicle. This menu-based
system will guide you through the steps necessary to
retract the EPB actuator in order to perform rear brake
service.
Service Mode has requirements that must be met
in order to be activated:
The vehicle must be at a standstill.
The parking brake must be unapplied.
The transmission must be in PARK or NEUTRAL.
While in Service Mode, the EPB fault lamp will flash
continuously while the ignition is in ON/RUN.
When brake service work is complete, the following
steps must be followed to reset the park brake
system to normal operation:
Ensure the vehicle is at a standstill.
Press the brake pedal with moderate force.
Apply the EPB Switch.
AUTOMATIC TRANSMISSION
WARNING!
You can be badly injured working on or around a
motor vehicle. Do only that service work for
which you have the knowledge and the right
equipment. If you have any doubt about your
ability to perform a service job, take your vehicle
to a competent mechanic.
WARNING!
It is dangerous to shift out of PARK or
NEUTRAL if the engine speed is higher than
idle speed. If your foot is not firmly pressing
the brake pedal, the vehicle could accelerate
quickly forward or in reverse. You could lose
control of the vehicle and hit someone or
something. Only shift into gear when the
engine is idling normally and your foot is firmly
pressing the brake pedal.
Unintended movement of a vehicle could
injure those in or near the vehicle. As with all
vehicles, you should never exit a vehicle while
the engine is running. Before exiting a vehicle,
always come to a complete stop, then apply
the parking brake, shift the transmission into
PARK, and turn the ignition off. When the igni -
tion is in the OFF position, the transmission is
locked in PARK, securing the vehicle against
unwanted movement.
When leaving the vehicle, always make sure
the ignition is in the OFF position, remove the
key fob from the vehicle, and lock the vehicle.
4
22_VF_OM_EN_USC_t.book Page 73
Page 78 of 268

76STARTING AND OPERATING
The following indicators should be used to ensure
that you have engaged the transmission into the
PARK position:
When shifting into PARK, firmly move the gear
selector all the way forward and to the left until
it stops and is fully seated.
Look at the transmission gear position display
and verify that it indicates the PARK position (P).
With the brake pedal released, verify that the
gear selector will not move out of PARK.
REVERSE (R)
This range is for moving the vehicle backward.
Shift into REVERSE only after the vehicle has come
to a complete stop.
NEUTRAL (N)
Use this range when the vehicle is standing for
prolonged periods with the engine running.
The engine may be started in this range. Apply the
parking brake and shift the transmission into PARK
if you must exit the vehicle.
DRIVE (D)
This range should be used for most city and
highway driving. It provides the smoothest upshifts
and downshifts, and the best fuel economy. The
transmission automatically upshifts through all
forward gears.
Unintended movement of a vehicle could injure
those in or near the vehicle. As with all vehicles,
you should never exit a vehicle while the engine is
running or the propulsion system is active. Before
exiting a vehicle, always come to a complete stop,
then apply the parking brake, shift the transmis -
sion into PARK, and turn the ignition OFF. When
the ignition is in the OFF position, the transmission
is locked in PARK, securing the vehicle against
unwanted movement.
When leaving the vehicle, always make sure
the ignition is in the OFF position, remove the
key fob from the vehicle, and lock the vehicle.
Never leave children alone in a vehicle, or with
access to an unlocked vehicle. Allowing chil -
dren to be in a vehicle unattended is
dangerous for a number of reasons. A child or
others could be seriously or fatally injured.
Children should be warned not to touch the
parking brake, brake pedal or the transmis -
sion gear selector.
Do not leave the key fob in or near the vehicle
(or in a location accessible to children), and do
not leave the ignition in the ON/RUN position.
A child could operate power windows, other
controls, or move the vehicle.
WARNING!
CAUTION!
Before moving the transmission gear selector
out of PARK, you must turn the ignition to the
ON/RUN position, and also press the brake
pedal. Otherwise, damage to the gear selector
could result.
DO NOT race the engine when shifting from
PARK or NEUTRAL into another gear range, as
this can damage the drivetrain.
WARNING!
Do not coast in NEUTRAL and never turn off the
ignition to coast down a hill. These are unsafe
practices that limit your response to changing
traffic or road conditions. You might lose control
of the vehicle and have a collision.
CAUTION!
Towing the vehicle, coasting, or driving for any
other reason with the transmission in NEUTRAL
can cause severe transmission damage.
For Recreational Towing Ú page 116.
For Towing A Disabled Vehicle Ú page 196.
22_VF_OM_EN_USC_t.book Page 76
Page 89 of 268

STARTING AND OPERATING87
Distance Settings
To adjust the distance setting, push the Distance
Setting Button and release. Each time the button is
pushed, the distance setting decreases by one bar
(longer). Once the longest setting is reached, if the
button is pushed again it will be set to the shortest
setting available.
If a slower moving vehicle is detected in the same
lane, the instrument cluster display will show the
ACC Set With Target Detected Light. The system
will then adjust vehicle speed automatically to
maintain the distance setting, regardless of the
set speed.
The vehicle will then maintain the set distance until:
The vehicle ahead accelerates to a speed above
the set speed.
The vehicle ahead moves out of your lane or
view of the sensor.
The distance setting is changed.
The system disengages Ú
page 84.
The maximum braking applied by ACC is limited;
however, the driver can always apply the brakes
manually, if necessary.
NOTE:The brake lights will illuminate whenever the ACC
system applies the brakes.
A Proximity Warning will alert the driver if ACC
predicts that its maximum braking level is not
sufficient to maintain the set distance. If this
occurs, a visual alert “BRAKE!” will flash in the
instrument cluster display and a chime will sound
while ACC continues to apply its maximum braking
force.
NOTE:The “BRAKE!” screen in the instrument cluster
display is a warning for the driver to take action
and does not necessarily mean that the Forward
Collision Warning system is applying the brakes
autonomously.
Overtake Aid
When driving with Adaptive Cruise Control (ACC)
engaged and following a vehicle, the system will
provide an additional acceleration up to the ACC
set speed to assist in passing the vehicle. This
additional acceleration is triggered when the driver
utilizes the left turn signal and will only be active
when passing on the left hand side.
ACC Operation At Stop
In the event that the ACC system brings your
vehicle to a standstill while following a vehicle in
front, if the vehicle in front starts moving within two
seconds of your vehicle coming to a standstill, your
vehicle will resume motion without the need for
any driver action.
If the vehicle in front does not start moving within
two seconds of your vehicle coming to a standstill,
the driver will either have to push the RES (resume)
button, or apply the accelerator pedal to reengage
the ACC to the existing set speed.
NOTE:After the ACC system holds your vehicle at a stand -
still for approximately three consecutive minutes,
the parking brake will be activated, and the ACC
system will be cancelled.
While ACC is holding your vehicle at a standstill, if
the driver seat belt is unbuckled or the driver door
is opened, the parking brake will be activated, and
the ACC system will be cancelled.
1 — Longest Distance Setting (Four Bars)
2 — Medium Distance Setting (Two Bars)
3 — Long Distance Setting (Three Bars)
4 — Short Distance Setting (One Bar)
4
22_VF_OM_EN_USC_t.book Page 87