ESP RAM PROMASTER 2023 Owners Manual
[x] Cancel search | Manufacturer: RAM, Model Year: 2023, Model line: PROMASTER, Model: RAM PROMASTER 2023Pages: 296, PDF Size: 12.31 MB
Page 2 of 296

The driver’s primary responsibility is the safe operation of the vehicle. Driving while distracted can result in loss of vehicle control, resulting in an accident and personal injury. FCA US LLC strongly recommends that the driver use extreme caution when using any device or feature that may take their attention off the
road. Use of any electrical devices, such as cellular telephones, computers, portable radios, vehicle navigation or other devices, by the driver while the vehicle is moving is dangerous and could lead to a serious accident. Texting while driving is also dangerous and should never be done while the vehicle is moving. If
you find yourself unable to devote your full attention to vehicle operation, pull off the road to a safe location and stop your vehicle. Some states or provinces
prohibit the use of cellular telephones or texting while driving. It is always the driver’s responsibility to comply with all local laws.
This Owner’s Manual has been prepared to help you get acquainted with your new Ram brand vehicle and to provide a convenient reference for common questions.
Not all features shown in this manual may apply to your vehicle. For additional information on accessories to help personalize your vehicle, visit
mopar.com/om (USA), owners.mopar.ca (Canada) or your local Ram brand dealer.
This Owner’s Manual is intended to familiarize you with the important features of your vehicle. Your most up-to-date Owner’s Manual, Navigation/Uconnect manuals and Warranty Booklet can be found by visiting the website on the back cover.
U.S. Residents: If you are the first registered retail owner of your vehicle, you may obtain a complimentary printed copy of the Warranty Booklet by calling
1-866-726-4636 or by contacting your dealer. Replacement kits can be purchased by visiting www.techauthority.com.
Canadian Residents: If you are the first registered retail owner of your vehicle, you may obtain a complimentary printed copy of the Warranty Booklet or
purchase a replacement kit by calling 1-800-387-1143 or by contacting your dealer.
DRIVING AND ALCOHOL
Drunk driving is one of the most frequent causes of accidents. Your driving ability can be seriously impaired with blood alcohol levels far below the legal
minimum. If you are drinking, don’t drive. Ride with a designated non-drinking driver, call a cab, a friend or use public transportation.
WARNING
Driving after drinking can lead to an accident. Your perceptions are less sharp, your reflexes are slower and your judgment is impaired when you have been drinking. Never drink and then drive.
WARNING: Operating, servicing and maintaining a passenger vehicle or off-highway
motor vehicle can expose you to chemicals including engine exhaust, carbon monoxide, phthalates,
and lead, which are known to the State of California to cause cancer and birth defects or other
reproductive harm. To minimize exposure, avoid breathing exhaust, do not idle the engine except
as necessary, service your vehicle in a well-ventilated area and wear gloves or wash your hands frequently
when servicing your vehicle. For more information go to www.P65Warnings.ca.gov/passenger-vehicle.
This Owner’s Manual illustrates and describes the operation of features and equipment that are either standard or optional on this vehicle. This manual
may also include a description of features and equipment that are no longer available or were not ordered on this vehicle. Please disregard any features and
equipment described in this manual that are not on this vehicle. FCA US LLC reserves the right to make changes in design and specifications, and/or make
additions to or improvements to its products without imposing any obligation upon itself to install them on products previously manufactured.
With respect to any vehicles sold in Canada, the name FCA US LLC shall be deemed to be deleted and the name FCA Canada Inc. used in substitution
therefore.
ROADSIDE ASSISTANCE
24 HOURS, 7 DAYS A WEEK AT YOUR SERVICE. CALL 1-800-521-2779 OR VISIT CHRYSLER.RSAHELP.COM (USA)
CALL 1-800-363-4869 OR VISIT FCA.ROADSIDEAID.COM (CANADA) SERVICES: Flat Tire Service, Out Of Gas/Fuel Delivery, Battery Jump Assistance, Lockout Service and Towing Service
Please see the Customer Assistance chapter in this Owner’s Manual for further information.
FCA US LLC reserves the right to modify the terms or discontinue the Roadside Assistance Program at any time. The Roadside Assistance Program is subject to
restrictions and conditions of use, that are determined solely by FCA US LLC.
Page 7 of 296
5
SAFETY TIPS ........................................................ 189 Transporting Passengers .............................. 189Transporting Pets ......................................... 190
Connected Vehicles....................................... 190
Safety Checks You Should Make Inside The
Vehicle ........................................................... 190Periodic Safety Checks You Should Make
Outside The Vehicle ...................................... 191Exhaust Gas ................................................... 192Carbon Monoxide Warnings ......................... 192
IN CASE OF EMERGENCY
HAZARD WARNING FLASHERS ......................... 193
SOS AND ASSIST SYSTEM ................................. 193
JACKING AND TIRE CHANGING.......................... 196
Preparations For Jacking .............................. 197Jack And Tools Location................................ 197
Spare Tire Removal ....................................... 198
Jacking Instructions ...................................... 200Wheel Covers ................................................. 203
TIRE SERVICE KIT — IF EQUIPPED ..................... 203
Alternate Tire Service Kit —
If Equipped..................................................... 209
Tire Service Kit Components And
Operation ....................................................... 209
Tire Service Kit Usage Precautions .............. 210
Sealing A Tire With Tire Service Kit .............. 211 JUMP STARTING .................................................. 214
Preparations For Jump Start ........................ 214
Jump Starting Procedure .............................. 215Battery Location ............................................ 216
IF YOUR ENGINE OVERHEATS .......................... 216
GEAR SELECTOR OVERRIDE ............................. 217
FREEING A STUCK VEHICLE .............................. 218
TOWING A DISABLED VEHICLE ......................... 219 Automatic Transmission ............................... 220
ENHANCED ACCIDENT RESPONSE
SYSTEM (EARS) ................................................... 220
EVENT DATA RECORDER (EDR) ........................ 220SERVICING AND MAINTENANCE
SCHEDULED SERVICING ................................... 221
Maintenance Plan ......................................... 222
ENGINE COMPARTMENT .................................... 225
3.6L Engine .................................................. 225
Checking Oil Level ......................................... 226
Adding Washer Fluid ..................................... 226
Maintenance-Free Battery ........................... 227Pressure Washing ......................................... 227
VEHICLE MAINTENANCE..................................... 227
Engine Oil ....................................................... 228
Engine Oil Filter ............................................ 228
Engine Air Cleaner Filter .............................. 228Air Conditioner Maintenance ....................... 229 Body Lubrication ........................................... 231
Windshield Wiper Blades ............................. 231
Exhaust System ............................................ 232
Cooling System.............................................. 233
Brake System ............................................... 235Automatic Transmission ............................... 236
Fuses.............................................................. 236
Bulb Replacement ....................................... 244
TIRES .................................................................... 249
Tire Safety Information ................................ 249Tires — General Information ......................... 256
Tire Types....................................................... 259Spare Tires — If Equipped ............................ 260
Wheel And Wheel Trim Care ........................ 262Snow Traction Devices ................................. 263
Tire Rotation Recommendations ................. 264
DEPARTMENT OF TRANSPORTATION UNIFORM
TIRE QUALITY GRADES ...................................... 264
Treadwear...................................................... 264
Traction Grades ............................................. 264Temperature Grades..................................... 265
STORING THE VEHICLE ...................................... 265
BODYWORK .......................................................... 265
Protection From Atmospheric Agents .......... 265
Body And Underbody Maintenance ............. 266
Preserving The Bodywork ............................. 266
23_VF_OM_EN_USC_t.book Page 5
Page 29 of 296
GETTING TO KNOW YOUR VEHICLE27
NOTE:Once a heat setting is selected, heat will be felt
within two to five minutes.
FOLD DOWN TRAY — IF EQUIPPED
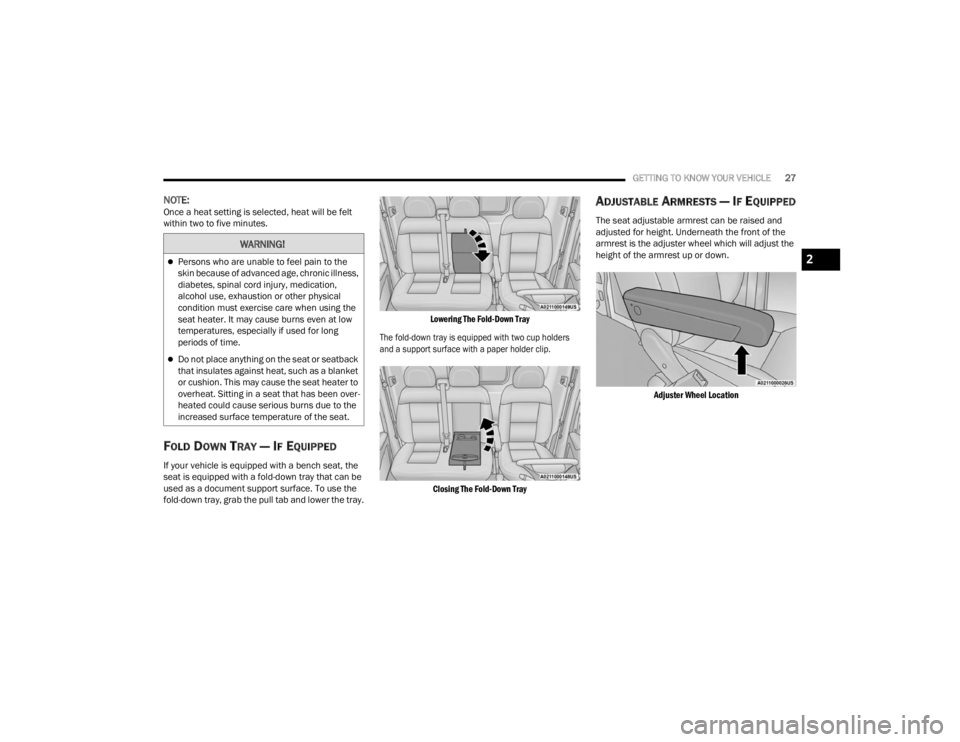
If your vehicle is equipped with a bench seat, the
seat is equipped with a fold-down tray that can be
used as a document support surface. To use the
fold-down tray, grab the pull tab and lower the tray.
Lowering The Fold-Down Tray
The fold-down tray is equipped with two cup holders
and a support surface with a paper holder clip.
Closing The Fold-Down Tray
ADJUSTABLE ARMRESTS — IF EQUIPPED
The seat adjustable armrest can be raised and
adjusted for height. Underneath the front of the
armrest is the adjuster wheel which will adjust the
height of the armrest up or down.
Adjuster Wheel Location
WARNING!
Persons who are unable to feel pain to the
skin because of advanced age, chronic illness,
diabetes, spinal cord injury, medication,
alcohol use, exhaustion or other physical
condition must exercise care when using the
seat heater. It may cause burns even at low
temperatures, especially if used for long
periods of time.
Do not place anything on the seat or seatback
that insulates against heat, such as a blanket
or cushion. This may cause the seat heater to
overheat. Sitting in a seat that has been over -
heated could cause serious burns due to the
increased surface temperature of the seat.
2
23_VF_OM_EN_USC_t.book Page 27
Page 33 of 296
GETTING TO KNOW YOUR VEHICLE31
NOTE:The Digital Rearview Mirror is not as effective when
driving in the following conditions:
Nighttime in low light applications
Bad weather conditions (e.g. extreme haze,
snow/slush)
If it becomes difficult to see clearly in the display,
the camera may need to be cleaned. If snow, ice,
mud, or any foreign substance builds up on the
camera lens, clean the lens, rinse with water, and
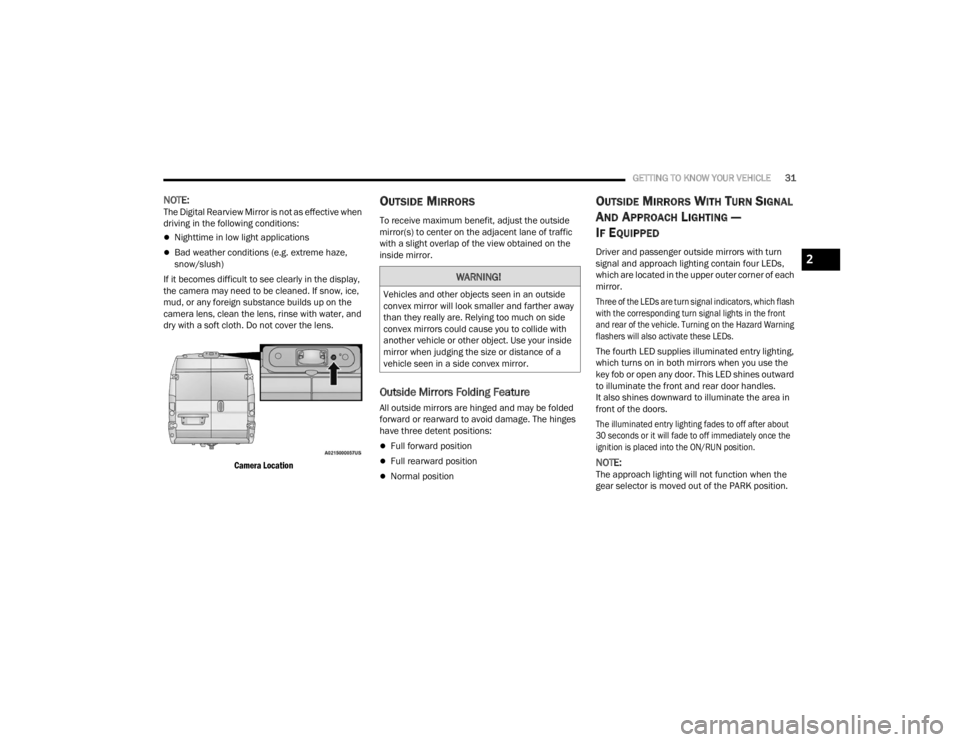
dry with a soft cloth. Do not cover the lens.
Camera Location
OUTSIDE MIRRORS
To receive maximum benefit, adjust the outside
mirror(s) to center on the adjacent lane of traffic
with a slight overlap of the view obtained on the
inside mirror.
Outside Mirrors Folding Feature
All outside mirrors are hinged and may be folded
forward or rearward to avoid damage. The hinges
have three detent positions:
Full forward position
Full rearward position
Normal position
OUTSIDE MIRRORS WITH TURN SIGNAL
A
ND APPROACH LIGHTING —
I
F EQUIPPED
Driver and passenger outside mirrors with turn
signal and approach lighting contain four LEDs,
which are located in the upper outer corner of each
mirror.
Three of the LEDs are turn signal indicators, which flash
with the corresponding turn signal lights in the front
and rear of the vehicle. Turning on the Hazard Warning
flashers will also activate these LEDs.
The fourth LED supplies illuminated entry lighting,
which turns on in both mirrors when you use the
key fob or open any door. This LED shines outward
to illuminate the front and rear door handles.
It also shines downward to illuminate the area in
front of the doors.
The illuminated entry lighting fades to off after about
30 seconds or it will fade to off immediately once the
ignition is placed into the ON/RUN position.
NOTE:The approach lighting will not function when the
gear selector is moved out of the PARK position.
WARNING!
Vehicles and other objects seen in an outside
convex mirror will look smaller and farther away
than they really are. Relying too much on side
convex mirrors could cause you to collide with
another vehicle or other object. Use your inside
mirror when judging the size or distance of a
vehicle seen in a side convex mirror.
2
23_VF_OM_EN_USC_t.book Page 31
Page 38 of 296

36GETTING TO KNOW YOUR VEHICLE
INTERIOR LIGHTS
COURTESY LIGHTS
These lights are mounted between the sun visors
on the overhead console. Each light is turned on by
pushing the corresponding switch.
Courtesy Lights
Dome Lights
The interior lights can be set to three different
positions (off/left position, center position,
on/right position). Using the switch on the bottom
of the overhead console:
Push the switch to the on/right position from its
center position and the lights are always on.
Push the switch to the off/left position from its
center position and the lights are always off.
Leave the switch in the center position, and the
lights are turned on and off when the doors are
opened or closed.
Map Lights
The switches on the left and right sides of the
overhead console control the map or reading
function of the lights. Push the switch on the right
to turn the right light on; push again to turn off.
Push the switch on the left to turn the left light on;
push again to turn off.
Rear Lights
Your vehicle may be equipped with a Rear Cargo
Lamp located at the upper rear cargo area above
the rear doors.
Rear Cargo Lamp Location
Your vehicle may also be equipped with a Side
Cargo Lamp located at the upper rear area of the
passenger side sliding door opening.
1 — Ambient Light
2 — Left Map Light
3 — Off/Left Position
4 — Center Position
5 — Right Map Light
6 — On/Right Position
CAUTION!
Before getting out of the vehicle be sure that the
switch is in the center position or that the lights
are off to avoid draining the battery.
23_VF_OM_EN_USC_t.book Page 36
Page 69 of 296

GETTING TO KNOW YOUR INSTRUMENT PANEL67
Drowsy Driver Detected Warning Light —
If Equipped
Drowsy driver detection helps to avoid
crashes caused by fatigue by advising
drivers to take a break in time. Once a
Drowsy Driver is detected, A pop-up will
display continuously until the driver presses the
OK button to clear.
Once the pop-up message is cleared, it is stored
until the condition is no longer true.
Electric Power Steering (EPS) Fault
Warning Light
This warning light will turn on when
there's a fault with the EPS system
Ú page 85.
Electronic Throttle Control (ETC) Warning
Light
This warning light will illuminate to inform of
a problem with the ETC system. If a problem
is detected while the vehicle is running, the
light will either stay on or flash depending on
the nature of the problem. Cycle the ignition when
the vehicle is safely and completely stopped and the
transmission is placed in the PARK (P) position.
The light should turn off. If the light remains on with the
vehicle running, your vehicle will usually be drivable;
however, see an authorized dealer for service as soon
as possible.
If the light continues to flash when the vehicle is
running, immediate service is required and you may
experience reduced performance, an elevated/
rough idle, or engine stall and your vehicle may
require towing. The light will come on when the
ignition is placed in the ON/RUN or MAR/ON/RUN
position and remain on briefly as a bulb check. If the
light does not come on during starting, have the
system checked by an authorized dealer.
Engine Temperature Warning Light
This light warns of an overheated
engine condition. If the engine coolant
temperature is too high, this indicator will
illuminate and a single chime will sound.
If the light turns on while driving, safely pull over and
stop the vehicle. If the Air Conditioning (A/C) system is
on, turn it off. Also, shift the transmission into NEUTRAL
and idle the vehicle. If the temperature reading does
not return to normal, turn the engine off immediately
and call for service
Ú
page 216.
Generic Warning Light
The Generic Warning Light will illuminate
to signal the failure of one or more safety
warning lights with a corresponding
message. The safety systems that may
cause the Generic Warning Light to illuminate
include but are not limited too: Seat belt Reminder,
Electric Park Brake, Brakes, Air Bag, and Swivel
Seat failure.
The telltale will remain on in case of swivel seat
failure and will blink in case of Air Bag Warning
Light Failure. Contact an authorized dealer
immediately for service.
WARNING!
Continued operation with reduced assist could
pose a safety risk to yourself and others. Service
should be obtained as soon as possible.
3
23_VF_OM_EN_USC_t.book Page 67
Page 72 of 296
70GETTING TO KNOW YOUR INSTRUMENT PANEL
Service Active Lane Management Warning
Light — If Equipped
This warning light will illuminate when the
Active Lane Management system is not
operating and requires service. Please
see an authorized dealer.
Service Forward Collision Warning (FCW)
Light — If Equipped
This warning light will illuminate to
indicate a fault in the FCW System or an
external blockage on the frontal camera.
Contact an authorized dealer for service.
Service Required/Call For Service Warning
Light
This warning light will illuminate when
service is needed. A pop-up will appear in
the display to signal the need for service.
Contact an authorized dealer as soon as
possible.
Speed Limiter Fail Warning Light —
If Equipped
This light will illuminate when there is a
failure in the speed limiter system.
Swivel Seat (Driver or Passenger) Fail
Warning Light — If Equipped
This light will illuminate when the driver
or passenger swivel seat fails.
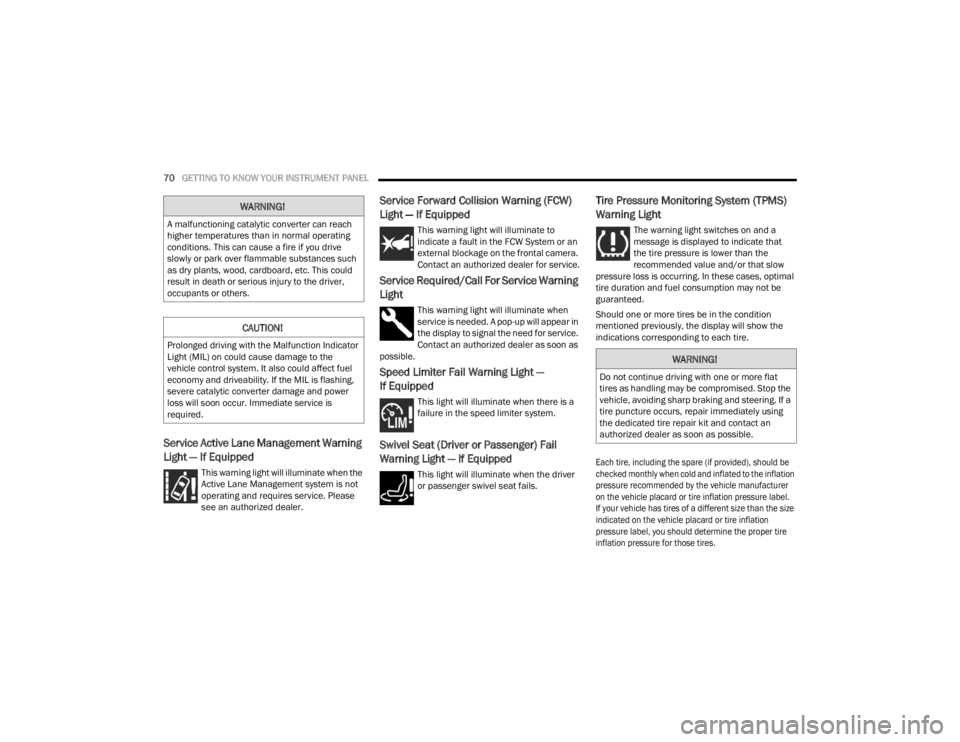
Tire Pressure Monitoring System (TPMS)
Warning Light
The warning light switches on and a
message is displayed to indicate that
the tire pressure is lower than the
recommended value and/or that slow
pressure loss is occurring. In these cases, optimal
tire duration and fuel consumption may not be
guaranteed.
Should one or more tires be in the condition
mentioned previously, the display will show the
indications corresponding to each tire.
Each tire, including the spare (if provided), should be
checked monthly when cold and inflated to the inflation
pressure recommended by the vehicle manufacturer
on the vehicle placard or tire inflation pressure label.
If your vehicle has tires of a different size than the size
indicated on the vehicle placard or tire inflation
pressure label, you should determine the proper tire
inflation pressure for those tires.
WARNING!
A malfunctioning catalytic converter can reach
higher temperatures than in normal operating
conditions. This can cause a fire if you drive
slowly or park over flammable substances such
as dry plants, wood, cardboard, etc. This could
result in death or serious injury to the driver,
occupants or others.
CAUTION!
Prolonged driving with the Malfunction Indicator
Light (MIL) on could cause damage to the
vehicle control system. It also could affect fuel
economy and driveability. If the MIL is flashing,
severe catalytic converter damage and power
loss will soon occur. Immediate service is
required.
WARNING!
Do not continue driving with one or more flat
tires as handling may be compromised. Stop the
vehicle, avoiding sharp braking and steering. If a
tire puncture occurs, repair immediately using
the dedicated tire repair kit and contact an
authorized dealer as soon as possible.
23_VF_OM_EN_USC_t.book Page 70
Page 73 of 296
GETTING TO KNOW YOUR INSTRUMENT PANEL71
As an added safety feature, your vehicle has been
equipped with a TPMS that illuminates a low tire
pressure telltale when one or more of your tires is
significantly underinflated. Accordingly, when the low
tire pressure telltale illuminates, you should stop and
check your tires as soon as possible, and inflate them
to the proper pressure. Driving on a significantly
underinflated tire causes the tire to overheat and can
lead to tire failure. Underinflation also reduces fuel
efficiency and tire tread life, and may affect the
vehicle’s handling and stopping ability.
Please note that the TPMS is not a substitute for
proper tire maintenance, and it is the driver’s
responsibility to maintain correct tire pressure,
even if underinflation has not reached the level to
trigger illumination of the TPMS low tire pressure
telltale.
Your vehicle has also been equipped with a TPMS
malfunction indicator to indicate when the system
is not operating properly. The TPMS malfunction
indicator is combined with the low tire pressure telltale.
When the system detects a malfunction, the telltale will
flash for approximately one minute and then remain
continuously illuminated. This sequence will continue
upon subsequent vehicle start-ups as long as the
malfunction exists. When the malfunction indicator
is illuminated, the system may not be able to detect or signal low tire pressure as intended. TPMS
malfunctions may occur for a variety of reasons,
including the installation of replacement or alternate
tires or wheels on the vehicle that prevent the TPMS
from functioning properly. Always check the TPMS
malfunction telltale after replacing one or more tires or
wheels on your vehicle to ensure that the replacement
or alternate tires and wheels allow the TPMS to
continue to function properly.
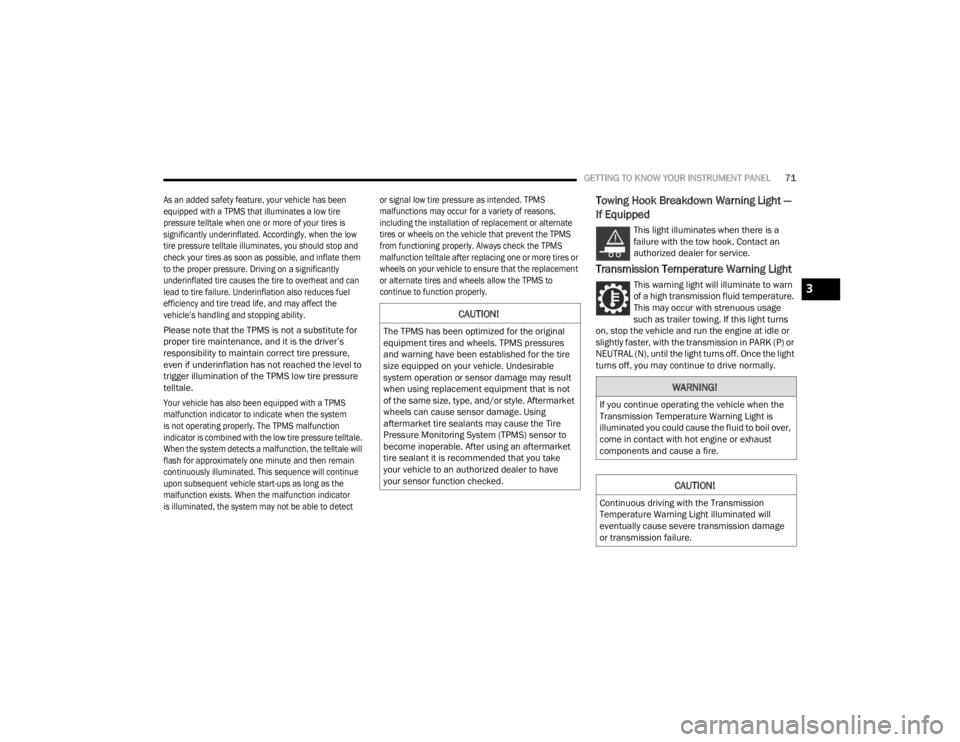
Towing Hook Breakdown Warning Light —
If Equipped
This light illuminates when there is a
failure with the tow hook. Contact an
authorized dealer for service.
Transmission Temperature Warning Light
This warning light will illuminate to warn
of a high transmission fluid temperature.
This may occur with strenuous usage
such as trailer towing. If this light turns
on, stop the vehicle and run the engine at idle or
slightly faster, with the transmission in PARK (P) or
NEUTRAL (N), until the light turns off. Once the light
turns off, you may continue to drive normally.
CAUTION!
The TPMS has been optimized for the original
equipment tires and wheels. TPMS pressures
and warning have been established for the tire
size equipped on your vehicle. Undesirable
system operation or sensor damage may result
when using replacement equipment that is not
of the same size, type, and/or style. Aftermarket
wheels can cause sensor damage. Using
aftermarket tire sealants may cause the Tire
Pressure Monitoring System (TPMS) sensor to
become inoperable. After using an aftermarket
tire sealant it is recommended that you take
your vehicle to an authorized dealer to have
your sensor function checked.
WARNING!
If you continue operating the vehicle when the
Transmission Temperature Warning Light is
illuminated you could cause the fluid to boil over,
come in contact with hot engine or exhaust
components and cause a fire.
CAUTION!
Continuous driving with the Transmission
Temperature Warning Light illuminated will
eventually cause severe transmission damage
or transmission failure.
3
23_VF_OM_EN_USC_t.book Page 71
Page 84 of 296

82STARTING AND OPERATING
NOTE:Swivel seats that are unlocked can also prevent
the transmission gear selector from being moved
out of the PARK position. To shift the transmission
out of the PARK position the first time after
cranking is allowed, ensure swivel seats are locked
in the forward facing position.
9-SPEED AUTOMATIC TRANSMISSION
The transmission gear position display (located in
the instrument cluster) indicates the transmission
gear range. You must press the brake pedal to
move the gear selector out of PARK. To drive, move
the gear selector from PARK or NEUTRAL to the
DRIVE position.
The electronically controlled transmission provides
a precise shift schedule. The transmission
electronics are self-calibrating; therefore, the first
few shifts on a new vehicle may be somewhat
abrupt. This is a normal condition, and precision
shifts will develop within a few hundred miles
(kilometers).
Gear Selector
Only shift from DRIVE to PARK or REVERSE when
the accelerator pedal is released and the vehicle is
stopped. Be sure to keep your foot on the brake
pedal when shifting between these gears.
The transmission gear selector provides PARK,
REVERSE, NEUTRAL, DRIVE, and Electronic Range
Select (ERS) shift positions. Manual downshifts
can be made using the ERS shift control. Moving
the gear selector into the ERS “-”/”+” position
(beside the DRIVE position) activates ERS mode,
displays the current gear in the instrument cluster,
and prevents automatic upshifts beyond this gear.
In ERS mode, toggling the gear selector forward “-”
or rearward “+” will change the highest available
gear Ú page 85.
NOTE:If the gear selector cannot be moved to the PARK,
REVERSE, or NEUTRAL position (when pushed forward) it is probably in the ERS “+”/”-” position
(beside the DRIVE position). In ERS mode, the
transmission gear limit (1, 2, 3, etc.) is displayed in
the instrument cluster. Move the gear selector to
the right (into the DRIVE [D] position) for access to
PARK, REVERSE, and NEUTRAL.
Gear Ranges
Do not press the accelerator pedal when shifting
out of PARK or NEUTRAL.
NOTE:After selecting any gear range, wait a moment to
allow the selected gear to engage before acceler
-
ating. This is especially important when the engine
is cold.
PARK (P)
This range supplements the parking brake by
locking the transmission. The engine can be
started in this range. Never attempt to use PARK
while the vehicle is in motion. Apply the parking
brake when exiting the vehicle in this range.
When parking on a hill, apply the parking brake
before shifting the transmission to PARK,
otherwise the load on the transmission locking
mechanism may make it difficult to move the gear
selector out of PARK. As an added precaution, turn
the front wheels toward the curb on a downhill
grade, and away from the curb on an uphill grade.
23_VF_OM_EN_USC_t.book Page 82
Page 86 of 296

84STARTING AND OPERATING
REVERSE (R)
This range is for moving the vehicle backward.
Shift into REVERSE only after the vehicle has come
to a complete stop.
NEUTRAL (N)
Use this range when the vehicle is standing
for prolonged periods with the engine running.
The engine may be started in this range. Apply the
parking brake and shift the transmission into PARK
if you must exit the vehicle.
DRIVE (D)
This range should be used for most city and
highway driving. It provides the smoothest upshifts
and downshifts, and the best fuel economy.
The transmission automatically upshifts through
all forward gears.
When frequent transmission shifting occurs (such
as when operating the vehicle under heavy loading
conditions, in hilly terrain, traveling into strong
head winds, or while towing a heavy trailer), select
TOW/HAUL mode or use the Electronic Range
Select (ERS) shift control to select a lower gear
range Úpage 85. Under these conditions, using a
lower gear range will improve performance and
extend transmission life by reducing excessive
shifting and heat buildup.
During cold temperatures, transmission operation may
be modified depending on engine and transmission
temperature as well as vehicle speed. This feature
improves warm-up time of the engine and transmission
to achieve maximum efficiency. During extremely cold temperatures (-16°F [-27°C] or below), operation may
briefly be limited to THIRD gear only. Normal operation
will resume once the transmission temperature has
risen to a suitable level.
Transmission Limp Home Mode
Transmission function is monitored electronically for
abnormal conditions. If a condition is detected that
could result in transmission damage, Transmission
Limp Home Mode is activated. In this mode, the
transmission remains in THIRD gear regardless of
which forward gear is selected. PARK, REVERSE, and
NEUTRAL will continue to operate. The Malfunction
Indicator Light (MIL) may be illuminated. Transmission
Limp Home Mode allows the vehicle to be driven to an
authorized dealer for service without damaging the
transmission.
In the event of a momentary problem, the
transmission can be reset to regain all forward
gears by performing the following steps:
1. Stop the vehicle.
2. Shift the transmission into PARK.
3. Turn the ignition OFF.
4. Wait approximately 10 seconds.
5. Restart the engine.
6. Shift into the desired gear range. If the
problem is no longer detected, the
transmission will return to normal operation.
CAUTION!
Before moving the transmission gear selector
out of PARK, you must turn the ignition to the
ON/RUN position, and also press the brake
pedal. Otherwise, damage to the gear selector
could result.
DO NOT race the engine when shifting from
PARK or NEUTRAL into another gear range, as
this can damage the drivetrain.
WARNING!
Do not coast in NEUTRAL and never turn off the
ignition to coast down a hill. These are unsafe
practices that limit your response to changing
traffic or road conditions. You might lose control
of the vehicle and have a collision.
CAUTION!
Towing the vehicle, coasting, or driving for any
other reason with the transmission in NEUTRAL
can cause severe transmission damage.
For Recreational Towing Ú page 130.
For Towing A Disabled Vehicle Ú page 219.
23_VF_OM_EN_USC_t.book Page 84