charging RENAULT CAPTUR 2017 1.G R Link Owners Manual
[x] Cancel search | Manufacturer: RENAULT, Model Year: 2017, Model line: CAPTUR, Model: RENAULT CAPTUR 2017 1.GPages: 96, PDF Size: 4.02 MB
Page 3 of 96
GB.1
User precautions . . . . . . . . . . . . . . . . . . . . . . . . . . . . . . . . . . . . \
. . . . . . . . . . . . . . . . . . . . . . . . . . . . GB.3
general information . . . . . . . . . . . . . . . . . . . . . . . . . . . . . . . . . . . .\
. . . . . . . . . . . . . . . . . . . . . . . . . . GB.4General description . . . . . . . . . . . . . . . . . . . . . . . . . . . . . . . . . . . .\
. . . . . . . . . . . . . . . . . . . . GB.4
Introduction to the controls . . . . . . . . . . . . . . . . . . . . . . . . . . . . . . . . . . . . \
. . . . . . . . . . . . . . . GB.5
SD card: use, initialisation . . . . . . . . . . . . . . . . . . . . . . . . . . . . . . . . . . . .\
. . . . . . . . . . . . . . . GB.14
operating principles . . . . . . . . . . . . . . . . . . . . . . . . . . . . . . . . . . . .\
. . . . . . . . . . . . . . . . . . . . GB.16
Switching on/off . . . . . . . . . . . . . . . . . . . . . . . . . . . . . . . . . . . .\
. . . . . . . . . . . . . . . . . . . . . . . GB.20
Add and manage favourites . . . . . . . . . . . . . . . . . . . . . . . . . . . . . . . . . . . . \
. . . . . . . . . . . . . . GB.21
Using voice recognition . . . . . . . . . . . . . . . . . . . . . . . . . . . . . . . . . . . .\
. . . . . . . . . . . . . . . . . GB.22
Navigation . . . . . . . . . . . . . . . . . . . . . . . . . . . . . . . . . . . .\
. . . . . . . . . . . . . . . . . . . . . . . . . . . . . . . . . GB.28 Enter a destination . . . . . . . . . . . . . . . . . . . . . . . . . . . . . . . . . . . . \
. . . . . . . . . . . . . . . . . . . . . GB.28
Volume and voice . . . . . . . . . . . . . . . . . . . . . . . . . . . . . . . . . . . . \
. . . . . . . . . . . . . . . . . . . . . . GB.33
Reading a map . . . . . . . . . . . . . . . . . . . . . . . . . . . . . . . . . . . . \
. . . . . . . . . . . . . . . . . . . . . . . . GB.34
Guidance . . . . . . . . . . . . . . . . . . . . . . . . . . . . . . . . . . . .\
. . . . . . . . . . . . . . . . . . . . . . . . . . . . GB.35
Preparing a route . . . . . . . . . . . . . . . . . . . . . . . . . . . . . . . . . . . . \
. . . . . . . . . . . . . . . . . . . . . . GB.39
Traffic information . . . . . . . . . . . . . . . . . . . . . . . . . . . . . . . . . . . . \
. . . . . . . . . . . . . . . . . . . . . . GB.40
Displaying the map . . . . . . . . . . . . . . . . . . . . . . . . . . . . . . . . . . . . \
. . . . . . . . . . . . . . . . . . . . . GB.43
Navigation services . . . . . . . . . . . . . . . . . . . . . . . . . . . . . . . . . . . . \
. . . . . . . . . . . . . . . . . . . . GB.44
Z.E. Services . . . . . . . . . . . . . . . . . . . . . . . . . . . . . . . . . . . .\
. . . . . . . . . . . . . . . . . . . . . . . . . GB.46
Recharging station . . . . . . . . . . . . . . . . . . . . . . . . . . . . . . . . . . . . \
. . . . . . . . . . . . . . . . . . . . . GB.47
Range . . . . . . . . . . . . . . . . . . . . . . . . . . . . . . . . . . . . \
. . . . . . . . . . . . . . . . . . . . . . . . . . . . . . . GB.48
Adding, managing saved addresses . . . . . . . . . . . . . . . . . . . . . . . . . . . . . . . . . . . .\
. . . . . . . GB.49
Navigation settings . . . . . . . . . . . . . . . . . . . . . . . . . . . . . . . . . . . . \
. . . . . . . . . . . . . . . . . . . . . GB.50
Multimedia . . . . . . . . . . . . . . . . . . . . . . . . . . . . . . . . . . . . \
. . . . . . . . . . . . . . . . . . . . . . . . . . . . . . . . . GB.52 Listen to the radio . . . . . . . . . . . . . . . . . . . . . . . . . . . . . . . . . . . . \
. . . . . . . . . . . . . . . . . . . . . . GB.52
Media . . . . . . . . . . . . . . . . . . . . . . . . . . . . . . . . . . . . \
. . . . . . . . . . . . . . . . . . . . . . . . . . . . . . . GB.57
Photo reader . . . . . . . . . . . . . . . . . . . . . . . . . . . . . . . . . . . .\
. . . . . . . . . . . . . . . . . . . . . . . . . GB.58
Video playback . . . . . . . . . . . . . . . . . . . . . . . . . . . . . . . . . . . . \
. . . . . . . . . . . . . . . . . . . . . . . . GB.59
Multimedia settings . . . . . . . . . . . . . . . . . . . . . . . . . . . . . . . . . . . .\
. . . . . . . . . . . . . . . . . . . . GB.60
Page 6 of 96
GB.4
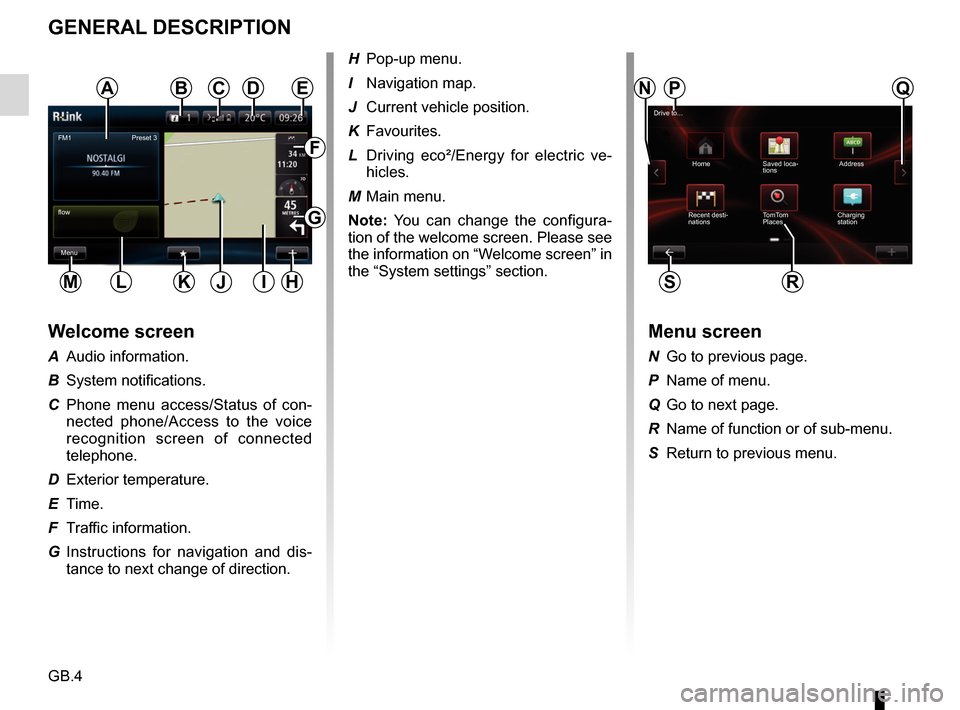
GENERAL DESCRIPTION
Menu screen
N Go to previous page.
P Name of menu.
Q Go to next page.
R Name of function or of sub-menu.
S Return to previous menu.
Welcome screen
A Audio information.
B System notifications.
C Phone menu access/Status of con-nected phone/Access to the voice
recognition screen of connected
telephone.
D Exterior temperature.
E Time.
F Traffic information.
G Instructions for navigation and dis- tance to next change of direction.
Drive to...
Home Saved loca- tions Address
Recent desti-
nations TomTom
Places Charging
station
FM1
flow
Menu Preset 3
ANQC
R
BPDE
F
G
HIKLM
H Pop-up menu.
I Navigation map.
J Current vehicle position.
K Favourites.
L Driving eco²/Energy for electric ve-
hicles.
M Main menu.
Note: You can change the configura-
tion of the welcome screen. Please see
the information on “Welcome screen” in
the “System settings” section.
SJ
Page 30 of 96
GB.28
ENTERING A DESTINATION (1/5)
For safety reasons, carry
out these operations when
the vehicle is stationary.
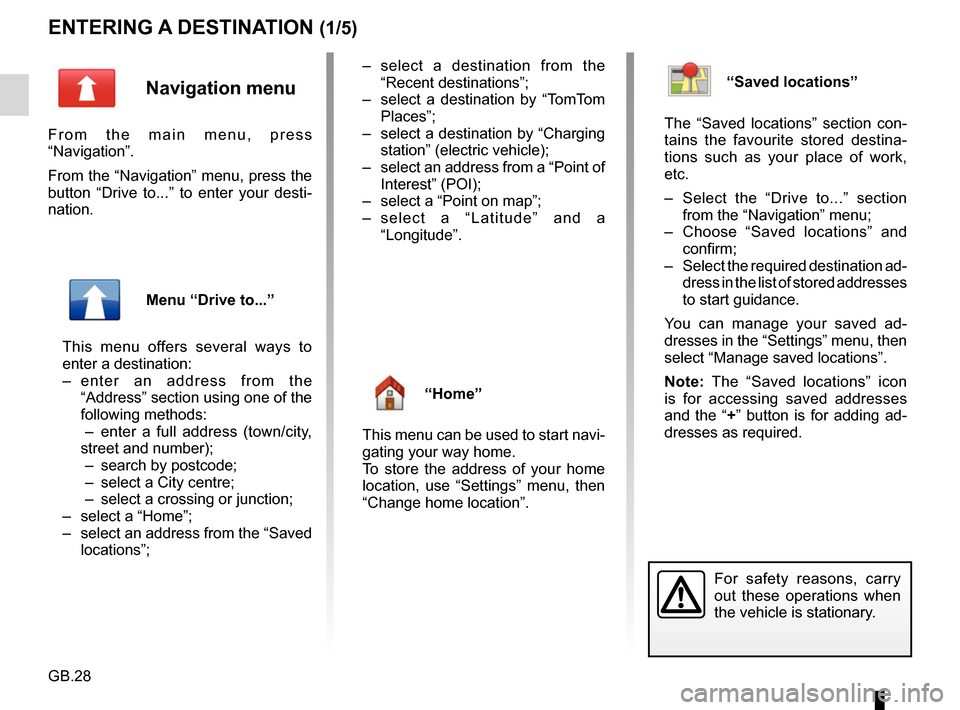
Navigation menu
From the main menu, press
“Navigation”.
From the “Navigation” menu, press the
button “Drive to...” to enter your desti-
nation.
Menu “Drive to...”
This menu offers several ways to
enter a destination:
– enter an address from the “Address” section using one of the
following methods:
– enter a full address (town/city, street and number);
– search by postcode;
– select a City centre;
– select a crossing or junction;
– select a “Home”;
– select an address from the “Saved locations”; – select a destination from the
“Recent destinations”;
– select a destination by “TomTom Places”;
– select a destination by “Charging station” (electric vehicle);
– select an address from a “Point of Interest” (POI);
– select a “Point on map”;
– select a “Latitude” and a “Longitude”.
“Home”
This menu can be used to start navi-
gating your way home.
To store the address of your home
location, use “Settings” menu, then
“Change home location”.
“Saved locations”
The “Saved locations” section con-
tains the favourite stored destina-
tions such as your place of work,
etc.
– Select the “Drive to...” section from the “Navigation” menu;
– Choose “Saved locations” and confirm;
– Select the required destination ad- dress in the list of stored addresses
to start guidance.
You can manage your saved ad-
dresses in the “Settings” menu, then
select “Manage saved locations”.
Note: The “Saved locations” icon
is for accessing saved addresses
and the “+” button is for adding ad-
dresses as required.
Page 32 of 96
GB.30
ENTERING A DESTINATION (3/5)
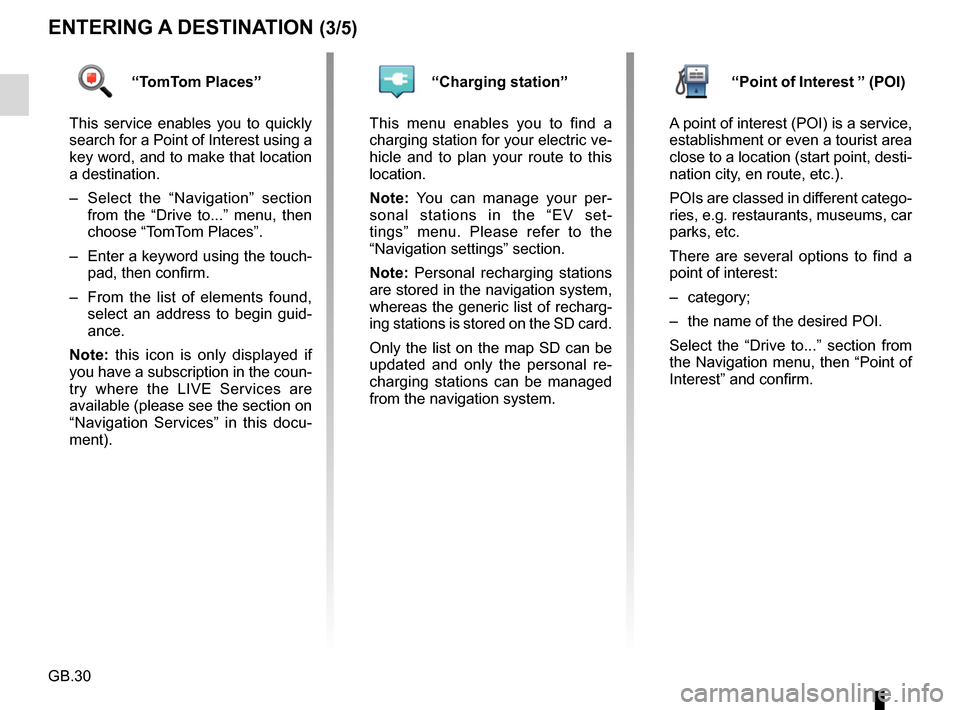
“TomTom Places”
This service enables you to quickly
search for a Point of Interest using a
key word, and to make that location
a destination.
– Select the “Navigation” section from the “Drive to...” menu, then
choose “TomTom Places”.
– Enter a keyword using the touch- pad, then confirm.
– From the list of elements found, select an address to begin guid-
ance.
Note: this icon is only displayed if
you have a subscription in the coun-
try where the LIVE Services are
available (please see the section on
“Navigation Services” in this docu-
ment).“Charging station”
This menu enables you to find a
charging station for your electric ve-
hicle and to plan your route to this
location.
Note: You can manage your per-
sonal stations in the “EV set-
tings” menu. Please refer to the
“Navigation settings” section.
Note: Personal recharging stations
are stored in the navigation system,
whereas the generic list of recharg-
ing stations is stored on the SD card.
Only the list on the map SD can be
updated and only the personal re-
charging stations can be managed
from the navigation system.“Point of Interest ” (POI)
A point of interest (POI) is a service,
establishment or even a tourist area
close to a location (start point, desti-
nation city, en route, etc.).
POIs are classed in different catego-
ries, e.g. restaurants, museums, car
parks, etc.
There are several options to find a
point of interest:
– category;
– the name of the desired POI.
Select the “Drive to...” section from
the Navigation menu, then “Point of
Interest” and confirm.
Page 34 of 96
GB.32
ENTERING A DESTINATION (5/5)
Note: if you do not confirm, this page
will close after ten seconds and guid-
ance will start automatically.
Note: depending on the vehicle charge
level, if you can reach your destination,
guidance is launched – if the charge
level is too low, the system offers to
search for a recharging terminal on the
way.
Note: “ IQ Routes™” is a function which
optimises the journey time using statis-
tical data and calculates routes based
on the average traffic levels on that day
and time. To activate or deactivate this
function, refer to the “Navigation set-
tings” section.
Latest map guarantee
After delivery of your new vehicle you
have about 60 days in which to update
the map free of charge.
Once this time has elapsed, you will
need to pay for updates.
For more information, please see an
Authorised Dealer.54
Go to...ConfirmLIVE
Magny-les-hameaux 0:15 h
8.5 km
The quickest way IQ Routes
1 Janvier, 0:32
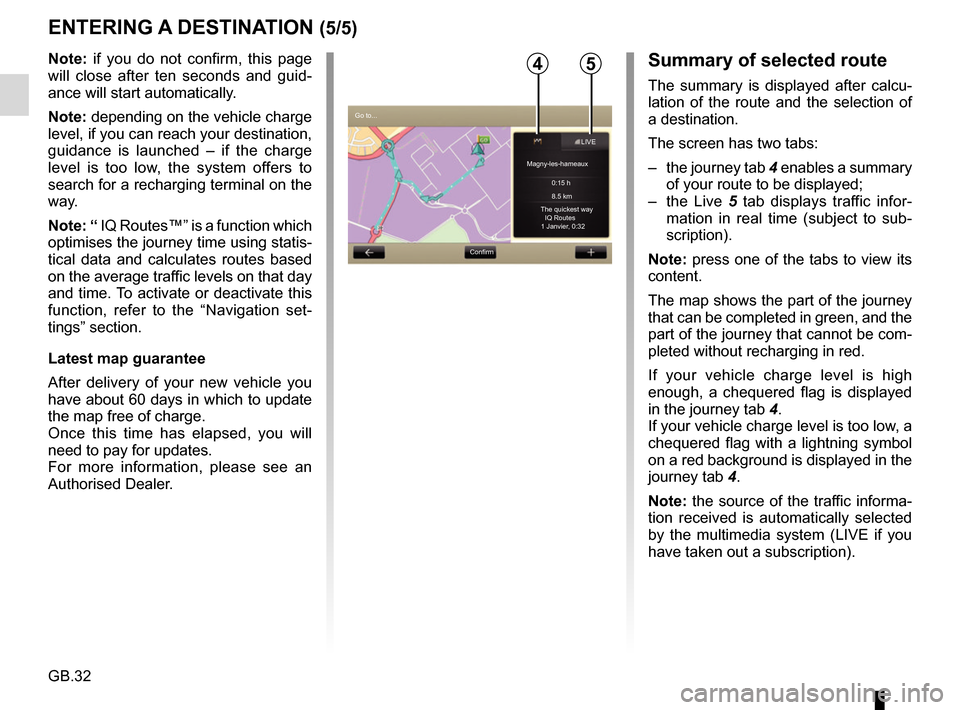
Summary of selected route
The summary is displayed after calcu-
lation of the route and the selection of
a destination.
The screen has two tabs:
– the journey tab 4 enables a summary
of your route to be displayed;
– the Live 5 tab displays traffic infor-
mation in real time (subject to sub-
scription).
Note: press one of the tabs to view its
content.
The map shows the part of the journey
that can be completed in green, and the
part of the journey that cannot be com-
pleted without recharging in red.
If your vehicle charge level is high
enough, a chequered flag is displayed
in the journey tab 4.
If your vehicle charge level is too low, a
chequered flag with a lightning symbol
on a red background is displayed in the
journey tab 4.
Note: the source of the traffic informa-
tion received is automatically selected
by the multimedia system (LIVE if you
have taken out a subscription).
Page 36 of 96
GB.34
READING A MAP
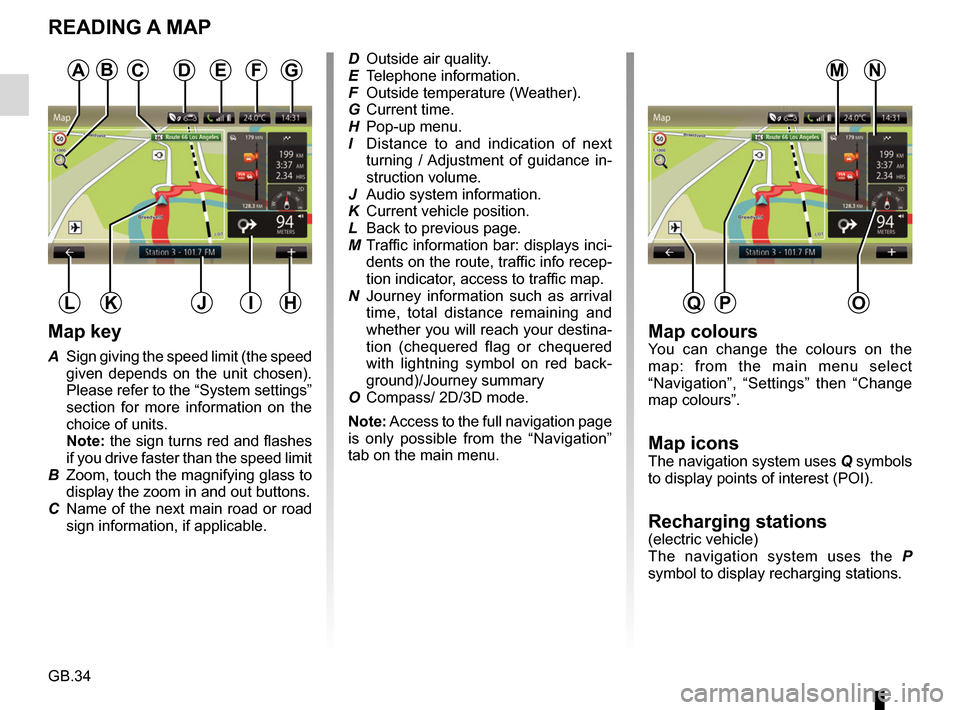
Map key
A Sign giving the speed limit (the speed given depends on the unit chosen).
Please refer to the “System settings”
section for more information on the
choice of units.
Note: the sign turns red and flashes
if you drive faster than the speed limit
B Zoom, touch the magnifying glass to display the zoom in and out buttons.
C Name of the next main road or road sign information, if applicable.
A
HJK
Map coloursYou can change the colours on the
map: from the main menu select
“Navigation”, “Settings” then “Change
map colours”.
Map iconsThe navigation system uses Q symbols
to display points of interest (POI).
Recharging stations(electric vehicle)
The navigation system uses the P
symbol to display recharging stations.
DFG
IL
ED Outside air quality.
E Telephone information.
F Outside temperature (Weather).
G Current time.
H Pop-up menu.
I Distance to and indication of next turning / Adjustment of guidance in-
struction volume.
J Audio system information.
K Current vehicle position.
L Back to previous page.
M Traffic information bar: displays inci- dents on the route, traffic info recep-
tion indicator, access to traffic map.
N Journey information such as arrival time, total distance remaining and
whether you will reach your destina-
tion (chequered flag or chequered
with lightning symbol on red back-
ground)/Journey summary
O Compass/ 2D/3D mode.
Note: Access to the full navigation page
is only possible from the “Navigation”
tab on the main menu.
O
NMCB
PQ
Page 45 of 96
GB.43
“Use this location to...”
This menu enables the selected posi-
tion to be used to:
– centre the map on the vehicle’s loca-tion;
– navigate to a point on the map;
– search for a point on the map;
– add a point on the map to the favour- ites;
– add a point on the map to the POI;
– correct the position of your vehicle.
“Find”
This menu allows you to centre the map
on:
– your home;
– a saved address;
– an address;
– a recent destination;
– TomTom Places;
– a recharging station search;
– a point of interest;
– your position;
– latitude and longitude.
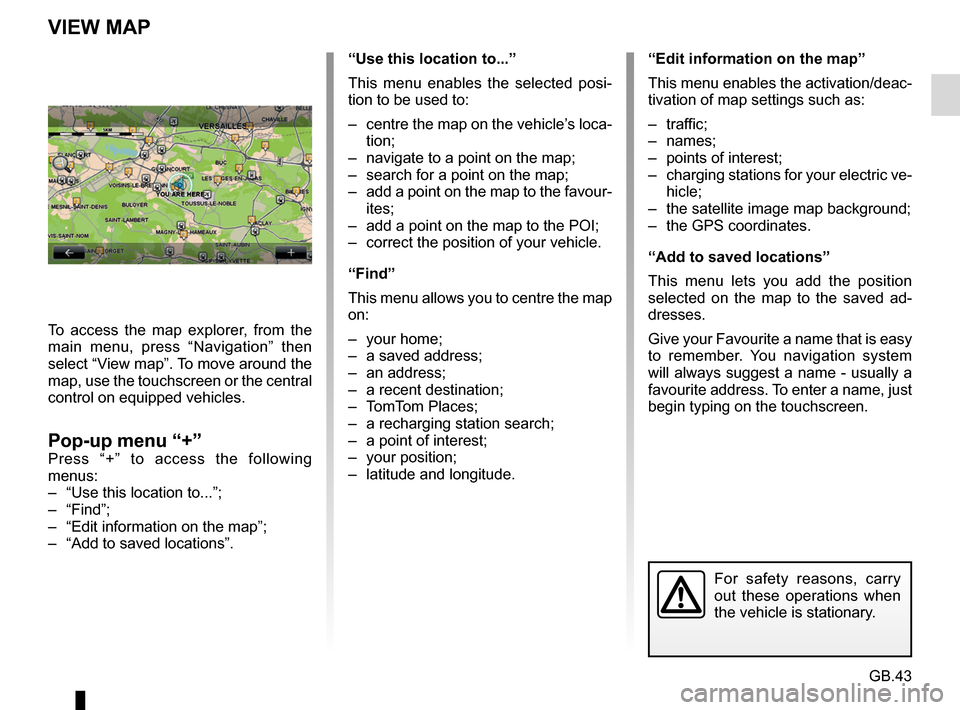
VIEW MAP
To access the map explorer, from the
main menu, press “Navigation” then
select “View map”. To move around the
map, use the touchscreen or the central
control on equipped vehicles.
Pop-up menu “+”Press “+” to access the following
menus:
– “Use this location to...”;
– “Find”;
– “Edit information on the map”;
– “Add to saved locations”.
“Edit information on the map”
This menu enables the activation/deac-
tivation of map settings such as:
– traffic;
– names;
– points of interest;
– charging stations for your electric ve- hicle;
– the satellite image map background;
– the GPS coordinates.
“Add to saved locations”
This menu lets you add the position
selected on the map to the saved ad-
dresses.
Give your Favourite a name that is easy
to remember. You navigation system
will always suggest a name - usually a
favourite address. To enter a name, just
begin typing on the touchscreen.
For safety reasons, carry
out these operations when
the vehicle is stationary.
Page 48 of 96
GB.46
SERVICES Z.E.
The Services Z.E. are only available on
electric vehicles.
They include on-board vehicle serv-
ices and other services accessible from
outside the vehicle (mobile phone and
Internet).
They enable you to determine, inter
alia, the charge status of your vehicle,
using mobile phones or your computer.
This information is also available di-
rectly on the instrument panel of your
vehicle.
For further information, please contact
an Authorised Dealer of brand.
Accessing the
Services Z.E.
To access the Services Z.E.:
– from the main menu, press “Navigation”;
– select “Navigation services”;
– select “Services Z.E.”.
“Search by availability”
This option gives you access to a list
of the nearest recharging stations
with at least one recharging terminal
available.
“E.V. Services guided
tour”
This menu gives access to a series
of tutorials explaining the Services
Z.E. and functions relating to elec-
tric vehicles. You can press the
“Suivant” button to move to the next
screen, or the “Précédent” button to
return to the previous screen.
Page 49 of 96
GB.47
RECHARGING STATION
Saving new recharging
stations
When you recharge your vehicle at a
new recharging terminal, it will be auto-
matically saved in the system.
You can also create and manage
your own recharging stations in the
“Settings” menu, by selecting “EV set-
tings”. Please refer to the “Navigation
settings” section.
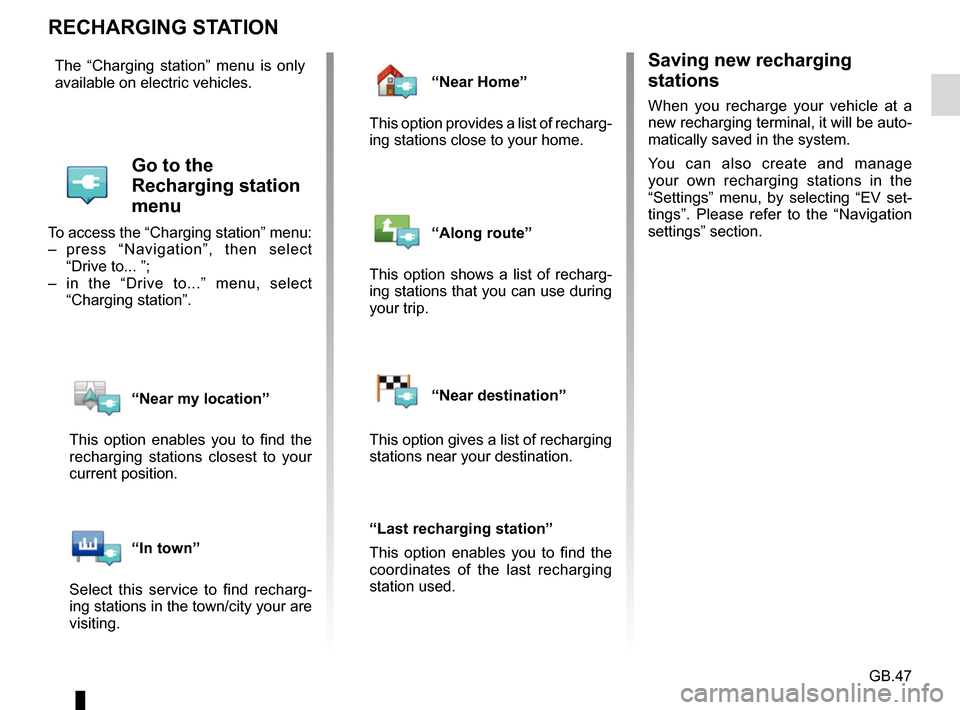
The “Charging station” menu is only
available on electric vehicles.
Go to the
Recharging station
menu
To access the “Charging station” menu:
– press “Navigation”, then select
“Drive to... ”;
– in the “Drive to...” menu, select “Charging station”.
“Near my location”
This option enables you to find the
recharging stations closest to your
current position.
“In town”
Select this service to find recharg-
ing stations in the town/city your are
visiting.
“Near Home”
This option provides a list of recharg-
ing stations close to your home.
“Along route”
This option shows a list of recharg-
ing stations that you can use during
your trip.
“Near destination”
This option gives a list of recharging
stations near your destination.
“Last recharging station”
This option enables you to find the
coordinates of the last recharging
station used.
Page 50 of 96
GB.48
RANGE
The range distance is only available for
electric vehicles.
Attainability of the
destination
The classic map display indicates
whether the battery level of your elec-
tric vehicle is sufficient to reach your
destination:
– chequered flag: the vehicle can reach your destination at the current
battery level;
– chequered flag with lightning symbol on red background: look for a re-
charging station to avoid running out
of power.
Low battery warning
When the charge level reaches the
minimum alert level on the instrument
panel, the system automatically pro-
poses a list of recharging stations near
your current location.
Deactivating the low battery
warning
This option enables you to deactivate
the automatic proposal of recharging
stations when the battery level is low:
– from the “Navigation” menu, select “Settings” then “EV settings”.
– select the “Disable low battery warn- ing” option.
Select this option again to reactivate
the low battery alert.
Note: if the ongoing guidance is indi-
cating an attainable charging point, the
low battery alert will not be triggered.
Range view
– In guidance mode, from the route summary screen: you can see the
route portions (zones) that are at-
tainable (in green) and non-attaina-
ble (in red);
– when not in guidance mode, from the “attainable zone” main menu: your
range distance is shown as a radi-
ous around your vehicle’s current
position.