air con RENAULT DUSTER 2016 Owner's Guide
[x] Cancel search | Manufacturer: RENAULT, Model Year: 2016, Model line: DUSTER, Model: RENAULT DUSTER 2016Pages: 256, PDF Size: 6.49 MB
Page 186 of 256
5.8
TYRE INFLATION KIT (4/4)
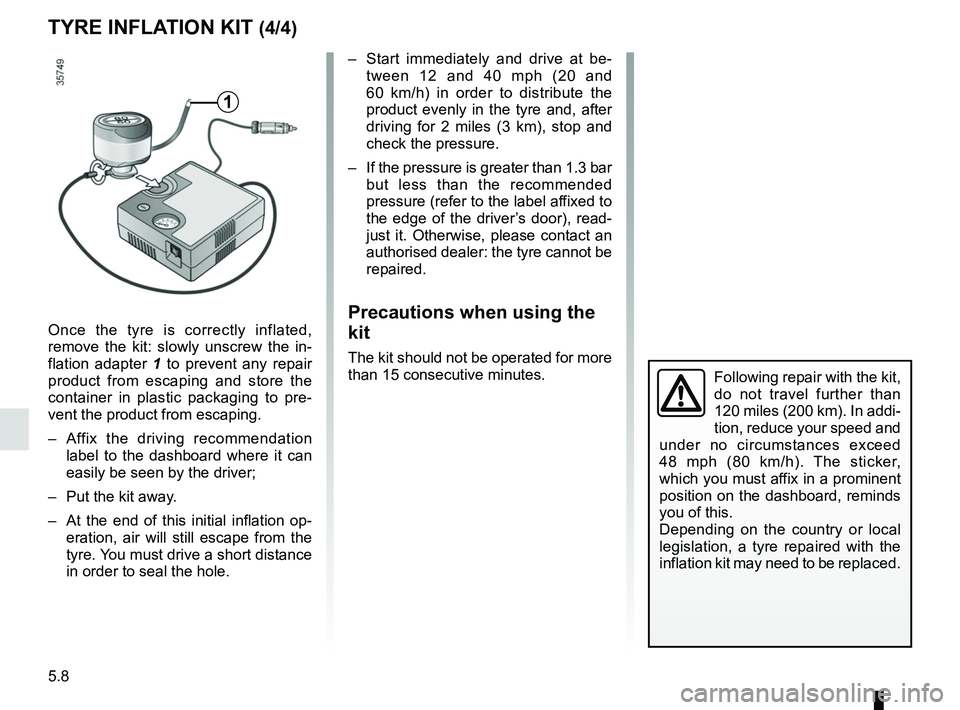
Once the tyre is correctly inflated,
remove the kit: slowly unscrew the in-
flation adapter 1 to prevent any repair
product from escaping and store the
container in plastic packaging to pre-
vent the product from escaping.
– Affix the driving recommendation label to the dashboard where it can
easily be seen by the driver;
– Put the kit away.
– At the end of this initial inflation op- eration, air will still escape from the
tyre. You must drive a short distance
in order to seal the hole.
– Start immediately and drive at be-tween 12 and 40 mph (20 and
60 km/h) in order to distribute the
product evenly in the tyre and, after
driving for 2 miles (3 km), stop and
check the pressure.
– If the pressure is greater than 1.3 bar but less than the recommended
pressure (refer to the label affixed to
the edge of the driver’s door), read-
just it. Otherwise, please contact an
authorised dealer: the tyre cannot be
repaired.
Precautions when using the
kit
The kit should not be operated for more
than 15 consecutive minutes.
1
Following repair with the kit,
do not travel further than
120 miles (200 km). In addi-
tion, reduce your speed and
under no circumstances exceed
48 mph (80 km/h). The sticker,
which you must affix in a prominent
position on the dashboard, reminds
you of this.
Depending on the country or local
legislation, a tyre repaired with the
inflation kit may need to be replaced.
Page 191 of 256
5.13
TYRES (2/4)
Tyre pressures
Adhere to the tyre pressures (including
the emergency spare wheel). The tyre
pressures should be checked at least
once a month and additionally before
any long journey (refer to the label af-
fixed to the edge of the driver’s door).
Incorrect tyre pressures
lead to abnormal tyre wear
and unusually hot running.
These are factors which
may seriously affect safety and lead
to:
– poor road holding;
– risk of blowouts or throwing a tread.
The tyre pressure depends on the
load and speed of use; adjust the
pressures according to the condi-
tions of use (refer to the information
on “Tyre pressures” in Section 4).
Please be aware that a poorly tightened or missing valve cap can make
the tyres less airtight and may lead to pressure loss. Always use valve
caps of the same type as the originals and tighten them fully.
Pressures should be checked when the
tyres are cold; ignore higher pressures
which may be reached in hot weather
or following a fast journey.
If tyre pressures cannot be checked
when the tyres are cold, assume an in-
crease of 0.2 to 0.3 bar.
Never deflate a hot tyre.
Special note
Depending on the vehicle, there may
be an adapter which needs to be posi-
tioned on the valve before air is added.
Your vehicle is equipped with large
wheels. These are more sensitive to
imbalance. If you experience vibra-
tion while driving, contact an appro-
ved dealer.
Vehicle fitted with a tyre pressure
loss warning system
If under-inflated (puncture, low pres-
sure, etc.), the warning light
on
the instrument panel comes on. See
«Tyre pressure loss warning» in chap-
ter 2.
Page 209 of 256
5.31
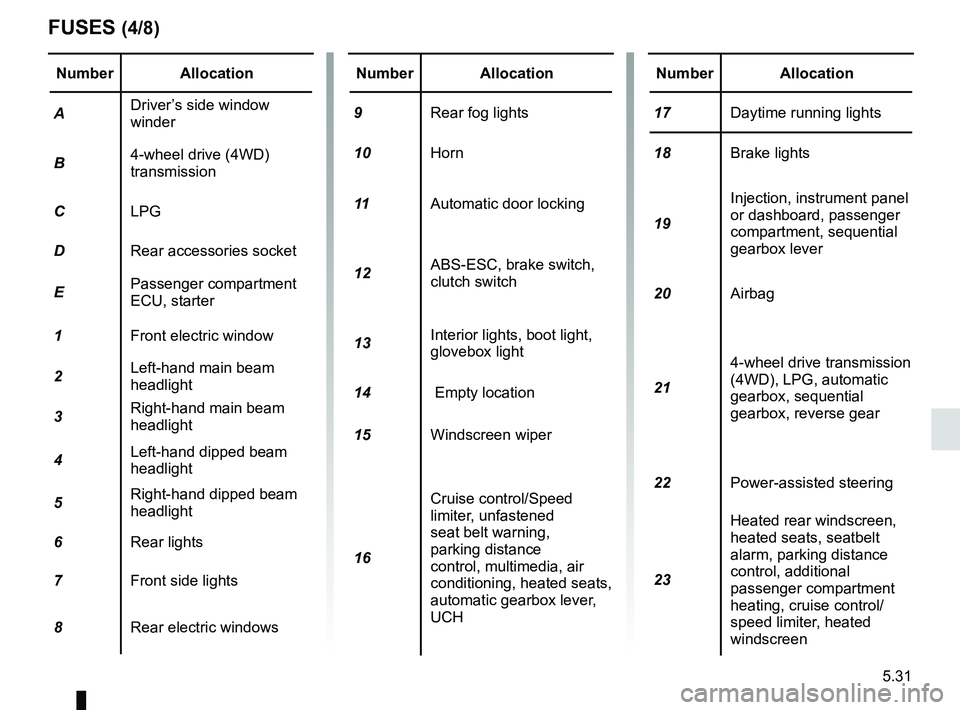
Number Allocation
A Driver’s side window
winder
B 4-wheel drive (4WD)
transmission
C LPG
D Rear accessories socket
E Passenger compartment
ECU, starter
1 Front electric window
2 Left-hand main beam
headlight
3 Right-hand main beam
headlight
4 Left-hand dipped beam
headlight
5 Right-hand dipped beam
headlight
6 Rear lights
7 Front side lights
8 Rear electric windowsNumber Allocation
9 Rear fog lights
10 Horn
11 Automatic door locking
12 ABS-ESC, brake switch,
clutch switch
13 Interior lights, boot light,
glovebox light
14 Empty location
15 Windscreen wiper
16 Cruise control/Speed
limiter, unfastened
seat belt warning,
parking distance
control, multimedia, air
conditioning, heated seats,
automatic gearbox lever,
UCHNumber Allocation
17 Daytime running lights
18 Brake lights
19 Injection, instrument panel
or dashboard, passenger
compartment, sequential
gearbox lever
20 Airbag
21 4-wheel drive transmission
(4WD), LPG, automatic
gearbox, sequential
gearbox, reverse gear
22 Power-assisted steering
23 Heated rear windscreen,
heated seats, seatbelt
alarm, parking distance
control, additional
passenger compartment
heating, cruise control/
speed limiter, heated
windscreen
FUSES (4/8)
Page 210 of 256
5.32
FUSES (5/8)
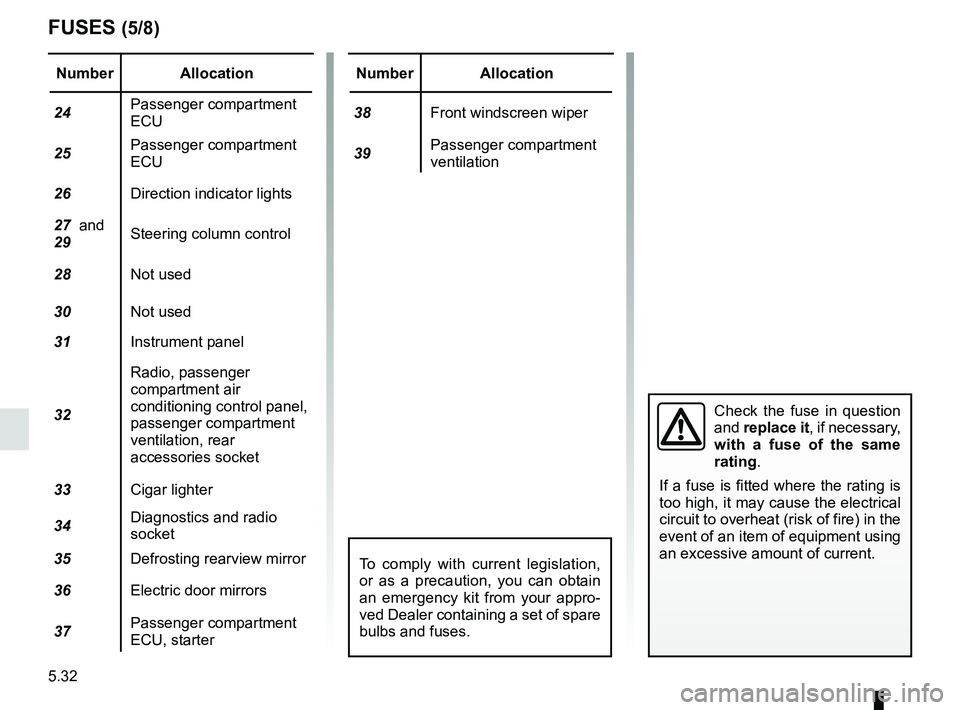
Number Allocation
24 Passenger compartment
ECU
25 Passenger compartment
ECU
26 Direction indicator lights
27 and
29 Steering column control
28 Not used
30 Not used
31 Instrument panel
32 Radio, passenger
compartment air
conditioning control panel,
passenger compartment
ventilation, rear
accessories socket
33 Cigar lighter
34 Diagnostics and radio
socket
35 Defrosting rearview mirror
36 Electric door mirrors
37 Passenger compartment
ECU, starterNumber Allocation
38 Front windscreen wiper
39 Passenger compartment
ventilation
Check the fuse in question
and
replace it, if necessary,
with a fuse of the same
rating.
If a fuse is fitted where the rating is
too high, it may cause the electrical
circuit to overheat (risk of fire) in the
event of an item of equipment using
an excessive amount of current.
To comply with current legislation,
or as a precaution, you can obtain
an emergency kit from your appro-
ved Dealer containing a set of spare
bulbs and fuses.
Page 212 of 256
5.34
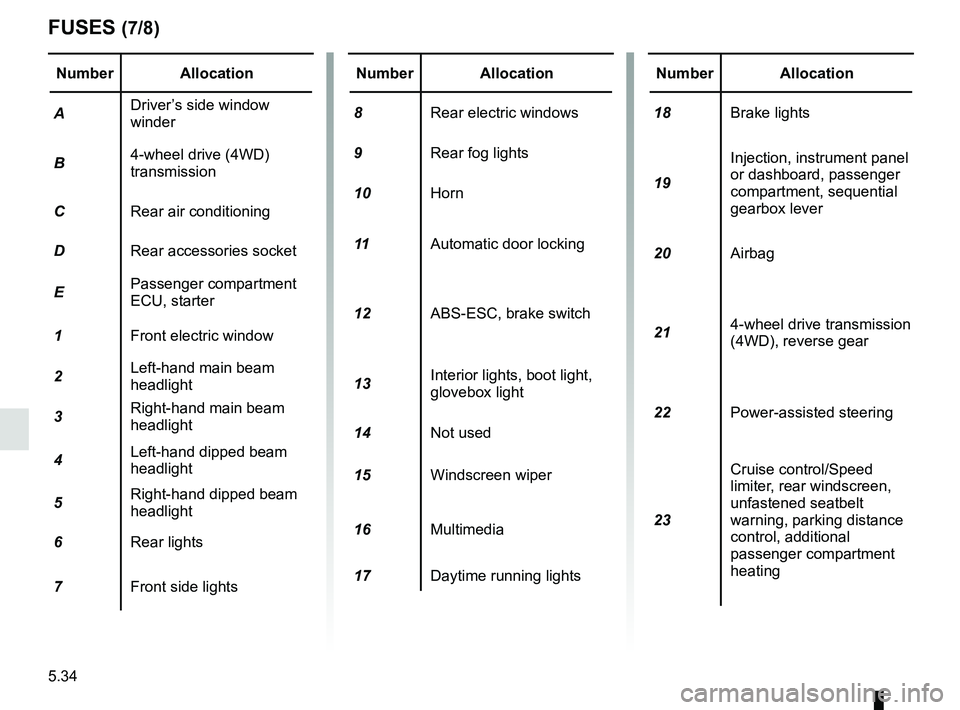
FUSES (7/8)
Number Allocation
A Driver’s side window
winder
B 4-wheel drive (4WD)
transmission
C Rear air conditioning
D Rear accessories socket
E Passenger compartment
ECU, starter
1 Front electric window
2 Left-hand main beam
headlight
3 Right-hand main beam
headlight
4 Left-hand dipped beam
headlight
5 Right-hand dipped beam
headlight
6 Rear lights
7 Front side lightsNumber Allocation
8 Rear electric windows
9 Rear fog lights
10 Horn
11 Automatic door locking
12 ABS-ESC, brake switch
13 Interior lights, boot light,
glovebox light
14 Not used
15 Windscreen wiper
16 Multimedia
17 Daytime running lightsNumber Allocation
18 Brake lights
19 Injection, instrument panel
or dashboard, passenger
compartment, sequential
gearbox lever
20 Airbag
21 4-wheel drive transmission
(4WD), reverse gear
22 Power-assisted steering
23 Cruise control/Speed
limiter, rear windscreen,
unfastened seatbelt
warning, parking distance
control, additional
passenger compartment
heating
Page 213 of 256
5.35
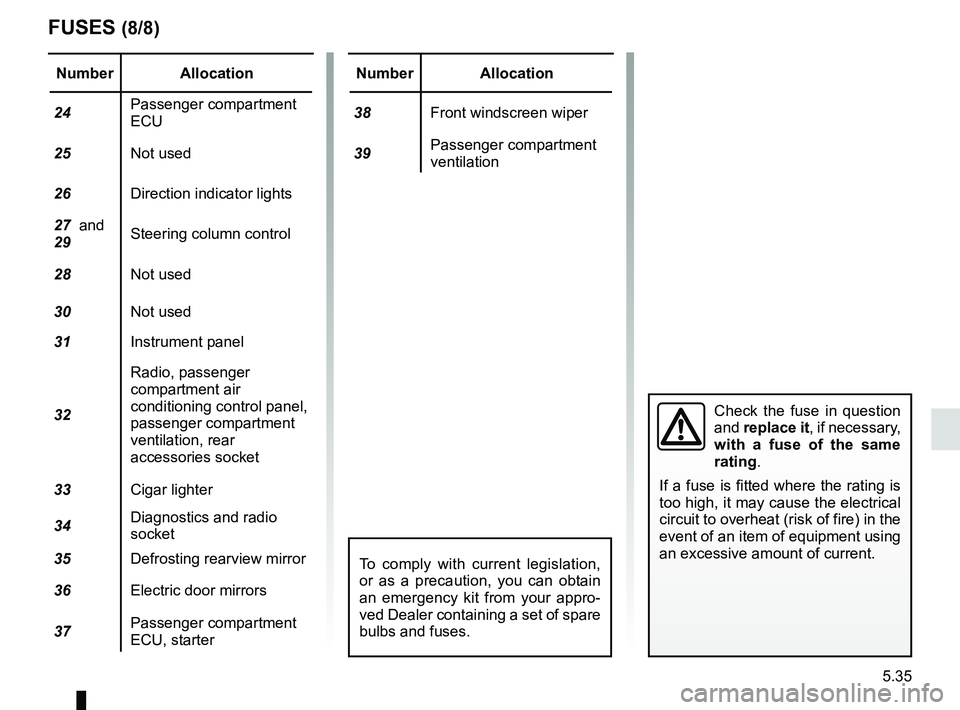
FUSES (8/8)
Number Allocation
24 Passenger compartment
ECU
25 Not used
26 Direction indicator lights
27 and
29 Steering column control
28 Not used
30 Not used
31 Instrument panel
32 Radio, passenger
compartment air
conditioning control panel,
passenger compartment
ventilation, rear
accessories socket
33 Cigar lighter
34 Diagnostics and radio
socket
35 Defrosting rearview mirror
36 Electric door mirrors
37 Passenger compartment
ECU, starterNumber Allocation
38 Front windscreen wiper
39 Passenger compartment
ventilation
Check the fuse in question
and
replace it, if necessary,
with a fuse of the same
rating.
If a fuse is fitted where the rating is
too high, it may cause the electrical
circuit to overheat (risk of fire) in the
event of an item of equipment using
an excessive amount of current.
To comply with current legislation,
or as a precaution, you can obtain
an emergency kit from your appro-
ved Dealer containing a set of spare
bulbs and fuses.
Page 236 of 256
6.8
SPARE PARTS AND REPAIRS
Original parts are based on strict specifications and are subject to hig\
hly-specialised tests. Therefore, they are of at least the same
level of quality as the parts fitted originally.
If you always fit genuine replacement parts to your vehicle, you will en\
sure that it performs well. Furthermore, repairs carried out
within the manufacturer’s Network using original parts are guaranteed according to the condition\
s set out on the reverse of the
repair order.
Page 243 of 256
6.15
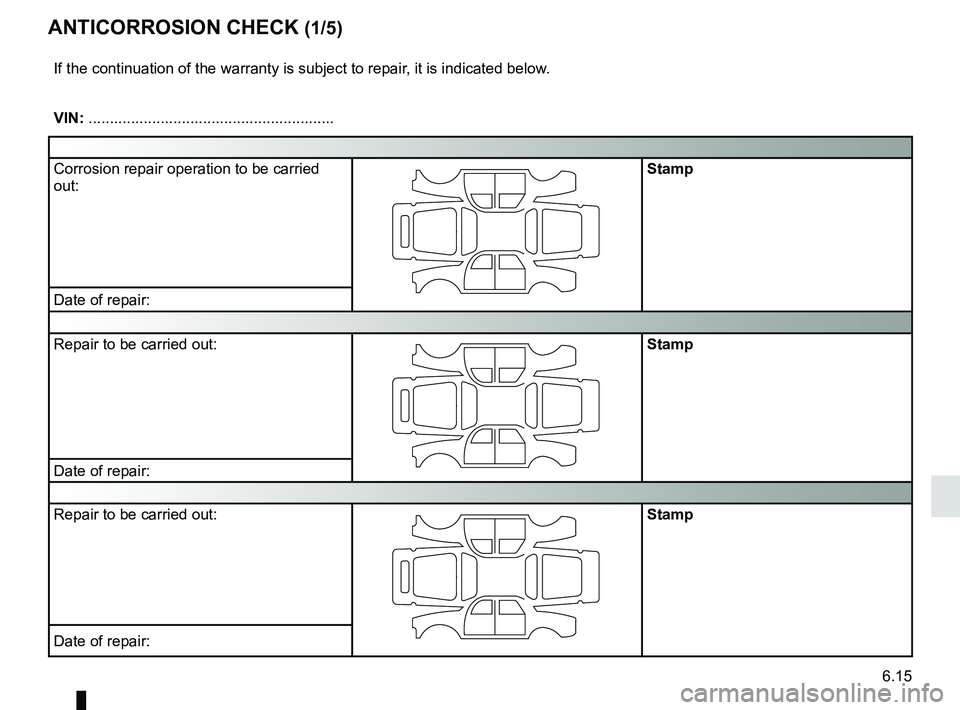
ANTICORROSION CHECK (1/5)
If the continuation of the warranty is subject to repair, it is indicated below.
VIN: ..........................................................
Corrosion repair operation to be carried
out:
Stamp
Date of repair:
Repair to be carried out:
Stamp
Date of repair:
Repair to be carried out:
Stamp
Date of repair:
Page 244 of 256
6.16
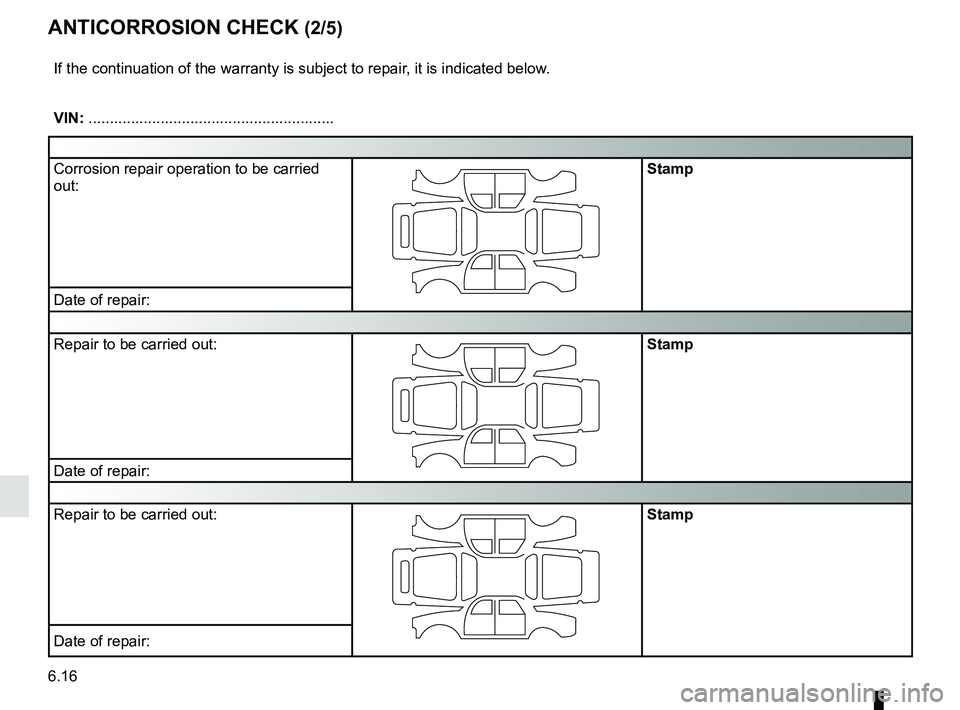
ANTICORROSION CHECK (2/5)
If the continuation of the warranty is subject to repair, it is indicated below.
VIN: ..........................................................
Corrosion repair operation to be carried
out:
Stamp
Date of repair:
Repair to be carried out:
Stamp
Date of repair:
Repair to be carried out:
Stamp
Date of repair:
Page 245 of 256
6.17
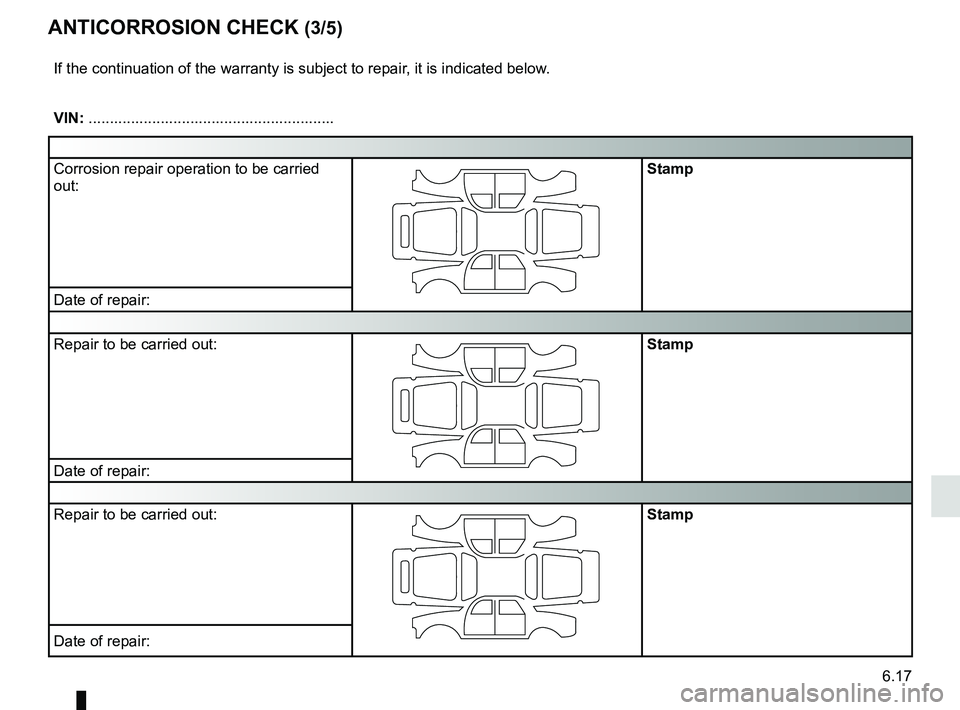
ANTICORROSION CHECK (3/5)
If the continuation of the warranty is subject to repair, it is indicated below.
VIN: ..........................................................
Corrosion repair operation to be carried
out:
Stamp
Date of repair:
Repair to be carried out:
Stamp
Date of repair:
Repair to be carried out:
Stamp
Date of repair: