transmission RENAULT ESPACE 2000 J66 / 3.G Technical Note 3426A User Guide
[x] Cancel search | Manufacturer: RENAULT, Model Year: 2000, Model line: ESPACE, Model: RENAULT ESPACE 2000 J66 / 3.GPages: 52, PDF Size: 0.98 MB
Page 16 of 52
Downloaded from www.Manualslib.com manuals search engine TOP AND FRONT OF ENGINE
Timing belt
11
11 - 2
Timing belt
REMOVAL
Disconnect the battery.
If necessary, place the vehicle on a two-post lift.
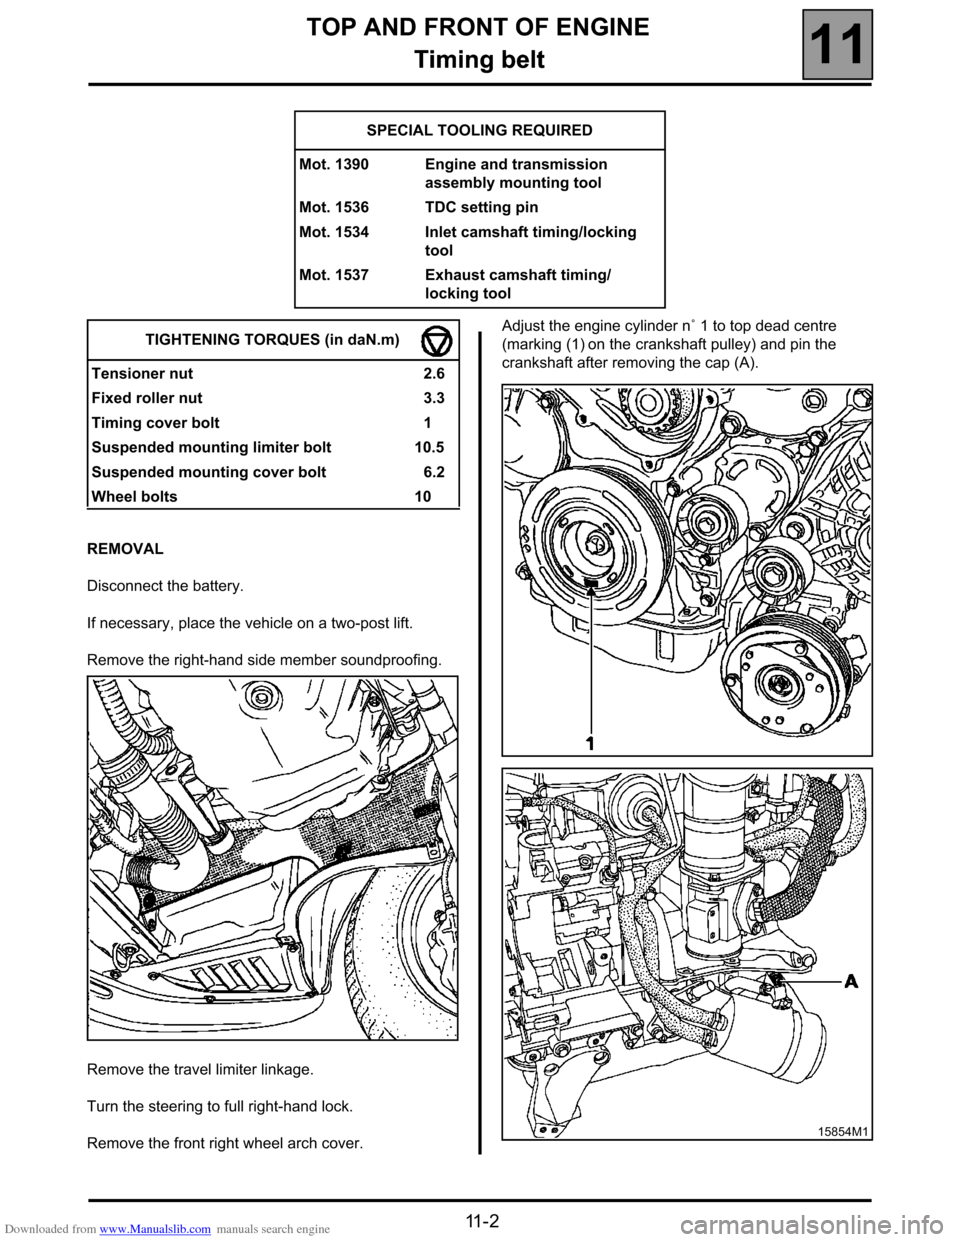
Remove the right-hand side member soundproofing.
Remove the travel limiter linkage.
Turn the steering to full right-hand lock.
Remove the front right wheel arch cover. Adjust the engine cylinder n˚ 1 to top dead centre
(marking (1) on the crankshaft pulley) and pin the
crankshaft after removing the cap (A). SPECIAL TOOLING REQUIRED
Mot. 1390 Engine and transmission
assembly mounting tool
Mot. 1536 TDC setting pin
Mot. 1534 Inlet camshaft timing/locking
tool
Mot. 1537 Exhaust camshaft timing/
locking tool
TIGHTENING TORQUES (in daN.m)
Tensioner nut 2.6
Fixed roller nut 3.3
Timing cover bolt 1
Suspended mounting limiter bolt 10.5
Suspended mounting cover bolt 6.2
Wheel bolts 10
15854M1
Page 17 of 52
Downloaded from www.Manualslib.com manuals search engine TOP AND FRONT OF ENGINE
Timing belt
11
11 - 3
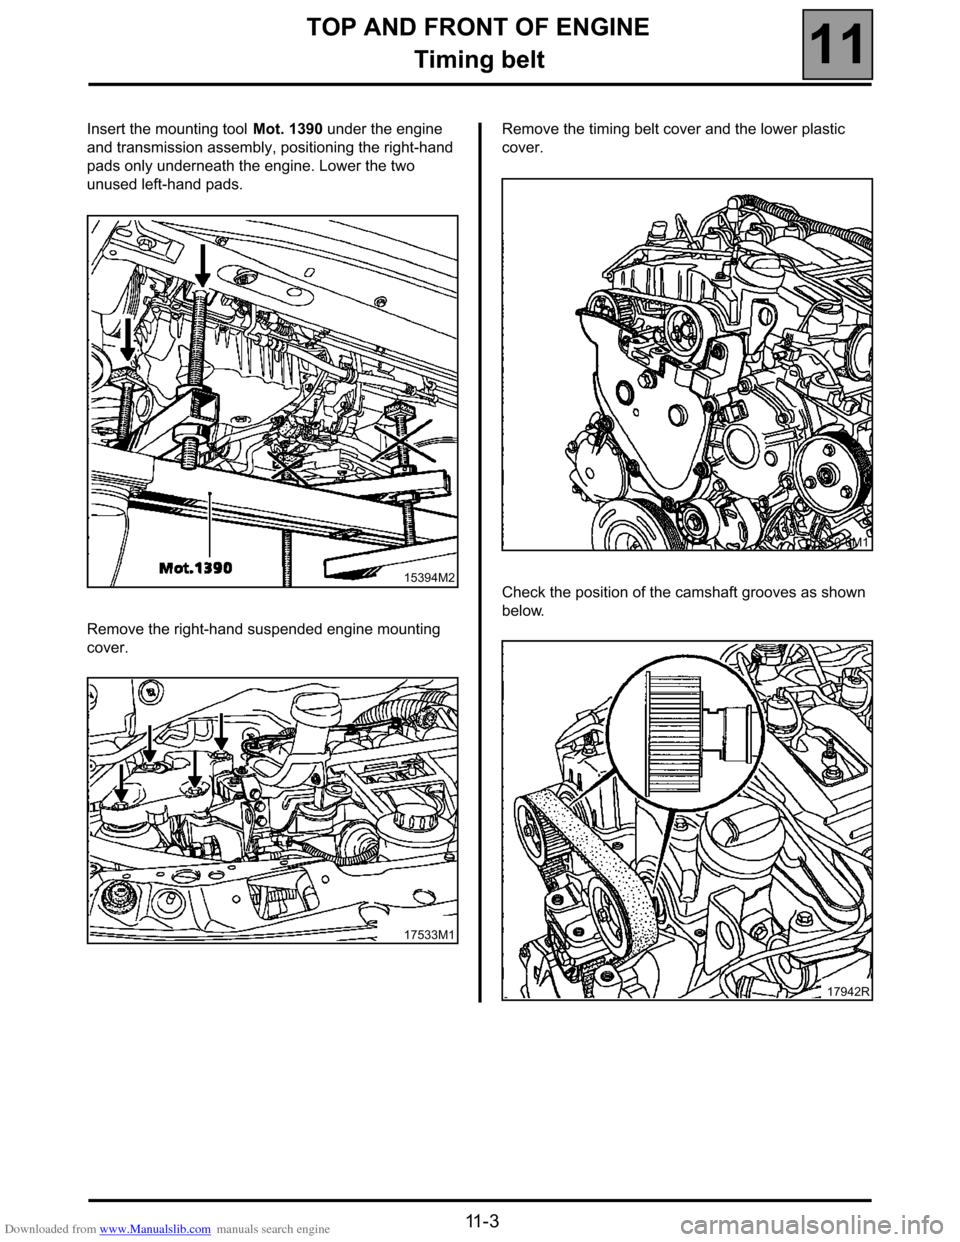
Insert the mounting tool Mot. 1390 under the engine
and transmission assembly, positioning the right-hand
pads only underneath the engine. Lower the two
unused left-hand pads.
Remove the right-hand suspended engine mounting
cover.Remove the timing belt cover and the lower plastic
cover.
Check the position of the camshaft grooves as shown
below.
15394M2
17533M1
15850-6M1
17942R
Page 22 of 52

Downloaded from www.Manualslib.com manuals search engine TOP AND FRONT OF ENGINE
Cylinder head gasket
11
11 - 8
Cylinder head gasket
Consult manual Mot. G9 for the details of this
operation.You must remove the engine and transmission
assembly to remove the cylinder head
Page 23 of 52
Downloaded from www.Manualslib.com manuals search engine TURBOCHARGING
Turbocharger
12
112TURBOCHARGING
Turbocharger
THE TURBOCHARGING PRESSURE ON THE
TURBOCHARGER FITTED ON THE G9T 710
ENGINE IS NOT ADJUSTABLE.
In operation, the pressure should stabilise at
210 ± 3.5 mbar.
REMOVAL
Removal or refitting of the turbocharger requires the
removal of the engine and transmission assembly.TIGHTENING TORQUES (in daN.m)
Turbocharger mounting nuts 2.6
Oil inlet union bolt 2
Oil return union bolt 0.9
Turbo mounting nut on the intermediate
exhaust downpipe 2.6
12-1
Page 29 of 52
Downloaded from www.Manualslib.com manuals search engine FUEL MIXTURE
Exhaust manifold
12
12-7
Exhaust manifold
REMOVAL
Removal of the exhaust manifold requires removal of the engine and
transmission assembly (see section 10 "Removing/refitting engine and
transmission assembly"), and the removal of the turbocharger (see
section 12 "Removing/refitting turbocharger").
REFITTING
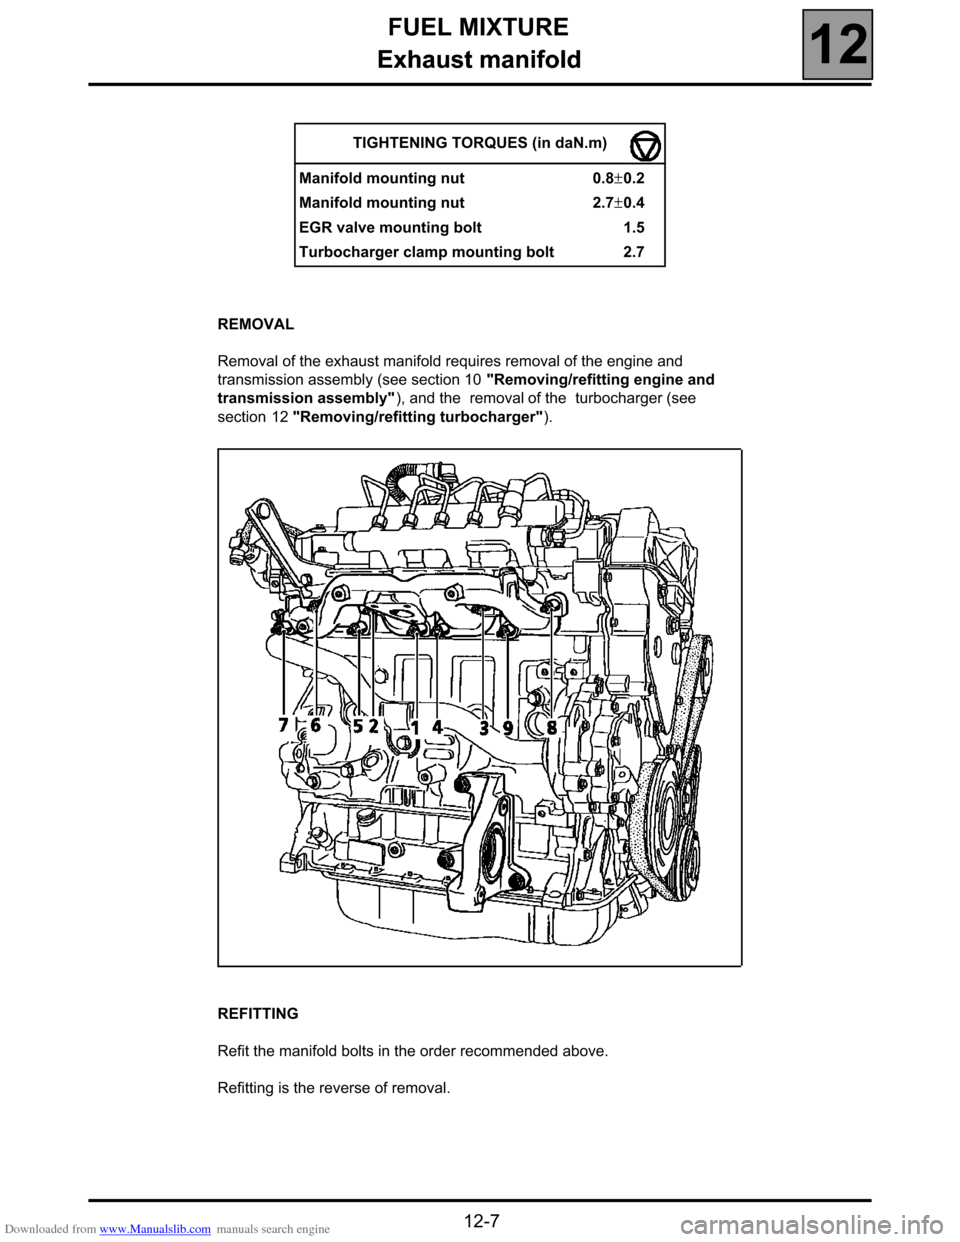
Refit the manifold bolts in the order recommended above.
Refitting is the reverse of removal.TIGHTENING TORQUES (in daN.m)
Manifold mounting nut 0.8±0.2
Manifold mounting nut 2.7±0.4
EGR valve mounting bolt 1.5
Turbocharger clamp mounting bolt 2.7
Page 30 of 52
Downloaded from www.Manualslib.com manuals search engine FUEL MIXTURE
Inlet manifold
12
12-8
Inlet manifold
REMOVAL
The removal of the inlet manifold/cylinder head cover
requires the removal of the injectors and injection
harnesses. (See section 13 "Removing/refitting the
high pressure injection section").
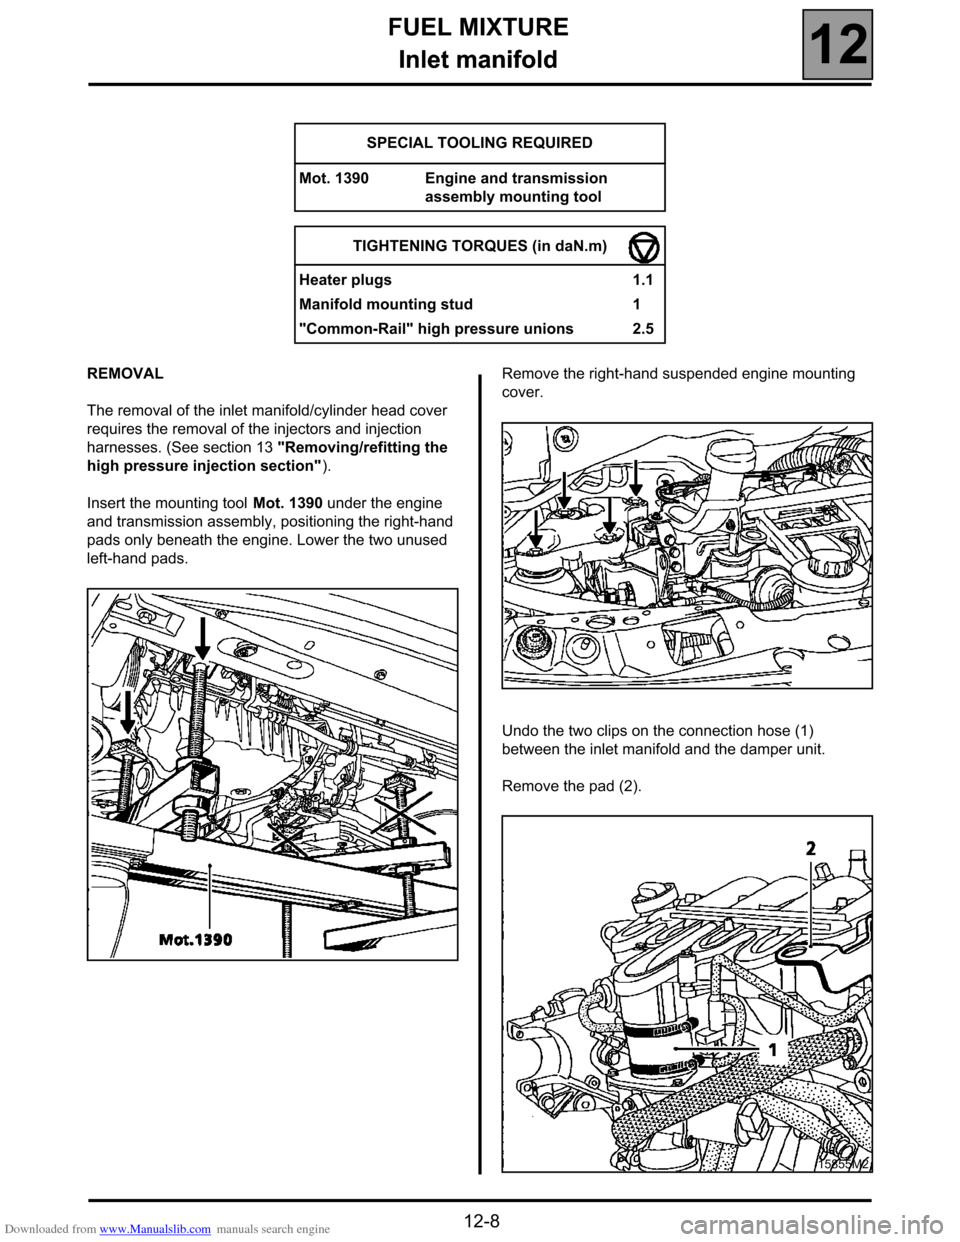
Insert the mounting tool Mot. 1390 under the engine
and transmission assembly, positioning the right-hand
pads only beneath the engine. Lower the two unused
left-hand pads.Remove the right-hand suspended engine mounting
cover.
Undo the two clips on the connection hose (1)
between the inlet manifold and the damper unit.
Remove the pad (2). SPECIAL TOOLING REQUIRED
Mot. 1390 Engine and transmission
assembly mounting tool
TIGHTENING TORQUES (in daN.m)
Heater plugs 1.1
Manifold mounting stud 1
"Common-Rail" high pressure unions 2.5
15855M2
Page 34 of 52
Downloaded from www.Manualslib.com manuals search engine STARTING - CHARGING
Alternator
16
16-3
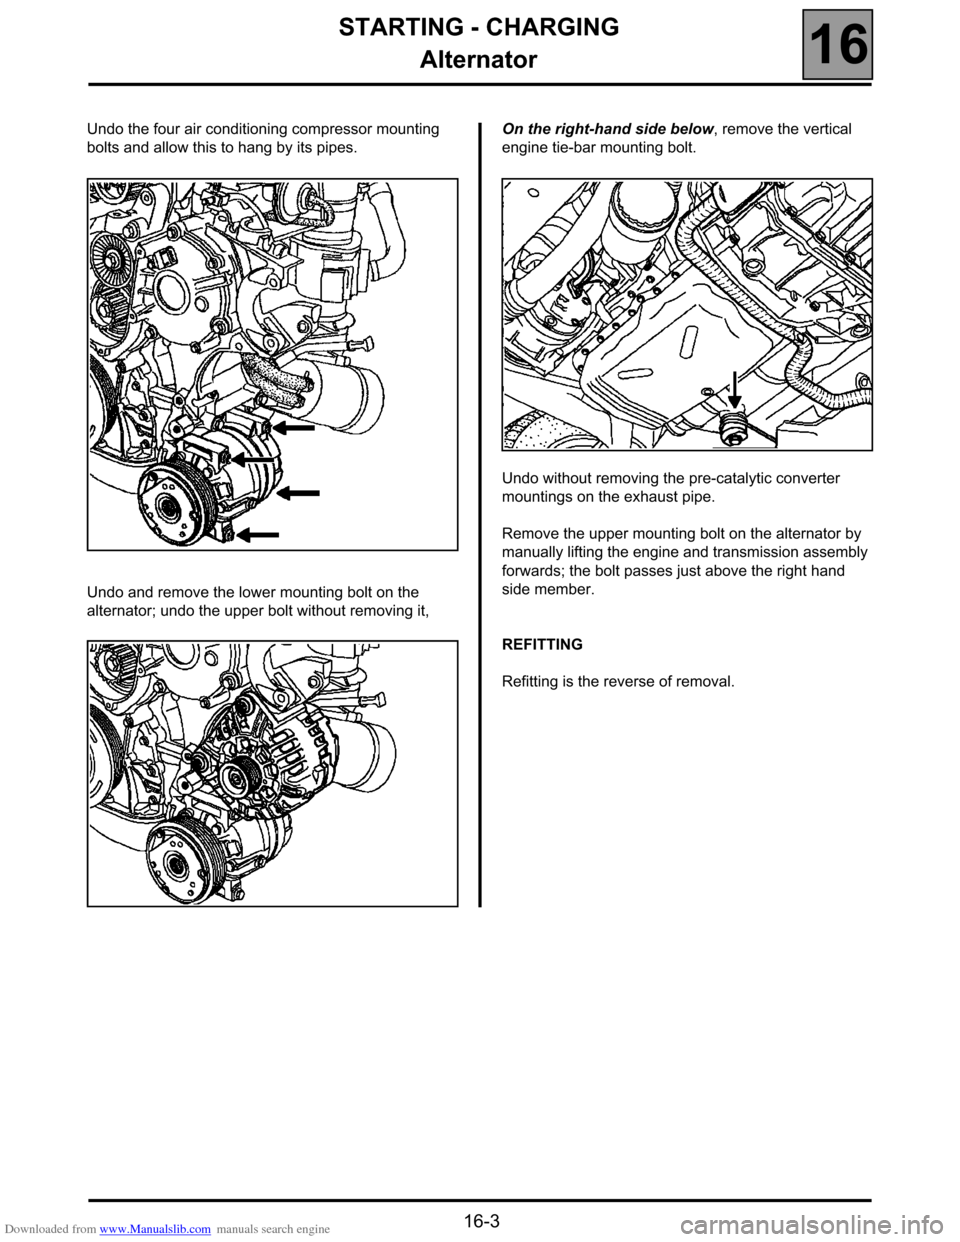
Undo the four air conditioning compressor mounting
bolts and allow this to hang by its pipes.
Undo and remove the lower mounting bolt on the
alternator; undo the upper bolt without removing it,On the right-hand side below, remove the vertical
engine tie-bar mounting bolt.
Undo without removing the pre-catalytic converter
mountings on the exhaust pipe.
Remove the upper mounting bolt on the alternator by
manually lifting the engine and transmission assembly
forwards; the bolt passes just above the right hand
side member.
REFITTING
Refitting is the reverse of removal.
Page 45 of 52
Downloaded from www.Manualslib.com manuals search engine MANUAL GEARBOX
Removal - refitting
21
21-4
Removal - refitting
The method for removing/refitting the PK1 G9T
gearbox is the same as for the G8T engine.
See Workshop Repair Manual 315 section 21
"Transmission: removing/refitting the PK1
gearbox".
Please observe the recommendations for bleeding the
hydraulic clutch system given in Technical Note
3345A when refitting.
IMPORTANT:
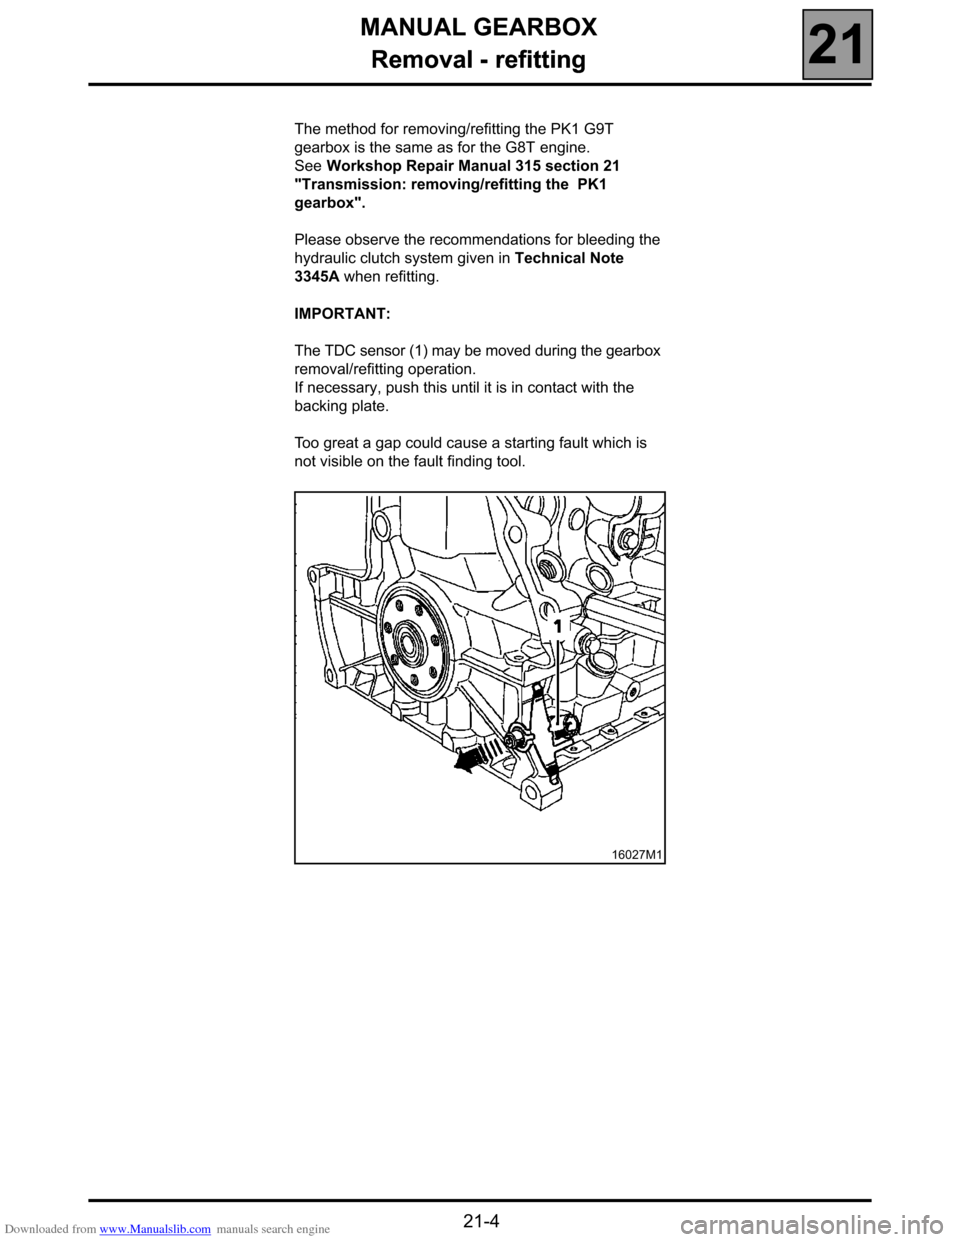
The TDC sensor (1) may be moved during the gearbox
removal/refitting operation.
If necessary, push this until it is in contact with the
backing plate.
Too great a gap could cause a starting fault which is
not visible on the fault finding tool.
16027M1