lock RENAULT FLUENCE Z.E. 2012 Owner's Manual
[x] Cancel search | Manufacturer: RENAULT, Model Year: 2012, Model line: FLUENCE Z.E., Model: RENAULT FLUENCE Z.E. 2012Pages: 195, PDF Size: 5.23 MB
Page 47 of 195
child restraint/seat ................................ (up to the end of the DU)
child restraint/seat ................................ (up to the end of the DU)
child restraint/seat ................................ (up to the end of the DU)
child safety ............................................ (up to the end of the DU)
child seats ............................................. (up to the end of the DU)
transporting children ............................. (up to the end of the DU)
1.42
ENG_UD21488_3
Sécurité enfants : installation du siège enfant (L38 - X38 - R\
enault)
ENG_NU_914-4_L38e_Renault_1
Jaune NoirNoir texte
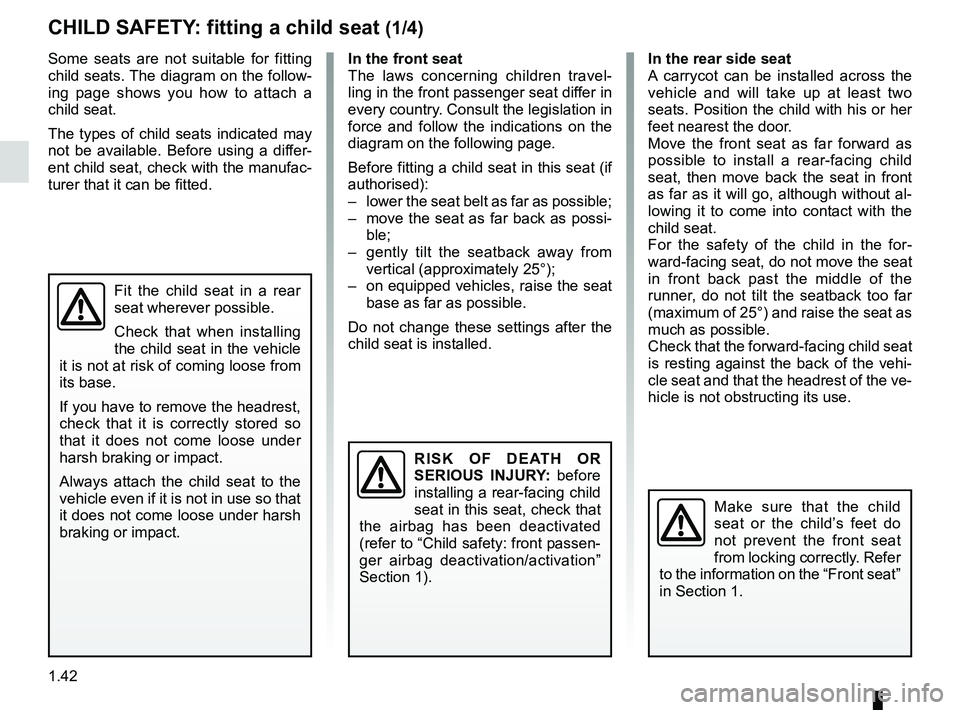
Some seats are not suitable for fitting
child seats. The diagram on the follow -
ing page shows you how to attach a
child seat.
The types of child seats indicated may
not be available. Before using a differ-
ent child seat, check with the manufac-
turer that it can be fitted.
fitting a child seat
chilD SAFetY : fitting a child seat (1/4)
in the rear side seat
A carrycot can be installed across the
vehicle and will take up at least two
seats. Position the child with his or her
feet nearest the door.
Move the front seat as far forward as
possible to install a rear-facing child
seat, then move back the seat in front
as far as it will go, although without al-
lowing it to come into contact with the
child seat.
For the safety of the child in the for -
ward-facing seat, do not move the seat
in front back past the middle of the
runner, do not tilt the seatback too far
(maximum of 25°) and raise the seat as
much as possible.
Check that the forward-facing child seat
is resting against the back of the vehi-
cle seat and that the headrest of the ve-
hicle is not obstructing its use.
in the front seat
The laws concerning children travel
-
ling in the front passenger seat differ in
every country. Consult the legislation in
force and follow the indications on the
diagram on the following page.
Before fitting a child seat in this seat (if
authorised):
– lower the seat belt as far as possible;
– move the seat as far back as possi-
ble;
– gently tilt the seatback away from
vertical (approximately 25°);
– on equipped vehicles, raise the seat
base as far as possible.
Do not change these settings after the
child seat is installed.
r i S K O F D eAt h O r
S eri OUS iNJU rY: before
installing a rear-facing child
seat in this seat, check that
the airbag has been deactivated
(refer to “Child safety: front passen-
ger airbag deactivation/activation”
Section 1).
Fit the child seat in a rear
seat wherever possible.
Check that when installing
the child seat in the vehicle
it is not at risk of coming loose from
its base.
If you have to remove the headrest,
check that it is correctly stored so
that it does not come loose under
harsh braking or impact.
Always attach the child seat to the
vehicle even if it is not in use so that
it does not come loose under harsh
braking or impact.
Make sure that the child
seat or the child’s feet do
not prevent the front seat
from locking correctly. Refer
to the information on the “Front seat”
in Section 1.
Page 51 of 195
air bagdeactivating the front passenger air bags ........ (current page)
front passenger air bag deactivation ..................... (current page)
child restraint/seat ................................ (up to the end of the DU)
child safety ............................................ (up to the end of the DU)
child restraint/seat ................................ (up to the end of the DU)
transporting children ............................. (up to the end of the DU)
1.46
ENG_UD28761_4
Sécurité enfants : désactivation/activation airbag passager ava\
nt (L38 - X38 - Renault)
ENG_NU_914-4_L38e_Renault_1
Jaune NoirNoir texte
deactivating, activating the front passenger airbag
Deactivating the front
passenger air bags
(on equipped vehicles)
You must deactivate certain devices
in addition to the front passenger seat
belt before fitting a child seat in the front
passenger seat. t
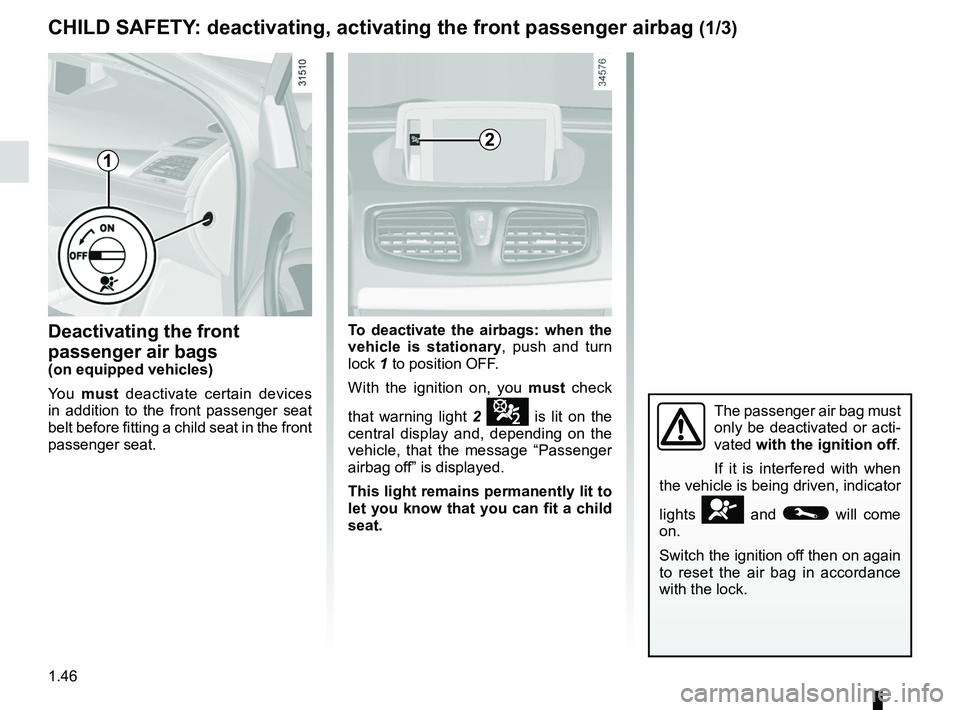
o deactivate the airbags: when the
vehicle is stationary , push and turn
lock 1 to position OFF.
With the ignition on, you must check
that warning light 2
¹ is lit on the
central display and, depending on the
vehicle, that the message “ Passenger
airbag off” is displayed.
this light remains permanently lit to
let you know that you can fit a child
seat.
chilD SAFetY : deactivating, activating the front passenger airbag (1/3)
1
The passenger air bag must
only be deactivated or acti-
vated with the ignition off.
If it is interfered with when
the vehicle is being driven, indicator
lights
å and © will come
on.
Switch the ignition off then on again
to reset the air bag in accordance
with the lock.
2
Page 53 of 195
air bagactivating the front passenger air bags ............ (current page)
1.48
ENG_UD28761_4
Sécurité enfants : désactivation/activation airbag passager ava\
nt (L38 - X38 - Renault)
ENG_NU_914-4_L38e_Renault_1
chilD SAFetY : deactivating, activating the front passenger airbag (3/3)
Operating faults
It is forbidden to fit a rear-facing child
seat to the front passenger seat if the
air bag activation/deactivation system
is faulty.
Allowing any other passenger to sit in
that seat is not recommended.
Contact your approved dealer as soon
as possible.
Activating the front
passenger air bags
You should reactivate the air bag as
soon as you remove the child seat from
the front passenger seat to ensure the
protection of the front passenger in the
event of an impact.
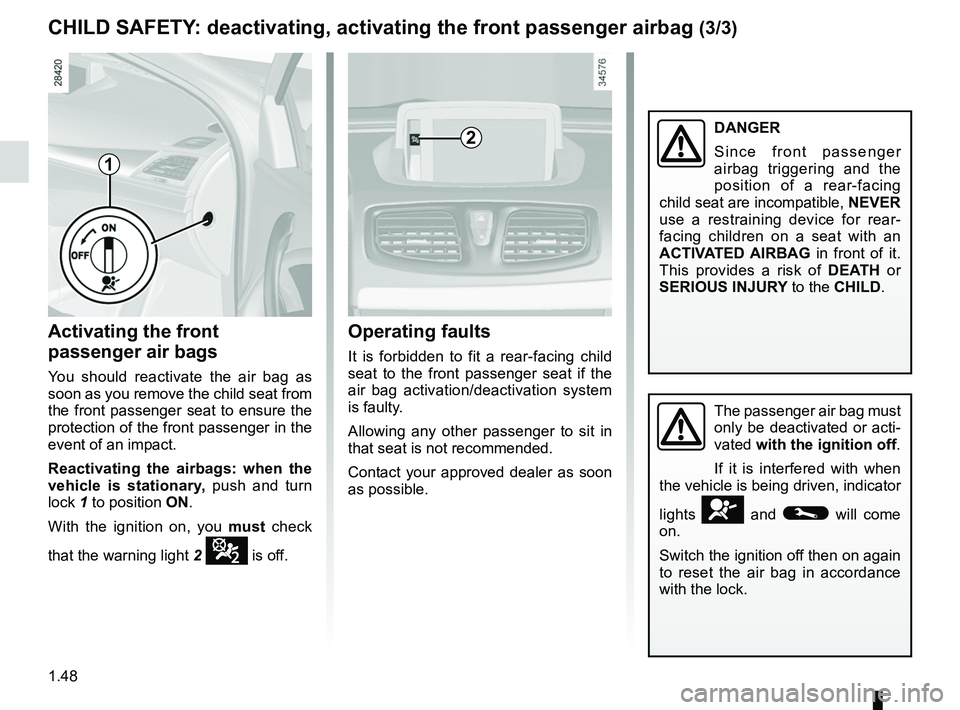
r eactivating the airbags: when the
vehicle is stationary, push and turn
lock 1 to position ON.
With the ignition on, you must check
that the warning light 2
¹ is off.
1
The passenger air bag must
only be deactivated or acti-
vated with the ignition off.
If it is interfered with when
the vehicle is being driven, indicator
lights
å and © will come
on.
Switch the ignition off then on again
to reset the air bag in accordance
with the lock.
2DANger
S i n c e f r o n t p a s s e n g e r
airbag triggering and the
position of a rear-facing
child seat are incompatible, Never
use a restraining device for rear -
facing children on a seat with an
A ctiv Ate D A irBA g in front of it.
This provides a risk of DeAth or
SeriOUS iNJUr Y to the chilD.
Page 54 of 195

clock ..................................................... (up to the end of the DU)
clock ..................................................... (up to the end of the DU)
external temperature ............................ (up to the end of the DU)
indicators: exterior temperature indicator .......................... (current page)
1.49
ENG_UD21536_3
Heure et température extérieure (L38 - X38 - Renault)
ENG_NU_914-4_L38e_Renault_1
Clock and exterior temperature
With the ignition on , the time and,
depending on the vehicle, the exterior
temperature are displayed.
resetting the clock 1
v ehicles equipped with a navigation
system, radio, etc.
Refer to the equipment instructions for
the special features.
external temperature
indicator
As ice formation is related
to climatic exposure, local
air humidity and temperature, the
external temperature alone is not
sufficient to detect ice.
clOcK AND eXteriOr temPerA tUre
external temperature
indicator
Special note:
When the outside temperature is – 3°C
to + 3°C, the °C characters flash (sig -
nalling a risk of ice on the road).
1
Page 56 of 195
JauneNoirNoir texte
1.51
ENG_UD23033_2
Poste de conduite à gauche (L38 électrique - Renault)
ENG_NU_914-4_L38e_Renault_1
DriviNg POSitiON: leFt-hAND Drive (2/2)
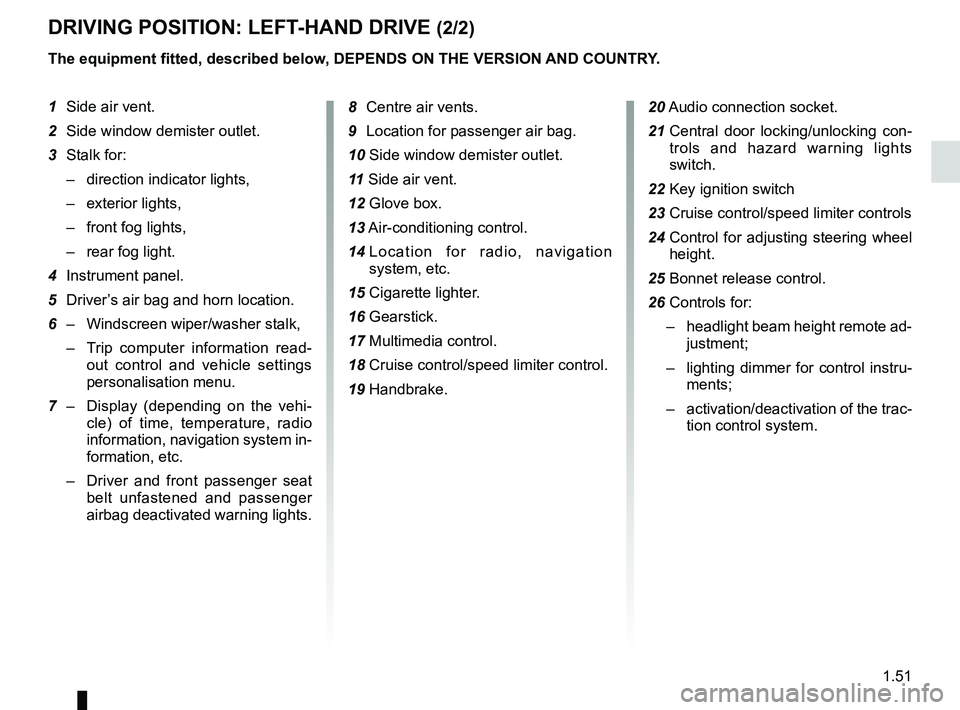
the equipment fitted, described below, DePeNDS ON the verSiON AND cOUNtr Y.
1 Side air vent.
2 Side window demister outlet.
3 Stalk for:
– direction indicator lights,
– exterior lights,
– front fog lights,
– rear fog light.
4 Instrument panel.
5 Driver’s air bag and horn location.
6 – Windscreen wiper/washer stalk,
– Trip computer information read -
out control and vehicle settings
personalisation menu.
7 – Display (depending on the vehi -
cle) of time, temperature, radio
information, navigation system in-
formation, etc.
– Driver and front passenger seat
belt unfastened and passenger
airbag deactivated warning lights. 8
Centre air vents.
9 Location for passenger air bag.
10 Side window demister outlet.
11 Side air vent.
12 Glove box.
13 Air-conditioning control.
14 Location for radio, navigation
system, etc.
15 Cigarette lighter.
16 Gearstick.
17 Multimedia control.
18 Cruise control/speed limiter control.
19 Handbrake. 20
Audio connection socket.
21 Central door locking/unlocking con -
trols and hazard warning lights
switch.
22 Key ignition switch
23 Cruise control/speed limiter controls
24 Control for adjusting steering wheel
height.
25 Bonnet release control.
26 Controls for:
– headlight beam height remote ad-
justment;
– lighting dimmer for control instru-
ments;
– activation/deactivation of the trac-
tion control system.
Page 58 of 195
JauneNoirNoir texte
1.53
ENG_UD23034_2
Poste de conduite à droite (L38 électrique - Renault)
ENG_NU_914-4_L38e_Renault_1
DriviNg POSitiON: right-hAND Drive (2/2)
the equipment fitted, described below, DePeNDS ON the verSiON AND cOUNtr Y.
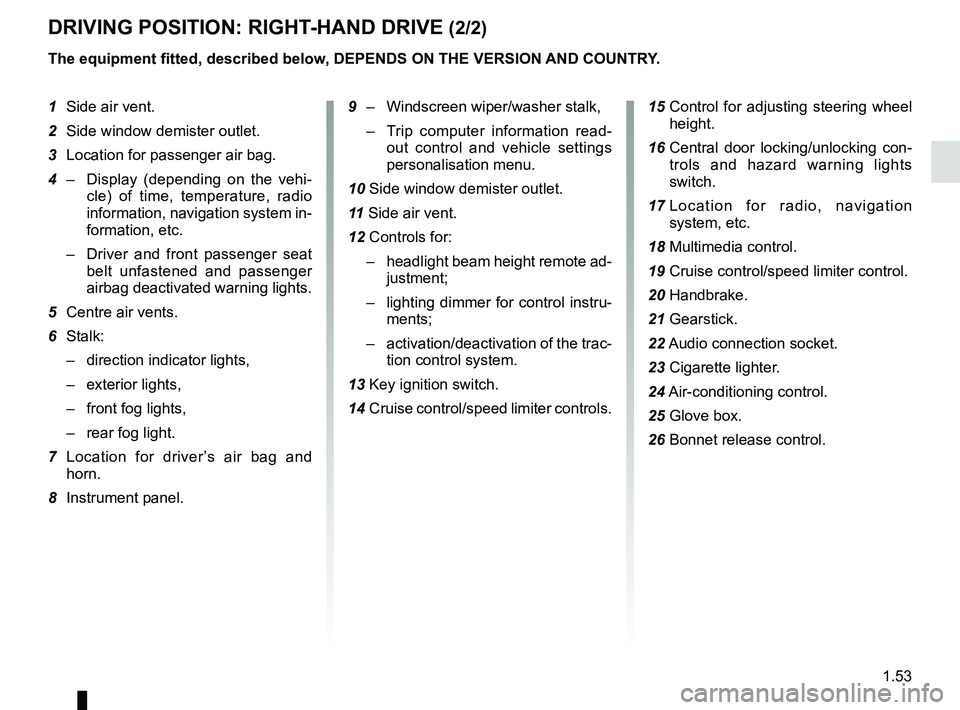
1 Side air vent.
2 Side window demister outlet.
3 Location for passenger air bag.
4 – Display (depending on the vehi -
cle) of time, temperature, radio
information, navigation system in-
formation, etc.
– Driver and front passenger seat
belt unfastened and passenger
airbag deactivated warning lights.
5 Centre air vents.
6 Stalk:
– direction indicator lights,
– exterior lights,
– front fog lights,
– rear fog light.
7 Location for driver ’s air bag and
horn.
8 Instrument panel.
9 – Windscreen wiper/washer stalk,
– Trip computer information read -
out control and vehicle settings
personalisation menu.
10 Side window demister outlet.
11 Side air vent.
12 Controls for:
– headlight beam height remote ad-
justment;
– lighting dimmer for control instru-
ments;
– activation/deactivation of the trac-
tion control system.
13 Key ignition switch.
14 Cruise control/speed limiter controls. 15
Control for adjusting steering wheel
height.
16 Central door locking/unlocking con -
trols and hazard warning lights
switch.
17 Location for radio, navigation
system, etc.
18 Multimedia control.
19 Cruise control/speed limiter control.
20 Handbrake.
21 Gearstick.
22 Audio connection socket.
23 Cigarette lighter.
24
Air-conditioning control.
25 Glove box.
26 Bonnet release control.
Page 61 of 195
1.56
ENG_UD26161_4
Témoins lumineux (L38 électrique - Renault)
ENG_NU_914-4_L38e_Renault_1
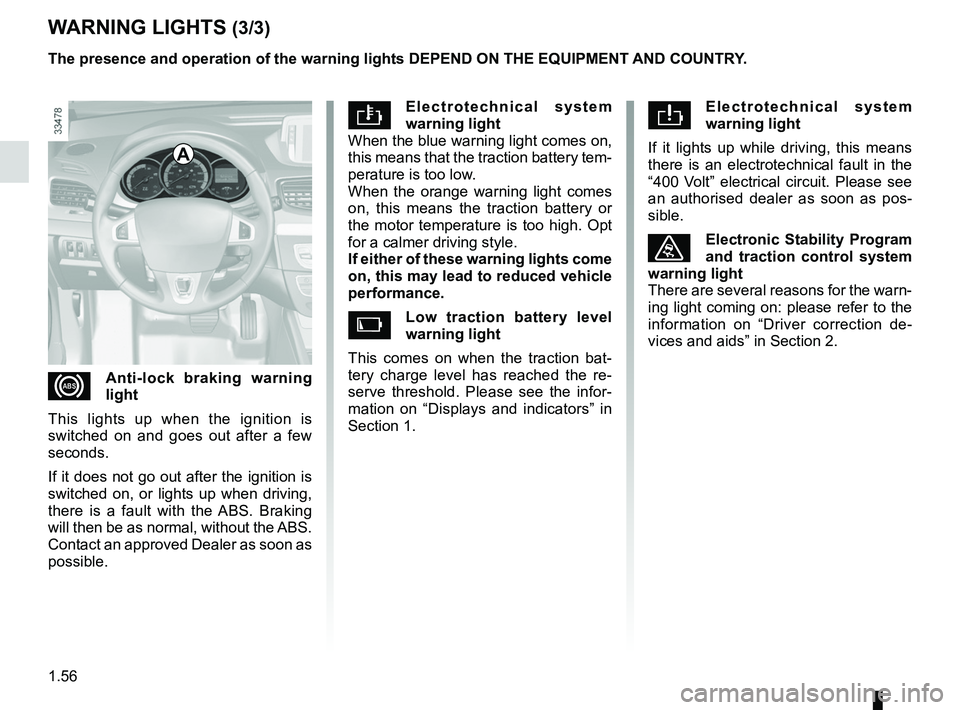
e l e c t r o t e c h n i c a l s y s t e m
warning light
When the blue warning light comes on,
this means that the traction battery tem-
perature is too low.
When the orange warning light comes
on, this means the traction battery or
the motor temperature is too high. Opt
for a calmer driving style.
if either of these warning lights come
on, this may lead to reduced vehicle
performance.
l ow traction battery level
warning light
This comes on when the traction bat -
tery charge level has reached the re -
serve threshold. Please see the infor -
mation on “Displays and indicators” in
Section 1.
W ArNiNg lightS (3/3)
el e c t r o t e c h n i c a l s y s t e m
warning light
If it lights up while driving, this means
there is an electrotechnical fault in the
“400 Volt” electrical circuit. Please see
an authorised dealer as soon as pos -
sible.
ùelectronic Stability Program
and traction control system
warning light
There are several reasons for the warn-
ing light coming on: please refer to the
information on “Driver correction de -
vices and aids” in Section 2.
xAnti-lock braking warning
light
This lights up when the ignition is
switched on and goes out after a few
seconds.
If it does not go out after the ignition is
switched on, or lights up when driving,
there is a fault with the ABS. Braking
will then be as normal, without the ABS.
Contact an approved Dealer as soon as
possible. the presence and operation of the warning lights DePeND ON the eqUiPmeNt AND cOUNtr Y.
A
Page 70 of 195
instrument panel messages..................(up to the end of the DU)
trip computer and warning system ........(up to the end of the DU)
instrument panel ................................... (up to the end of the DU)
1.65
ENG_UD23104_1
Ordinateur de bord : messages d’information (L38 électrique - Ren\
ault)
ENG_NU_914-4_L38e_Renault_1
triP cOmPUter AND WArNiNg SYStem: information messages
examples of messages interpreting the display selected
“charge remain. 02:10 "Indicates the time remaining before a full charge.
“checking control functions ”Displayed with the ignition on when the vehicle is running self-diagnost\
ics.
“t raction control off ” Indicates that you have deactivated the ASR function.
“No message available” No warning is stored.
“Steering wheel not locked ”Indicates that the steering column has not been locked.
“Performance limited” Indicates deterioration of vehicle performance.
“Brake the vehicle ” Follow these instructions: risk of damage to the motor.
These can help in the vehicle starting phase, or give information about \
a selection or a driving status.
Examples of information messages are given in the following pages.
Page 73 of 195
menu for customising the vehicle settings
(up to the end of the DU)
customising the vehicle settings ........... (up to the end of the DU)
customised vehicle settings .................. (up to the end of the DU)
1.68
ENG_UD21535_3
Menu de personnalisation des réglages du véhicule (L38 - X38 - Re\
nault)
ENG_NU_914-4_L38e_Renault_1
Vehicle settings customisation menu.
vehicle SettiNgS cUSt OmiSAtiON meNU
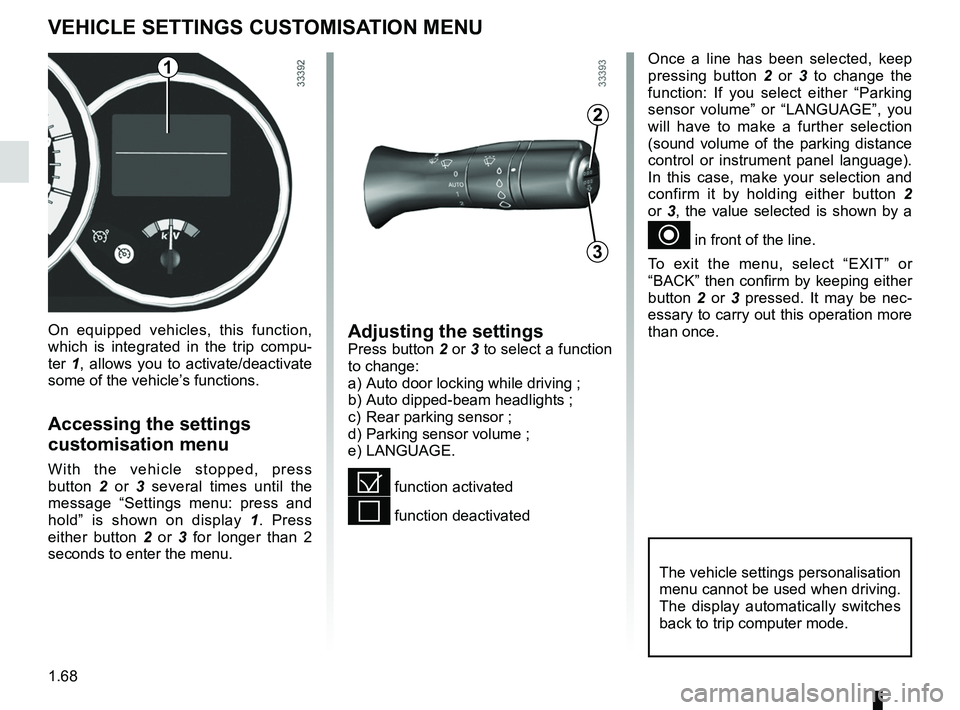
Adjusting the settingsPress button 2 or 3 to select a function
to change:
a) Auto door locking while driving ;
b) Auto dipped-beam headlights ;
c) Rear parking sensor ;
d) Parking sensor volume ;
e) LANGUAGE.
= function activated
< function deactivated
On equipped vehicles, this function,
which is integrated in the trip compu
-
ter 1, allows you to activate/deactivate
some of the vehicle’s functions.
Accessing the settings
customisation menu
With the vehicle stopped, press
button 2 or 3 several times until the
message “ Settings menu: press and
hold ” is shown on display 1 . Press
either button 2 or 3 for longer than 2
seconds to enter the menu.
Once a line has been selected, keep
pressing button 2 or 3 to change the
function: If you select either “ Parking
sensor volume ” or “LANGUAGE ”, you
will have to make a further selection
(sound volume of the parking distance
control or instrument panel language).
In this case, make your selection and
confirm it by holding either button 2
or 3, the value selected is shown by a
~ in front of the line.
To exit the menu, select “ EXIT” or
“BACK” then confirm by keeping either
button 2 or 3 pressed. It may be nec -
essary to carry out this operation more
than once.
2
3
1
The vehicle settings personalisation
menu cannot be used when driving.
The display automatically switches
back to trip computer mode.
Page 77 of 195
lights:main beam headlights ...................................... (current page)
warning buzzer ...................................................... (current page)
see-me-home lighting ............................................ (current page)
1.72
ENG_UD20073_2
Éclairages et signalisations extérieurs (L38 - X38 - Renault)
ENG_NU_914-4_L38e_Renault_1
Jaune NoirNoir texte
eXteriOr lightiNg AND SigNAlS (2/3)
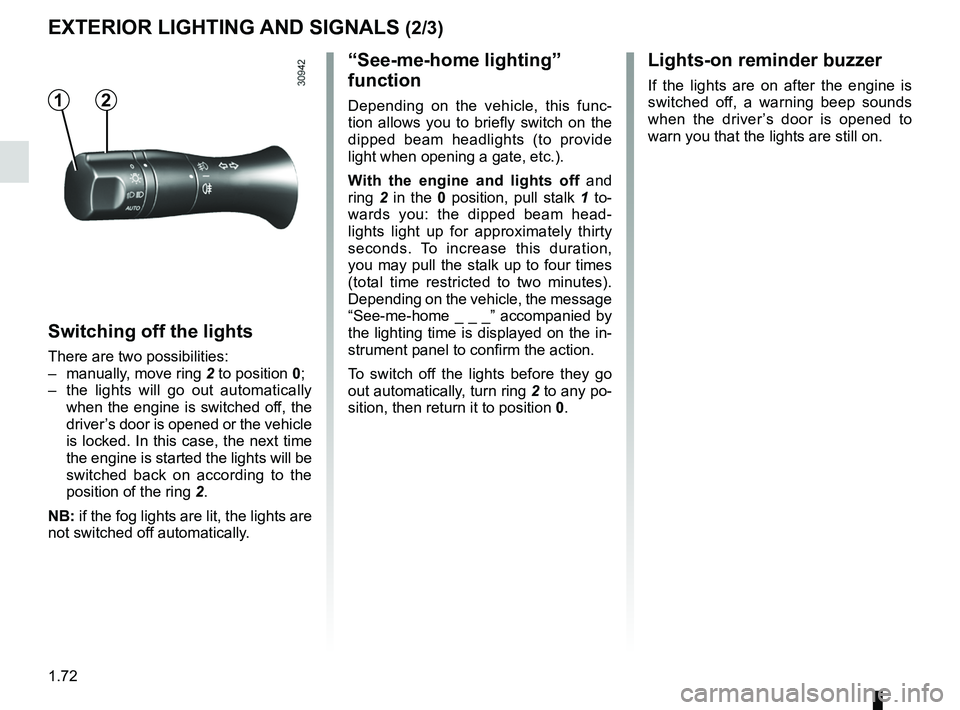
Switching off the lights
There are two possibilities:
– manually, move ring 2 to position 0;
– the lights will go out automatically
when the engine is switched off, the
driver’s door is opened or the vehicle
is locked. In this case, the next time
the engine is started the lights will be
switched back on according to the
position of the ring 2.
NB: if the fog lights are lit, the lights are
not switched off automatically.
“See-me-home lighting”
function
Depending on the vehicle, this func -
tion allows you to briefly switch on the
dipped beam headlights (to provide
light when opening a gate, etc.).
With the engine and lights off and
ring 2 in the 0 position, pull stalk 1 to-
wards you: the dipped beam head -
lights light up for approximately thirty
seconds. To increase this duration,
you may pull the stalk up to four times
(total time restricted to two minutes).
Depending on the vehicle, the message
“See-me-home _ _ _” accompanied by
the lighting time is displayed on the in-
strument panel to confirm the action.
To switch off the lights before they go
out automatically, turn ring 2 to any po-
sition, then return it to position 0.
lights-on reminder buzzer
If the lights are on after the engine is
switched off, a warning beep sounds
when the driver ’s door is opened to
warn you that the lights are still on.12