dashboard warning lights RENAULT KANGOO 2012 X61 / 2.G Owners Manual
[x] Cancel search | Manufacturer: RENAULT, Model Year: 2012, Model line: KANGOO, Model: RENAULT KANGOO 2012 X61 / 2.GPages: 237, PDF Size: 8.62 MB
Page 61 of 237

JauneNoirNoir texte
1.55
ENG_UD24365_6
Tableau de bord : témoins lumineux (X61 - F61 - K61 - Renault)
ENG_NU_813-11_FK61_Renault_1
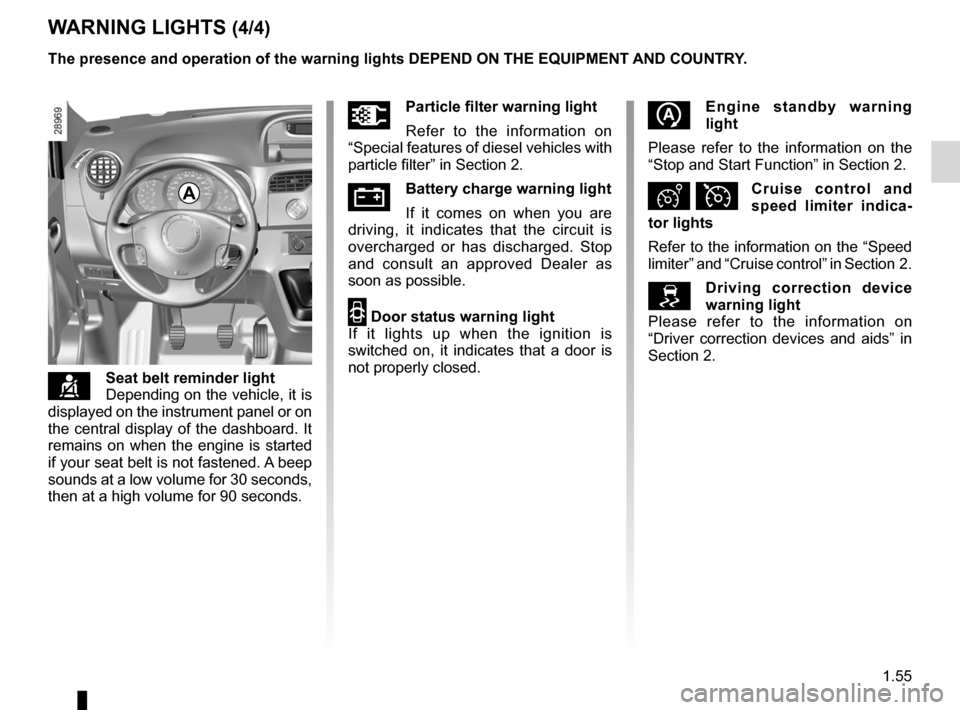
WARNING LIGHTS (4/4)
çSeat belt reminder light
Depending on the vehicle, it is
displayed on the instrument panel or on
the central display of the dashboard. It
remains on when the engine is started
if your seat belt is not fastened. A beep
sounds at a low volume for 30 seconds,
then at a high volume for 90 seconds.
A
The presence and operation of the warning lights DepeND ON THe eQUIpMeNT AND COUNTR y.
Üparticle filter warning light
Refer to the information on
“Special features of diesel vehicles with
particle filter” in Section 2.
ÚBattery charge warning light
If it comes on when you are
driving, it indicates that the circuit is
overcharged or has discharged. Stop
and consult an approved Dealer as
soon as possible.
2 Door status warning light
If it lights up when the ignition is
switched on, it indicates that a door is
not properly closed.
e ngine standby warning
light
Please refer to the information on the
“Stop and Start Function” in Section 2.
Ð ÏCruise control and
speed limiter indica -
tor lights
Refer to the information on the “Speed
limiter” and “Cruise control” in Section 2.
Driving correction device
warning light
Please refer to the information on
“Driver correction devices and aids” in
Section 2.
Page 174 of 237

5.4
ENG_UD29751_1
Kit de gonflage des pneumatiques (2 kits) (X61 - F61 - K61 - Renault)\
ENG_NU_813-11_FK61_Renault_5
Jaune NoirNoir texte
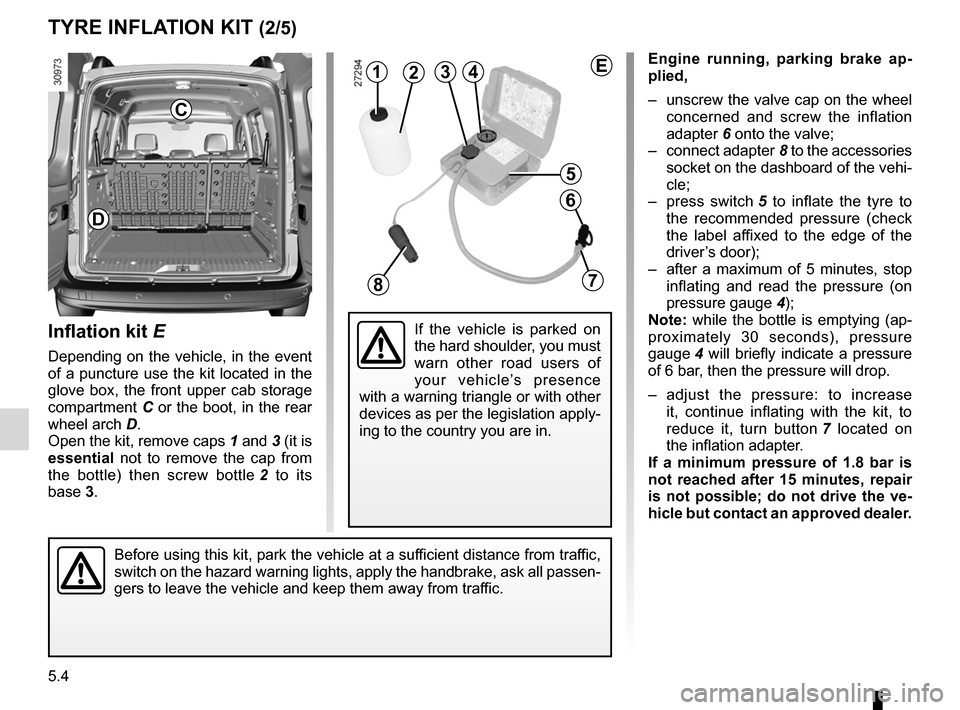
engine running, parking brake ap -
plied,
– unscrew the valve cap on the wheel
concerned and screw the inflation
adapter 6 onto the valve;
– connect adapter 8 to the accessories
socket on the dashboard of the vehi-
cle;
– press switch 5 to inflate the tyre to
the recommended pressure (check
the label affixed to the edge of the
driver’s door);
– after a maximum of 5 minutes, stop
inflating and read the pressure (on
pressure gauge 4);
note: while the bottle is emptying (ap-
proximately 30 seconds), pressure
gauge 4 will briefly indicate a pressure
of 6 bar, then the pressure will drop.
– adjust the pressure: to increase
it, continue inflating with the kit, to
reduce it, turn button 7 located on
the inflation adapter.
If a minimum pressure of 1.8 bar is
not reached after 15 minutes, repair
is not possible; do not drive the ve-
hicle but contact an approved dealer.
Inflation kit E
Depending on the vehicle, in the event
of a puncture use the kit located in the
glove box, the front upper cab storage
compartment C or the boot, in the rear
wheel arch D.
Open the kit, remove caps 1 and 3 (it is
essential not to remove the cap from
the bottle) then screw bottle 2 to its
base 3.
tyre InFlatIOn KIt (2/5)
143
5
6
78
2
Before using this kit, park the vehicle at a sufficient distance from traffic,
switch on the hazard warning lights, apply the handbrake, ask all passen-
gers to leave the vehicle and keep them away from traffic.
D
If the vehicle is parked on
the hard shoulder, you must
warn other road users of
your vehicle’s presence
with a warning triangle or with other
devices as per the legislation apply-
ing to the country you are in.
c
e