engine RENAULT KANGOO 2018 Owners Manual
[x] Cancel search | Manufacturer: RENAULT, Model Year: 2018, Model line: KANGOO, Model: RENAULT KANGOO 2018Pages: 264, PDF Size: 7.09 MB
Page 2 of 264

A passion for performance
ELF, partner of
RENAULT recommends ELF
Partners in cutting-edge automotive technology, Elf and Renault combine their expertise on both
the racetrack and the city streets. This enduring partnership gives drivers a range of lubricants
perfectly suited to Renault cars. Lasting protection and optimum performance for your engine –
guaranteed. Whether changing the oil or simply topping up, to find the approved ELF lubricant
best suited to your vehicle, ask your Renault dealer for a recommendation or consult your vehi-
cle maintenance handbook.
www.lubricants.elf.com
A brand from
2016-Elf-ENG.indd 118/05/2016 14:20
Page 9 of 264
1.3
Radio frequency remote
control operating range
This varies according to the surround-
ings: take care not to lock or unlock the
doors by inadvertently pressing the but-
tons on the remote control.
Interference
Interference by factors in the immediate
vicinity (external installations or the use
of equipment operating on the same
frequency as the remote control) may
affect the operation of the remote con-
trol.
Note: if a door is not opened within
approximately 2 seconds of the door
being unlocked by remote control, the
doors will lock again automatically.
KEY, RADIO FREQUENCY REMOTE CONTROL: general information (2/2)
For replacement, or if you
require an additional remote
control.
You must only contact an approved
Dealer.
– To replace a remote control, the vehicle must be taken to an ap-
proved Dealer as both the vehi-
cle and the remote control are
needed to initialise the system.
– Depending on the vehicle, you have the option of using up to
four remote controls.
Remote control unit failure
Make sure that the correct battery
type is being used, and that the
battery is in good condition and in-
serted correctly. These batteries
have a service life of approximately
two years.
To learn how to change the battery,
please refer to the information on
the “Key, radio frequency remote
control: Batteries” in Section 5.
Driver’s responsibility
when parking or stopping
the vehicle
Never leave an animal,
child or adult who is not self-suffi-
cient alone in your vehicle, even for
a short time.
They may pose a risk to themselves
or to others by starting the engine,
activating equipment such as the
electric windows or locking the
doors, for example.
Also, in hot and/or sunny weather,
please remember that the tempera-
ture inside the passenger compart-
ment increases very quickly.
RISK OF DEATH OR SERIOUS
INJURY.
Page 11 of 264
1.5
2
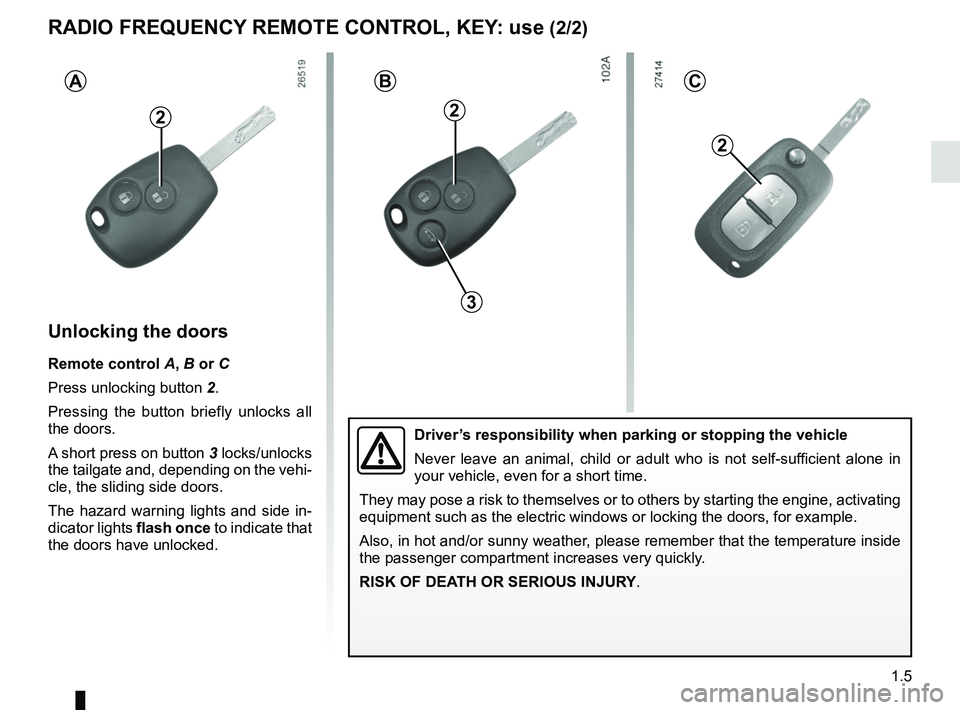
Unlocking the doors
Remote control A, B or C
Press unlocking button 2.
Pressing the button briefly unlocks all
the doors.
A short press on button 3 locks/unlocks
the tailgate and, depending on the vehi-
cle, the sliding side doors.
The hazard warning lights and side in-
dicator lights flash once to indicate that
the doors have unlocked.
AB
2
RADIO FREQUENCY REMOTE CONTROL, KEY: use (2/2)
2
3
Driver’s responsibility when parking or stopping the vehicle
Never leave an animal, child or adult who is not self-sufficient alone in
your vehicle, even for a short time.
They may pose a risk to themselves or to others by starting the engine, \
activating
equipment such as the electric windows or locking the doors, for example\
.
Also, in hot and/or sunny weather, please remember that the temperature inside
the passenger compartment increases very quickly.
RISK OF DEATH OR SERIOUS INJURY.
C
Page 16 of 264
1.10
Rear hinged doors
(continued)
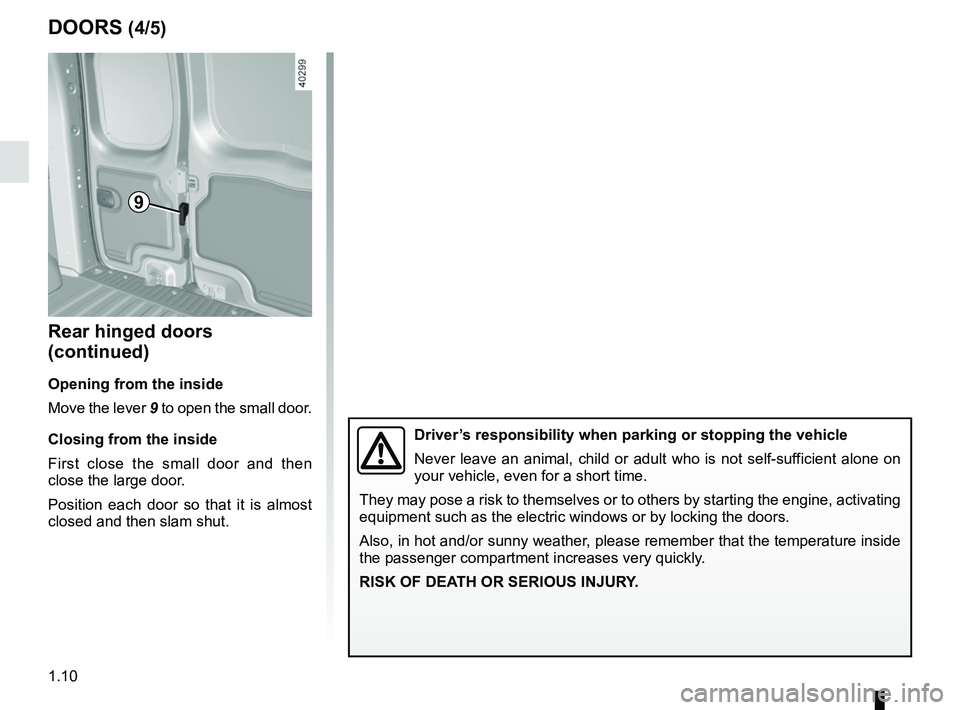
Opening from the inside
Move the lever 9 to open the small door.
Closing from the inside
First close the small door and then
close the large door.
Position each door so that it is almost
closed and then slam shut.
DOORS (4/5)
Driver’s responsibility when parking or stopping the vehicle
Never leave an animal, child or adult who is not self-sufficient alone on
your vehicle, even for a short time.
They may pose a risk to themselves or to others by starting the engine, \
activating
equipment such as the electric windows or by locking the doors.
Also, in hot and/or sunny weather, please remember that the temperature inside
the passenger compartment increases very quickly.
RISK OF DEATH OR SERIOUS INJURY.
9
Page 17 of 264
1.11
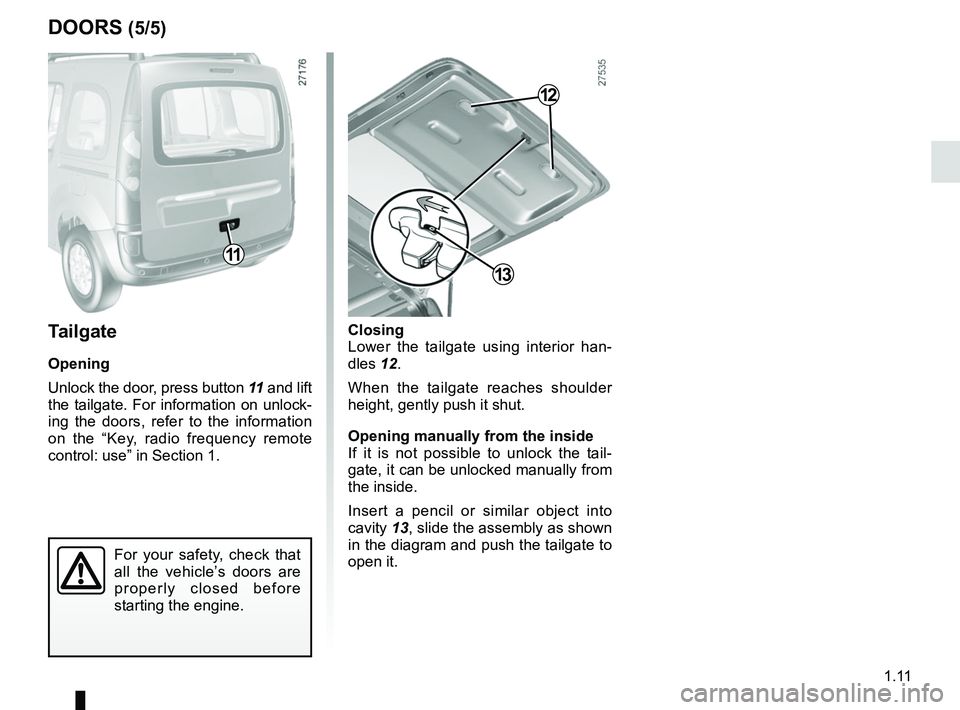
Closing
Lower the tailgate using interior han-
dles 12.
When the tailgate reaches shoulder
height, gently push it shut.
Opening manually from the inside
If it is not possible to unlock the tail-
gate, it can be unlocked manually from
the inside.
Insert a pencil or similar object into
cavity 13, slide the assembly as shown
in the diagram and push the tailgate to
open it.Tailgate
Opening
Unlock the door, press button 11 and lift
the tailgate. For information on unlock-
ing the doors, refer to the information
on the “Key, radio frequency remote
control: use” in Section 1.
For your safety, check that
all the vehicle’s doors are
properly closed before
starting the engine.
11
13
12
DOORS (5/5)
Page 18 of 264
1.12
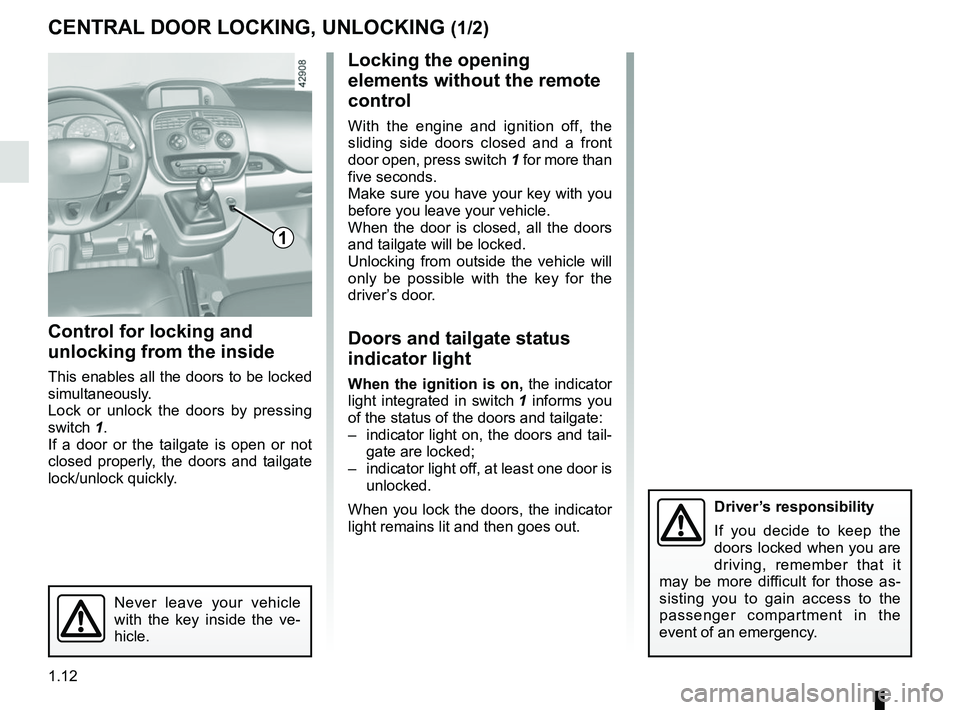
Locking the opening
elements without the remote
control
With the engine and ignition off, the
sliding side doors closed and a front
door open, press switch 1 for more than
five seconds.
Make sure you have your key with you
before you leave your vehicle.
When the door is closed, all the doors
and tailgate will be locked.
Unlocking from outside the vehicle will
only be possible with the key for the
driver’s door.
Doors and tailgate status
indicator light
When the ignition is on, the indicator
light integrated in switch 1 informs you
of the status of the doors and tailgate:
– indicator light on, the doors and tail- gate are locked;
– indicator light off, at least one door is unlocked.
When you lock the doors, the indicator
light remains lit and then goes out.
Control for locking and
unlocking from the inside
This enables all the doors to be locked
simultaneously.
Lock or unlock the doors by pressing
switch 1.
If a door or the tailgate is open or not
closed properly, the doors and tailgate
lock/unlock quickly.
CENTRAL DOOR LOCKING, UNLOCKING (1/2)
1
Never leave your vehicle
with the key inside the ve-
hicle.
Driver’s responsibility
If you decide to keep the
doors locked when you are
driving, remember that it
may be more difficult for those as-
sisting you to gain access to the
passenger compartment in the
event of an emergency.
Page 20 of 264
1.14
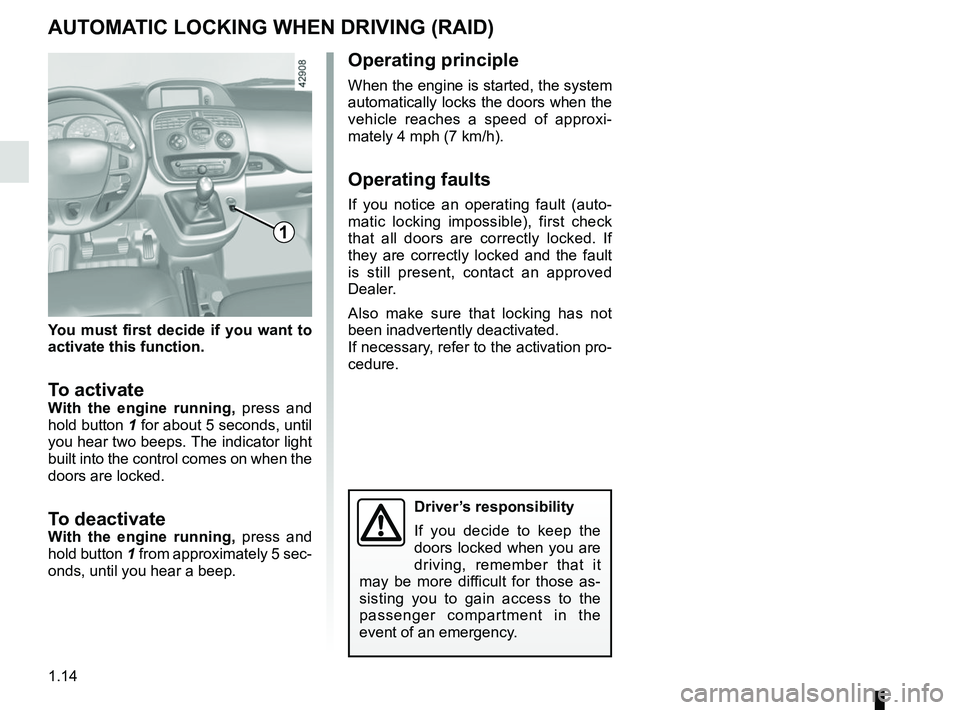
You must first decide if you want to
activate this function.
To activateWith the engine running, press and
hold button 1 for about 5 seconds, until
you hear two beeps. The indicator light
built into the control comes on when the
doors are locked.
To deactivateWith the engine running, press and
hold button 1 from approximately 5 sec-
onds, until you hear a beep.
AUTOMATIC LOCKING WHEN DRIVING (RAID)
Operating principle
When the engine is started, the system
automatically locks the doors when the
vehicle reaches a speed of approxi-
mately 4 mph (7 km/h).
Operating faults
If you notice an operating fault (auto-
matic locking impossible), first check
that all doors are correctly locked. If
they are correctly locked and the fault
is still present, contact an approved
Dealer.
Also make sure that locking has not
been inadvertently deactivated.
If necessary, refer to the activation pro-
cedure.
1
Driver’s responsibility
If you decide to keep the
doors locked when you are
driving, remember that it
may be more difficult for those as-
sisting you to gain access to the
passenger compartment in the
event of an emergency.
Page 25 of 264
1.19
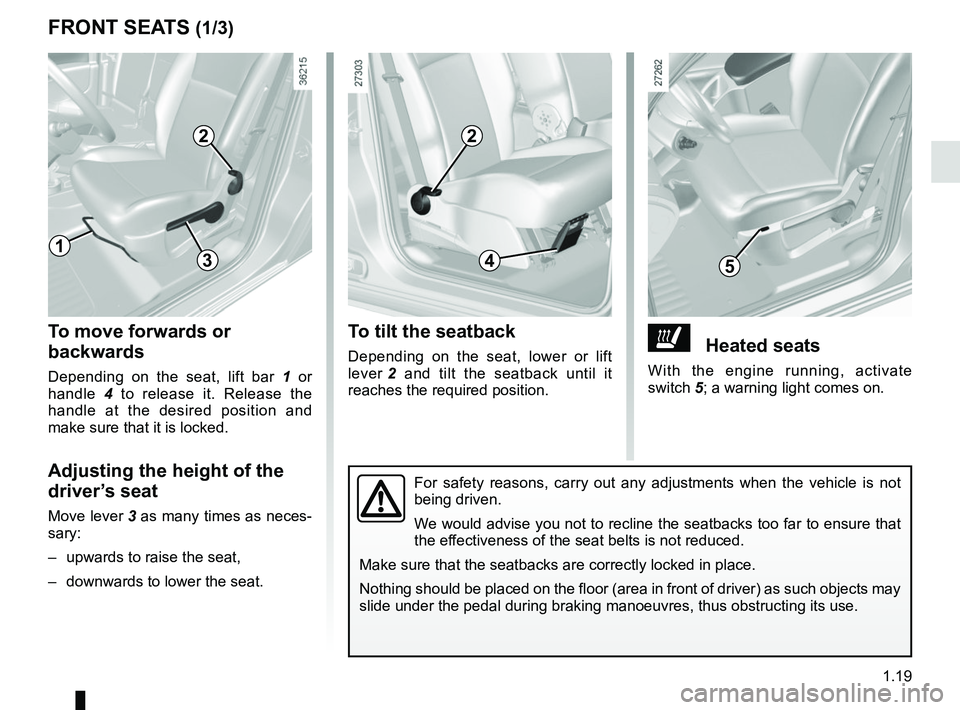
ðHeated seats
With the engine running, activate
switch 5; a warning light comes on.
To tilt the seatback
Depending on the seat, lower or lift
lever 2 and tilt the seatback until it
reaches the required position.
To move forwards or
backwards
Depending on the seat, lift bar 1 or
handle 4 to release it. Release the
handle at the desired position and
make sure that it is locked.
Adjusting the height of the
driver’s seat
Move lever 3 as many times as neces-
sary:
– upwards to raise the seat,
– downwards to lower the seat.
FRONT SEATS (1/3)
1
2
534
2
For safety reasons, carry out any adjustments when the vehicle is not
being driven.
We would advise you not to recline the seatbacks too far to ensure that
the effectiveness of the seat belts is not reduced.
Make sure that the seatbacks are correctly locked in place.
Nothing should be placed on the floor (area in front of driver) as suc\
h objects may
slide under the pedal during braking manoeuvres, thus obstructing its us\
e.
Page 32 of 264
1.26
SEAT BELTS (2/4)
™Front seat belt reminder
warning light
It remains on when the engine
is started if your seat belt is not fas-
tened. An audible warning sounds at a
low volume for 30 seconds, then at a
high volume for 90 seconds.
Unfastening
Press button 4 and the seat belt will be
rewound by the inertia reel. Guide the
belt.
Note: an object placed on the passen-
ger seat base may activate the warning
light in some cases.
6
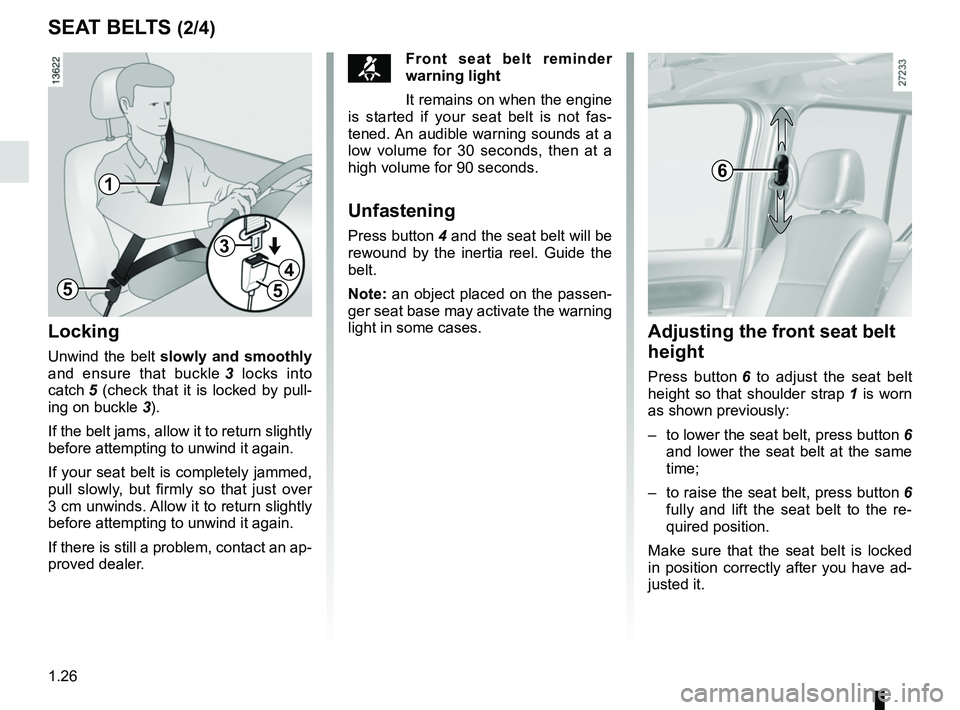
Adjusting the front seat belt
height
Press button 6 to adjust the seat belt
height so that shoulder strap 1 is worn
as shown previously:
– to lower the seat belt, press button 6 and lower the seat belt at the same
time;
– to raise the seat belt, press button 6
fully and lift the seat belt to the re-
quired position.
Make sure that the seat belt is locked
in position correctly after you have ad-
justed it.
Locking
Unwind the belt slowly and smoothly
and ensure that buckle 3 locks into
catch 5 (check that it is locked by pull- ing on buckle 3).
If the belt jams, allow it to return slightly
before attempting to unwind it again.
If your seat belt is completely jammed,
pull slowly, but firmly so that just over
3 cm unwinds. Allow it to return slightly
before attempting to unwind it again.
If there is still a problem, contact an ap-
proved dealer.
1
5
3
4
5
Page 39 of 264
1.33
The air bag is designed to complement the action of the seat belt. Both \
the air bags and seat belts are integral parts of the same protection
system. It is therefore essential to wear seat belts at all times. If se\
at belts
are not worn, the occupants are exposed to the risk of serious injury in\
the event of an accident. It may also increase the risk of minor superfi\
cial injuries
occurring when the air bag is deployed, although such minor injuries are\
always
possible with air bags.
If the vehicle should overturn or suffer a rear impact, however severe, the pre-
tensioners and air bags are not always triggered. Impacts to the undersi\
de of the
vehicle, eg. from pavements, potholes or stones, can all trigger these s\
ystems.
– No work or modification whatsoever may be carried out on any part of the air
bag system (air bags, pretensioners, computer, wiring harness, etc.), except
by qualified personnel from an approved Dealer.
– To ensure that the system is in good working order and to avoid accidenta\
l trig- gering of the system which may cause injury, only qualified Network personnel
may work on the air bag system.
– As a safety precaution, have the air bag system checked if your vehicle \
has been involved in an accident, or is stolen or broken into.
– When selling or lending the vehicle, inform the user of these points and\
hand over this handbook with the vehicle.
– When scrapping your vehicle, contact your approved Dealer for disposal o\
f the gas generator(s).
ADDITIONAL METHODS OF RESTRAINT
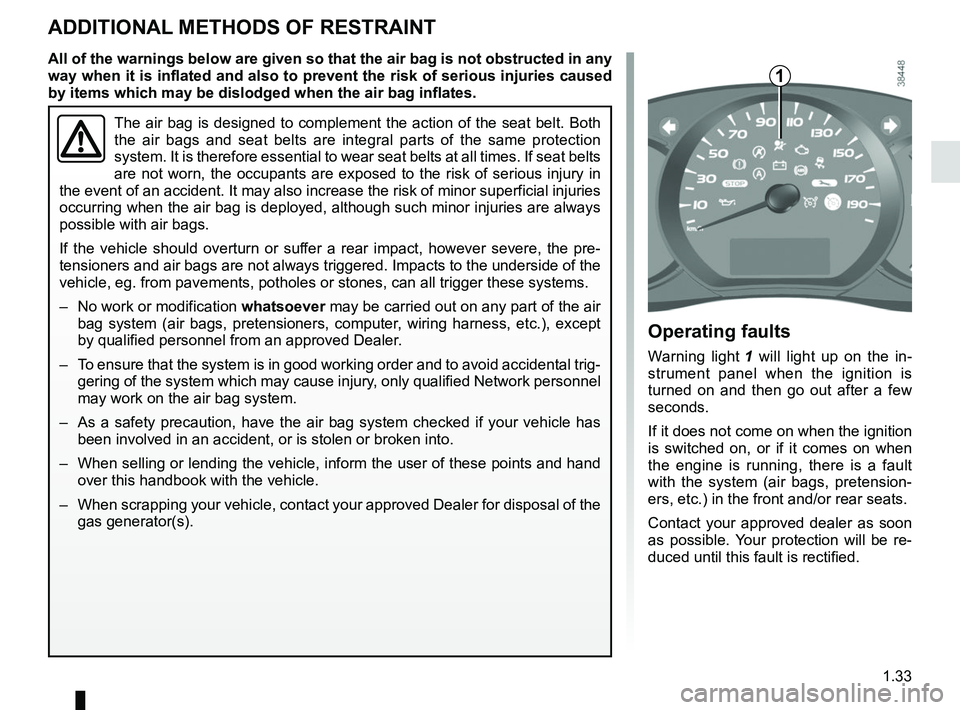
Operating faults
Warning light 1 will light up on the in-
strument panel when the ignition is
turned on and then go out after a few
seconds.
If it does not come on when the ignition
is switched on, or if it comes on when
the engine is running, there is a fault
with the system (air bags, pretension-
ers, etc.) in the front and/or rear seats.
Contact your approved dealer as soon
as possible. Your protection will be re-
duced until this fault is rectified.
1
All of the warnings below are given so that the air bag is not obstructed in any
way when it is inflated and also to prevent the risk of serious injuries caused
by items which may be dislodged when the air bag inflates.