check engine RENAULT KANGOO Z.E. 2018 User Guide
[x] Cancel search | Manufacturer: RENAULT, Model Year: 2018, Model line: KANGOO Z.E., Model: RENAULT KANGOO Z.E. 2018Pages: 230, PDF Size: 5.03 MB
Page 140 of 230
3.12
AIR CONDITIONING: information and operating instructions (1/2)
Do not open the refriger-
ant fluid circuit. The fluid
may damage eyes or skin.
Operating faults
As a general rule, contact your ap-
proved Dealer in the event of an oper-
ating fault.
– Reduction in de-icing, demisting or air conditioning performance.
This may be caused by the passen-
ger compartment filter cartridge be-
coming clogged.
– No cold air is being produced.
Check that the controls are set cor-
rectly and that the fuses are sound.
Otherwise, switch off the system.
Range
It is normal to notice an increase in
energy usage when the air conditioning
is operating.
Switch off the system when it is not re-
quired.
Advice for reducing consumption
and helping to preserve the environ-
ment
Drive with the air vents on and the win-
dows closed.
If the vehicle has been parked in the
sun, open the doors for a few moments
to let the hot air escape before starting
the engine.
MaintenanceRefer to the Maintenance Document
for your vehicle for the inspection fre-
quency.
Below approximately 10°C, with the
engine off it is normal to notice cold
air enter the passenger compart-
ment via the vents when ventilation
has not stopped (refer to the infor-
mation on “Heating, air condition-
ing” in section 3). It is recommended
to position the ventilation control at
0 in case of brief stops.
Presence of water under the
vehicle.
After prolonged use of the air condi-
tioning system, it is normal for water
to be present under the vehicle. This is
caused by condensation.
Noise
Each time the ignition is switched off,
the ventilation will be switched off after
about ten seconds.
Vehicles equipped with
mode ECO
Once activated, ECO mode may
reduce air conditioning perform-
ance. Please refer to the informa-
tion on “Driving advice, Eco-driving”
in Section 2.
Use the air conditioning system reg-
ularly, even in cold weather, running
it at least once a month for approxi-
mately 5 minutes.
Page 157 of 230
4.3
Ensure that the bonnet is
properly locked.
Check that nothing is pre-
venting the catch from lock-
ing (gravel, cloth, etc.).
BONNET (2/2)
Closing the bonnet
Check that nothing has been left in the
engine compartment.
To close the bonnet again, hold the
bonnet in the middle and lower it to 30
cm above the closed position, then re-
lease it.
After carrying out any work
in the engine compart-
ment, check that nothing
has been left behind (cloth,
tools, etc.).
These may damage the engine or
cause a fire.
In the event of even a slight
impact involving the radia-
tor grille or bonnet, have
the bonnet lock checked by
an approved dealer as soon as pos-
sible.
Page 158 of 230
4.4
Replacement intervals
Refer to the Maintenance Document for
your vehicle.
LEVELS (1/2)
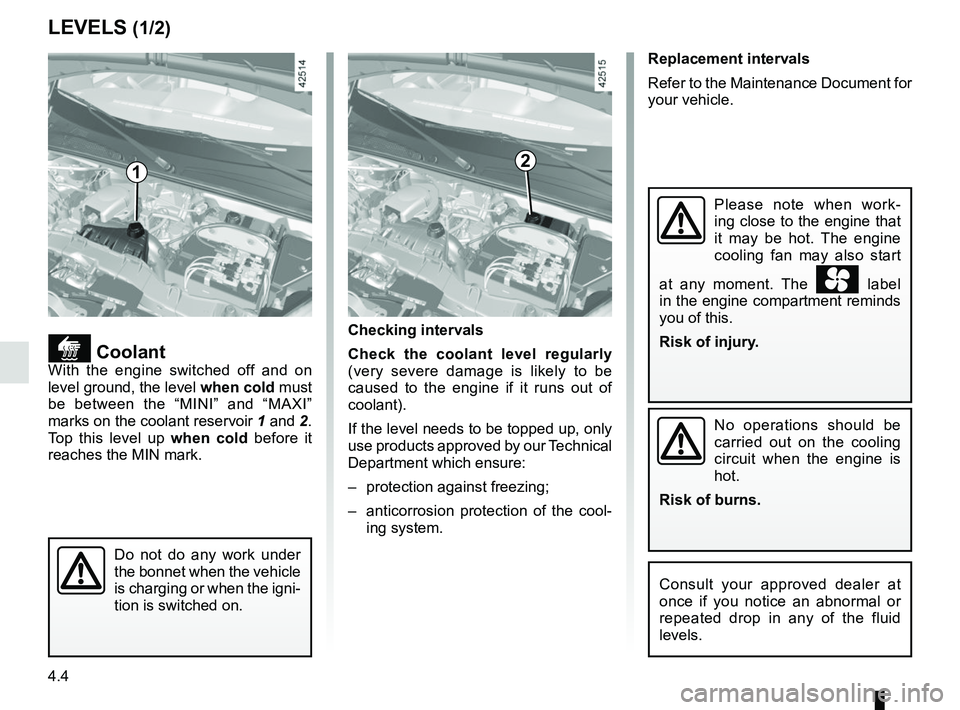
CoolantWith the engine switched off and on
level ground, the level when cold must
be between the “MINI” and “MAXI”
marks on the coolant reservoir 1 and 2.
Top this level up when cold before it
reaches the MIN mark. Checking intervals
Check the coolant level regularly
(very severe damage is likely to be
caused to the engine if it runs out of
coolant).
If the level needs to be topped up, only
use products approved by our Technical
Department which ensure:
– protection against freezing;
– anticorrosion protection of the cool-
ing system.
No operations should be
carried out on the cooling
circuit when the engine is
hot.
Risk of burns.
Consult your approved dealer at
once if you notice an abnormal or
repeated drop in any of the fluid
levels.
12
Do not do any work under
the bonnet when the vehicle
is charging or when the igni-
tion is switched on.
Please note when work-
ing close to the engine that
it may be hot. The engine
cooling fan may also start
at any moment. The
label
in the engine compartment reminds
you of this.
Risk of injury.
Page 159 of 230
4.5
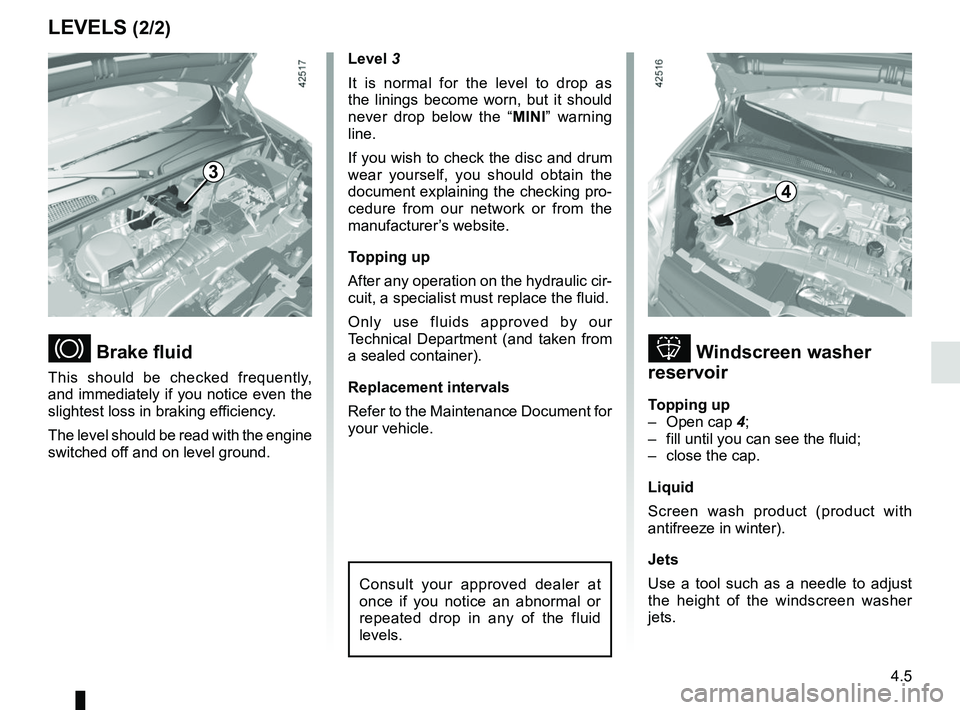
Windscreen washer
reservoir
Topping up
– Open cap 4;
– fill until you can see the fluid;
– close the cap.
Liquid
Screen wash product (product with
antifreeze in winter).
Jets
Use a tool such as a needle to adjust
the height of the windscreen washer
jets.
4
Level 3
It is normal for the level to drop as
the linings become worn, but it should
never drop below the “ MINI” warning
line.
If you wish to check the disc and drum
wear yourself, you should obtain the
document explaining the checking pro-
cedure from our network or from the
manufacturer’s website.
Topping up
After any operation on the hydraulic cir-
cuit, a specialist must replace the fluid.
Only use fluids approved by our
Technical Department (and taken from
a sealed container).
Replacement intervals
Refer to the Maintenance Document for
your vehicle.
Consult your approved dealer at
once if you notice an abnormal or
repeated drop in any of the fluid
levels.
Brake fluid
This should be checked frequently,
and immediately if you notice even the
slightest loss in braking efficiency.
The level should be read with the engine
switched off and on level ground.
3
LEVELS (2/2)
Page 166 of 230
4.12
Using a roller type car wash
Return the windscreen wiper stalk to
the Park position (refer to the informa-
tion on the “Windscreen washer, wiper”
in Section 1). Check the mounting of
external accessories, additional lights
and mirrors, and ensure that the wiper
blades are secured with adhesive tape.
Remove the radio aerial mast if your
vehicle is fitted with this equipment.
Remember to remove the tape and refit
the antenna after washing.
BODYWORK MAINTENANCE (3/3)Cleaning the headlights
As the headlights are made of plastic
“glass”, use a soft cloth or cotton wool
to clean them. If this does not clean
them properly, moisten the cloth with
soapy water, then wipe clean with a soft
damp cloth or cotton wool.
Finally, carefully dry off with a soft dry
cloth.
Do not use cleaning products con-
taining alcohol or utensils (e.g.: a
scraper).
Washing the vehicle
Never wash the engine
compartment, the charging
connection or the traction
battery with a high-pressure jet.
This risks damaging the electric cir-
cuit.
Never wash the vehicle while it is
charging.
Risk of electric shock and a risk to
life.
Vehicles with a matte paint
finish
This type of paint requires certain pre-
cautions.
Do not do the following
Use wax-based products (polishing).
Rub too hard.
Wash the vehicle in a roller-type car
wash.
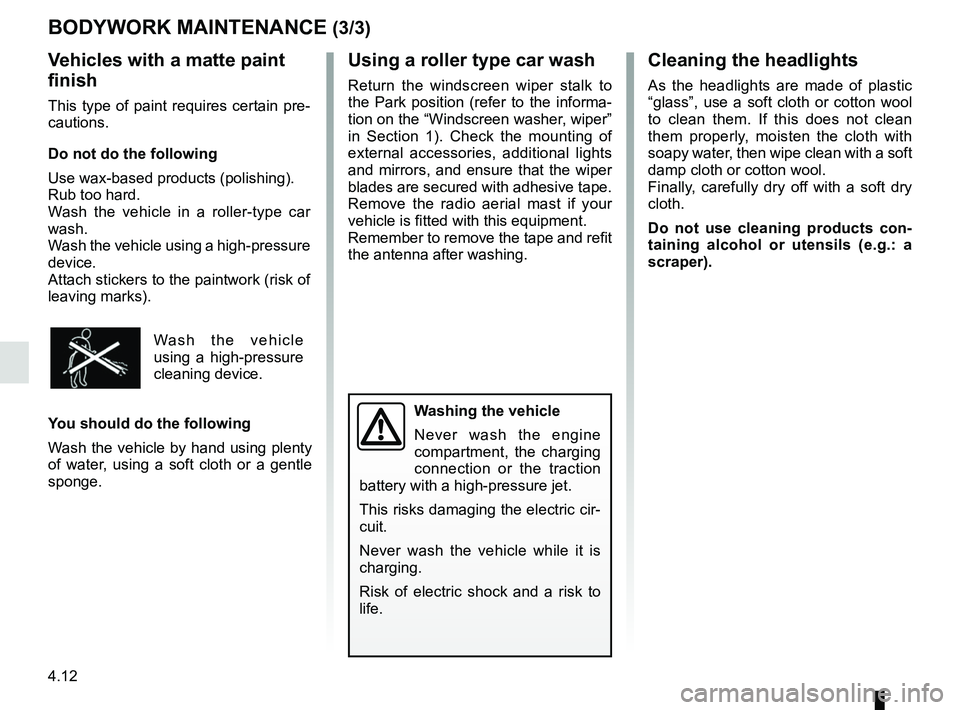
Wash the vehicle using a high-pressure
device.
Attach stickers to the paintwork (risk of
leaving marks).
Wash the vehicle
using a high-pressure
cleaning device.
You should do the following
Wash the vehicle by hand using plenty
of water, using a soft cloth or a gentle
sponge.
Page 189 of 230

5.21
To comply with local legislation, or
as a precaution, you can obtain an
emergency kit containing a set of
spare bulbs and fuses from an ap-
proved Dealer.
FUSES (1/2)
Fuse box
If any electrical component does not
work, check the condition of the fuses.
Unclip cover A. To locate the fuses, please see the fol-
lowing page.
It is not advisable to use the free fuse
locations.
Some functions are protected by fuses
located in the engine compartment.
However, because of their reduced ac-
cessibility,
it is recommended to have
these fuses replaced by an autho-
rised dealer.
Check the fuse in question and replace it, if necessary, with a fuse of
the same rating.
If a fuse is fitted where the rating is too high, it may cause the elect\
rical
circuit to overheat (risk of fire) in the event of an item of equipmen\
t using
an excessive amount of current.
A
1
Tweezers 1
Remove the fuse using tweezers 1, lo-
cated at the back of cover A.
To remove the fuse from the tweezers,
slide the fuse to the side.
Page 205 of 230
6.1
Section 6: Technical specifications
Vehicle identification plates . . . . . . . . . . . . . . . . . . . . . . . . . . . . . . . . . . . . \
. . . . . . . . . . . . . . . . . . . . 6.2
Engine identification plate . . . . . . . . . . . . . . . . . . . . . . . . . . . . . . . . . . . .\
. . . . . . . . . . . . . . . . . . . . . 6.3
Engine specification. . . . . . . . . . . . . . . . . . . . . . . . . . . . . . . . . . . . \
. . . . . . . . . . . . . . . . . . . . . . . . . . 6.3
Dimensions . . . . . . . . . . . . . . . . . . . . . . . . . . . . . . . . . . . .\
. . . . . . . . . . . . . . . . . . . . . . . . . . . . . . . . 6.4
Weights . . . . . . . . . . . . . . . . . . . . . . . . . . . . . . . . . . . .\
. . . . . . . . . . . . . . . . . . . . . . . . . . . . . . . . . . . 6.6
Replacement parts and repairs . . . . . . . . . . . . . . . . . . . . . . . . . . . . . . . . . . . . \
. . . . . . . . . . . . . . . . . 6.7
Service sheets . . . . . . . . . . . . . . . . . . . . . . . . . . . . . . . . . . . . \
. . . . . . . . . . . . . . . . . . . . . . . . . . . . . . 6.8
Anticorrosion check . . . . . . . . . . . . . . . . . . . . . . . . . . . . . . . . . . . . \
. . . . . . . . . . . . . . . . . . . . . . . . . . 6.14