LED RENAULT LAGUNA 2012 X91 / 3.G Owners Manual
[x] Cancel search | Manufacturer: RENAULT, Model Year: 2012, Model line: LAGUNA, Model: RENAULT LAGUNA 2012 X91 / 3.GPages: 241, PDF Size: 7.82 MB
Page 39 of 241
child restraint/seat ................................ (up to the end of the DU)
child restraint/seat ................................ (up to the end of the DU)
child restraint/seat ................................ (up to the end of the DU)
child safety ............................................ (up to the end of the DU)
child seats ............................................. (up to the end of the DU)
transporting children ............................. (up to the end of the DU)
1.33
ENG_UD25512_2
Sécurité enfants : choix de la fixation du siège enfant (X91 - B91 - K91 - Renault)
ENG_NU_936-5_BK91_Renault_1
choosing a child seat mounting
cHILd sAfETY : choosing a child seat mounting (1/2)
The are two ways of attaching child
seats: via the seat belt or using the
ISOFIX system.
Attachment via the seat belt
The seat belt must be adjusted to
ensure that it is effective in the event of
harsh braking or an impact.
Ensure that the strap paths indicated
by the child seat manufacturer are re -
spected.
Always check that the seat belt is cor-
rectly fastened by pulling it up, then
pulling it out fully whilst pressing on the
child seat.
Check that the seat is correctly held by
moving it from side to side and back
to front: the seat should remain firmly
fixed.
Check that the child seat has not been
installed at an angle and that it is not
resting against a window. Attachment with the IsOfIX system
Authorised ISOFIX child seats are ap
-
proved in accordance with regulation
ECE-R44 in one of the three following
scenarios:
– ISOFIX universal 3-point forward -
facing seat;
– ISOFIX semi-universal 2-point seat:
– specific.
For the latter two, check that your child
seat can be installed by consulting the
list of compatible vehicles.
Attach the child seat with the ISOFIX
locks, if these are provided. The ISOFIX
system allows quick, easy, safe fitting.
The ISOFIX system consists of 2 rings
and, in some case, a third ring.
Before using an ISOFIX
child seat that you pur -
chased for another vehicle,
check that its installation is
authorised. Consult the list of ve -
hicles which can be fitted with the
seat with the equipment manufac -
turer.
No modifications may be
made to the component
parts of the restraint system
(belts, ISOFIX and seats
and their mountings) originally fitted.
The seat belt must never
be twisted or the tension
relieved. Never pass the
shoulder strap under the
arm or behind the back.
Check that the seat belt has not
been damaged by sharp edges.
If the seat belt does not operate nor-
mally, it will not protect the child.
Consult an approved dealer. Do not
use this seat until the seat belt has
been repaired.
Do not use the child seat
if it may unfasten the seat
belt restraining it: the base
of the seat must not rest on
the buckle and/or catch of the seat
belt.
Page 41 of 241
child restraint/seat ................................ (up to the end of the DU)
child restraint/seat ................................ (up to the end of the DU)
child restraint/seat ................................ (up to the end of the DU)
child safety ............................................ (up to the end of the DU)
transporting children ............................. (up to the end of the DU)
child seats ............................................. (up to the end of the DU)
1.35
ENG_UD23633_2
Sécurité enfants: installation du siège enfant (X91 - B91 - K91 - Renault)
ENG_NU_936-5_BK91_Renault_1
Fitting a child seat
cHILd sAfETY : fitting a child seat (1/3)
In the rear side seat
A carrycot can be installed across the
vehicle and will take up at least two
seats. Position the child with his or her
feet nearest the door.
Move the front seat as far forward as
possible to install a rear-facing child
seat, then move back the seat in front
as far as it will go, although without al-
lowing it to come into contact with the
child seat.
For the safety of the child in the for -
ward-facing seat, do not move the seat
in front back past the middle of the
runner, do not tilt the seatback too far
(maximum of 25° ) and raise the seat as
much as possible.
Check that the forward-facing child seat
is resting against the back of the vehi-
cle seat and that the headrest of the ve-
hicle is not obstructing its use.
In the front seat
The laws concerning children travel
-
ling in the front passenger seat differ in
every country. Consult the legislation in
force and follow the indications on the
diagram on the following page.
Before fitting a child seat in this seat (if
authorised):
– lower the seat belt as far as possible;
– move the seat as far back as possi-
ble;
– gently tilt the seatback away from
vertical (approximately 25°);
– on equipped vehicles, raise the seat
base as far as possible.
Do not change these settings after the
child seat is installed.
R I sK O f dE AT H O R
s ERIOU s INJURY: before
fitting a rear-facing child
seat in this seat, check
that the air bag has been deacti -
vated (refer to the information on
“Deactivating the front passenger
air bags” in Section 1).
Some seats are not suitable for fitting
child seats. The diagram on the follow -
ing page shows you how to attach a
child seat.
The types of child seats indicated may
not be available. Before using a differ-
ent child seat, check with the manufac-
turer that it can be fitted.
Fit the child seat in a rear
seat wherever possible.
Check that when installing
the child seat in the vehicle
it is not at risk of coming loose from
its base.
If you have to remove the headrest,
check that it is correctly stored so
that it does not come loose under
harsh braking or impact.
Always attach the child seat to the
vehicle even if it is not in use so that
it does not come loose under harsh
braking or impact.
Page 43 of 241
JauneNoirNoir texte
1.37
ENG_UD23633_2
Sécurité enfants: installation du siège enfant (X91 - B91 - K91 - Renault)
ENG_NU_936-5_BK91_Renault_1
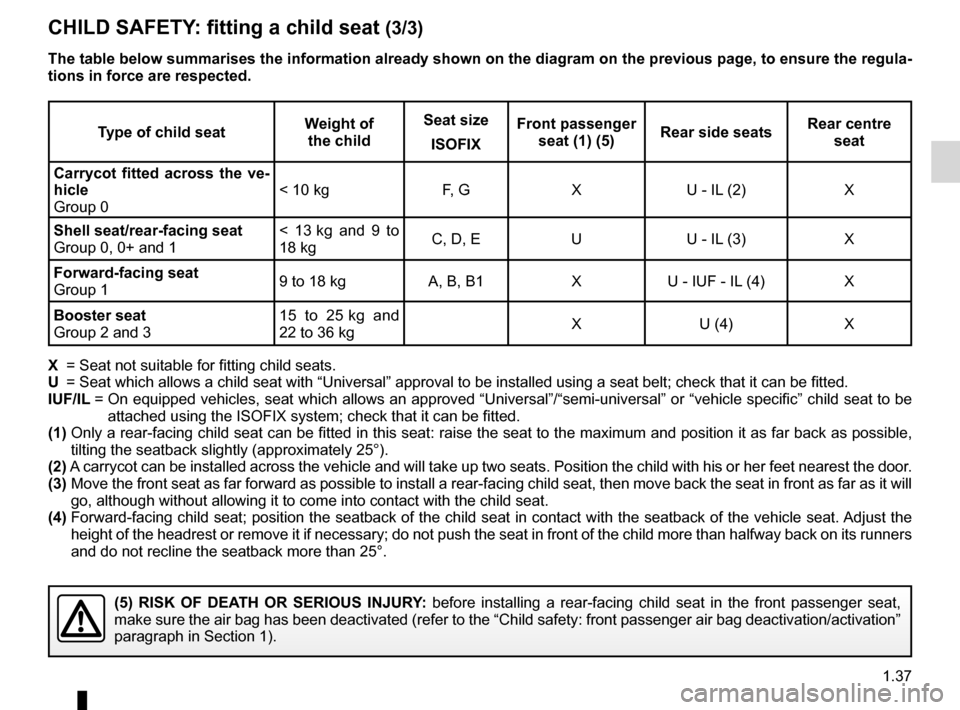
cHILd sAfETY : fitting a child seat (3/3)
Type of child seat Weight of
the child seat size
IsOfIX front passenger
seat (1) (5) Rear side seats Rear centre
seat
carrycot fitted across the ve-
hicle
Group 0 < 10 kg
F, GXU - IL (2) X
shell seat/rear-facing seat
Group 0, 0+ and 1 < 13
kg and 9 to
18 kg C, D, E
UU - IL (3) X
forward-facing seat
Group 1 9 to 18 kg
A, B, B1XU - IUF - IL (4) X
Booster seat
Group 2 and 3 15 to 25
kg and
22 to 36 kg X
U (4) X
X = Seat not suitable for fitting child seats.
U = Seat which allows a child seat with “Universal” approval to be installed using a seat belt; check that it can be fitted.
IUf/IL = On equipped vehicles, seat which allows an approved “Universal”/“semi-universal” or “vehicle specific” child seat to be
attached using the ISOFIX system; check that it can be fitted.
(1) Only a rear-facing child seat can be fitted in this seat: raise the seat to the maximum and position it as far back as possible,
tilting the seatback slightly (approximately 25°).
(2) A carrycot can be installed across the vehicle and will take up two seats. Position the child with his or her feet nearest the door.
(3) Move the front seat as far forward as possible to install a rear-facing child seat, then move back the seat in front as far as it will
go, although without allowing it to come into contact with the child seat.
(4) Forward-facing child seat; position the seatback of the child seat in contact with the seatback of the vehicle seat. Adjust the
height of the headrest or remove it if necessary; do not push the seat in front of the child more than halfway back on its runners
and do not recline the seatback more than 25°.
(5) RIsK Of dEATH OR sERIOUs INJURY: before installing a rear-facing child seat in the front passenger seat,
make sure the air bag has been deactivated (refer to the “Child safety: front passenger air bag deactivation/activation”
paragraph in Section 1).
The table below summarises the information already shown on the diagram on the previous page, to ensure the regula-
tions in force are respected.
Page 57 of 241
control instruments ............................... (up to the end of the DU)
indicators: instrument panel ............................. (up to the end of the DU)
trip computer and warning system ........(up to the end of the DU)
instrument panel ................................... (up to the end of the DU)
warning lights ........................................ (up to the end of the DU)
1.51
ENG_UD23773_2
Ordinateur de bord : généralités (X91 - B91 - K91 - Renault)
ENG_NU_936-5_BK91_Renault_1
Trip computer
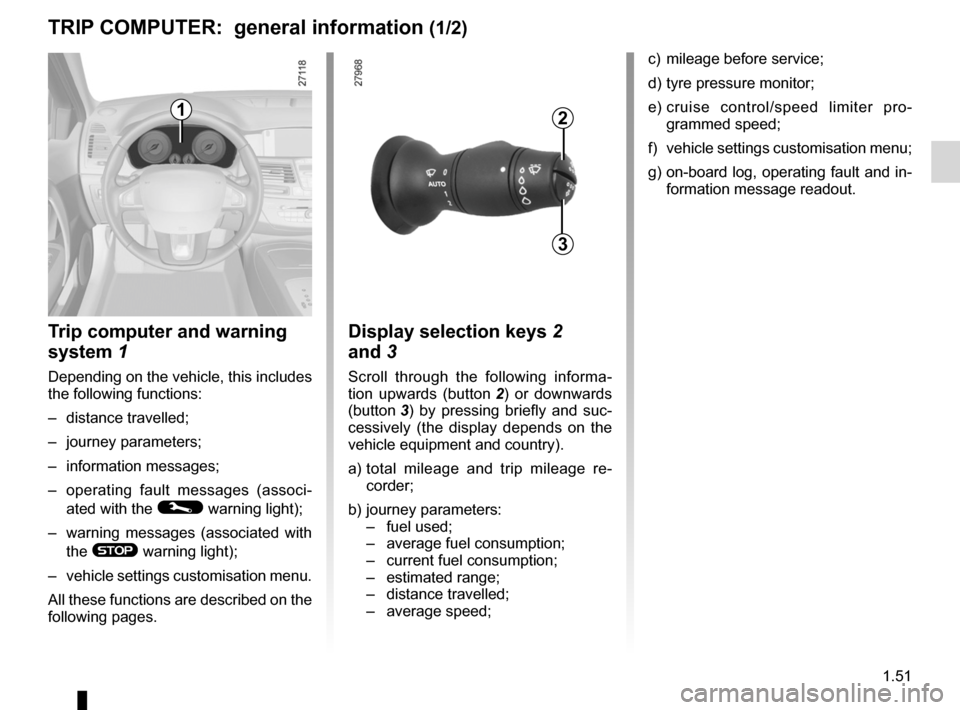
Trip computer and warning
system 1
Depending on the vehicle, this includes
the following functions:
– distance travelled;
– journey parameters;
– information messages;
– operating fault messages (associ -
ated with the
© warning light);
– warning messages (associated with
the
® warning light);
– vehicle settings customisation menu.
All these functions are described on the
following pages.
display selection keys 2
and 3
Scroll through the following informa -
tion upwards (button 2 ) or downwards
(button 3 ) by pressing briefly and suc -
cessively (the display depends on the
vehicle equipment and country).
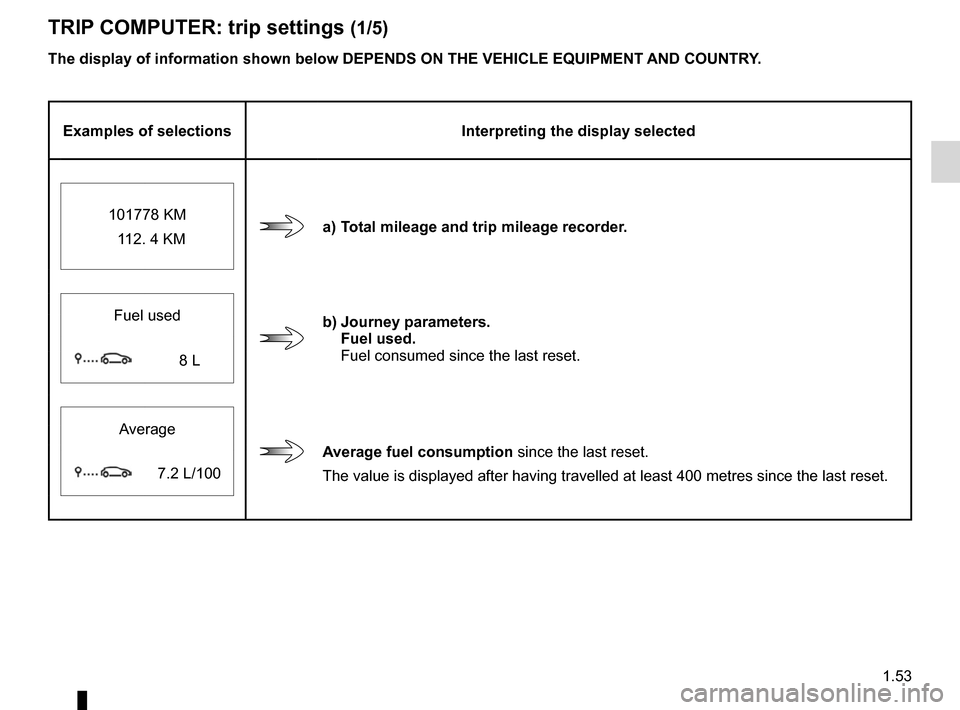
a) total mileage and trip mileage re -
corder;
b) journey parameters:
– fuel used;
– average fuel consumption;
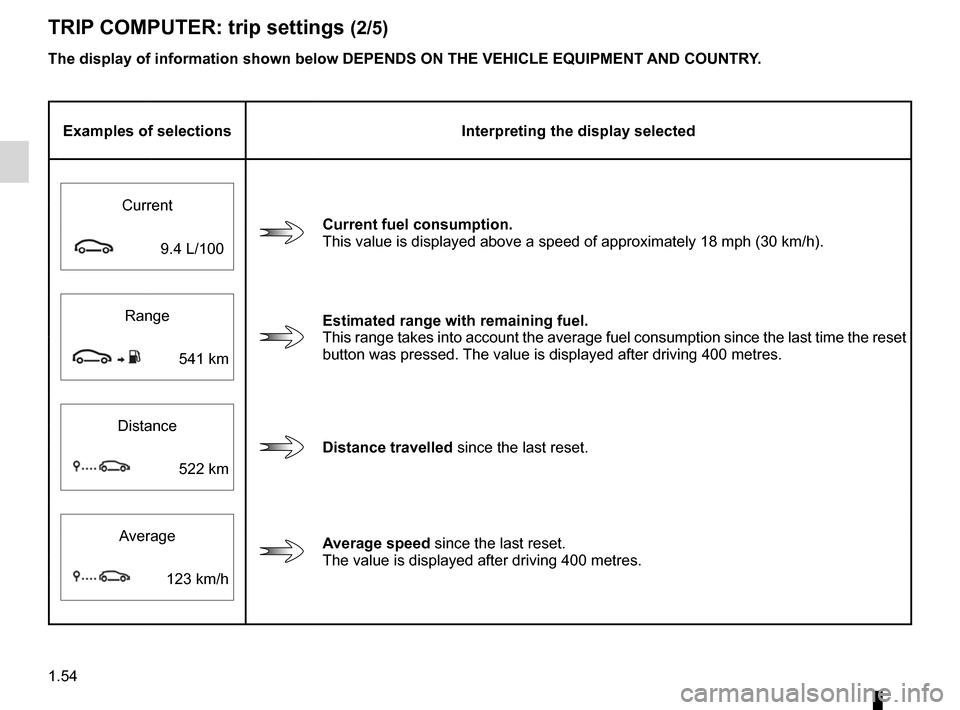
– current fuel consumption;
– estimated range;
– distance travelled;
– average speed;
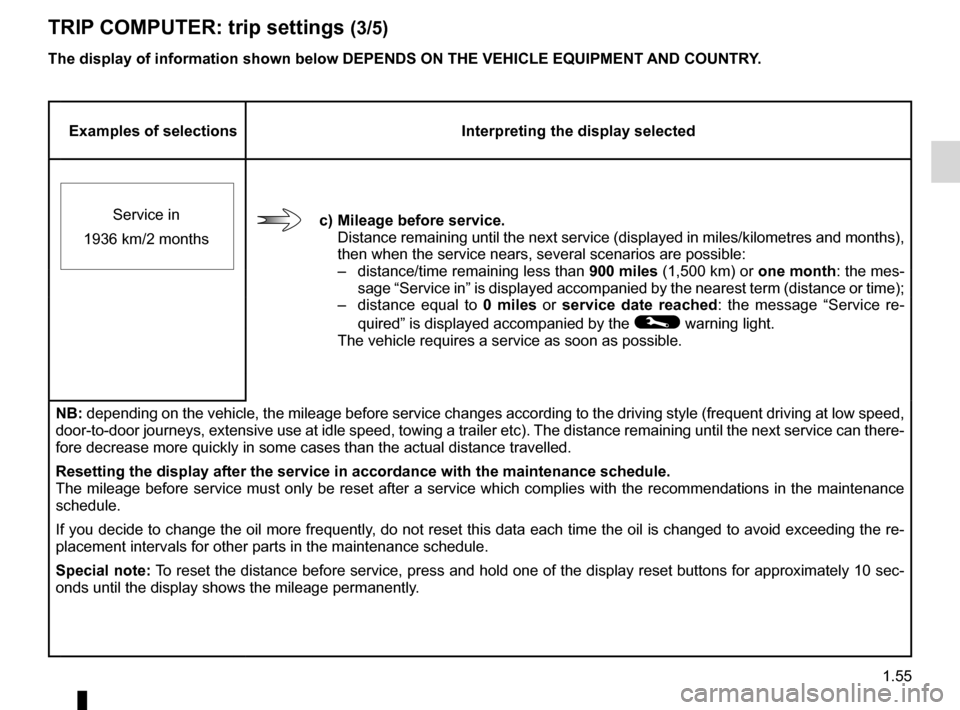
c) mileage before service;
d) tyre pressure monitor;
e) cruise control/speed limiter pro -
grammed speed;
f) vehicle settings customisation menu;
g) on-board log, operating fault and in-
formation message readout.
12
3
TRIp cOmpUTER: general information (1/2)
Page 59 of 241
trip computer and warning system........(up to the end of the DU)
warning lights ........................................ (up to the end of the DU)
instrument panel messages ..................(up to the end of the DU)
instrument panel ................................... (up to the end of the DU)
1.53
ENG_UD23764_1
Ordinateur de bord : paramètres de voyage (X91 - B91 - K91 - Renault)
ENG_NU_936-5_BK91_Renault_1
The display of information shown below dEpENds ON THE vEHIcLE EQUIpmENT ANd cOUNTRY.
Examples of selections Interpreting the display selected
101778 KM 112. 4 KM
a) Total mileage and trip mileage recorder.
Fuel used
b) Journey parameters.
fuel used.
Fuel consumed since the last reset.
8 L
Average
Average fuel consumption since the last reset.
The value is displayed after having travelled at least 400 metres since the last reset.
7.2 L/100
TRIp cOmpUTER: trip settings (1/5)
Page 60 of 241
1.54
ENG_UD23764_1
Ordinateur de bord : paramètres de voyage (X91 - B91 - K91 - Renault)
ENG_NU_936-5_BK91_Renault_1
Jaune NoirNoir texte
The display of information shown below dEpENds ON THE vEHIcLE EQUIpmENT ANd cOUNTRY.
Examples of selections Interpreting the display selected
Current
current fuel consumption.
This value is displayed above a speed of approximately 18 mph (30 km/h).
9.4 L/100
Estimated range with remaining fuel.
This range takes into account the average fuel consumption since the last time the reset
button was pressed. The value is displayed after driving 400 metres.
Range
541 km
distance travelled
since the last reset.
Distance
522 km
Average speed since the last reset.
The value is displayed after driving 400 metres.
Average
123 km/h
TRIp
cOmpUTER: trip settings (2/5)
Page 61 of 241
JauneNoirNoir texte
1.55
ENG_UD23764_1
Ordinateur de bord : paramètres de voyage (X91 - B91 - K91 - Renault)
ENG_NU_936-5_BK91_Renault_1
Examples of selections Interpreting the display selected
c) mileage before service. Distance remaining until the next service (displayed in miles/kilometres and months),
then when the service nears, several scenarios are possible:
– distance/time remaining less than 900 miles (1,500 km) or one month: the mes-
sage “Service in” is displayed accompanied by the nearest term (distance or time);
– distance equal to 0 miles or service date reached : the message “Service re-
quired ” is displayed accompanied by the
© warning light.
The vehicle requires a service as soon as possible.
Service in
1936 km/2 months
NB: depending on the vehicle, the mileage before service changes according to the driving style (frequent driving at low speed,
door-to-door journeys, extensive use at idle speed, towing a trailer etc). The distance remaining until the next service can there-
fore decrease more quickly in some cases than the actual distance travelled.
Resetting the display after the service in accordance with the maintenance schedule.
The mileage before service must only be reset after a service which complies with the recommendations in the maintenance
schedule.
If you decide to change the oil more frequently, do not reset this data each time the oil is changed to avoid exceeding the re-
placement intervals for other parts in the maintenance schedule.
special note: To reset the distance before service, press and hold one of the display reset buttons for approximately 10 sec-
onds until the display shows the mileage permanently.
The display of information shown below dEpENds ON THE vEHIcLE EQUIpmENT ANd cOUNTRY.
TRIp
cOmpUTER: trip settings (3/5)
Page 70 of 241
1.64
ENG_UD23635_4
Rétroviseurs (X91 - B91 - K91 - Renault)
ENG_NU_936-5_BK91_Renault_1
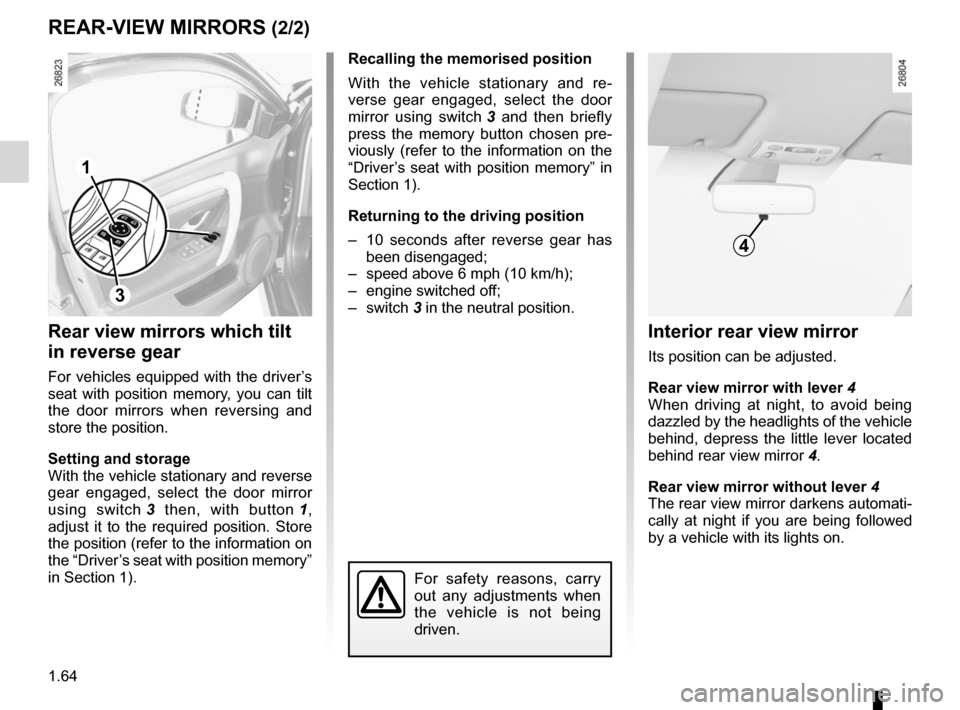
Interior rear view mirror
Its position can be adjusted.
Rear view mirror with lever 4
When driving at night, to avoid being
dazzled by the headlights of the vehicle
behind, depress the little lever located
behind rear view mirror 4.
Rear view mirror without lever 4
The rear view mirror darkens automati-
cally at night if you are being followed
by a vehicle with its lights on.
4
Rear view mirrors which tilt
in reverse gear
For vehicles equipped with the driver’s
seat with position memory, you can tilt
the door mirrors when reversing and
store the position.
setting and storage
With the vehicle stationary and reverse
gear engaged, select the door mirror
using switch 3 then, with button 1 ,
adjust it to the required position. Store
the position (refer to the information on
the “Driver’s seat with position memory”
in Section 1).
REAR-vIEW mIRRORs (2/2)
1
3
Recalling the memorised position
With the vehicle stationary and re -
verse gear engaged, select the door
mirror using switch 3 and then briefly
press the memory button chosen pre -
viously (refer to the information on the
“Driver’s seat with position memory” in
Section 1).
Returning to the driving position
– 10 seconds after reverse gear has
been disengaged;
– speed above 6 mph (10 km/h);
– engine switched off;
– switch 3 in the neutral position.
For safety reasons, carry
out any adjustments when
the vehicle is not being
driven.
Page 77 of 241
headlight washer ................................................... (current page)
JauneNoirNoir texte
1.71
ENG_UD23636_5
Essuie-vitre / lave-vitre avant (X91 - B91 - K91 - Renault)
ENG_NU_936-5_BK91_Renault_1
Headlight washers
Headlights on
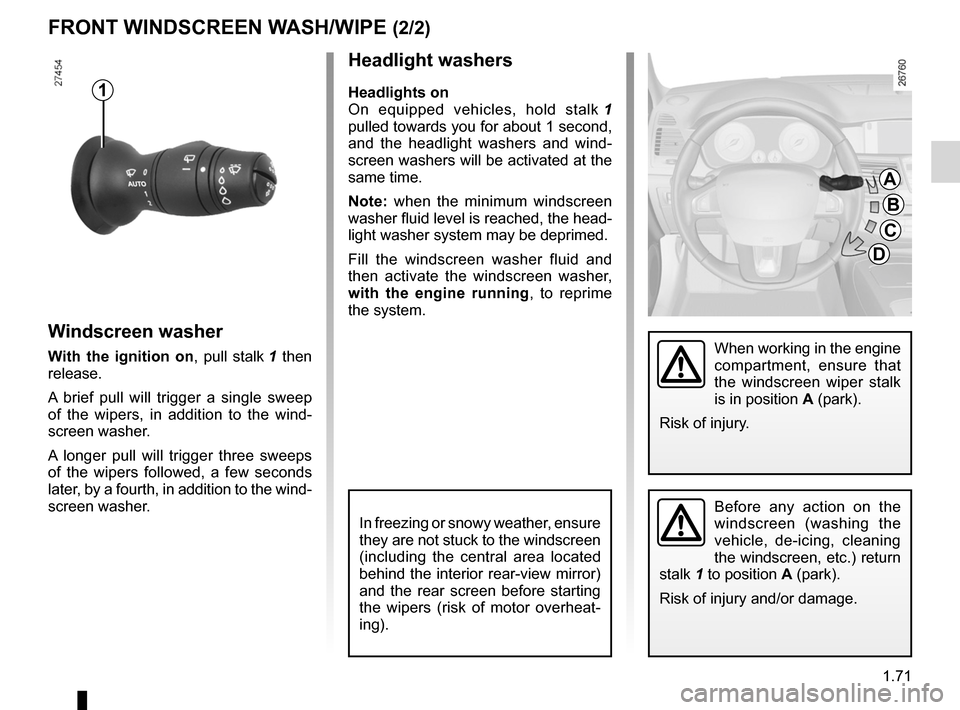
On equipped vehicles, hold stalk 1
pulled towards you for about 1 second,
and the headlight washers and wind -
screen washers will be activated at the
same time.
Note: when the minimum windscreen
washer fluid level is reached, the head -
light washer system may be deprimed.
Fill the windscreen washer fluid and
then activate the windscreen washer,
with the engine running , to reprime
the system.
Windscreen washer
With the ignition on, pull stalk 1 then
release.
A brief pull will trigger a single sweep
of the wipers, in addition to the wind -
screen washer.
A longer pull will trigger three sweeps
of the wipers followed, a few seconds
later, by a fourth, in addition to the wind -
screen washer.
fRONT WINdscREEN WAsH/WIpE (2/2)
1
In freezing or snowy weather, ensure
they are not stuck to the windscreen
(including the central area located
behind the interior rear-view mirror)
and the rear screen before starting
the wipers (risk of motor overheat -
ing).
A
B
c
d
When working in the engine
compartment, ensure that
the windscreen wiper stalk
is in position A (park).
Risk of injury.
Before any action on the
windscreen (washing the
vehicle, de-icing, cleaning
the windscreen, etc.) return
stalk 1 to position A (park).
Risk of injury and/or damage.
Page 80 of 241
1.74
ENG_UD28947_3
Réservoir carburant (X91 - B91 - K91 - Renault)
ENG_NU_936-5_BK91_Renault_1
Jaune NoirNoir texte
fUEL TANK (2/3)
filling with fuel
With the ignition off, insert the nozzle to
open valve B and insert it fully before
turning it on to fill the fuel tank (risk of
splashing).
Keep the nozzle in this position
throughout the entire filling operation.
When the pump cuts out automatically
at the end of the filling procedure, a
maximum of two further filling attempts
may be made, as there must be suffi -
cient space in the fuel tank to allow for
expansion.
Make sure that no water enters the fuel
tank during filling. Valve B and its sur -
round must remain clean.
petrol versions
Using leaded petrol will damage the
antipollution system and may lead to a
loss of warranty.
To ensure that the fuel tank is not filled
with leaded petrol, the fuel tank filler
neck contains a restrictor fitted with a
foolproof system which only allows
the nozzle for unleaded petrol to be
used (at the pump).
v
ehicles running on ethanol -based
fuel
It is essential to use unleaded petrol or
fuel containing a maximum of 85% eth-
anol (E85).
In very cold conditions, it may be very
difficult or even impossible to start the
engine. To avoid this problem, use un-
leaded petrol or, for equipped vehi -
cles, use the heater integrated into the
engine: connect the specified end of
the extension piece supplied into the
socket integrated into the radiator grille
and the other end into a 220v socket
for at least 6 hours before starting.
Note: you may notice an increase in
fuel consumption with this type of fuel.
v ehicle fitted with the Stop and
Start function
To fill up with fuel, the engine must
be stopped (and not on standby):
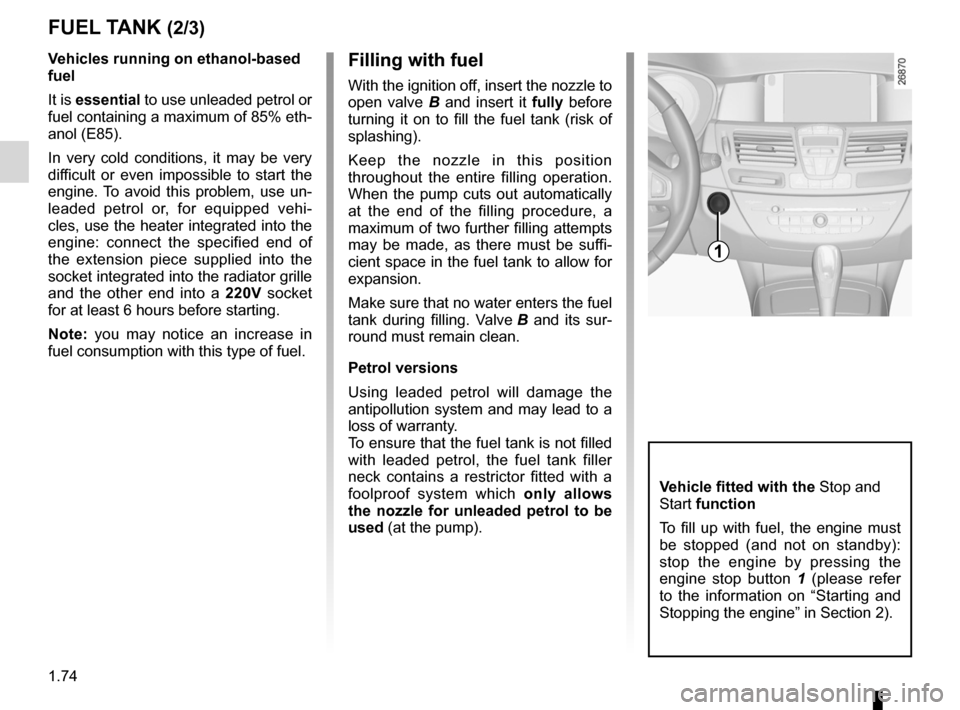
stop the engine by pressing the
engine stop button 1 (please refer
to the information on “Starting and
Stopping the engine” in Section 2).
1