instrument panel RENAULT MEGANE 2017 4.G Owner's Guide
[x] Cancel search | Manufacturer: RENAULT, Model Year: 2017, Model line: MEGANE, Model: RENAULT MEGANE 2017 4.GPages: 346, PDF Size: 7.04 MB
Page 131 of 346
2.19
Operating faults
– If there is a fault, the © warning
light illuminates on the instrument
panel accompanied by the “Check
parking brake” message and, in
some cases, the
} warning
light.
Please contact an authorised dealer
as soon as possible.
– If there is an assisted parking brake fault, the warning light
® comes
on, along with the message “Braking
system fault”, a beep and, in some
cases, the warning light
}.
This means that you must stop as
soon as traffic conditions allow.
Versions with an automatic
gearbox
For safety reasons, automatic release
is deactivated when the driver’s door
is open or not shut properly and the
engine is running (in order to prevent
the vehicle from moving without the
driver). The “Release parking brake
manually” message appears on the
instrument panel when the driver de-
presses the accelerator.
ELECTRONIC PARKING BRAKE (3/3)
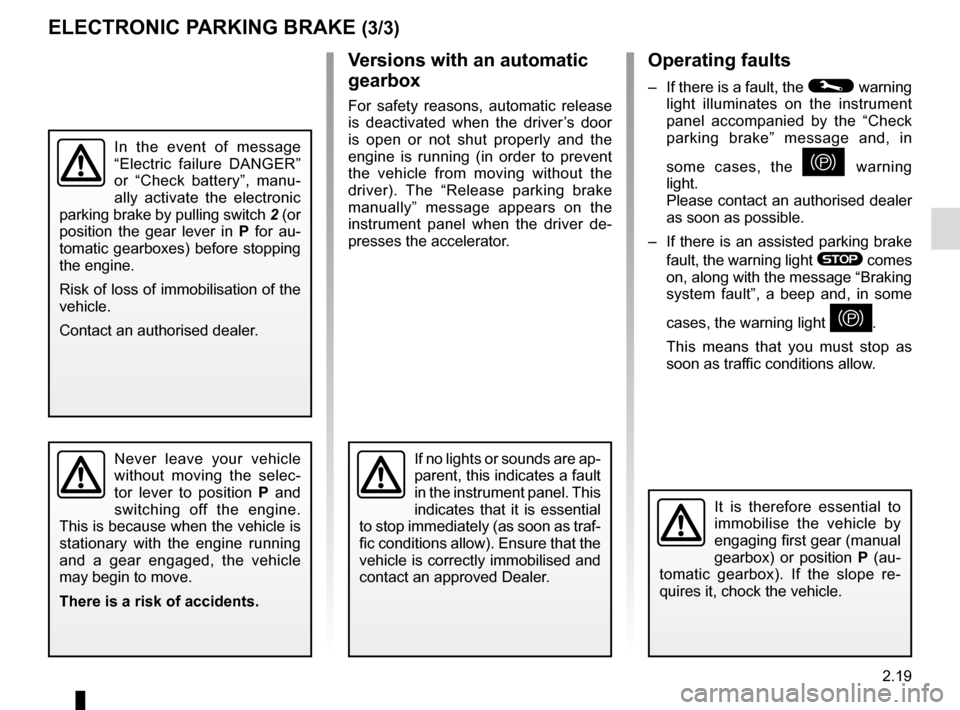
It is therefore essential to
immobilise the vehicle by
engaging first gear (manual
gearbox) or position P (au-
tomatic gearbox). If the slope re-
quires it, chock the vehicle.
Never leave your vehicle
without moving the selec-
tor lever to position P and
switching off the engine.
This is because when the vehicle is
stationary with the engine running
and a gear engaged, the vehicle
may begin to move.
There is a risk of accidents.If no lights or sounds are ap-
parent, this indicates a fault
in the instrument panel. This
indicates that it is essential
to stop immediately (as soon as traf-
fic conditions allow). Ensure that the
vehicle is correctly immobilised and
contact an approved Dealer.
In the event of message
“Electric failure DANGER”
or “Check battery”, manu-
ally activate the electronic
parking brake by pulling switch 2 (or
position the gear lever in P for au-
tomatic gearboxes) before stopping
the engine.
Risk of loss of immobilisation of the
vehicle.
Contact an authorised dealer.
Page 132 of 346
2.20
DRIVING ADVICE, ECO-DRIVING (1/5)
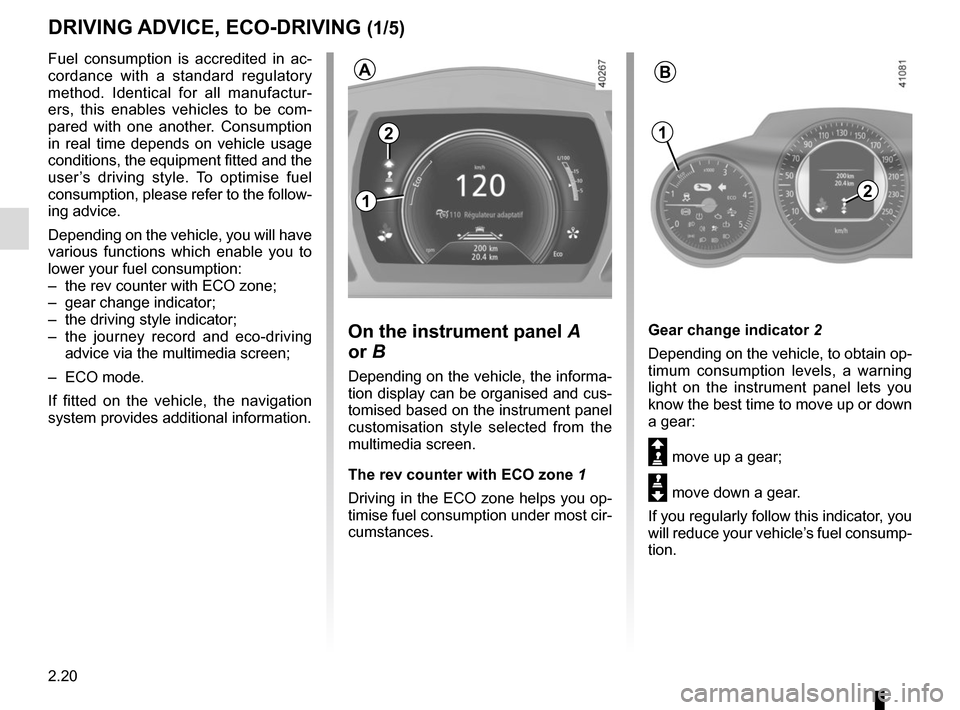
Gear change indicator 2
Depending on the vehicle, to obtain op-
timum consumption levels, a warning
light on the instrument panel lets you
know the best time to move up or down
a gear:
Š move up a gear;
‰ move down a gear.
If you regularly follow this indicator, you
will reduce your vehicle’s fuel consump-
tion.
Fuel consumption is accredited in ac-
cordance with a standard regulatory
method. Identical for all manufactur-
ers, this enables vehicles to be com-
pared with one another. Consumption
in real time depends on vehicle usage
conditions, the equipment fitted and the
user’s driving style. To optimise fuel
consumption, please refer to the follow-
ing advice.
Depending on the vehicle, you will have
various functions which enable you to
lower your fuel consumption:
– the rev counter with ECO zone;
– gear change indicator;
– the driving style indicator;
– the journey record and eco-driving
advice via the multimedia screen;
– ECO mode.
If fitted on the vehicle, the navigation
system provides additional information.
On the instrument panel A
or B
Depending on the vehicle, the informa-
tion display can be organised and cus-
tomised based on the instrument panel
customisation style selected from the
multimedia screen.
The rev counter with ECO zone 1
Driving in the ECO zone helps you op-
timise fuel consumption under most cir-
cumstances.
2
1
AB
2
1
Page 134 of 346
2.22
DRIVING ADVICE, ECO-DRIVING (3/5)
ECO mode
ECO mode is a function which opti-
mises fuel consumption. It acts upon
certain power consuming systems in
the vehicle (heating, air conditioning,
power-assisted steering, etc.) and on
certain driving actions (acceleration,
gear changing, cruise control, decele-
ration, etc.).
Limiting acceleration enables low fuel
consumption in urban and surrounding
areas. Reduced usage of the air condi-
tioning reduces fuel consumption with-
out affecting heating comfort.
Free wheel in ECO mode
Depending on the vehicle, for vehi-
cles fitted with an automatic gearbox,
switching to “free wheel” is favoured to
slow down the vehicle without using the
engine brake. By releasing the acceler-
ator pedal completely to anticipate de-
celeration, you will save fuel.Activating the function
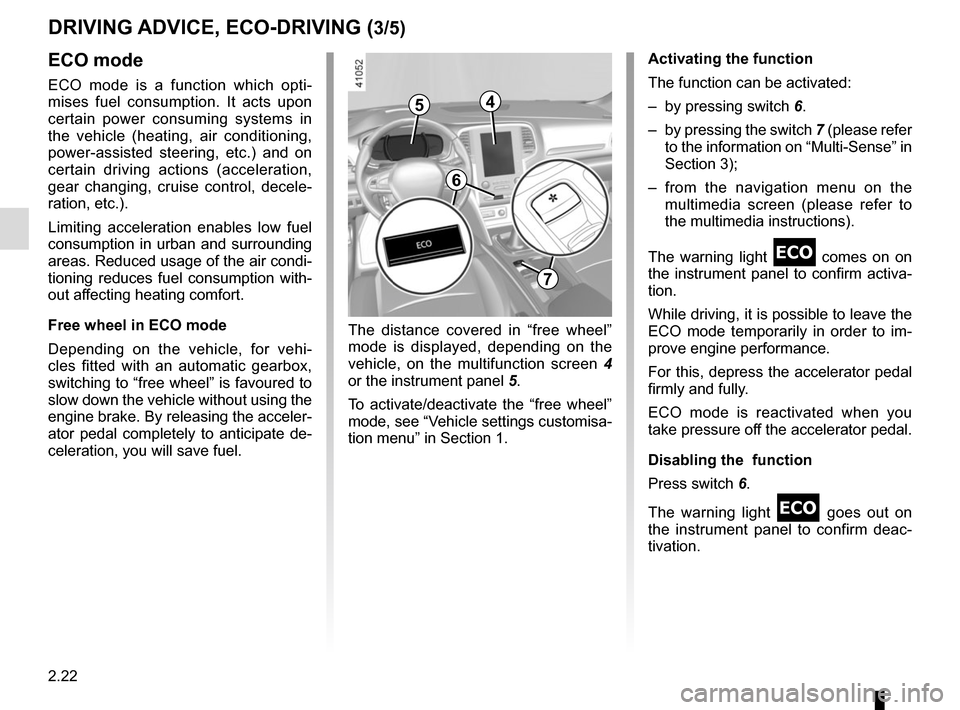
The function can be activated:
– by pressing switch
6.
– by pressing the switch 7 (please refer
to the information on “Multi-Sense” in
Section 3);
– from the navigation menu on the multimedia screen (please refer to
the multimedia instructions).
The warning light
comes on on
the instrument panel to confirm activa-
tion.
While driving, it is possible to leave the
ECO mode temporarily in order to im-
prove engine performance.
For this, depress the accelerator pedal
firmly and fully.
ECO mode is reactivated when you
take pressure off the accelerator pedal.
Disabling the function
Press switch 6.
The warning light
goes out on
the instrument panel to confirm deac-
tivation.
The distance covered in “free wheel”
mode is displayed, depending on the
vehicle, on the multifunction screen 4
or the instrument panel 5.
To activate/deactivate the “free wheel”
mode, see “Vehicle settings customisa-
tion menu” in Section 1.
6
7
45
Page 139 of 346
2.27
TYRE PRESSURE MONITORING SYSTEM (1/3)
If the vehicle is equipped with the func-
tion, this system monitors the tyre pres-
sure.
Operating principle
Each wheel (except for the emergency
spare wheel) has a sensor in the infla-
tion valve which periodically measures
the tyre pressure.
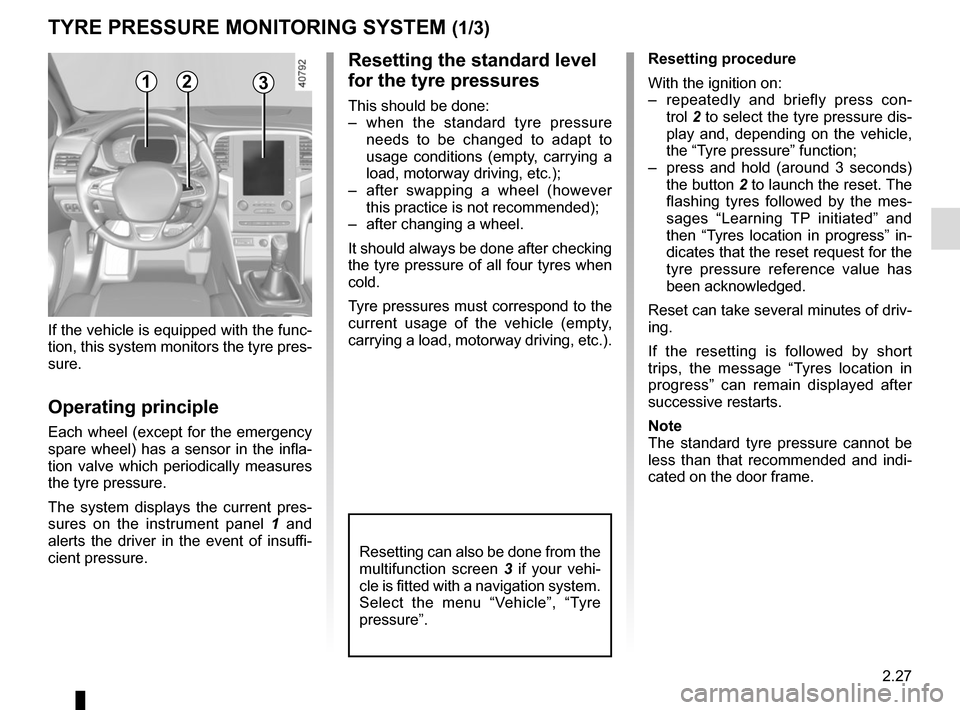
The system displays the current pres-
sures on the instrument panel 1 and
alerts the driver in the event of insuffi-
cient pressure.
Resetting the standard level
for the tyre pressures
This should be done:
– when the standard tyre pressure needs to be changed to adapt to
usage conditions (empty, carrying a
load, motorway driving, etc.);
– after swapping a wheel (however this practice is not recommended);
– after changing a wheel.
It should always be done after checking
the tyre pressure of all four tyres when
cold.
Tyre pressures must correspond to the
current usage of the vehicle (empty,
carrying a load, motorway driving, etc.).
21
Resetting procedure
With the ignition on:
– repeatedly and briefly press con- trol 2 to select the tyre pressure dis-
play and, depending on the vehicle,
the “Tyre pressure” function;
– press and hold (around 3 seconds) the button 2 to launch the reset. The
flashing tyres followed by the mes-
sages “Learning TP initiated” and
then “Tyres location in progress” in-
dicates that the reset request for the
tyre pressure reference value has
been acknowledged.
Reset can take several minutes of driv-
ing.
If the resetting is followed by short
trips, the message “Tyres location in
progress” can remain displayed after
successive restarts.
Note
The standard tyre pressure cannot be
less than that recommended and indi-
cated on the door frame.
3
Resetting can also be done from the
multifunction screen 3 if your vehi-
cle is fitted with a navigation system.
Select the menu “Vehicle”, “Tyre
pressure”.
Page 140 of 346
2.28
TYRE PRESSURE MONITORING SYSTEM (2/3)
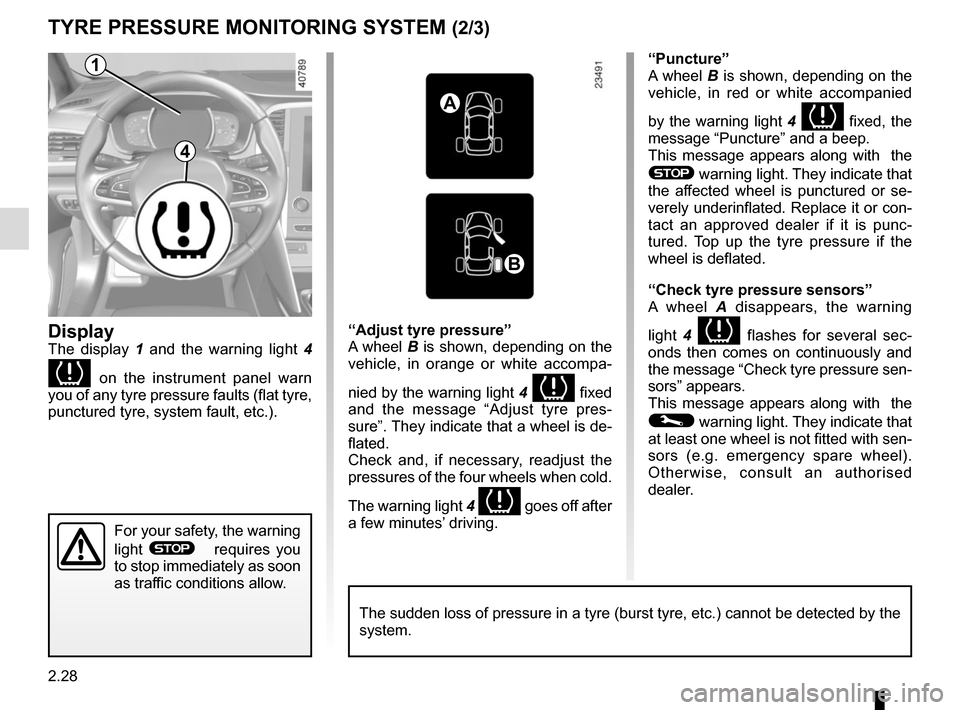
Display
The display 1 and the warning light 4
on the instrument panel warn
you of any tyre pressure faults (flat tyre,
punctured tyre, system fault, etc.).
“Puncture”
A wheel B is shown, depending on the
vehicle, in red or white accompanied
by the warning light 4
fixed, the
message “Puncture” and a beep.
This message appears along with the
® warning light. They indicate that
the affected wheel is punctured or se-
verely underinflated. Replace it or con-
tact an approved dealer if it is punc-
tured. Top up the tyre pressure if the
wheel is deflated.
“Check tyre pressure sensors”
A wheel A disappears, the warning
light 4
flashes for several sec-
onds then comes on continuously and
the message “Check tyre pressure sen-
sors” appears.
This message appears along with the
© warning light. They indicate that
at least one wheel is not fitted with sen-
sors (e.g. emergency spare wheel).
Otherwise, consult an authorised
dealer.
“Adjust tyre pressure”
A wheel B is shown, depending on the
vehicle, in orange or white accompa-
nied by the warning light
4
fixed
and the message “Adjust tyre pres-
sure”. They indicate that a wheel is de-
flated.
Check and, if necessary, readjust the
pressures of the four wheels when cold.
The warning light 4
goes off after
a few minutes’ driving.
A
B
1
For your safety, the warning
light
® requires you
to stop immediately as soon
as traffic conditions allow.
The sudden loss of pressure in a tyre (burst tyre, etc.) cannot be det\
ected by the
system.
4
Page 143 of 346
2.31
DRIVER CORRECTION DEVICES AND AIDS (2/10)
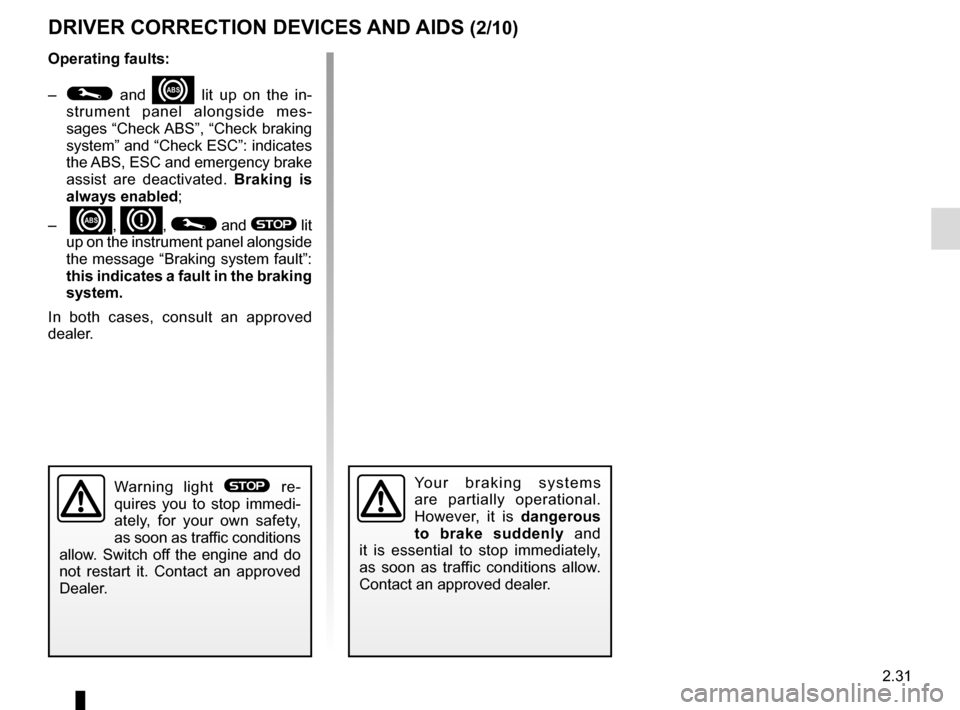
Operating faults:
–
© and x lit up on the in-
strument panel alongside mes-
sages “Check ABS”, “Check braking
system” and “Check ESC”: indicates
the ABS, ESC and emergency brake
assist are deactivated. Braking is
always enabled;
–
x, D, © and ® lit
up on the instrument panel alongside
the message “Braking system fault”:
this indicates a fault in the braking
system.
In both cases, consult an approved
dealer.
Your braking systems
are partially operational.
However, it is dangerous
to brake suddenly and
it is essential to stop immediately,
as soon as traffic conditions allow.
Contact an approved dealer.Warning light ® re-
quires you to stop immedi-
ately, for your own safety,
as soon as traffic conditions
allow. Switch off the engine and do
not restart it. Contact an approved
Dealer.
Page 144 of 346
2.32
Electronic stability control
ESC with understeer control
and traction control
Electronic stability control ESC
This system helps you to keep control
of the vehicle in critical driving condi-
tions (avoiding an obstacle, loss of grip
on a bend, etc.).
Operating principle
A sensor in the steering wheel detects
the direction selected by the driver.
Other sensors throughout the vehicle
measure the actual direction.
The system compares driver input to
the actual trajectory of the vehicle and
corrects the trajectory if necessary by
controlling the braking of certain wheels
and/or engine power. In the event that
the system is engaged, indicator light
flashes on the instrument panel.Understeer control
This system optimises the action of the
ESC in the case of pronounced under-
steer (loss of front axle road holding).
Traction control
This system helps to limit wheelspin of
the drive wheels and to control the ve-
hicle when pulling away accelerating or
decelerating.
Operating principle
Using the wheel sensors, the system
measures and compares the speed of
the drive wheels at all times and slows
down their over-rotation. If a wheel is
starting to slip, the system brakes au-
tomatically until the drive supplied be-
comes compatible with the level of grip
under the wheel again.
The system also adjusts the engine
speed to the grip available under the
wheels, independently of the pressure
exerted on the accelerator pedal.
Operating faults
When the system detects an operat-
ing fault the message “Check ESC” and
warning light
© and appear
on the instrument panel.
In this case, the ESC and traction con-
trol system are deactivated. Consult an
authorised dealer.
DRIVER CORRECTION DEVICES AND AIDS (3/10)
Page 145 of 346
2.33
DRIVER CORRECTION DEVICES AND AIDS (4/10)
Emergency brake assist
This system supplements the ABS
and helps reduce vehicle stopping dis-
tances.
Operating principle
The system is for detecting an emer-
gency braking situation. In this case,
the braking assistance immediately de-
velops maximum power and may trig-
ger ABS regulation.
ABS braking is maintained as long as
the brake pedal is applied.
Hazard warning lights switching on
Depending on the vehicle, these may
light up in the event of sudden decel-
eration. Braking anticipation
Depending on the vehicle, when you
rapidly release the accelerator, the
system anticipates the braking ma-
noeuvre in order to reduce stopping
distances.
Special cases
When using the cruise control:
– if you use the accelerator, when you
release it, the system may be trig-
gered;
– if you do not use the accelerator, the system will not be triggered.
Operating faults
When the system detects an operat-
ing fault the message “Check brak-
ing system” appears on the instrument
panel along with the
© warning
light.
Consult an approved dealer.
Page 146 of 346
2.34
DRIVER CORRECTION DEVICES AND AIDS (5/10)
If the driver depresses the brake pedal
and the system still detects a risk of col-
lision, the brake force is increased.
If the driver fails to react following
an alert of an imminent collision, the
system activates the brakes.
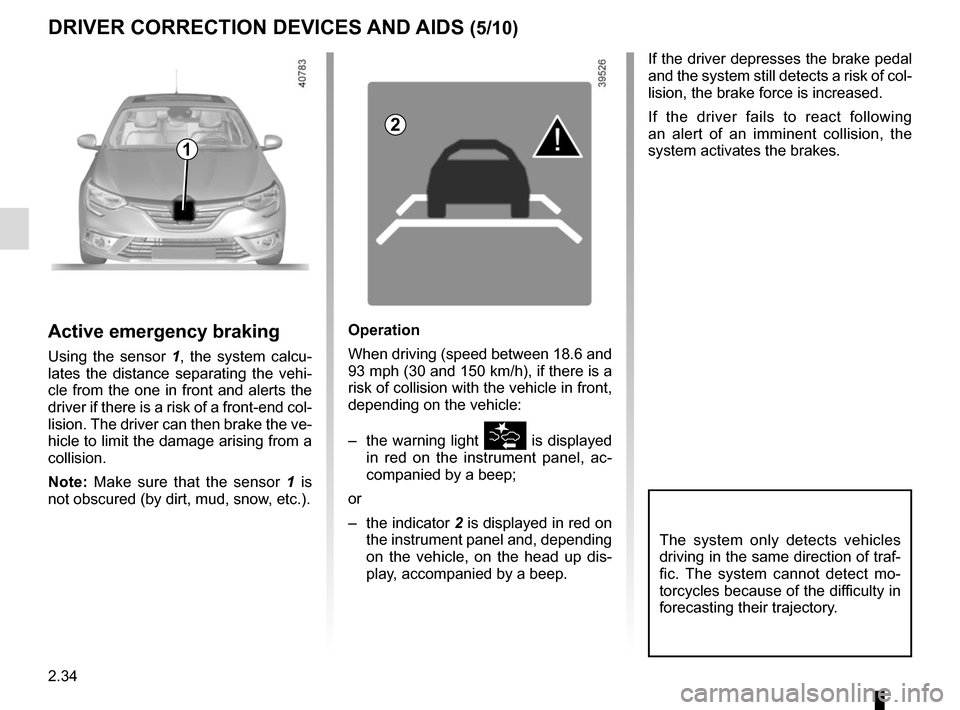
Active emergency braking
Using the sensor 1, the system calcu-
lates the distance separating the vehi-
cle from the one in front and alerts the
driver if there is a risk of a front-end col-
lision. The driver can then brake the ve-
hicle to limit the damage arising from a
collision.
Note: Make sure that the sensor 1 is
not obscured (by dirt, mud, snow, etc.).
Operation
When driving (speed between 18.6 and
93 mph (30 and 150 km/h), if there is a
risk of collision with the vehicle in front,
depending on the vehicle:
– the warning light
is displayed
in red on the instrument panel, ac-
companied by a beep;
or
– the indicator 2 is displayed in red on
the instrument panel and, depending
on the vehicle, on the head up dis- play, accompanied by a beep.
The system only detects vehicles
driving in the same direction of traf-
fic. The system cannot detect mo-
torcycles because of the difficulty in
forecasting their trajectory.
1
2
Page 147 of 346
2.35
DRIVER CORRECTION DEVICES AND AIDS (6/10)
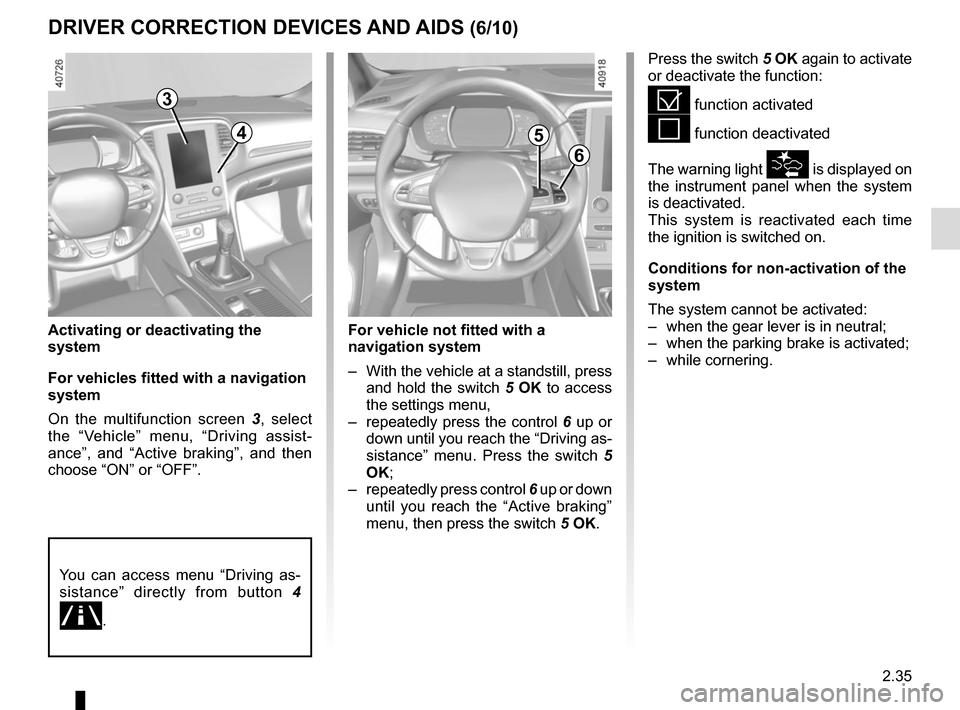
Activating or deactivating the
system
For vehicles fitted with a navigation
system
On the multifunction screen 3, select
the “Vehicle” menu, “Driving assist-
ance”, and “Active braking”, and then
choose “ON” or “OFF”.
Press the switch 5 OK again to activate
or deactivate the function:
= function activated
< function deactivated
The warning light
is displayed on
the instrument panel when the system
is deactivated.
This system is reactivated each time
the ignition is switched on.
Conditions for non-activation of the
system
The system cannot be activated:
– when the gear lever is in neutral;
– when the parking brake is activated;
– while cornering.
3
6
5
For vehicle not fitted with a
navigation system
– With the vehicle at a standstill, press and hold the switch 5 OK to access
the settings menu,
– repeatedly press the control 6 up or
down until you reach the “Driving as-
sistance” menu. Press the switch 5
OK;
– repeatedly press control 6 up or down
until you reach the “Active braking”
menu, then press the switch 5 OK.
You can access menu “Driving as-
sistance” directly from button 4
\b.
4