Stop and start function RENAULT MEGANE 2017 4.G Owners Manual
[x] Cancel search | Manufacturer: RENAULT, Model Year: 2017, Model line: MEGANE, Model: RENAULT MEGANE 2017 4.GPages: 346, PDF Size: 7.04 MB
Page 8 of 346
1.2
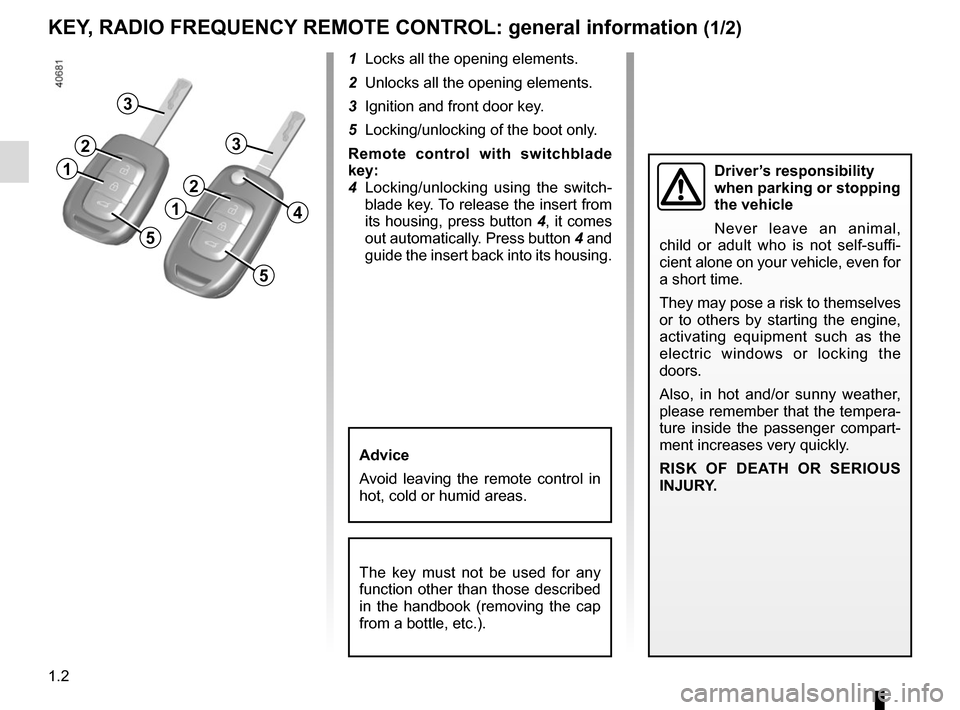
1 Locks all the opening elements.
2 Unlocks all the opening elements.
3 Ignition and front door key.
5 Locking/unlocking of the boot only.
Remote control with switchblade
key:
4 Locking/unlocking using the switch-blade key. To release the insert from
its housing, press button 4, it comes
out automatically. Press button 4 and
guide the insert back into its housing.
KEY, RADIO FREQUENCY REMOTE CONTROL: general information (1/2)
The key must not be used for any
function other than those described
in the handbook (removing the cap
from a bottle, etc.).
Advice
Avoid leaving the remote control in
hot, cold or humid areas.
Driver’s responsibility
when parking or stopping
the vehicle
Never leave an animal,
child or adult who is not self-suffi-
cient alone on your vehicle, even for
a short time.
They may pose a risk to themselves
or to others by starting the engine,
activating equipment such as the
electric windows or locking the
doors.
Also, in hot and/or sunny weather,
please remember that the tempera-
ture inside the passenger compart-
ment increases very quickly.
RISK OF DEATH OR SERIOUS
INJURY.
4
1
2
3
5
1
2
3
5
Page 13 of 346
1.7
RENAULT CARD: general information (2/2)
Advice
Avoid leaving the card in hot, cold or
humid areas.
Do not keep the RENAULT card in
a place where it could be bent or
damaged accidentally, such as in a
back pocket of a garment.
Replacement: need for an
additional RENAULT Card
If you lose your RENAULT card or
require another, you can obtain one
from an approved dealer.
If a RENAULT card is replaced, it
will be necessary to take the vehi-
cle and all of its RENAULT cards
to an approved dealer to initialise
the system.
You may use up to four RENAULT
cards per vehicle.
Distance lighting function
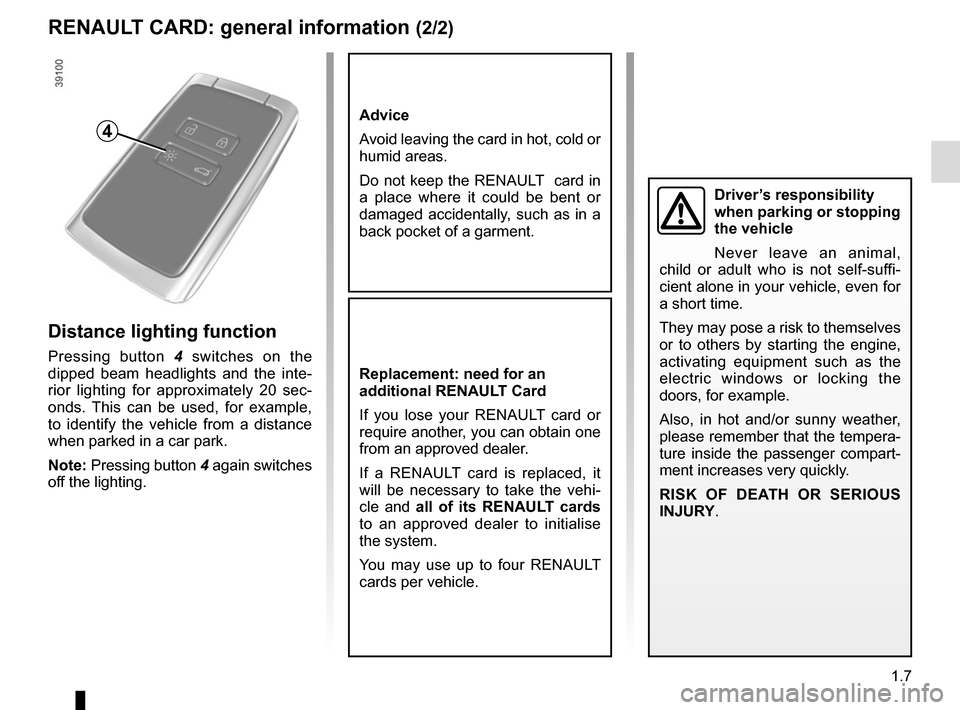
Pressing button 4 switches on the
dipped beam headlights and the inte-
rior lighting for approximately 20 sec-
onds. This can be used, for example,
to identify the vehicle from a distance
when parked in a car park.
Note: Pressing button 4 again switches
off the lighting.
4
Driver’s responsibility
when parking or stopping
the vehicle
Never leave an animal,
child or adult who is not self-suffi-
cient alone in your vehicle, even for
a short time.
They may pose a risk to themselves
or to others by starting the engine,
activating equipment such as the
electric windows or locking the
doors, for example.
Also, in hot and/or sunny weather,
please remember that the tempera-
ture inside the passenger compart-
ment increases very quickly.
RISK OF DEATH OR SERIOUS
INJURY.
Page 14 of 346
1.8
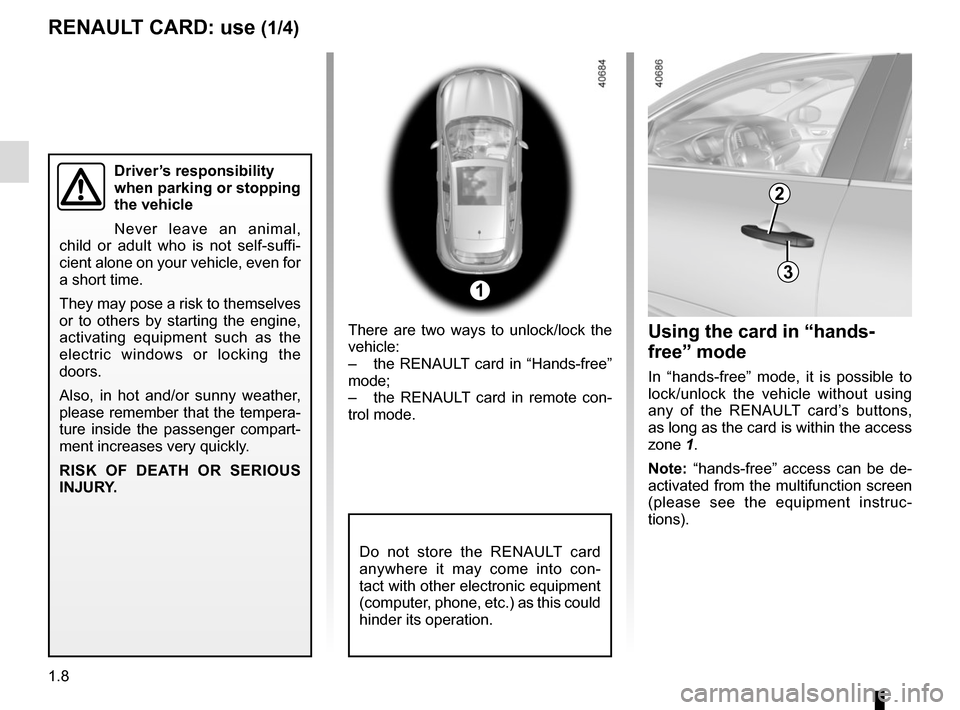
There are two ways to unlock/lock the
vehicle:
– the RENAULT card in “Hands-free”
mode;
– the RENAULT card in remote con-
trol mode.
RENAULT CARD: use (1/4)
Do not store the RENAULT card
anywhere it may come into con-
tact with other electronic equipment
(computer, phone, etc.) as this could
hinder its operation.
1
Using the card in “hands-
free” mode
In “hands-free” mode, it is possible to
lock/unlock the vehicle without using
any of the RENAULT card’s buttons,
as long as the card is within the access
zone 1.
Note: “hands-free” access can be de-
activated from the multifunction screen
(please see the equipment instruc-
tions).
Driver’s responsibility
when parking or stopping
the vehicle
Never leave an animal,
child or adult who is not self-suffi-
cient alone on your vehicle, even for
a short time.
They may pose a risk to themselves
or to others by starting the engine,
activating equipment such as the
electric windows or locking the
doors.
Also, in hot and/or sunny weather,
please remember that the tempera-
ture inside the passenger compart-
ment increases very quickly.
RISK OF DEATH OR SERIOUS
INJURY.
3
2
Page 61 of 346
1.55
DRIVER’S POSITION, LEFT-HAND DRIVE (2/2)
The equipment fitted, described below, DEPENDS ON THE VERSION AND COUNTRY.
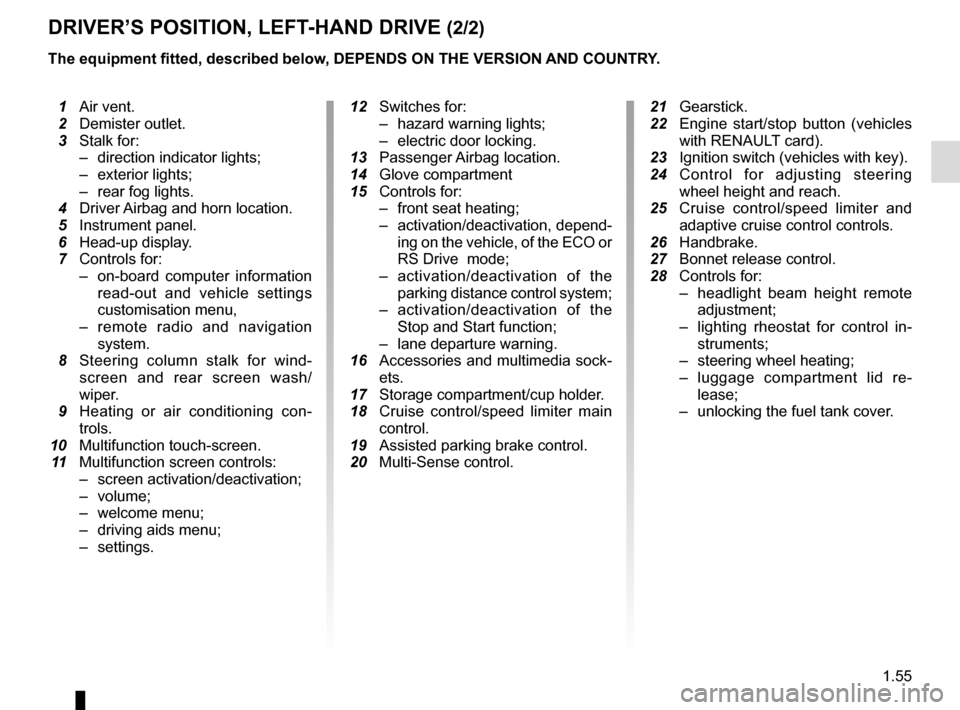
1 Air vent.
2 Demister outlet.
3 Stalk for:
– direction indicator lights;
– exterior lights;
– rear fog lights.
4 Driver Airbag and horn location.
5 Instrument panel.
6 Head-up display.
7 Controls for:
– on-board computer information
read-out and vehicle settings
customisation menu,
– remote radio and navigation
system.
8 Steering column stalk for wind-
screen and rear screen wash/
wiper.
9 Heating or air conditioning con-
trols.
10 Multifunction touch-screen.
11 Multifunction screen controls:
– screen activation/deactivation;
– volume;
– welcome menu;
– driving aids menu;
– settings.
12 Switches for:
– hazard warning lights;
– electric door locking.
13 Passenger Airbag location.
14 Glove compartment
15 Controls for:
– front seat heating;
– activation/deactivation, depend-
ing on the vehicle, of the ECO or
RS Drive mode;
– activation/deactivation of the
parking distance control system;
– activation/deactivation of the
Stop and Start function;
– lane departure warning.
16 Accessories and multimedia sock-
ets.
17 Storage compartment/cup holder.
18 Cruise control/speed limiter main
control.
19 Assisted parking brake control.
20 Multi-Sense control.
21 Gearstick.
22 Engine start/stop button (vehicles
with RENAULT card).
23 Ignition switch (vehicles with key).
24
Control for adjusting steering wheel height and reach.
25 Cruise control/speed limiter and
adaptive cruise control controls.
26 Handbrake.
27 Bonnet release control.
28 Controls for:
– headlight beam height remote
adjustment;
– lighting rheostat for control in-
struments;
– steering wheel heating;
– luggage compartment lid re-
lease;
– unlocking the fuel tank cover.
Page 63 of 346
1.57
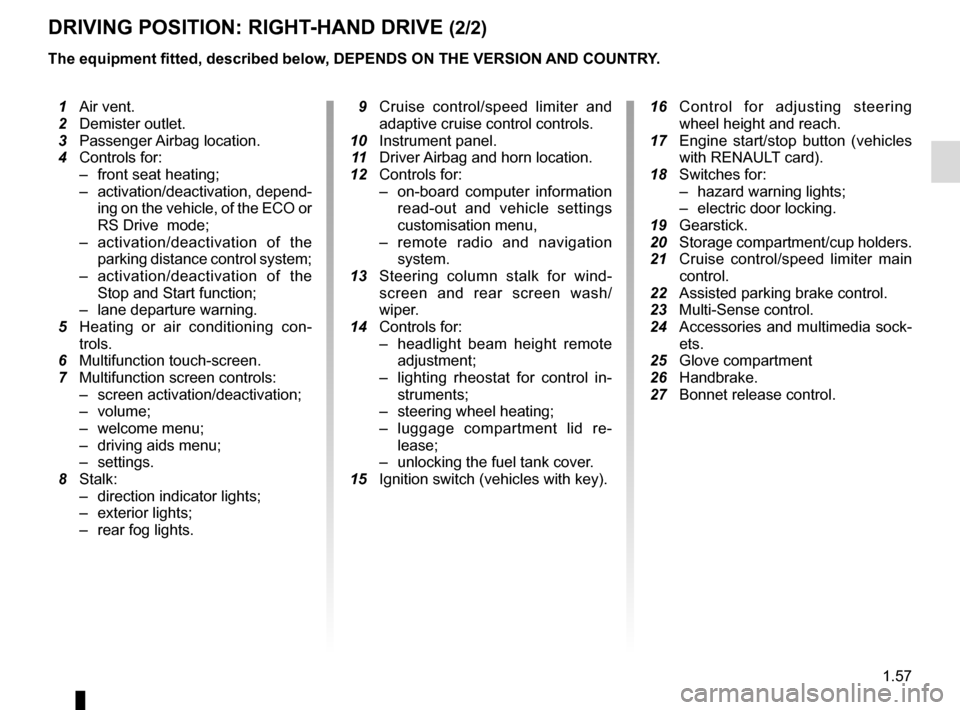
DRIVING POSITION: RIGHT-HAND DRIVE (2/2)
The equipment fitted, described below, DEPENDS ON THE VERSION AND COUNTRY.
16 Control for adjusting steering
wheel height and reach.
17 Engine start/stop button (vehicles
with RENAULT card).
18 Switches for:
– hazard warning lights;
– electric door locking.
19 Gearstick.
20 Storage compartment/cup holders.
21 Cruise control/speed limiter main
control.
22 Assisted parking brake control.
23 Multi-Sense control.
24 Accessories and multimedia sock-
ets.
25 Glove compartment
26 Handbrake.
27 Bonnet release control.
1 Air vent.
2 Demister outlet.
3 Passenger Airbag location.
4 Controls for:
– front seat heating;
– activation/deactivation, depend-
ing on the vehicle, of the ECO or
RS Drive mode;
– activation/deactivation of the
parking distance control system;
– activation/deactivation of the
Stop and Start function;
– lane departure warning.
5 Heating or air conditioning con-
trols.
6 Multifunction touch-screen.
7 Multifunction screen controls:
– screen activation/deactivation;
– volume;
– welcome menu;
– driving aids menu;
– settings.
8 Stalk:
– direction indicator lights;
– exterior lights;
– rear fog lights.
9 Cruise control/speed limiter and
adaptive cruise control controls.
10 Instrument panel.
11 Driver Airbag and horn location.
12 Controls for:
– on-board computer information
read-out and vehicle settings
customisation menu,
– remote radio and navigation
system.
13 Steering column stalk for wind-
screen and rear screen wash/
wiper.
14 Controls for:
– headlight beam height remote
adjustment;
– lighting rheostat for control in-
struments;
– steering wheel heating;
– luggage compartment lid re-
lease;
– unlocking the fuel tank cover.
15 Ignition switch (vehicles with key).
Page 66 of 346
1.60
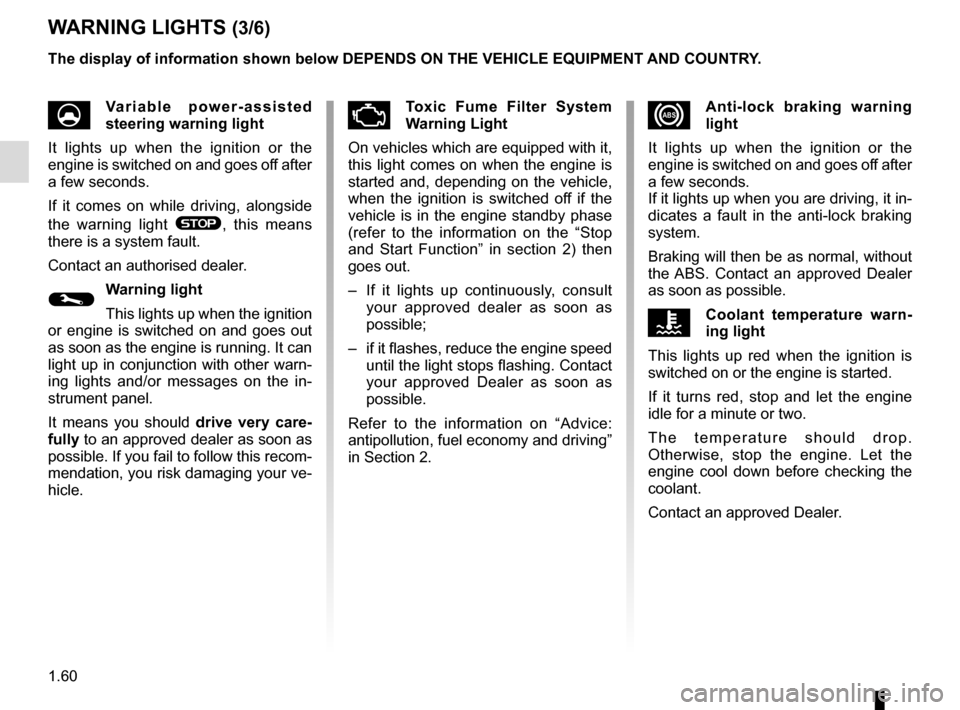
xAnti-lock braking warning
light
It lights up when the ignition or the
engine is switched on and goes off after
a few seconds.
If it lights up when you are driving, it in-
dicates a fault in the anti-lock braking
system.
Braking will then be as normal, without
the ABS. Contact an approved Dealer
as soon as possible.
ÔCoolant temperature warn-
ing light
This lights up red when the ignition is
switched on or the engine is started.
If it turns red, stop and let the engine
idle for a minute or two.
The temperature should drop.
Otherwise, stop the engine. Let the
engine cool down before checking the
coolant.
Contact an approved Dealer.
WARNING LIGHTS (3/6)
UVariable power-assisted
steering warning light
It lights up when the ignition or the
engine is switched on and goes off after
a few seconds.
If it comes on while driving, alongside
the warning light
®, this means
there is a system fault.
Contact an authorised dealer.
©Warning light
This lights up when the ignition
or engine is switched on and goes out
as soon as the engine is running. It can
light up in conjunction with other warn-
ing lights and/or messages on the in-
strument panel.
It means you should drive very care-
fully to an approved dealer as soon as
possible. If you fail to follow this recom-
mendation, you risk damaging your ve-
hicle.
ÄToxic Fume Filter System
Warning Light
On vehicles which are equipped with it,
this light comes on when the engine is
started and, depending on the vehicle,
when the ignition is switched off if the
vehicle is in the engine standby phase
(refer to the information on the “Stop
and Start Function” in section 2) then
goes out.
– If it lights up continuously, consult your approved dealer as soon as
possible;
– if it flashes, reduce the engine speed until the light stops flashing. Contact
your approved Dealer as soon as
possible.
Refer to the information on “Advice:
antipollution, fuel economy and driving”
in Section 2.
The display of information shown below DEPENDS ON THE VEHICLE EQUIPMENT \
AND COUNTRY.
Page 68 of 346
1.62
WARNING LIGHTS (5/6)
The display of information shown below DEPENDS ON THE VEHICLE EQUIPMENT \
AND COUNTRY.
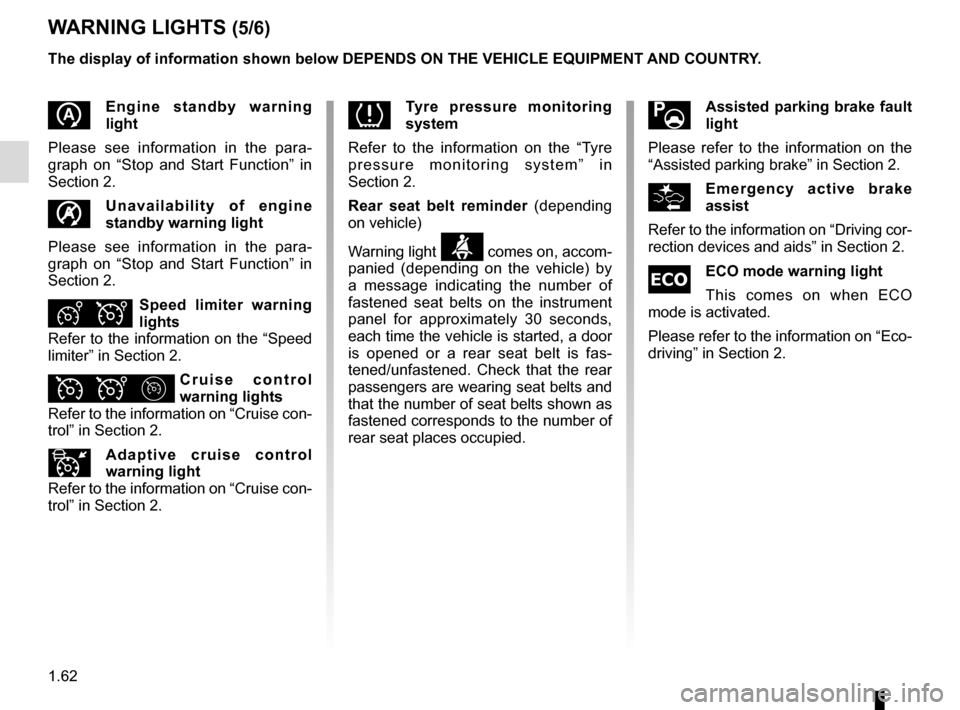
Assisted parking brake fault
light
Please refer to the information on the
“Assisted parking brake” in Section 2.
Emergency active brake
assist
Refer to the information on “Driving cor-
rection devices and aids” in Section 2.
\bECO mode warning light
This comes on when ECO
mode is activated.
Please refer to the information on “Eco-
driving” in Section 2.
Tyre pressure monitoring
system
Refer to the information on the “Tyre
pressure monitoring system” in
Section 2.
Rear seat belt reminder (depending
on vehicle)
Warning light
ß comes on, accom-
panied (depending on the vehicle) by
a message indicating the number of
fastened seat belts on the instrument
panel for approximately 30 seconds,
each time the vehicle is started, a door
is opened or a rear seat belt is fas-
tened/unfastened. Check that the rear
passengers are wearing seat belts and
that the number of seat belts shown as
fastened corresponds to the number of
rear seat places occupied.
Engine standby warning
light
Please see information in the para-
graph on “Stop and Start Function” in
Section 2.
Unavailability of engine
standby warning light
Please see information in the para-
graph on “Stop and Start Function” in
Section 2.
ÐÎSpeed limiter warning
lights
Refer to the information on the “Speed
limiter” in Section 2.
ÏΦ Cruise control
warning lights
Refer to the information on “Cruise con-
trol” in Section 2.
\fAdaptive cruise control
warning light
Refer to the information on “Cruise con-
trol” in Section 2.
Page 73 of 346
1.67
DISPLAYS AND INDICATORS (4/6)
1211
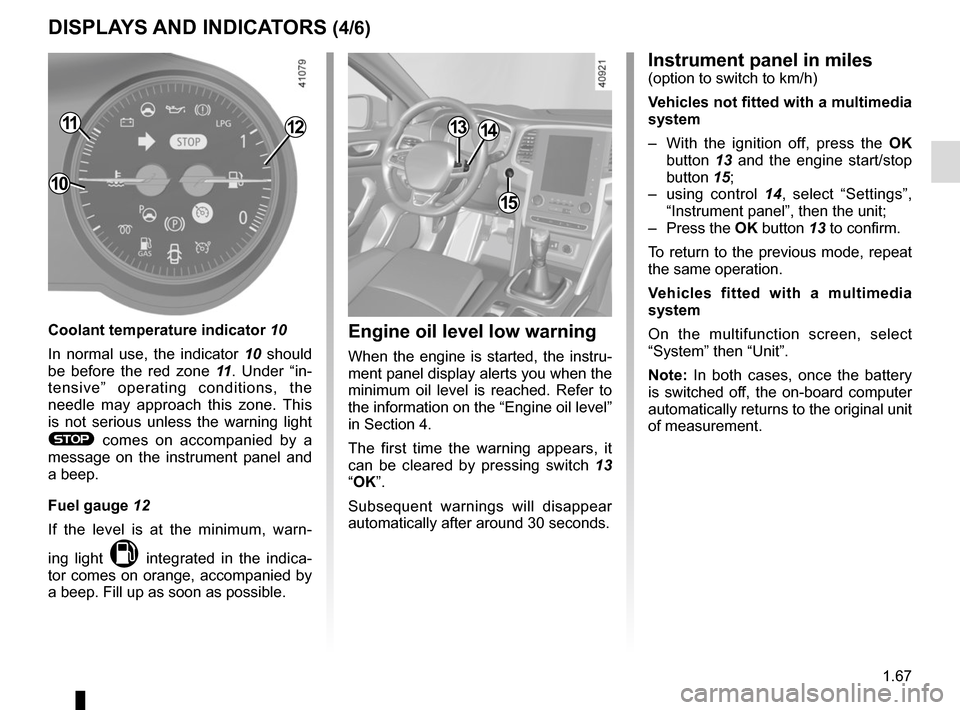
Coolant temperature indicator 10
In normal use, the indicator 10 should
be before the red zone 11. Under “in-
tensive” operating conditions, the
needle may approach this zone. This
is not serious unless the warning light
® comes on accompanied by a
message on the instrument panel and
a beep.
Fuel gauge 12
If the level is at the minimum, warn-
ing light
M integrated in the indica-
tor comes on orange, accompanied by
a beep. Fill up as soon as possible.
10
15
1314
Instrument panel in miles(option to switch to km/h)
Vehicles not fitted with a multimedia
system
– With the ignition off, press the OK
button 13 and the engine start/stop
button 15;
– using control 14, select “Settings”,
“Instrument panel”, then the unit;
– Press the OK button 13 to confirm.
To return to the previous mode, repeat
the same operation.
Vehicles fitted with a multimedia
system
On the multifunction screen, select
“System” then “Unit”.
Note: In both cases, once the battery
is switched off, the on-board computer
automatically returns to the original unit
of measurement.
Engine oil level low warning
When the engine is started, the instru-
ment panel display alerts you when the
minimum oil level is reached. Refer to
the information on the “Engine oil level”
in Section 4.
The first time the warning appears, it
can be cleared by pressing switch 13
“OK”.
Subsequent warnings will disappear
automatically after around 30 seconds.
Page 75 of 346
1.69
DISPLAYS AND INDICATORS (6/6)
Operating faults
In the event of a malfunction (the dis-
play fails to open when the engine is
started, or the display retracts, with the
engine running, following an object im-
pacting the display):
– stop and restart the engine;
or
– from the multifunction screen, change the display opening settings.
If there is still a problem, contact an au-
thorised dealer.
With the display opened or closed,
no object should be placed on it or
in its housing.
Do not use solvents, detergents or
an abrasive cloth to clean the dis-
play.
Only use a microfibre wipe.
Page 102 of 346
1.96
WINDSCREEN WASH/WIPE (2/6)
1
F
2
Vehicle fitted with front
windscreen wiper rain sensor
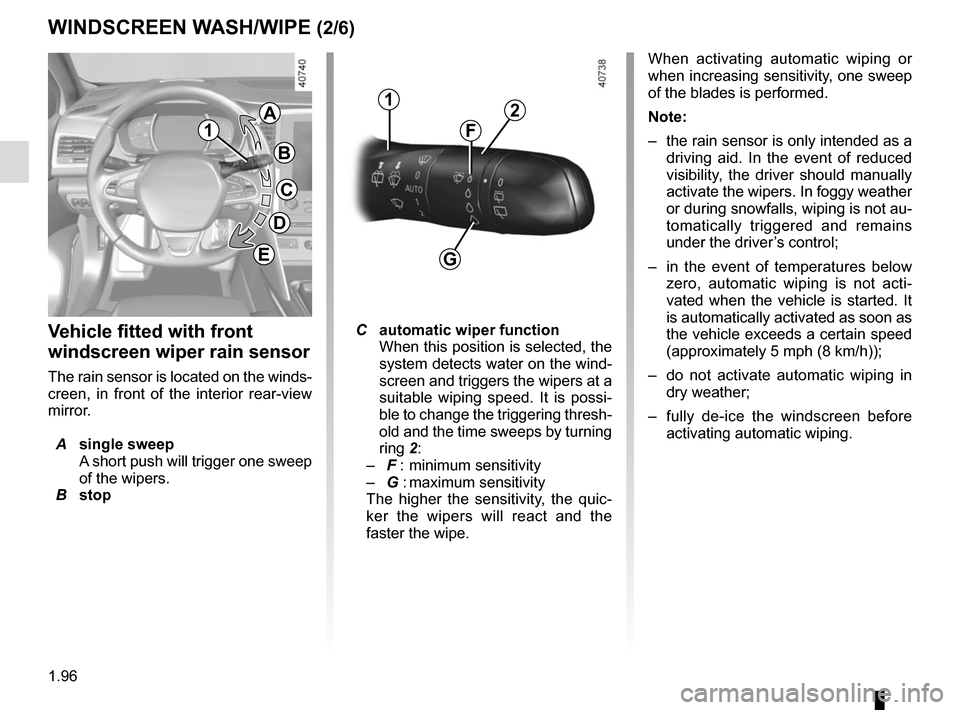
The rain sensor is located on the winds-
creen, in front of the interior rear-view
mirror.
A single sweep
A short push will trigger one sweep
of the wipers.
B stop
C automatic wiper function
When this position is selected, the
system detects water on the wind-
screen and triggers the wipers at a
suitable wiping speed. It is possi-
ble to change the triggering thresh-
old and the time sweeps by turning
ring 2:
– F : minimum sensitivity
– G : maximum sensitivity
The higher the sensitivity, the quic-
ker the wipers will react and the
faster the wipe. When activating automatic wiping or
when increasing sensitivity, one sweep
of the blades is performed.
Note:
–
the rain sensor is only intended as a
driving aid. In the event of reduced
visibility, the driver should manually
activate the wipers. In foggy weather
or during snowfalls, wiping is not au-
tomatically triggered and remains
under the driver’s control;
– in the event of temperatures below
zero, automatic wiping is not acti-
vated when the vehicle is started. It
is automatically activated as soon as
the vehicle exceeds a certain speed
(approximately 5 mph (8 km/h));
– do not activate automatic wiping in
dry weather;
– fully de-ice the windscreen before
activating automatic wiping.
G
1
A
B
C
D
E