display RENAULT MEGANE 2017 4.G R Link Owner's Manual
[x] Cancel search | Manufacturer: RENAULT, Model Year: 2017, Model line: MEGANE, Model: RENAULT MEGANE 2017 4.GPages: 96, PDF Size: 4.02 MB
Page 53 of 96
GB.51
NAVIGATION SETTINGS (2/2)
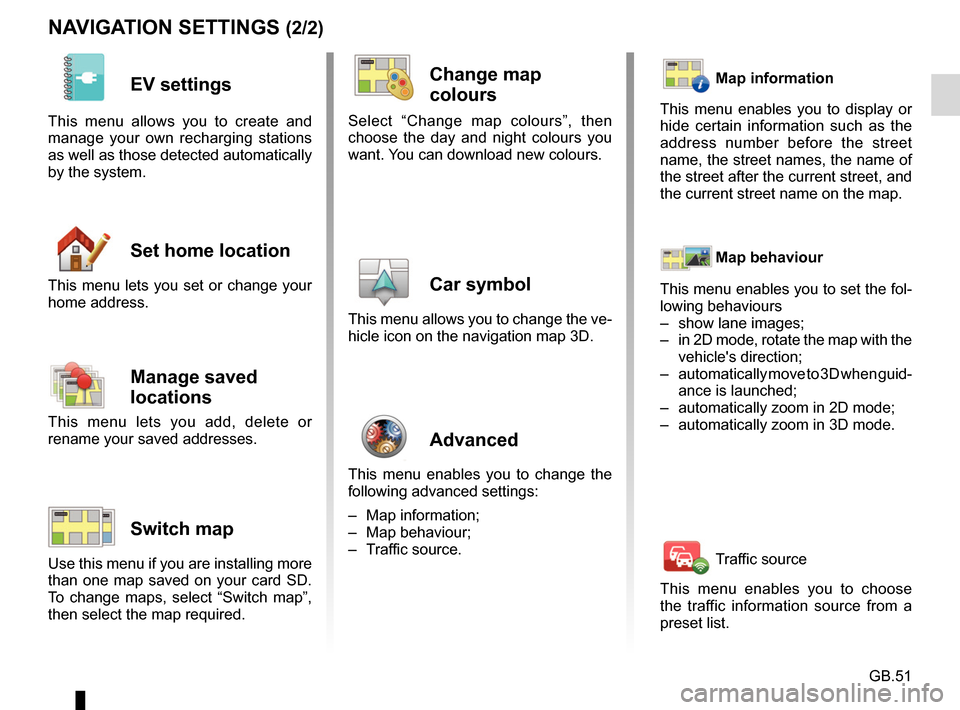
EV settings
This menu allows you to create and
manage your own recharging stations
as well as those detected automatically
by the system.
Set home location
This menu lets you set or change your
home address.
Manage saved
locations
This menu lets you add, delete or
rename your saved addresses.
Switch map
Use this menu if you are installing more
than one map saved on your card SD.
To change maps, select “Switch map”,
then select the map required.
Change map
colours
Select “Change map colours”, then
choose the day and night colours you
want. You can download new colours.
Car symbol
This menu allows you to change the ve-
hicle icon on the navigation map 3D.
Advanced
This menu enables you to change the
following advanced settings:
– Map information;
– Map behaviour;
– Traffic source.
Map information
This menu enables you to display or
hide certain information such as the
address number before the street
name, the street names, the name of
the street after the current street, and
the current street name on the map.
Map behaviour
This menu enables you to set the fol-
lowing behaviours
– show lane images;
– in 2D mode, rotate the map with the vehicle's direction;
– automatically move to 3D when guid- ance is launched;
– automatically zoom in 2D mode;
– automatically zoom in 3D mode.
Traffic source
This menu enables you to choose
the traffic information source from a
preset list.
Page 55 of 96
GB.53
LISTENING TO THE RADIO (2/5)To select a radio station DR
(terrestrial digital radio)
There are different modes for choosing
a radio station.
After selecting the waveband, select
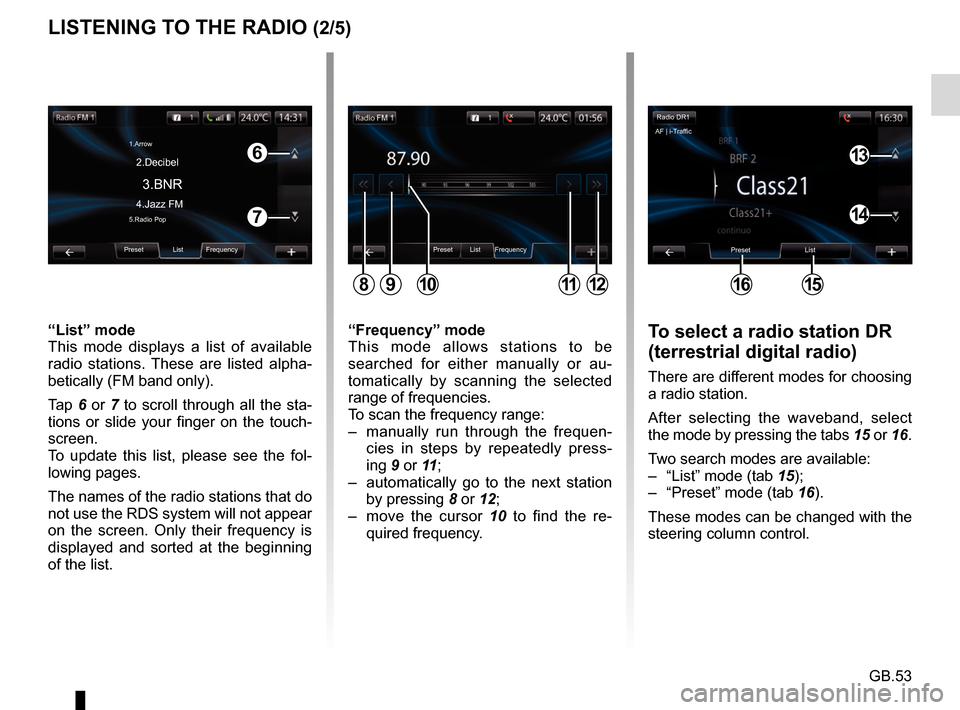
the mode by pressing the tabs 15 or 16.
Two search modes are available:
– “List” mode (tab 15);
– “Preset” mode (tab 16).
These modes can be changed with the
steering column control.
“Frequency” mode
This mode allows stations to be
searched for either manually or au-
tomatically by scanning the selected
range of frequencies.
To scan the frequency range:
– manually run through the frequen-
cies in steps by repeatedly press-
ing 9 or 11 ;
– automatically go to the next station by pressing 8 or 12;
– move the cursor 10 to find the re- quired frequency.
“List” mode
This mode displays a list of available
radio stations. These are listed alpha-
betically (FM band only).
Tap 6 or 7 to scroll through all the sta-
tions or slide your finger on the touch-
screen.
To update this list, please see the fol-
lowing pages.
The names of the radio stations that do
not use the RDS system will not appear
on the screen. Only their frequency is
displayed and sorted at the beginning
of the list.
Preset List Frequency
811912
6
7
Preset List Frequency
3.BNR
1.Arrow
4.Jazz FM 2.Decibel5.Radio Pop
10
Radio DR1
Preset List
1615
13
14
AF | i-Traffic
Page 56 of 96
GB.54
LISTENING TO THE RADIO (3/5)
Pop-up menu “+”.
FM or AM
From one of the three modes, press “+”
to:
– change the source (Radio, USB, SD, etc.);
– add a station to your favourites;
– save a station;
– get text information;
– access the radio settings.
Storing a station
From “Frequency” mode or “List” mode,
press “+” then “Save as preset”.
You can also press one of the preset
buttons until you hear a beep.
You can store up to 6 stations per band.
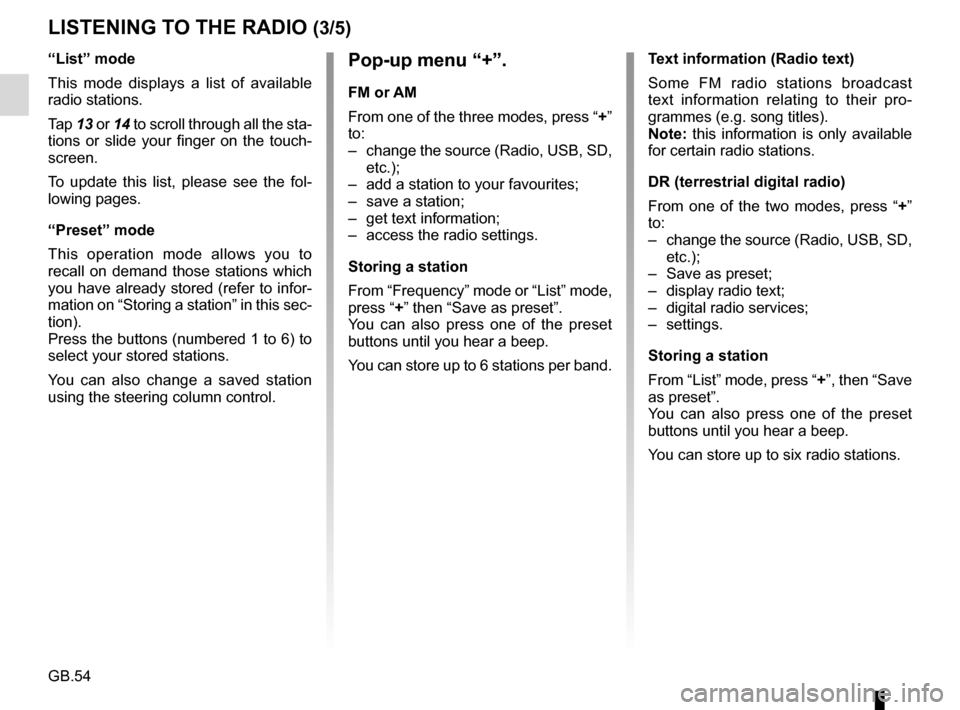
“List” mode
This mode displays a list of available
radio stations.
Tap
13 or 14 to scroll through all the sta-
tions or slide your finger on the touch-
screen.
To update this list, please see the fol-
lowing pages.
“Preset” mode
This operation mode allows you to
recall on demand those stations which
you have already stored (refer to infor-
mation on “Storing a station” in this sec-
tion).
Press the buttons (numbered 1 to 6) to
select your stored stations.
You can also change a saved station
using the steering column control. Text information (Radio text)
Some FM radio stations broadcast
text information relating to their pro-
grammes (e.g. song titles).
Note: this information is only available
for certain radio stations.
DR (terrestrial digital radio)
From one of the two modes, press “+”
to:
– change the source (Radio, USB, SD,
etc.);
– Save as preset;
– display radio text;
– digital radio services;
– settings.
Storing a station
From “List” mode, press “+”, then “Save
as preset”.
You can also press one of the preset
buttons until you hear a beep.
You can store up to six radio stations.
Page 57 of 96
GB.55
Text information (Radio text)
Some DR radio stations broadcast
text information relating to their pro-
grammes (e.g. song titles).
Note: this information is only available
for certain radio stations.
Digital radio services
From the pop-up menu, press “Digital
radio devices” to access the following
services:
– EPG;
– Intellitext;
– Slideshow.
LISTENING TO THE RADIO (4/5)Radio settings
FM
From one of the three modes, press “+”
then “Radio” to access the radio set-
tings menu. From the radio settings,
you can set the following elements:
– following an FM station;
– activate/deactivate traffic informa-tion;
– activate/deactivate the programme type search;
– update the list of radio stations.
Following a station FM (RDS-AF)
The frequency of an FM radio station
may change depending on the geo-
graphical area.
In order to keep listening to the same
radio station when driving, activate the
RDS-AF function so that your audio
system can automatically retune the
frequency.
EPG (DR) program guide
When this feature is activated, your
audio system will display the station’s
upcoming programs of the day.
Note: This information is only available
for the selected station’s next three
time slots.
Intellitext (DR) function
This feature allows access to text in-
formation recorded on some radio sta-
tions. You can scroll through the text to
display new updates on business, poli-
tics, health, weather and sports.
Slideshow
This function runs through all the photos
as a slideshow.
Page 58 of 96
GB.56
Note: not all radio stations offer this
possibility.
Poor reception can sometimes cause
erratic and annoying changes in fre-
quency. In this case you should deac-
tivate the automatic frequency retuning.
To activate/deactivate this function,
refer to the section on “Audio settings”.
Traffic information (i Traffic)
When this function is activated, the
source is interrupted automatically to
receive the traffic bulletins broadcast
by some FM radio stations.
Programme type search (PTY)
When this function is activated, your
audio system allows you to display the
type of programme (news, sport etc.)
currently being broadcast.
Update radio list
Select this menu to update the list of
radio stations.
LISTENING TO THE RADIO (5/5)
DR (terrestrial digital radio)
From one of the two modes, press “+”
to access the radio settings. From the
radio settings, you can set the follow-
ing elements:
– “AF” (Alternative Frequency)
– “i-Traffic” (traffic programme)
– “PTY” (programme type)
– “Simulcast”
– “i-Announcement”
– “Update the list” (DR).
Following a radio station DR (AF)
A DR radio station can change accord-
ing to the geographical area. In order to
keep listening to the same radio station
when driving, activate the AF function
so the audio system can retune the fre-
quency automatically.
Note: not all radio stations offer this
possibility.
Poor reception can sometimes cause
erratic and annoying changes. In this
case you should deactivate the auto-
matic frequency retuning. Traffic information (i Traffic)
With this function activated, the source
is interrupted automatically to receive
the traffic bulletins broadcast by some
DR radio stations.
Programme type search (PTY)
With this function activated, the audio
system lets you display the type of pro-
gramme (news, sport etc.) currently
broadcast.
Simulcast
This function lets you switch from one
DR station to the same FM station on
signal loss.
i-Announcement
This function lets you display informa-
tion (weather, etc.).
Updating the list (DR)
This feature allows you to perform an
update of all stations in your area.
Page 60 of 96
GB.58
Accessing photos
From the “Multimedia” menu, press
“Pictures” then select the connected
source (Card SD, USB, etc.) to access
the photos. The system offers you two
options:
– “read all photos”;
– “Read a photo”.
Note: Some formats may not be rea-
dable by the system.
Options from folders
From the list of folders/photos, press
“+” to:
– change the source;
– display full screen;
– display the slideshow;
– access zoom in;
– access photo settings.
Note: For more information on compa-
tible photo formats, please consult an
Authorised Dealer.
PHOTO READER
Playback
You can choose between reading all
the photos in a slideshow or viewing a
single photo.
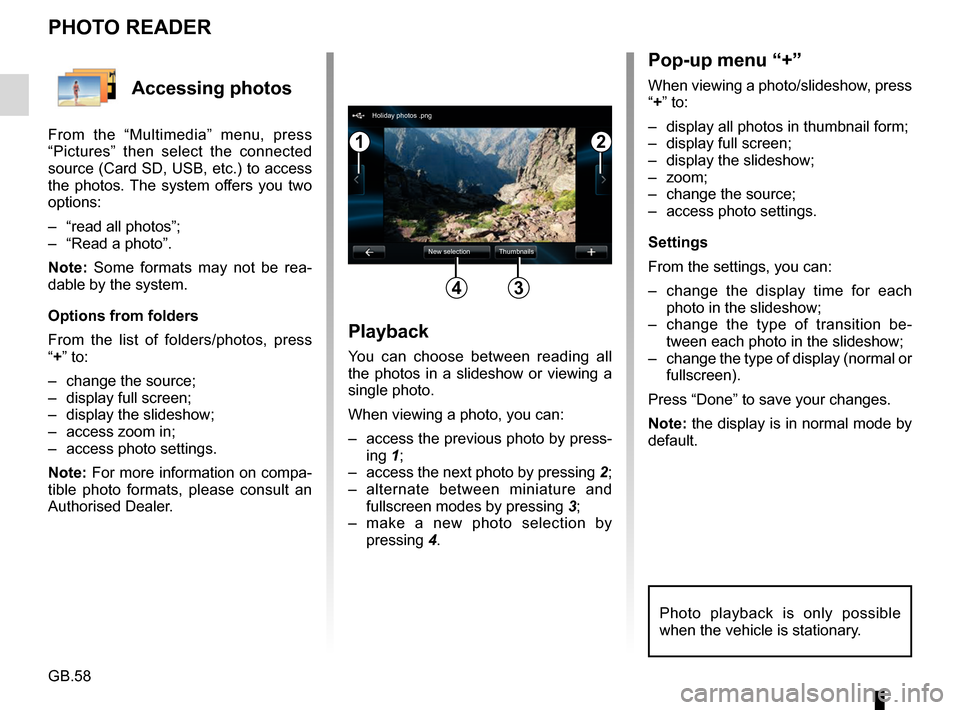
When viewing a photo, you can:
– access the previous photo by press-ing 1;
– access the next photo by pressing 2;
– alternate between miniature and fullscreen modes by pressing 3;
– make a new photo selection by pressing 4.
Pop-up menu “+”
When viewing a photo/slideshow, press
“+” to:
– display all photos in thumbnail form;
– display full screen;
– display the slideshow;
– zoom;
– change the source;
– access photo settings.
Settings
From the settings, you can:
– change the display time for each
photo in the slideshow;
– change the type of transition be- tween each photo in the slideshow;
– change the type of display (normal or fullscreen).
Press “Done” to save your changes.
Note: the display is in normal mode by
default.
12
34
Holiday photos .png
New selection Thumbnails
Photo playback is only possible
when the vehicle is stationary.
Page 61 of 96
GB.59
Accessing videos
From the “Multimedia” menu, press
“Video” then select the source con-
nected (SD card, USB, etc.) to access
videos. The system offers you two op-
tions:
– “play all videos”;
– “play a video”.
Note: Some formats may not be read-
able by the system.
Options from folders
From the list of folders/videos, press “+”
to:
– change the source;
– access the settings.
Note: For more information on compat-
ible video formats, please consult an
Authorised Dealer.
VIDEO PLAYBACK
Playback
You can choose between playing all the
videos or playing a single video.
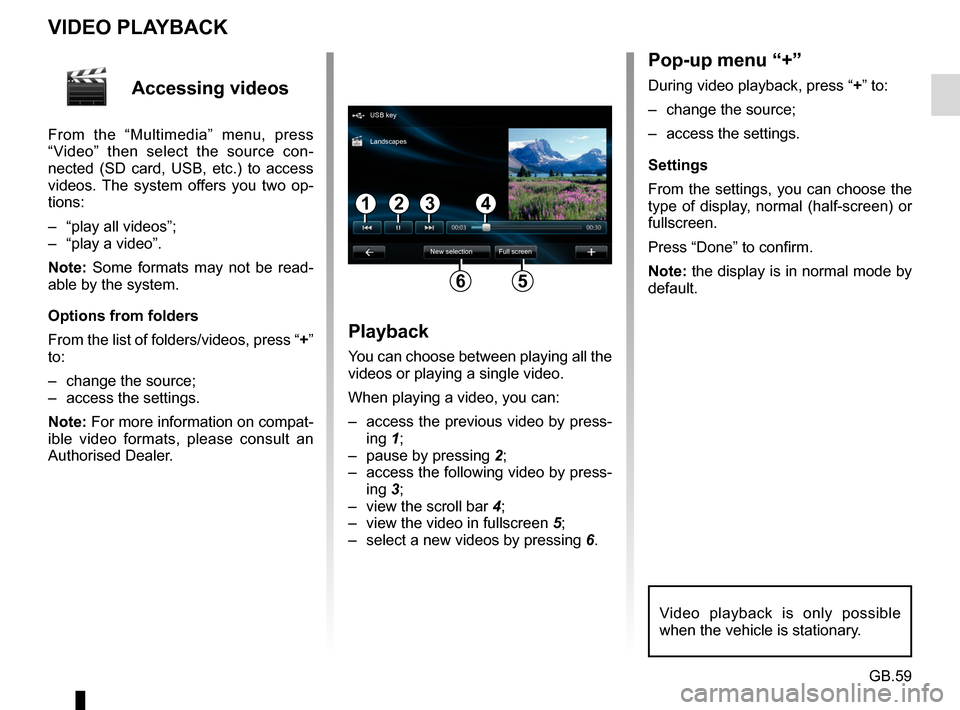
When playing a video, you can:
– access the previous video by press-ing 1;
– pause by pressing 2;
– access the following video by press- ing 3;
– view the scroll bar 4;
– view the video in fullscreen 5;
– select a new videos by pressing 6.
Pop-up menu “+”
During video playback, press “+” to:
– change the source;
– access the settings.
Settings
From the settings, you can choose the
type of display, normal (half-screen) or
fullscreen.
Press “Done” to confirm.
Note: the display is in normal mode by
default.
Video playback is only possible
when the vehicle is stationary.
1324
56
USB key
New selection Full screen
Landscapes
Page 62 of 96
GB.60
MULTIMEDIA SETTINGS (1/2)
Accessing
multimedia
settings
From the “Multimedia” menu, press
“Settings”, then select the element you
wish to modify:
– Sound;
– Radio;
– Media;
– Pictures;
– Video.
Radio
This menu enables you to adjust the
radio settings:
– activate/deactivate searching for alternative frequencies;
– activate/deactivate i-traffic;
– activate/deactivate programme type;
– update list of saved radio sta- tions.
Media
This menu allows you to adjust the mul-
timedia settings:
– activate/deactivate track repeat;
– activate/deactivate shuffle;
– activate/deactivate album image display;
– manage Bluetooth® devices connected.
Sound
This menu allows you to configure dif-
ferent sound settings:
– Spatialisation , for setting sound
distribution in the vehicle;
– “Bass Treble” , to set the treble
and bass levels. Once you have
made the adjustments, press
“Confirm” to confirm your set-
tings.
– Bass Boost Arkamys - to acti-
vate/deactivate bass amplifica-
tion.
– “ AGC Arkamys ”, to achieve an
even sound volume between two
audio tracks.
Page 63 of 96
GB.61
MULTIMEDIA SETTINGS (2/2)
Pictures
This menu allows you to adjust the mul-
timedia settings:
– set the timing of each picture in the slideshow;
– configure the default view for pic- tures.Video
This menu enables you to set the
type of video display:
– “Normal view”;
– “Full screen”.
Page 69 of 96
GB.67
MAKING, RECEIVING A CALL (2/2)
Receiving a call
When receiving a call, the reception
screen is displayed with any informa-
tion available on the caller:
– the name of the contact (if the number is present in your handset
memory or the phonebook list);
– the caller’s number (if the number is not present in your handset
memory);
– “No Caller ID” (if the number cannot be viewed).
Pick up
To pick up a call, press “Pick up”.
Press “End call” to end the call.
You can also pick up or hang up using
the steering column control.
Reject a call
To reject in incoming call, press “Reject”,
the person calling you will be redi-
rected to your voicemail.
Place a call on hold
Please refer to the “During communica-
tion” section.
For safety reasons, carry
out these operations when
the vehicle is stationary.
Making a call by
dialling a number
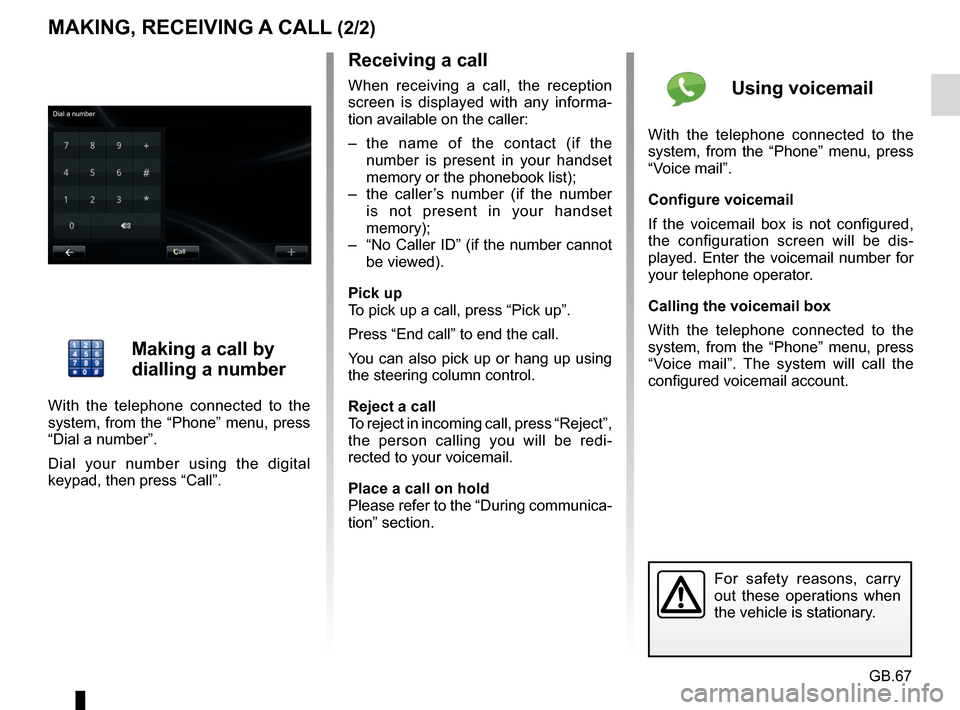
With the telephone connected to the
system, from the “Phone” menu, press
“Dial a number”.
Dial your number using the digital
keypad, then press “Call”.
Using voicemail
With the telephone connected to the
system, from the “Phone” menu, press
“Voice mail”.
Configure voicemail
If the voicemail box is not configured,
the configuration screen will be dis-
played. Enter the voicemail number for
your telephone operator.
Calling the voicemail box
With the telephone connected to the
system, from the “Phone” menu, press
“Voice mail”. The system will call the
configured voicemail account.
Call
Dial a number