brake RENAULT MEGANE COUPE CABRIOLET 2015 X95 / 3.G Owner's Manual
[x] Cancel search | Manufacturer: RENAULT, Model Year: 2015, Model line: MEGANE COUPE CABRIOLET, Model: RENAULT MEGANE COUPE CABRIOLET 2015 X95 / 3.GPages: 236, PDF Size: 5.1 MB
Page 113 of 236
2.31
CRUISE CONTROL/SPEED LIMITER: cruise control function (1/4)
The cruise control function helps you to
maintain your driving speed at a speed
that you choose, called the cruising
speed.
This cruising speed may be set at any
speed above 20 mph (30 km/h).
The cruise control function
is in no way linked to the
braking system.
This function is an additio-
nal driving aid. However,
the function does not take
the place of the driver.
Therefore, it can under no circums-
tances replace the driver’s responsi-
bility to respect speed limits and to
be vigilant (the driver must always
be ready to brake). Cruise control
must not be used in heavy traffic, on
undulating or slippery roads (black
ice, aquaplaning, gravel) and during
bad weather (fog, rain, side winds
etc.).
There is a risk of accidents.
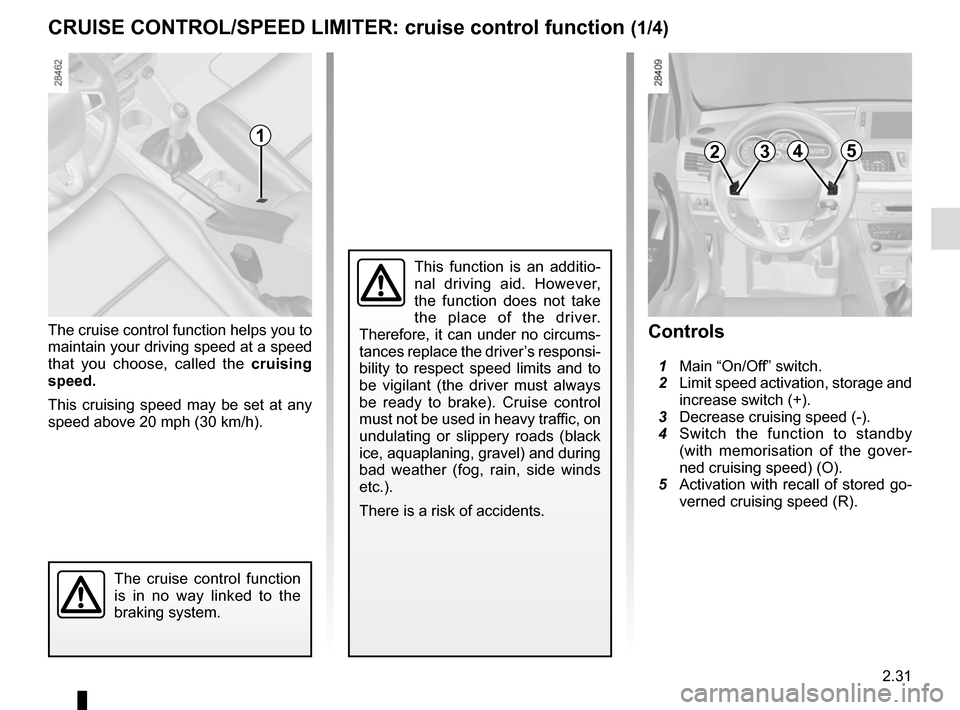
Controls
1 Main “On/Off” switch.
2 Limit speed activation, storage and
increase switch (+).
3 Decrease cruising speed (-).
4 Switch the function to standby
(with memorisation of the gover-
ned cruising speed) (O).
5 Activation with recall of stored go-
verned cruising speed (R).
23541
Page 115 of 236
2.33
Putting the function on
standby
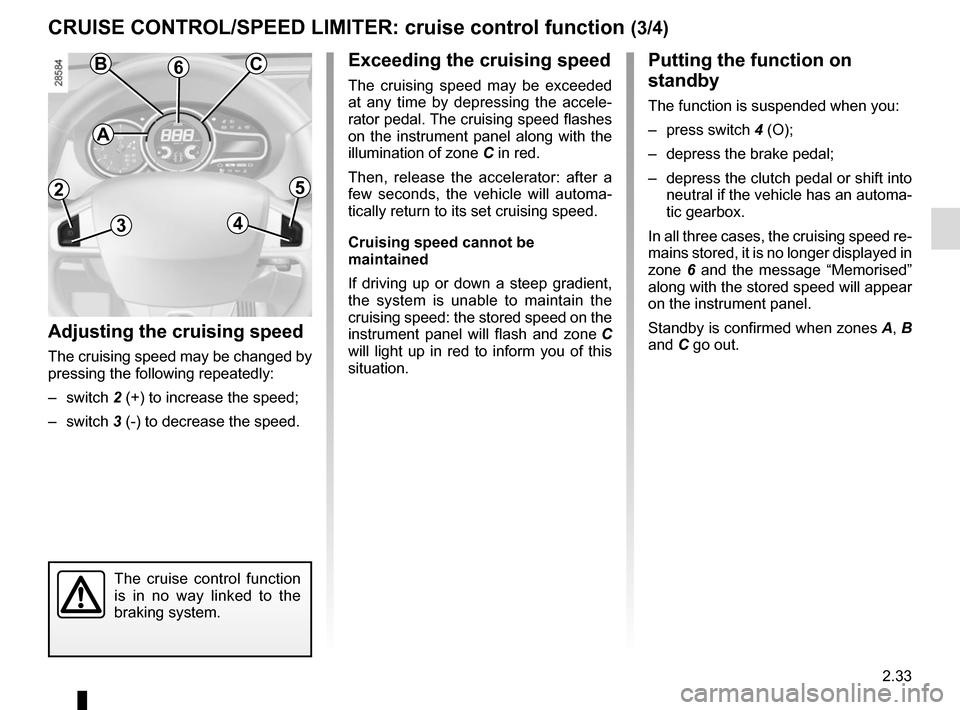
The function is suspended when you:
– press switch 4 (O);
– depress the brake pedal;
– depress the clutch pedal or shift into neutral if the vehicle has an automa-
tic gearbox.
In all three cases, the cruising speed re-
mains stored, it is no longer displayed in
zone 6 and the message “Memorised”
along with the stored speed will appear
on the instrument panel.
Standby is confirmed when zones A, B
and C go out.
Exceeding the cruising speed
The cruising speed may be exceeded
at any time by depressing the accele-
rator pedal. The cruising speed flashes
on the instrument panel along with the
illumination of zone C in red.
Then, release the accelerator: after a
few seconds, the vehicle will automa-
tically return to its set cruising speed.
Cruising speed cannot be
maintained
If driving up or down a steep gradient,
the system is unable to maintain the
cruising speed: the stored speed on the
instrument panel will flash and zone C
will light up in red to inform you of this
situation.
CRUISE CONTROL/SPEED LIMITER: cruise control function (3/4)
Adjusting the cruising speed
The cruising speed may be changed by
pressing the following repeatedly:
– switch 2 (+) to increase the speed;
– switch 3 (-) to decrease the speed.
The cruise control function
is in no way linked to the
braking system.
A
BC6
2
3
5
4
Page 116 of 236

2.34
CRUISE CONTROL/SPEED LIMITER: cruise control function (4/4)
Note: if the speed previously stored is
much higher than the current speed,
the vehicle will accelerate more rapidly
to reach this threshold.
When the cruise control function is
put on standby, pressing switch 2 (+)
reactivates the cruise control func-
tion without taking into account the
stored speed: it is the speed at
which the vehicle is moving that is
taken into account.
Switching off the function
The cruise control function is deactiva-
ted if you press switch 1: in this case a
speed is no longer stored. The instru-
ment panel green indicator light 7 and
zones A , B and C go out, confirming
that the function is deactivated.
Putting the cruise control
on standby or switching it
off does not cause a rapid
reduction in speed: you
must brake by depressing the brake
pedal.
1
Returning to the cruising speed
If a speed is stored, it can be recalled,
once you are sure that the road condi-
tions are suitable (traffic, road surface,
weather conditions, etc.).
Press switch 5 (R) if the vehicle speed
is above 20 mph (30 km/h).
When recalling the stored speed
zone A lights up to confirm activation.
Zone B lights up as soon as the crui-
sing speed is reached.
A
BC
2
3
5
4
7
Page 121 of 236
2.39
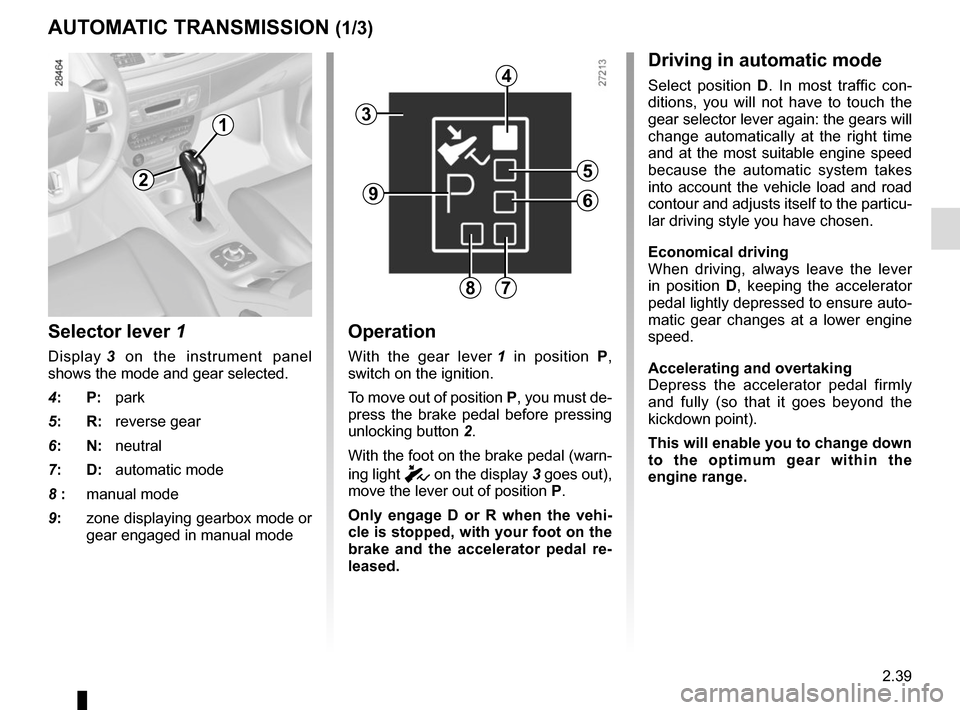
Selector lever 1
Display 3 on the instrument panel
shows the mode and gear selected.
4: P: park
5: R: reverse gear
6: N: neutral
7: D: automatic mode
8 : manual mode
9: zone displaying gearbox mode or
gear engaged in manual mode
Operation
With the gear lever 1 in position P,
switch on the ignition.
To move out of position P, you must de-
press the brake pedal before pressing
unlocking button 2.
With the foot on the brake pedal (warn-
ing light
c on the display 3 goes out),
move the lever out of position P.
Only engage D or R when the vehi-
cle is stopped, with your foot on the
brake and the accelerator pedal re-
leased.
AUTOMATIC TRANSMISSION (1/3)
Driving in automatic mode
Select position D. In most traffic con-
ditions, you will not have to touch the
gear selector lever again: the gears will
change automatically at the right time
and at the most suitable engine speed
because the automatic system takes
into account the vehicle load and road
contour and adjusts itself to the particu-
lar driving style you have chosen.
Economical driving
When driving, always leave the lever
in position D, keeping the accelerator
pedal lightly depressed to ensure auto-
matic gear changes at a lower engine
speed.
Accelerating and overtaking
Depress the accelerator pedal firmly
and fully (so that it goes beyond the
kickdown point).
This will enable you to change down
to the optimum gear within the
engine range.
3
2
1
4
5
6
78
9
Page 122 of 236
2.40
Parking the vehicle
When the vehicle is stopped, move the
lever to position P while keeping your
foot on the brake pedal: the gearbox is
in neutral and the drive wheels are me-
chanically locked by the driveshaft.
Apply the handbrake or, depending
on the vehicle, ensure that the elec-
tronic parking brake is applied.
Special circumstances
– If the road contours and bends
do not allow you to stay in auto-
matic mode (e.g.: in the mountains),
we recommend that you change to
manual mode.
This will prevent the automatic gear-
box from changing gears repeatedly
when climbing, and permit engine
braking on long descents.
– In cold weather, to prevent the
engine from stalling, wait a few mo-
ments before shifting the selector
lever from position P or N and en-
gaging D or R.
Driving in manual mode
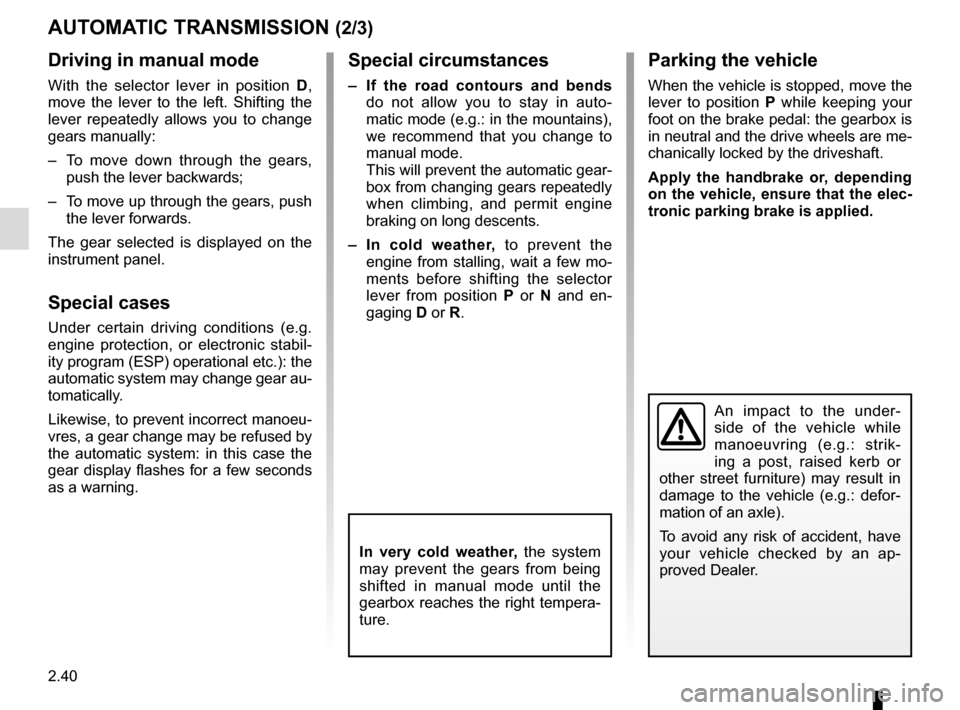
With the selector lever in position D,
move the lever to the left. Shifting the
lever repeatedly allows you to change
gears manually:
– To move down through the gears, push the lever backwards;
– To move up through the gears, push the lever forwards.
The gear selected is displayed on the
instrument panel.
Special cases
Under certain driving conditions (e.g.
engine protection, or electronic stabil-
ity program (ESP) operational etc.): the
automatic system may change gear au-
tomatically.
Likewise, to prevent incorrect manoeu-
vres, a gear change may be refused by
the automatic system: in this case the
gear display flashes for a few seconds
as a warning.
AUTOMATIC TRANSMISSION (2/3)
In very cold weather, the system
may prevent the gears from being
shifted in manual mode until the
gearbox reaches the right tempera-
ture.
An impact to the under-
side of the vehicle while
manoeuvring (e.g.: strik-
ing a post, raised kerb or
other street furniture) may result in
damage to the vehicle (e.g.: defor-
mation of an axle).
To avoid any risk of accident, have
your vehicle checked by an ap-
proved Dealer.
Page 123 of 236
2.41
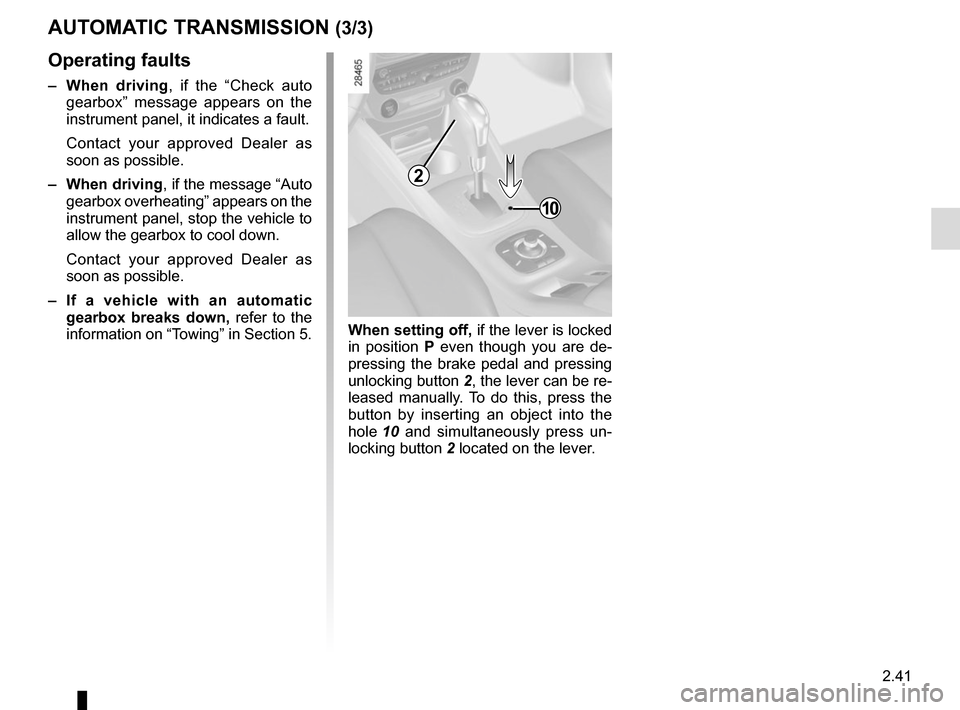
When setting off, if the lever is locked
in position P even though you are de-
pressing the brake pedal and pressing
unlocking button 2, the lever can be re-
leased manually. To do this, press the
button by inserting an object into the
hole 10 and simultaneously press un-
locking button 2 located on the lever.
AUTOMATIC TRANSMISSION (3/3)
Operating faults
– When driving , if the “Check auto
gearbox” message appears on the
instrument panel, it indicates a fault.
Contact your approved Dealer as
soon as possible.
– When driving , if the message “Auto
gearbox overheating” appears on the
instrument panel, stop the vehicle to
allow the gearbox to cool down.
Contact your approved Dealer as
soon as possible.
– If a vehicle with an automatic
gearbox breaks down, refer to the
information on “Towing” in Section 5.
10
2
Page 151 of 236
3.27
Always position the heavi-
est items directly on the
floor. Use the lashing points
on the floor of the luggage
compartment, if these are fitted to
the vehicle. The luggage should be
loaded in such a way that no items
will be thrown forward and strike the
occupants if the driver has to brake
suddenly. Fasten the rear seat belts,
even if the seats are not occupied.
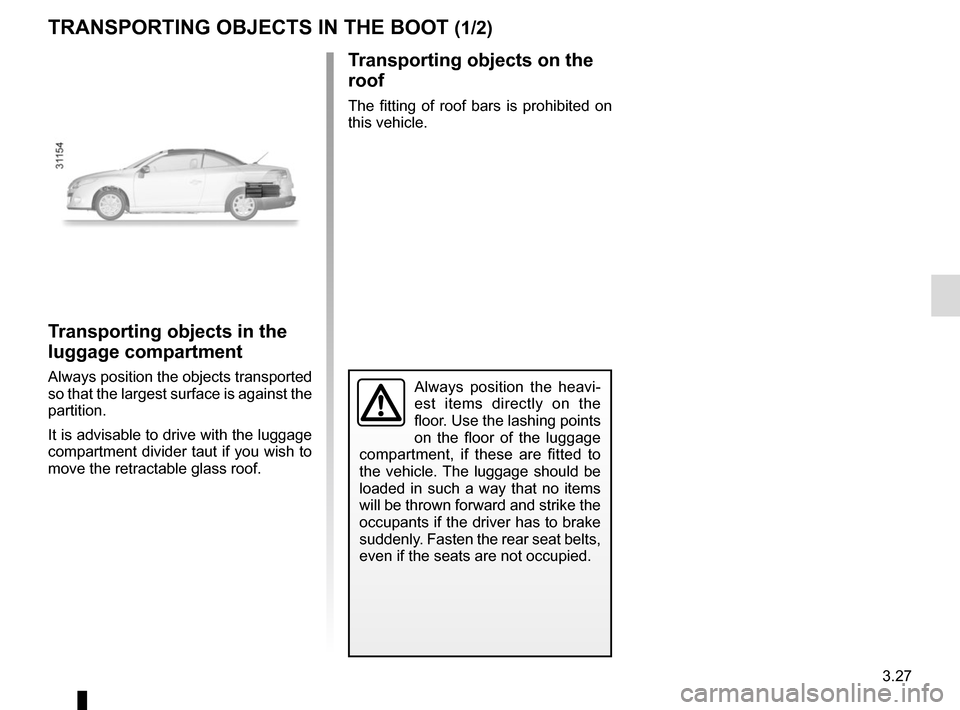
Transporting objects in the
luggage compartment
Always position the objects transported
so that the largest surface is against the
partition.
It is advisable to drive with the luggage
compartment divider taut if you wish to
move the retractable glass roof.
Transporting objects on the
roof
The fitting of roof bars is prohibited on
this vehicle.
TRANSPORTING OBJECTS IN THE BOOT (1/2)
Page 152 of 236
3.28
TRANSPORTING OBJECTS IN THE BOOT (2/2)/TOWING
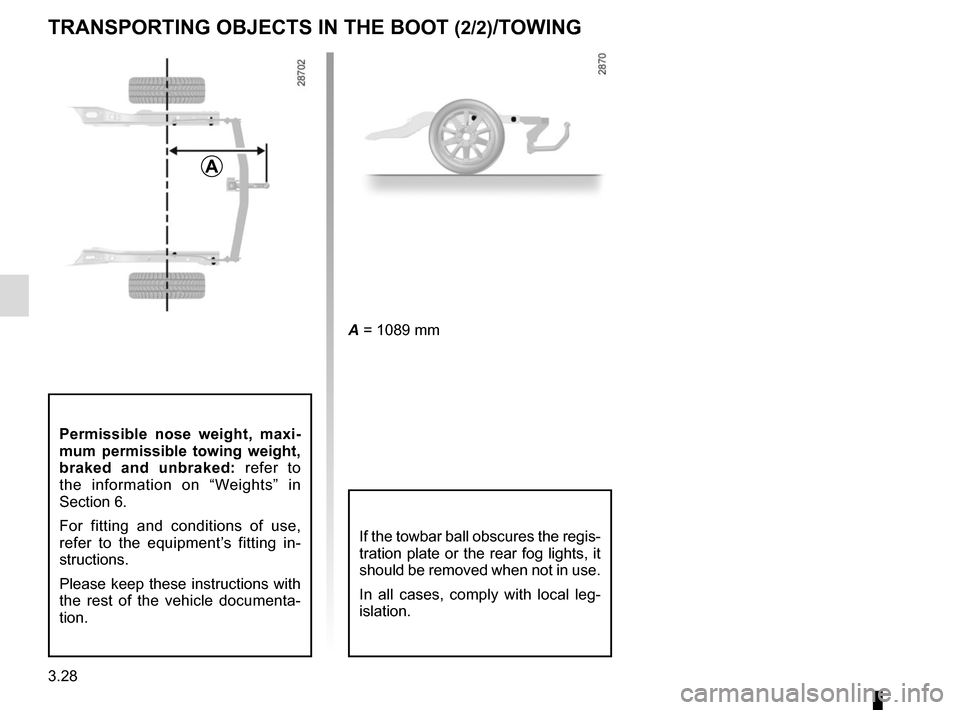
A = 1089 mm
Permissible nose weight, maxi-
mum permissible towing weight,
braked and unbraked: refer to
the information on “Weights” in
Section 6.
For fitting and conditions of use,
refer to the equipment’s fitting in-
structions.
Please keep these instructions with
the rest of the vehicle documenta-
tion.
If the towbar ball obscures the regis-
tration plate or the rear fog lights, it
should be removed when not in use.
In all cases, comply with local leg-
islation.
A
Page 155 of 236

4.1
Section 4: Maintenance
Bonnet . . . . . . . . . . . . . . . . . . . . . . . . . . . . . . . . . . . . \
. . . . . . . . . . . . . . . . . . . . . . . . . . . . . . . . . . . . 4.2
Engine oil level: . . . . . . . . . . . . . . . . . . . . . . . . . . . . . . . . . . . . \
. . . . . . . . . . . . . . . . . . . . . . . . . . . . . 4.4general information . . . . . . . . . . . . . . . . . . . . . . . . . . . . . . . . . . . . \
. . . . . . . . . . . . . . . . . . . . 4.4
topping up, filling . . . . . . . . . . . . . . . . . . . . . . . . . . . . . . . . . . . .\
. . . . . . . . . . . . . . . . . . . . . 4.6
Engine oil change . . . . . . . . . . . . . . . . . . . . . . . . . . . . . . . . . . . .\
. . . . . . . . . . . . . . . . . . . . . . . . . . . 4.8
Levels: . . . . . . . . . . . . . . . . . . . . . . . . . . . . . . . . . . . . \
. . . . . . . . . . . . . . . . . . . . . . . . . . . . . . . . . . . . 4.9 engine coolant . . . . . . . . . . . . . . . . . . . . . . . . . . . . . . . . . . . .\
. . . . . . . . . . . . . . . . . . . . . . . 4.9
brake fluid . . . . . . . . . . . . . . . . . . . . . . . . . . . . . . . . . . . . \
. . . . . . . . . . . . . . . . . . . . . . . . . . . 4.10
windscreen/headlight washer reservoir . . . . . . . . . . . . . . . . . . . . . . . . . . . . . . . . . . . .\
. . . . 4.11
Filters . . . . . . . . . . . . . . . . . . . . . . . . . . . . . . . . . . . . \
. . . . . . . . . . . . . . . . . . . . . . . . . . . . . . . . . . . . . 4.11
Tyre pressure. . . . . . . . . . . . . . . . . . . . . . . . . . . . . . \
. . . . . . . . . . . . . . . . . . . . . . . . . . . . . . . . . . . . . 4.12
Battery . . . . . . . . . . . . . . . . . . . . . . . . . . . . . . . . . . . . \
. . . . . . . . . . . . . . . . . . . . . . . . . . . . . . . . . . . . 4.13
Bodywork maintenance . . . . . . . . . . . . . . . . . . . . . . . . . . . . . . . . . . . . \
. . . . . . . . . . . . . . . . . . . . . . . 4.15
Interior trim maintenance . . . . . . . . . . . . . . . . . . . . . . . . . . . . . . . . . . . . \
. . . . . . . . . . . . . . . . . . . . . . 4.17
Page 164 of 236
4.10
LEVELS (2/3)
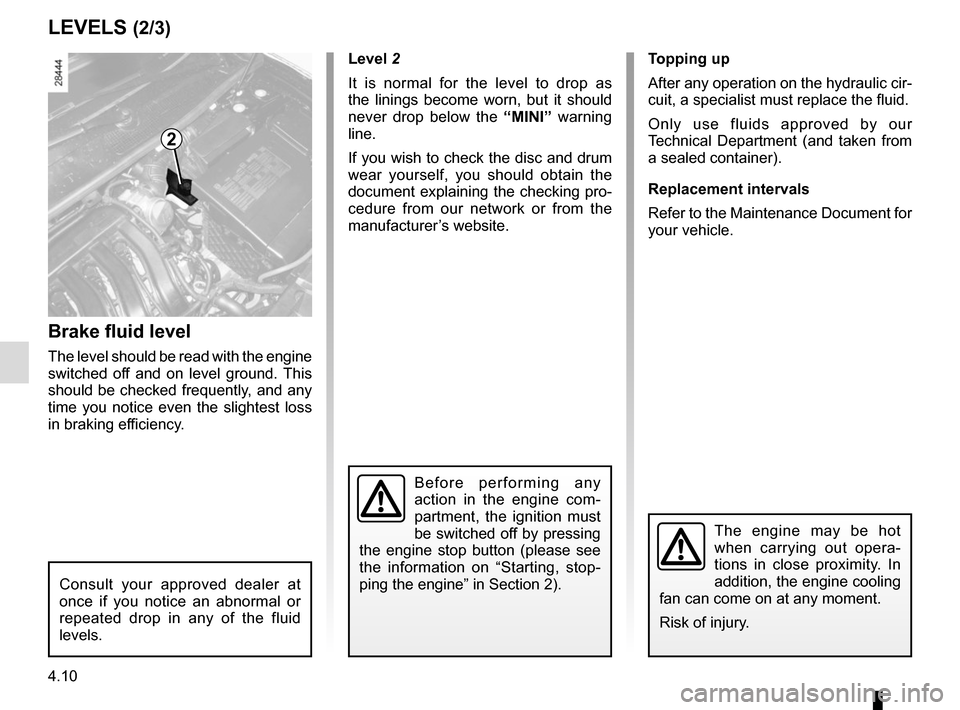
Brake fluid level
The level should be read with the engine
switched off and on level ground. This
should be checked frequently, and any
time you notice even the slightest loss
in braking efficiency. Level 2
It is normal for the level to drop as
the linings become worn, but it should
never drop below the “MINI” warning
line.
If you wish to check the disc and drum
wear yourself, you should obtain the
document explaining the checking pro-
cedure from our network or from the
manufacturer’s website. Topping up
After any operation on the hydraulic cir-
cuit, a specialist must replace the fluid.
Only use fluids approved by our
Technical Department (and taken from
a sealed container).
Replacement intervals
Refer to the Maintenance Document for
your vehicle.
2
Consult your approved dealer at
once if you notice an abnormal or
repeated drop in any of the fluid
levels.
Before performing any
action in the engine com-
partment, the ignition must
be switched off by pressing
the engine stop button (please see
the information on “Starting, stop-
ping the engine” in Section 2).
The engine may be hot
when carrying out opera-
tions in close proximity. In
addition, the engine cooling
fan can come on at any moment.
Risk of injury.