headlights RENAULT SCENIC 2017 J95 / 3.G User Guide
[x] Cancel search | Manufacturer: RENAULT, Model Year: 2017, Model line: SCENIC, Model: RENAULT SCENIC 2017 J95 / 3.GPages: 358, PDF Size: 10.42 MB
Page 107 of 358
1.101
HEADLIGHT BEAM ADJUSTMENT
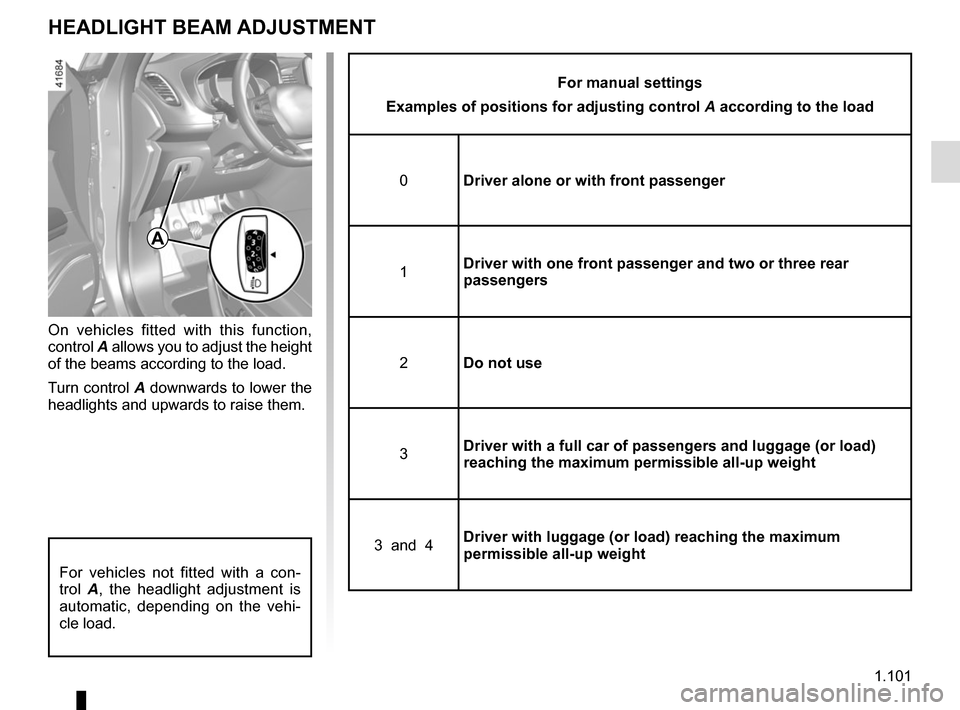
On vehicles fitted with this function,
control A allows you to adjust the height
of the beams according to the load.
Turn control A downwards to lower the
headlights and upwards to raise them.
A
For vehicles not fitted with a con-
trol A, the headlight adjustment is
automatic, depending on the vehi-
cle load.
For manual settings
Examples of positions for adjusting control A according to the load
0 Driver alone or with front passenger
1 Driver with one front passenger and two or three rear
passengers
2 Do not use
3 Driver with a full car of passengers and luggage (or load)
reaching the maximum permissible all-up weight
3 and 4 Driver with luggage (or load) reaching the maximum
permissible all-up weight
Page 113 of 358
1.107
WINDSCREEN WASH/WIPE (6/6)
Note:
To ensure the headlight washers op-
erate correctly in winter, remove snow
from the jet trims and de-ice the jet
trims using an aerosol de-icer.
You are recommended to regularly
remove dirt encrusted on the headlight
glass.
When the windscreen washer fluid level
reaches minimum:
– the message “Windscreen wash fluid shortage” is displayed on the instru-
ment panel;
– the headlight washer system may be deprimed.
Fill the windscreen washer fluid and
then activate the windscreen washer,
with the engine running , to reprime
the system.
Headlight washers
Headlights on
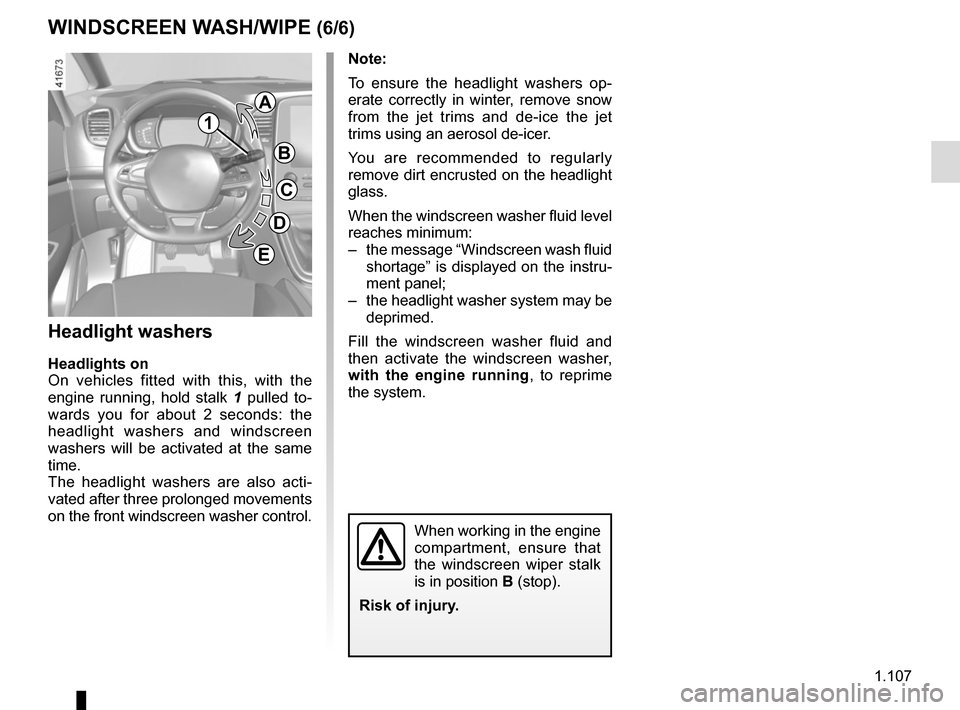
On vehicles fitted with this, with the
engine running, hold stalk 1 pulled to-
wards you for about 2 seconds: the
headlight washers and windscreen
washers will be activated at the same
time.
The headlight washers are also acti-
vated after three prolonged movements
on the front windscreen washer control.
When working in the engine
compartment, ensure that
the windscreen wiper stalk
is in position B (stop).
Risk of injury.
1
A
B
C
D
E
Page 138 of 358
2.20
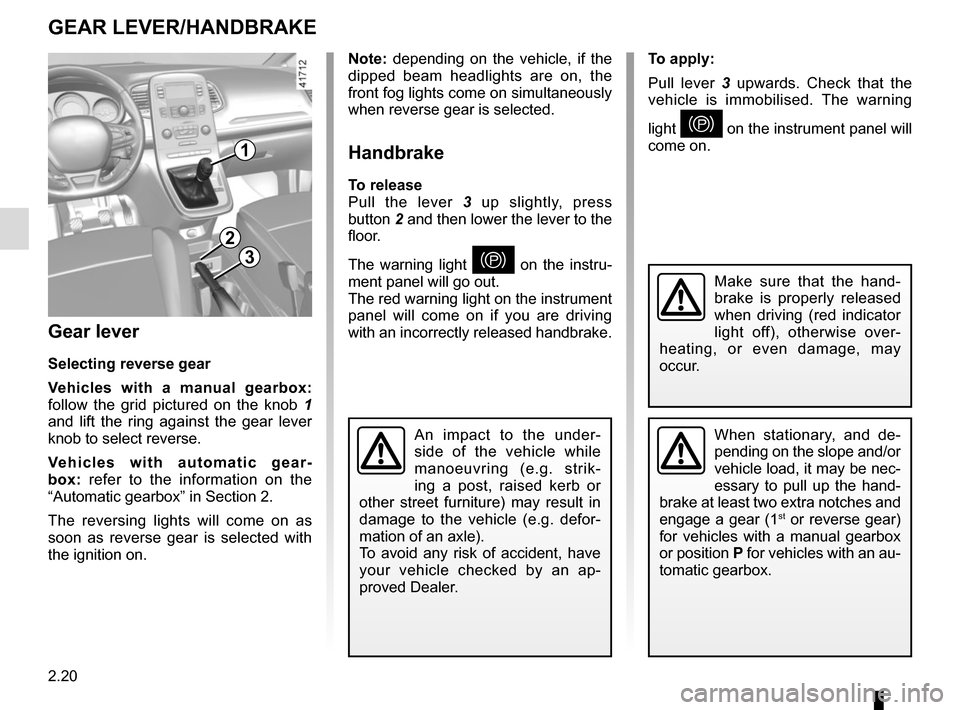
To apply:
Pull lever 3 upwards. Check that the
vehicle is immobilised. The warning
light
} on the instrument panel will
come on.
Gear lever
Selecting reverse gear
Vehicles with a manual gearbox:
follow the grid pictured on the knob 1
and lift the ring against the gear lever
knob to select reverse.
Vehicles with automatic gear-
box: refer to the information on the
“Automatic gearbox” in Section 2.
The reversing lights will come on as
soon as reverse gear is selected with
the ignition on.
1
GEAR LEVER/HANDBRAKE
Note: depending on the vehicle, if the
dipped beam headlights are on, the
front fog lights come on simultaneously
when reverse gear is selected.
Handbrake
To release
Pull the lever 3 up slightly, press
button 2 and then lower the lever to the
floor.
The warning light
} on the instru-
ment panel will go out.
The red warning light on the instrument
panel will come on if you are driving
with an incorrectly released handbrake.3
2
When stationary, and de-
pending on the slope and/or
vehicle load, it may be nec-
essary to pull up the hand-
brake at least two extra notches and
engage a gear (1
st or reverse gear)
for vehicles with a manual gearbox
or position P for vehicles with an au-
tomatic gearbox.
An impact to the under-
side of the vehicle while
manoeuvring (e.g. strik-
ing a post, raised kerb or
other street furniture) may result in
damage to the vehicle (e.g. defor-
mation of an axle).
To avoid any risk of accident, have
your vehicle checked by an ap-
proved Dealer.
Make sure that the hand-
brake is properly released
when driving (red indicator
light off), otherwise over-
heating, or even damage, may
occur.
Page 162 of 358
2.44
ACTIVE EMERGENCY BRAKING (5/7)
Conditions for non-activation
of the system
The system cannot be activated:
– when the gear lever is in neutral;
– when the parking brake is activated;
– while cornering.
As a general rule, if the driver shows
signs of attention (action on the steering
wheel, pedals etc.), the system delays
its operation or does not activate.
Operating faults
When the system detects an operating
fault, the
\b warning light lights up
on the instrument panel, with the mes-
sage “Active braking disconnected”.
Consult an approved dealer
Temporarily not available
When the system detects a tempo-
rary unavailability, the
\b warning
light lights up on the instrument panel
accompanied by the message “Active
braking: sensor blind” or, depending on
the vehicle, “Radar-camera: no visibil-
ity”.
The possible causes are:
– the system is temporarily blinded (glare from the sun, dipped beam
headlights, bad weather conditions
etc.). The system will be operational
again when visibility conditions are
better.
– The system is temporarily disrupted (for example: windscreen obscured
by dirt, ice, snow etc.). In this case,
park the vehicle and switch off the
engine. Clean the windscreen. When
you next start the engine, the warn-
ing light and the message go out.
– If this is not the case, this may arise from another cause; contact an
Approved Dealer.
Page 283 of 358
4.15
Respect local regulations about wash-
ing vehicles (e.g. do not wash your ve-
hicle on a public highway).
Observe the vehicle stopping distances
when driving on gravelled surfaces to
prevent paint damage.
Repair, or have repaired quickly, areas
where the paint has been damaged, to
prevent corrosion spreading.
Remember to visit the body shop pe-
riodically in order to maintain your
anti-corrosion warranty. Refer to the
Maintenance Document.
If it is necessary to clean mechani-
cal components, hinges, etc., spray
them with products approved by our
Technical Department to protect them
after they have been cleaned.
BODYWORK MAINTENANCE (2/2)
We have selected special products
to care for your vehicle and you can
obtain these from the manufactur-
er’s accessory outlets.
Using a roller type car wash
Return the windscreen wiper stalk to
the Park position (refer to the informa-
tion on the “Windscreen washer, wiper”
in Section 1). Check the mounting of
external accessories, additional lights
and mirrors, and ensure that the wiper
blades are secured with adhesive tape.
Remove the radio aerial mast if your
vehicle is fitted with this equipment.
Remember to remove the tape and refit
the antenna after washing.
Cleaning the headlights
As the headlights are made of plastic
“glass”, use a soft cloth or cotton wool
to clean them. If this does not clean
them properly, moisten the cloth with
soapy water, then wipe clean with a soft
damp cloth or cotton wool.
Finally, carefully dry off with a soft dry
cloth.
Cleaning products containing alco-
hol must not be used.
Vehicles with a matte paint
finish
This type of paint requires certain pre-
cautions.
Do not do the following
– use wax-based products (polishing);
– rub hard;
– wash the vehicle in a roller-type car
wash;
– wash the vehicle using a high-pres-
sure device;
– attach stickers to the paintwork (risk
of leaving marks).
You should do the following
Wash the vehicle by hand using plenty
of water, using a soft cloth or a gentle
sponge.
Page 287 of 358

5.1
Section 5: Practical advice
Puncture/emergency spare wheel . . . . . . . . . . . . . . . . . . . . . . . . . . . . . . . . . . . . \
. . . . . . . . . . . . . . . 5.2
Tyre inflation kit . . . . . . . . . . . . . . . . . . . . . . . . . . . . . . . . . . . .\
. . . . . . . . . . . . . . . . . . . . . . . . . . . . . 5.5
Tools . . . . . . . . . . . . . . . . . . . . . . . . . . . . . . . . . . . .\
. . . . . . . . . . . . . . . . . . . . . . . . . . . . . . . . . . . . . 5.9
Wheel trim . . . . . . . . . . . . . . . . . . . . . . . . . . . . . . . . . . . . \
. . . . . . . . . . . . . . . . . . . . . . . . . . . . . . . . . 5.11
Changing a wheel . . . . . . . . . . . . . . . . . . . . . . . . . . . . . . . . . . . .\
. . . . . . . . . . . . . . . . . . . . . . . . . . . 5.12
Tyres (tyre and wheel safety, use in winter) . . . . . . . . . . . . . . . . . . . . . . . . . . . . . . . . . . . .\
. . . . . . . 5.14
Headlights (changing bulbs) . . . . . . . . . . . . . . . . . . . . . . . . . . . . . . . . . . . .\
. . . . . . . . . . . . . . . . . . . 5.17
Rear lights (changing bulbs) . . . . . . . . . . . . . . . . . . . . . . . . . . . . . . . . . . . .\
. . . . . . . . . . . . . . . . . . . 5.19
Indicator lights (changing bulbs) . . . . . . . . . . . . . . . . . . . . . . . . . . . . . . . . . . . .\
. . . . . . . . . . . . . . . . 5.23
interior lighting:
Fuses . . . . . . . . . . . . . . . . . . . . . . . . . . . . . . . . . . . . \
. . . . . . . . . . . . . . . . . . . . . . . . . . . . . . . . . . . . . 5.27
Battery: troubleshooting. . . . . . . . . . . . . . . . . . . . . . . . . . . . . . . . . . . . \
. . . . . . . . . . . . . . . . . . . . . . . 5.29
RENAULT card: battery . . . . . . . . . . . . . . . . . . . . . . . . . . . . . . . . . . . . \
. . . . . . . . . . . . . . . . . . . . . . . 5.31
Radio frequency remote control: batteries. . . . . . . . . . . . . . . . . . . . . . . . . . . . . . . . . . . . \
. . . . . . . . . 5.32
Accessories . . . . . . . . . . . . . . . . . . . . . . . . . . . . . . . . . . . . \
. . . . . . . . . . . . . . . . . . . . . . . . . . . . . . . . 5.33
Wipers (replacing blades) . . . . . . . . . . . . . . . . . . . . . . . . . . . . . . . . . . . .\
. . . . . . . . . . . . . . . . . . . . . 5.34
Towing: breakdown . . . . . . . . . . . . . . . . . . . . . . . . . . . . . . . . . . . .\
. . . . . . . . . . . . . . . . . . . . . . . . . . 5.36
Tow eye . . . . . . . . . . . . . . . . . . . . . . . . . . . . . . . . . . . . \
. . . . . . . . . . . . . . . . . . . . . . . . . . . . . . . . . . . 5.37
Operating faults . . . . . . . . . . . . . . . . . . . . . . . . . . . . . . . . . . . . \
. . . . . . . . . . . . . . . . . . . . . . . . . . . . . 5.38
Page 303 of 358
5.17
HEADLIGHTS: changing bulbs (1/2)
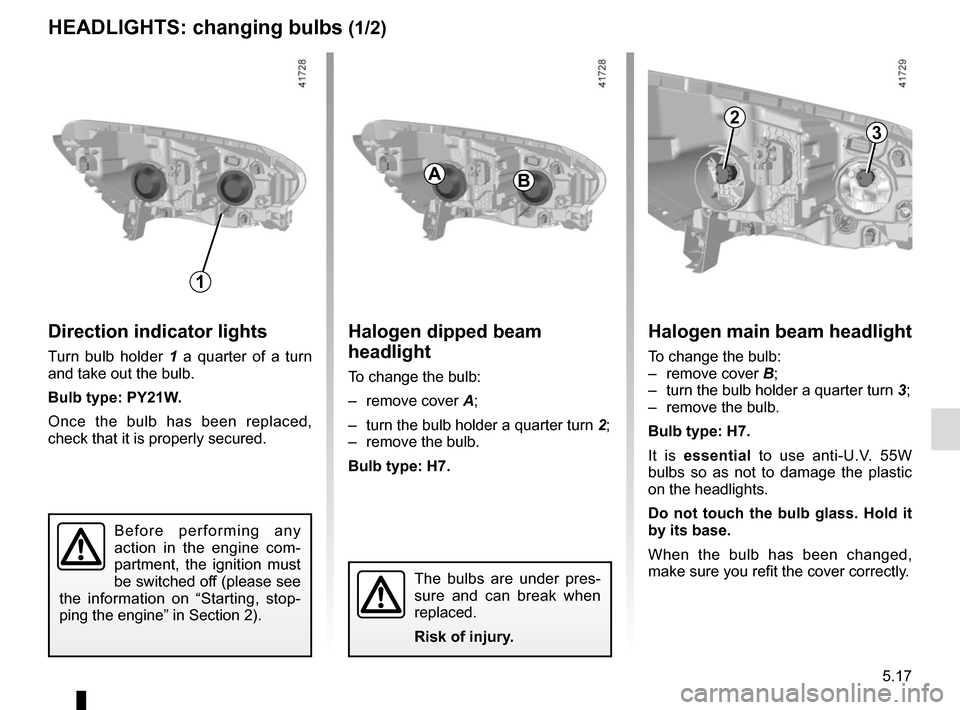
Direction indicator lights
Turn bulb holder 1 a quarter of a turn
and take out the bulb.
Bulb type: PY21W.
Once the bulb has been replaced,
check that it is properly secured.
1
The bulbs are under pres-
sure and can break when
replaced.
Risk of injury.
Before performing any
action in the engine com-
partment, the ignition must
be switched off (please see
the information on “Starting, stop-
ping the engine” in Section 2).
BA
Halogen dipped beam
headlight
To change the bulb:
– remove cover A;
– turn the bulb holder a quarter turn 2;
– remove the bulb.
Bulb type: H7.
23
Halogen main beam headlight
To change the bulb:
– remove cover B;
– turn the bulb holder a quarter turn 3;
– remove the bulb.
Bulb type: H7.
It is essential to use anti-U.V. 55W
bulbs so as not to damage the plastic
on the headlights.
Do not touch the bulb glass. Hold it
by its base.
When the bulb has been changed,
make sure you refit the cover correctly.
Page 304 of 358
5.18
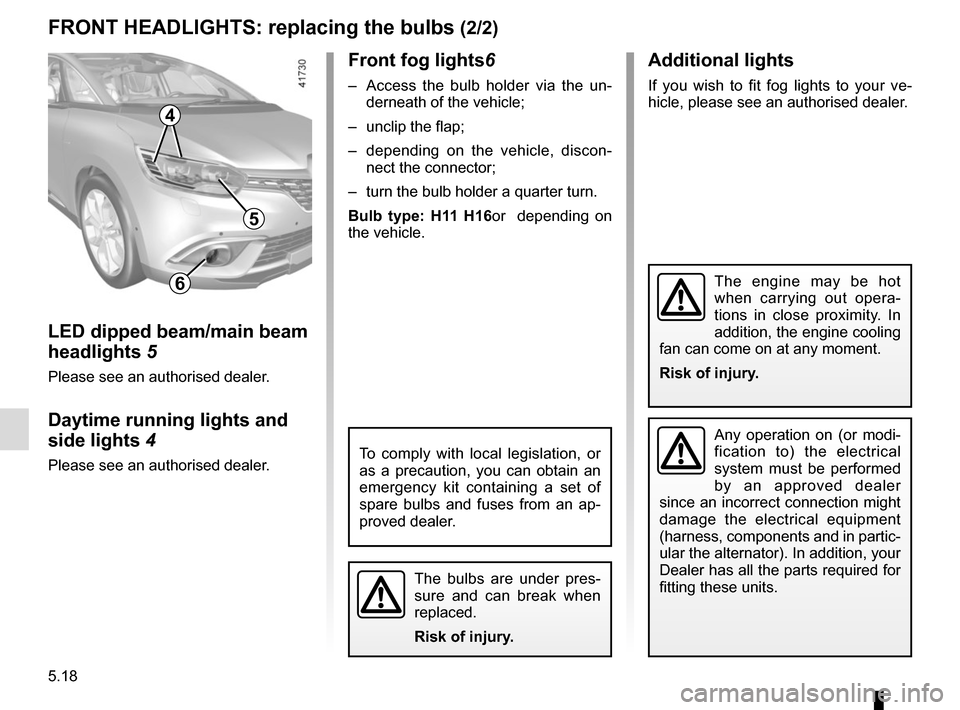
Front fog lights6
– Access the bulb holder via the un-
derneath of the vehicle;
– unclip the flap;
– depending on the vehicle, discon- nect the connector;
– turn the bulb holder a quarter turn.
Bulb type: H11 H16or depending on
the vehicle.
The bulbs are under pres-
sure and can break when
replaced.
Risk of injury.
FRONT HEADLIGHTS: replacing the bulbs (2/2)
To comply with local legislation, or
as a precaution, you can obtain an
emergency kit containing a set of
spare bulbs and fuses from an ap-
proved dealer.
Any operation on (or modi-
fication to) the electrical
system must be performed
by an approved dealer
since an incorrect connection might
damage the electrical equipment
(harness, components and in partic-
ular the alternator). In addition, your
Dealer has all the parts required for
fitting these units.
LED dipped beam/main beam
headlights 5
Please see an authorised dealer.
Daytime running lights and
side lights 4
Please see an authorised dealer.
6
Additional lights
If you wish to fit fog lights to your ve-
hicle, please see an authorised dealer.
4
5
The engine may be hot
when carrying out opera-
tions in close proximity. In
addition, the engine cooling
fan can come on at any moment.
Risk of injury.
Page 329 of 358
5.43
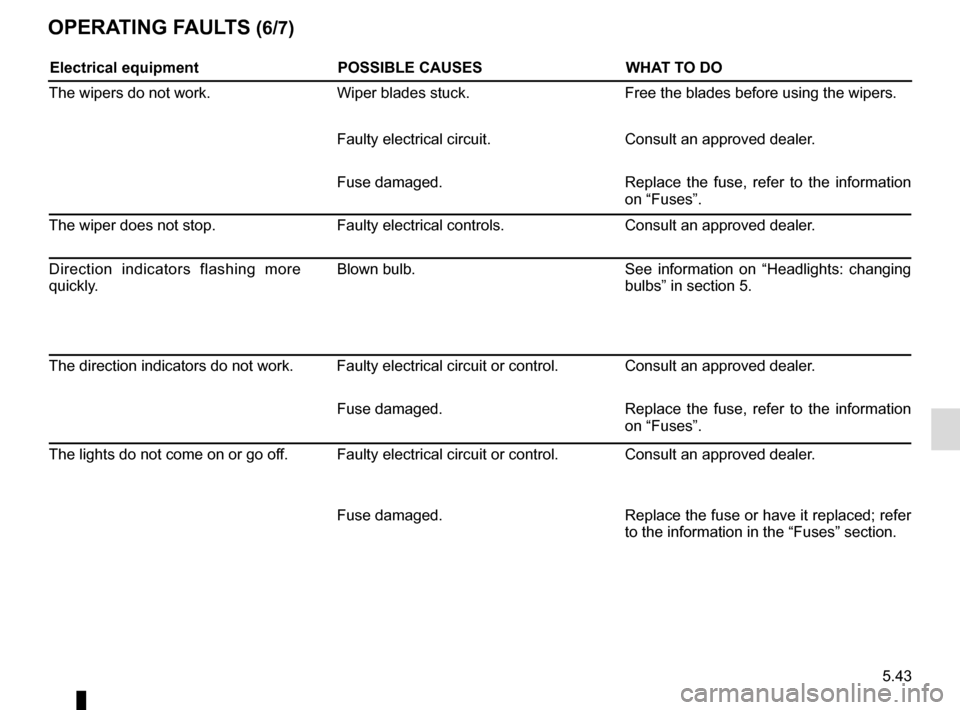
OPERATING FAULTS (6/7)
Electrical equipmentPOSSIBLE CAUSESWHAT TO DO
The wipers do not work. Wiper blades stuck. Free the blades before using the wipers.
Faulty electrical circuit. Consult an approved dealer.
Fuse damaged. Replace the fuse, refer to the information
on “Fuses”.
The wiper does not stop. Faulty electrical controls.Consult an approved dealer.
Direction indicators flashing more
quickly. Blown bulb.
See information on “Headlights: changing
bulbs” in section 5.
The direction indicators do not work. Faulty electrical circuit or control. Consult an approved dealer. Fuse damaged. Replace the fuse, refer to the information
on “Fuses”.
The lights do not come on or go off. Faulty electrical circuit or control. Consult an approved dealer.
Fuse damaged.Replace the fuse or have it replaced; refer
to the information in the “Fuses” section.
Page 354 of 358
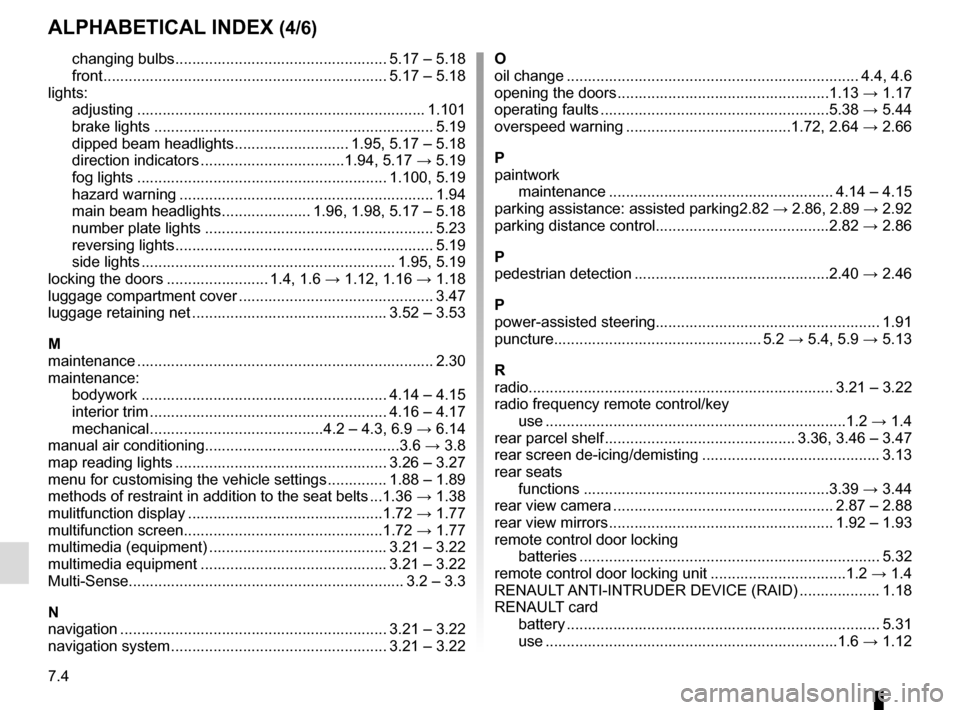
7.4
ALPHABETICAL INDEX (4/6)
changing bulbs .................................................. 5.17 – 5.18
front ................................................................... 5.17 – 5.18
lights: adjusting ..............................................................\
...... 1.101
brake lights .................................................................. 5.19
dipped beam headlights ........................... 1.95, 5.17 – 5.18
direction indicators ..................................1.94, 5.17 → 5.19
fog lights ........................................................... 1.100, 5.19
hazard warning ............................................................ 1.94
main beam headlights ..................... 1.96, 1.98, 5.17 – 5.18
number plate lights ...................................................... 5.23
reversing lights ............................................................. 5.19
side lights ............................................................ 1.95, 5.19
locking the doors ........................ 1.4, 1.6 → 1.12, 1.16 → 1.18
luggage compartment cover .............................................. 3.47
luggage retaining net .............................................. 3.52 – 3.53
M
maintenance ............................................................\
.......... 2.30
maintenance: bodywork .......................................................... 4.14 – 4.15
interior trim ........................................................ 4.16 – 4.17
mechanical .........................................4.2 – 4.3, 6.9 → 6.14
manual air conditioning..............................................3.6 → 3.8
map reading lights .................................................. 3.26 – 3.27
menu for customising the vehicle settings .............. 1.88 – 1.89
methods of restraint in addition to the seat belts ...1.36 → 1.38
mulitfunction display ..............................................1.72 → 1.77
multifunction screen...............................................1.72 → 1.77
multimedia (equipment) .......................................... 3.21 – 3.22
multimedia equipment ............................................ 3.21 – 3.22
Multi-Sense................................................................. 3.2 – 3.3
N
navigation ............................................................... 3.21 – 3.22
navigation system ................................................... 3.21 – 3.22 O
oil change ..................................................................... 4.4, 4.6
opening the doors ..................................................1.13
→ 1.17
operating faults ......................................................5.38 → 5.44
overspeed warning .......................................1.72, 2.64 → 2.66
P
paintwork maintenance ..................................................... 4.14 – 4.15
parking assistance: assisted parking 2.82 → 2.86, 2.89 → 2.92
parking distance control.........................................2.82 → 2.86
P
pedestrian detection ..............................................2.40 → 2.46
P
power-assisted steering..................................................... 1.91
puncture................................................. 5.2 → 5.4, 5.9 → 5.13
R
radio........................................................................\
3.21 – 3.22
radio frequency remote control/key use ....................................................................\
...1.2 → 1.4
rear parcel shelf ............................................. 3.36, 3.46 – 3.47
rear screen de-icing/demisting .......................................... 3.13
rear seats functions ..........................................................3.39 → 3.44
rear view camera .................................................... 2.87 – 2.88
rear view mirrors ..................................................... 1.92 – 1.93
remote control door locking batteries ..............................................................\
......... 5.32
remote control door locking unit ................................1.2 → 1.4
RENAULT ANTI-INTRUDER DEVICE (RAID) ................... 1.18
RENAULT card battery ................................................................\
.......... 5.31
use ....................................................................\
.1.6 → 1.12