RENAULT SCENIC 2018 Owners Manual
SCENIC 2018
RENAULT
RENAULT
https://www.carmanualsonline.info/img/7/58406/w960_58406-0.png
RENAULT SCENIC 2018 Owners Manual
Trending: bonnet, oil reset, remote control, oil, jump start, steering, light
Page 311 of 364
5.19
REAR LIGHTS AND SIDE LIGHTS: replacing the bulbs (1/5)
Direction indicator lights/
brake and side lights
Short chassis version
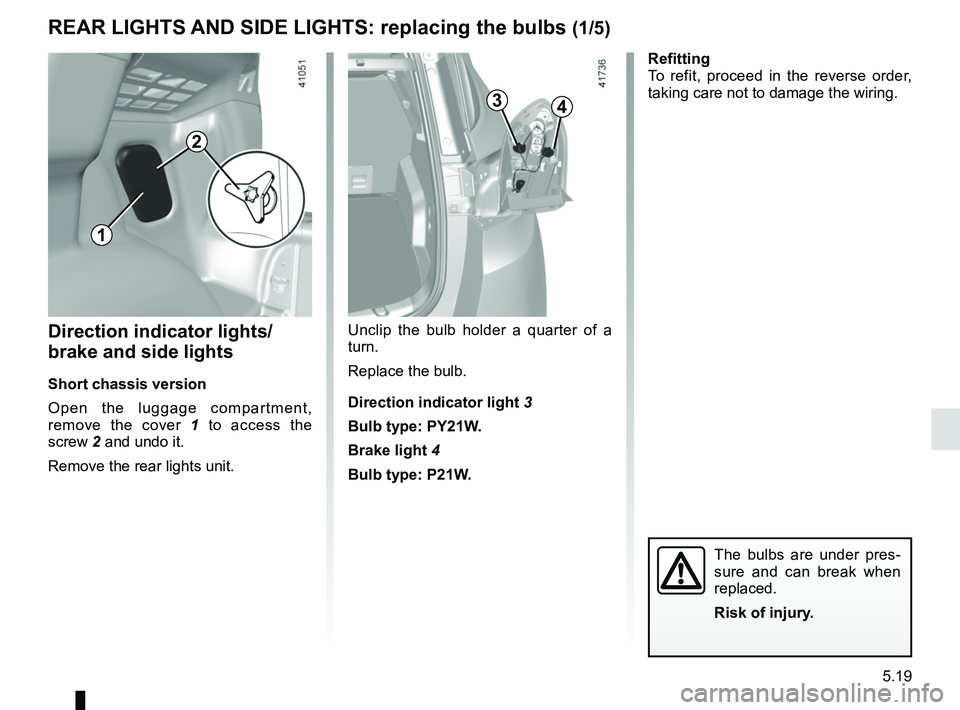
Open the luggage compartment,
remove the cover 1 to access the
screw 2 and undo it.
Remove the rear lights unit.
The bulbs are under pres-
sure and can break when
replaced.
Risk of injury.
Refitting
To refit, proceed in the reverse order,
taking care not to damage the wiring.
34
Unclip the bulb holder a quarter of a
turn.
Replace the bulb.
Direction indicator light 3
Bulb type: PY21W. Brake light 4
Bulb type: P21W.
1
2
Page 312 of 364
5.20
REAR LIGHTS AND SIDE LIGHTS: replacing the bulbs (2/5)
Direction indicator lights/
brake and side lights
(continued)
Long chassis version
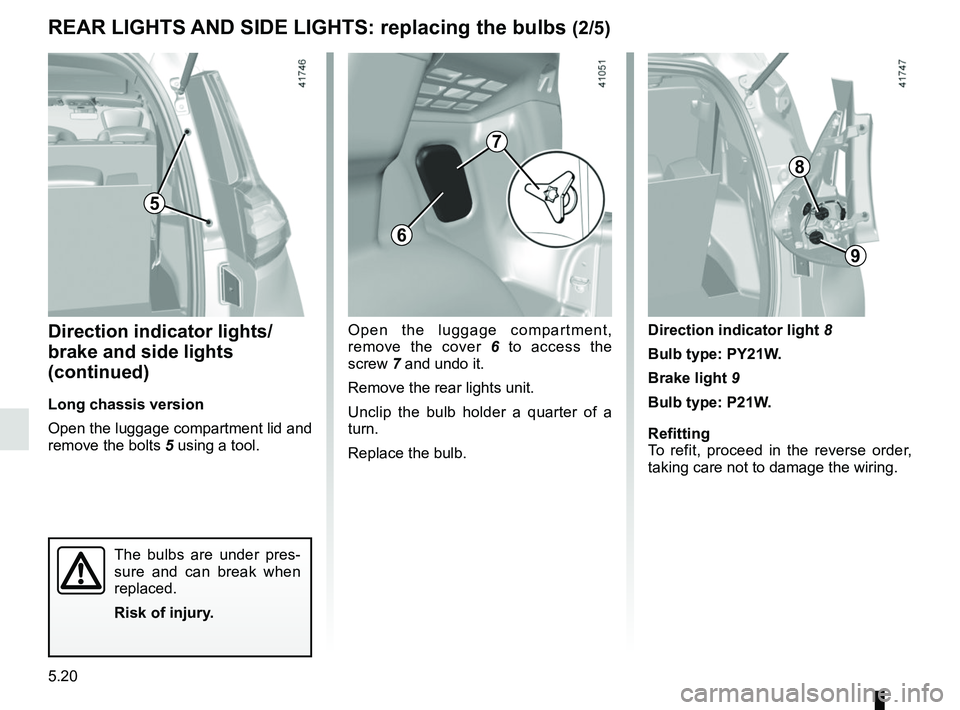
Open the luggage compartment lid and
remove the bolts 5 using a tool.
The bulbs are under pres-
sure and can break when
replaced.
Risk of injury.
Open the luggage compartment,
remove the cover 6 to access the
screw 7 and undo it.
Remove the rear lights unit.
Unclip the bulb holder a quarter of a
turn.
Replace the bulb.
8
9
Direction indicator light 8
Bulb type: PY21W.
Brake light 9
Bulb type: P21W.
Refitting
To refit, proceed in the reverse order,
taking care not to damage the wiring.
5
6
7
Page 313 of 364
5.21
Reversing lights
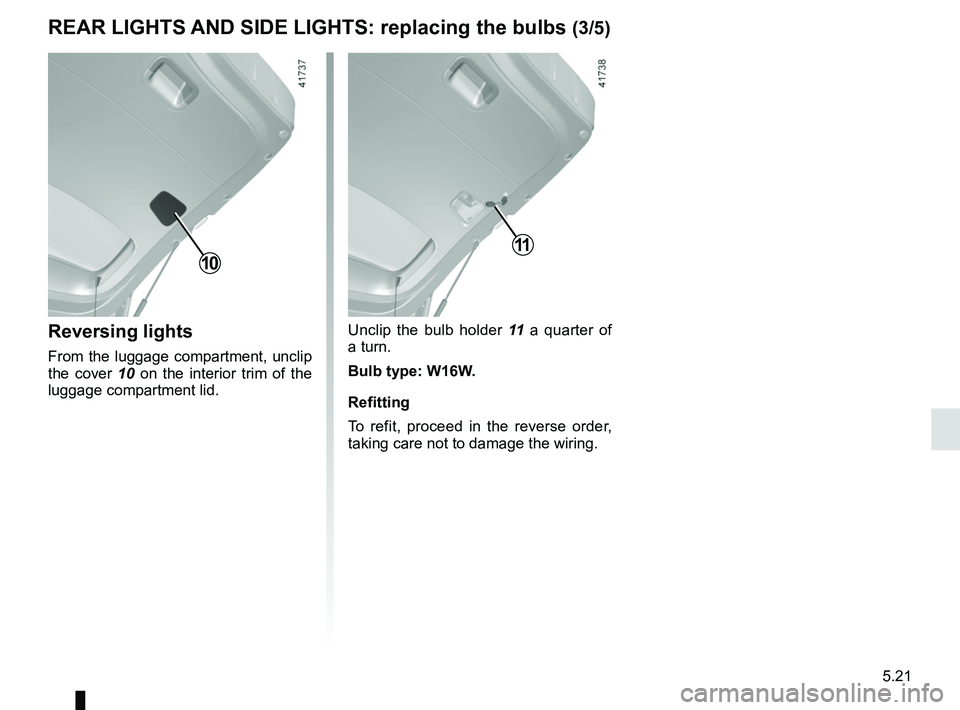
From the luggage compartment, unclip
the cover 10 on the interior trim of the
luggage compartment lid.
10
REAR LIGHTS AND SIDE LIGHTS: replacing the bulbs (3/5)
Unclip the bulb holder 11 a quarter of
a turn.
Bulb type: W16W.
Refitting
To refit, proceed in the reverse order,
taking care not to damage the wiring.
11
Page 314 of 364
5.22
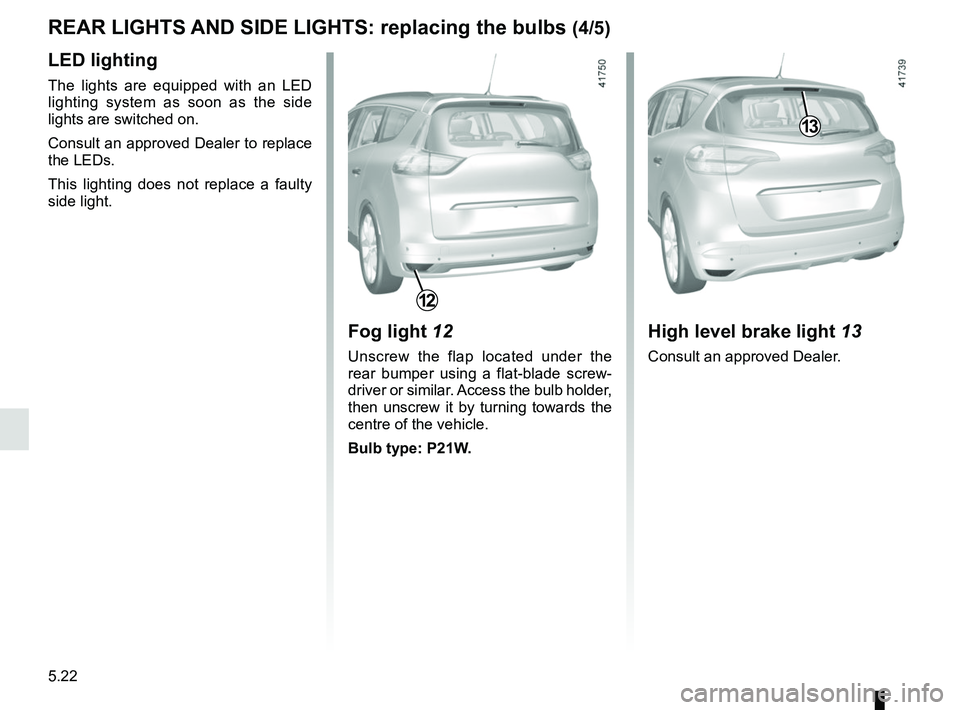
Fog light 12
Unscrew the flap located under the
rear bumper using a flat-blade screw-
driver or similar. Access the bulb holder,
then unscrew it by turning towards the
centre of the vehicle.
Bulb type: P21W.
REAR LIGHTS AND SIDE LIGHTS: replacing the bulbs (4/5)
12
LED lighting
The lights are equipped with an LED
lighting system as soon as the side
lights are switched on.
Consult an approved Dealer to replace
the LEDs.
This lighting does not replace a faulty
side light.
13
High level brake light 13
Consult an approved Dealer.
Page 315 of 364
5.23
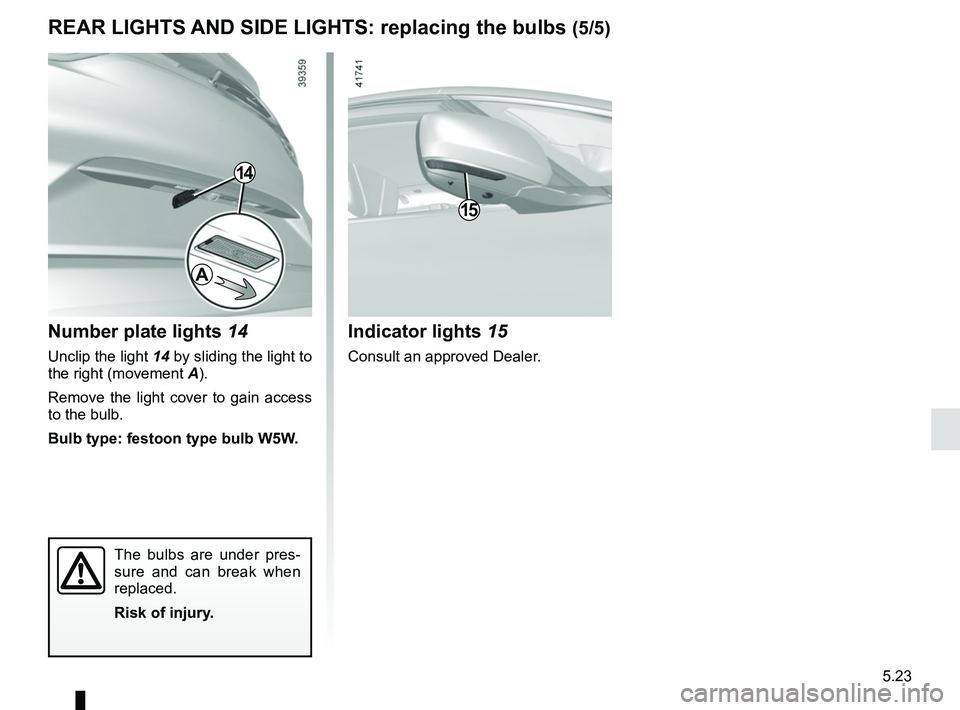
REAR LIGHTS AND SIDE LIGHTS: replacing the bulbs (5/5)
Indicator lights 15
Consult an approved Dealer.
15
Number plate lights 14
Unclip the light 14 by sliding the light to
the right (movement A).
Remove the light cover to gain access
to the bulb.
Bulb type: festoon type bulb W5W.
14
The bulbs are under pres-
sure and can break when
replaced.
Risk of injury.
A
Page 316 of 364
5.24
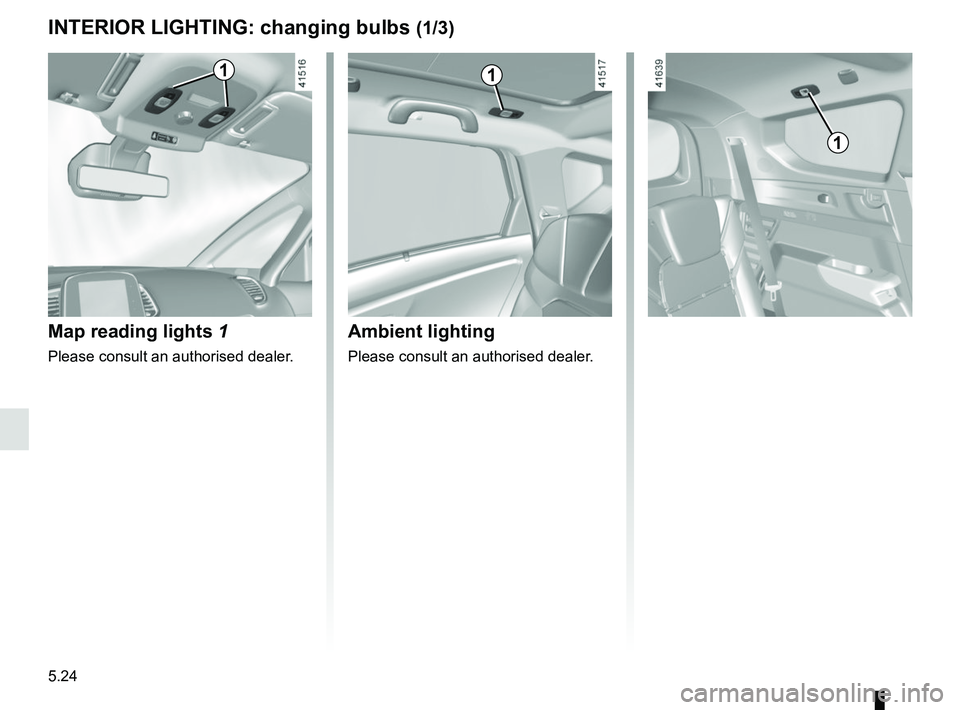
INTERIOR LIGHTING: changing bulbs (1/3)
Map reading lights 1
Please consult an authorised dealer.
11
Ambient lighting
Please consult an authorised dealer.
1
Page 317 of 364
5.25
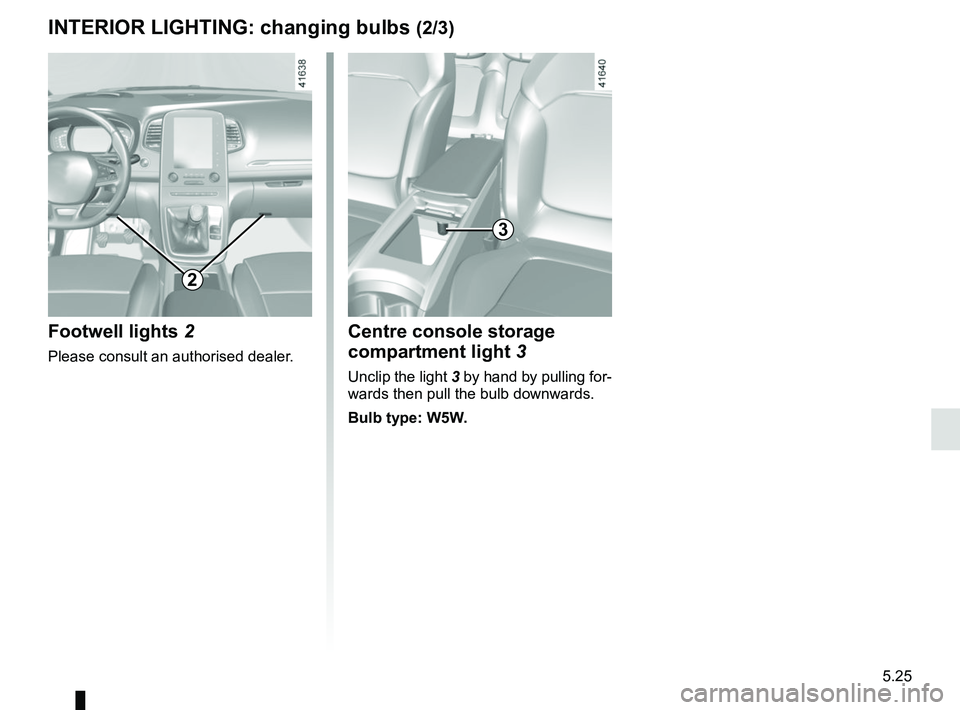
Centre console storage
compartment light 3
Unclip the light 3 by hand by pulling for-
wards then pull the bulb downwards.
Bulb type: W5W.
3
2
Footwell lights 2
Please consult an authorised dealer.
INTERIOR LIGHTING: changing bulbs (2/3)
Page 318 of 364
5.26
The bulbs are under pres-
sure and can break when
replaced.
Risk of injury.
INTERIOR LIGHTING: changing bulbs (3/3)
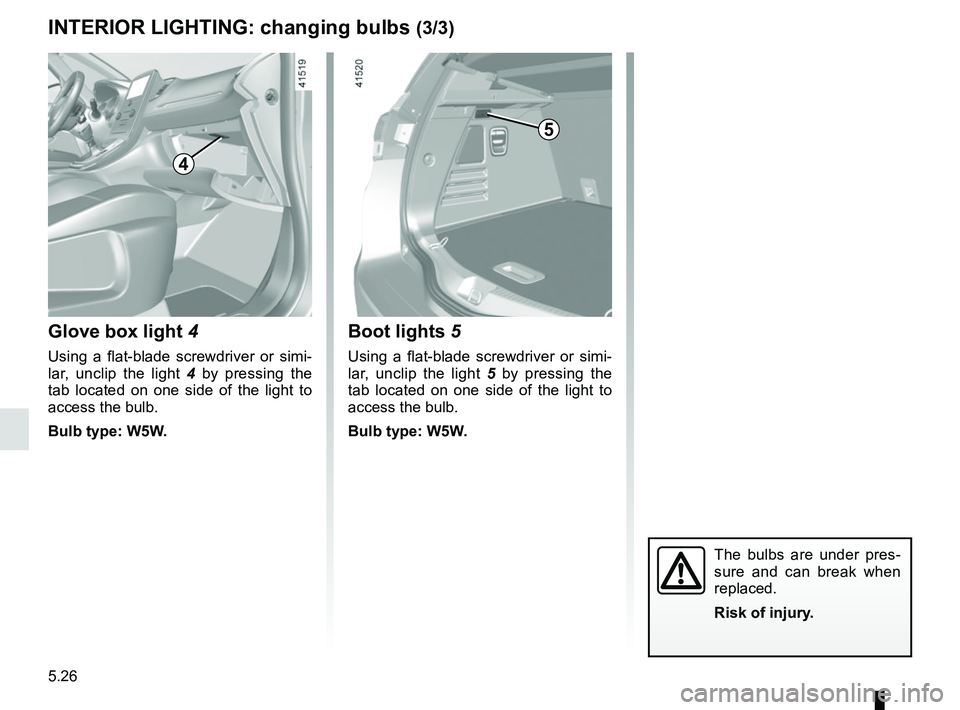
Boot lights 5
Using a flat-blade screwdriver or simi-
lar, unclip the light 5 by pressing the
tab located on one side of the light to
access the bulb.
Bulb type: W5W.
5
4
Glove box light 4
Using a flat-blade screwdriver or simi-
lar, unclip the light 4 by pressing the
tab located on one side of the light to
access the bulb.
Bulb type: W5W.
Page 319 of 364
5.27
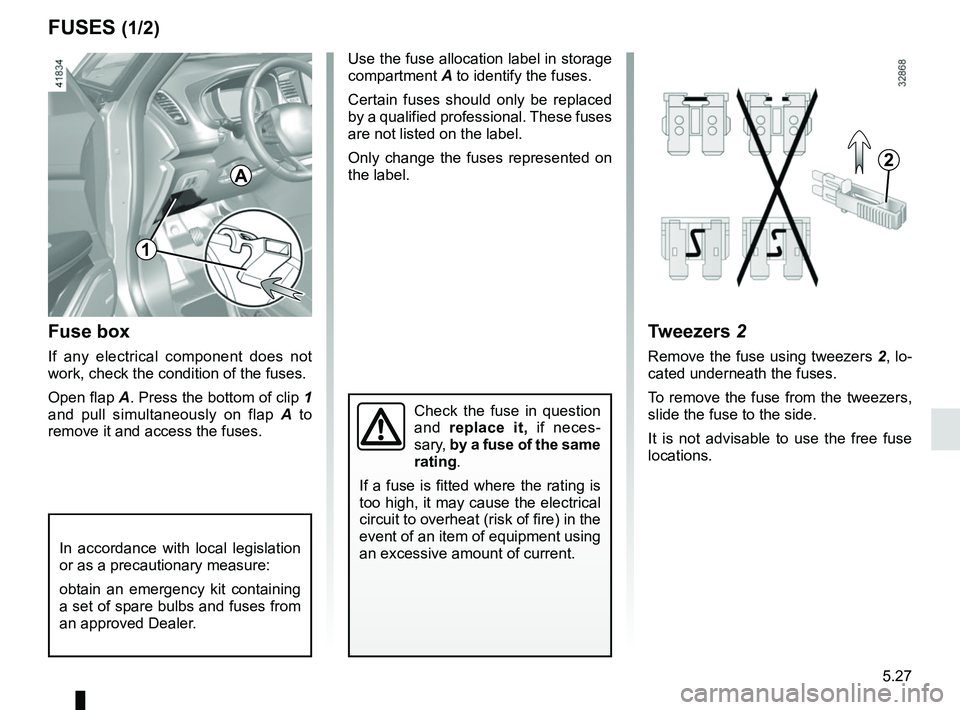
FUSES (1/2)
Fuse box
If any electrical component does not
work, check the condition of the fuses.
Open flap A. Press the bottom of clip 1
and pull simultaneously on flap A to
remove it and access the fuses.
Tweezers 2
Remove the fuse using tweezers 2, lo-
cated underneath the fuses.
To remove the fuse from the tweezers,
slide the fuse to the side.
It is not advisable to use the free fuse
locations.
Check the fuse in question
and replace it, if neces-
sary, by a fuse of the same
rating.
If a fuse is fitted where the rating is
too high, it may cause the electrical
circuit to overheat (risk of fire) in the
event of an item of equipment using
an excessive amount of current.
In accordance with local legislation
or as a precautionary measure:
obtain an emergency kit containing
a set of spare bulbs and fuses from
an approved Dealer.
2
Use the fuse allocation label in storage
compartment A to identify the fuses.
Certain fuses should only be replaced
by a qualified professional. These fuses
are not listed on the label.
Only change the fuses represented on
the label.
A
1
Page 320 of 364
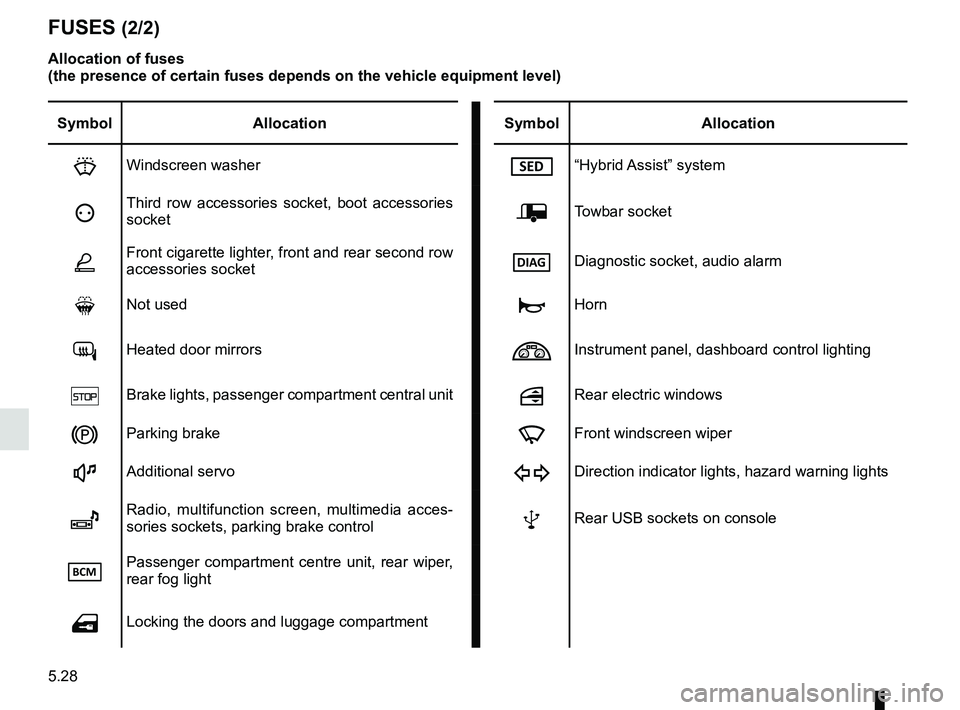
5.28
FUSES (2/2)
Allocation of fuses
(the presence of certain fuses depends on the vehicle equipment level)\
Symbol Allocation SymbolAllocation
HWindscreen washer“Hybrid Assist” system
ëThird row accessories socket, boot accessories
socketÝTowbar socket
ÆFront cigarette lighter, front and rear second row
accessories socketDiagnostic socket, audio alarm
Not usedÌHorn
Heated door mirrorsInstrument panel, dashboard control lighting
×Brake lights, passenger compartment central unitRear electric windows
\bParking brakefFront windscreen wiper
Additional servoDDirection indicator lights, hazard warning lights
îRadio, multifunction screen, multimedia acces-
sories sockets, parking brake controlRear USB sockets on console
Passenger compartment centre unit, rear wiper,
rear fog light
OLocking the doors and luggage compartment
Trending: snow chain, cruise control, remove seats, climate settings, heated windscreen, technical specifications, ad blue
